
Related Manuals for Husky 41214


Summary of Contents for Husky 41214
- Page 1 1.5-GALLON OIL-FREE AIR COMPRESSOR Model # 41214 TOLL FREE HELPLINE: 1-877-888-3872 FOR SAFE OPERATION, READ AND UNDERSTAND ALL CONTENTS OF THE INSTRUCTION MANUAL...
-
Page 2: Table Of Contents
MAINTENANCE ..................... STORAGE...................... 24 TROUBLESHOOTING..................PART LISTS....................LIMITED WARRANTY ..................SPECIFICATIONS Model No.: 41214 Motor..................120V 60Hz, 8-amp Watts....................960 watts Tank Size....................1.5-gallon Pump Type..............Single Cylinder: Belt Drive Air Hose Type............25 Recoil, MAX. 200 PSI Air Delivery..............3.0 SCFM @ 40 PSI 2.0 SCFM @ 90 PSI... -
Page 3: Safety
SAFETY GUIDELINES - DEFINITIONS This manual contains information that is important for you to know and understand. This information relates to protecting YOUR SAFETY and PREVENTING EQUIPMENT PROBLEMS . To help you recognize this information, we use the symbols below. Please read the manual and pay attention to these symbols. - Page 4 IMPORTANT SAFETY INSTRUCTIONS Save these instructions Improper operation or maintenance of this product could result in serious injury and property damage. Read and understand all warnings and operation instructions before using this equipment. HAZARD WARNING: Risk of explosion or fire What Could Happen How To Prevent It Always operate the compressor in a well...
- Page 5 HAZARD WARNING: Risk of Bursting Air Tank: The following conditions could lead to a weakening of the tank, and result in a violent tank explosion and could cause property damage or serious injury. What Could Happen How To Prevent It Drain tank daily or after each use.
- Page 6 HAZARD WARNING: Risk of Electric Shock WHAT CAN HAPPEN HOW TO PREVENT IT Your air compressor is powered by Never operate the compressor outdoors when it is raining or in wet conditions. electricity. Like any other electrically powered device, If it is not used properly Never operate compressor with it may cause electric shock.
- Page 7 HAZARD WARNING: RISK OF BURNS WHAT CAN HAPPEN HOW TO PREVENT IT Touching exposed metal such as the Never touch any exposed metal parts compressor head or outlet tubes, on compressor during or immediately after operation. Compressor will remain can result in serious burns. hot for several minutes after operation.
- Page 8 HAZARD WARNING: RISK OF SERIOUS INJURY OR PROPERTY DAMAGE WHEN TRANSPORTING COMPRESSOR (Fire, Inhalation, Damage to Vehicle Surfaces) WHAT CAN HAPPEN HOW TO PREVENT IT Oil can leak or spill and could result in Always place COMPRESSOR on a fire or breathing hazard; serious injury or protective mat when transporting to death can result.
-
Page 9: Glossary Of Terms
GLOSSARY OF TERMS Become familiar with these terms before operating the unit. CFM: Cubic feet per minute. SCFM: Standard cubic feet per minute; a unit of measure of air delivery. PSI: Pounds per square inch; a unit of measure of pressure. Code Certification: Products that bear one or more of the following marks: UL, CUL, ETL, CETL, have been evaluated by OSHA certified independent safety laboratories and meet the applicable Underwriters Laboratories... -
Page 10: Assemble Accessories
Assemble Accessories The unit is supplied with an accessory kit and inflator/deflator kit, choose the accessory needed. A-10 A-11 A-12 A-13 13 Pcs Accessories ITEM NAME AMOUNT Recoil air hose Inflation Needle Rubber tip nozzle Tapered Blow Gun Nozzle Blow Gun Adapter Blow Gun Safety Nozzle Blow Gun Tire Chuck... -
Page 11: Assembly
ASSEMBLY UNPACKING This product has been shipped completely assembled. Carefully remove the tool and any accessories from the box. Mark sure that all items listed in the packing list are included. Inspect the tool carefully to make sure no breakage or damage occurred during shipping. Do not discard the packing material until you have carefully inspected and satisfactorily operated the tool. - Page 12 ASSEMBLY Unpacking 1. Remove unit from carton and discard all packaging. NOTE : Save all parts. Attaching air hose to compressor (Fig. A) 1. Using your left hand push quick connect towards the body of the compressor. 2. Firmly press fit the male quick connect portion on the air hose into the female quick connect and release female quick connect locking hose in place.
- Page 13 ASSEMBLY Assemble Accessory Kit (Fig. B) Fig. B To Assemble Female Tire Chuck 1. Assemble female tire chuck (a) to hose (b) and tighten securely with wrenches. To Assemble Accessories 1. Attach the blow gun (c) to hose (b). Risk of unsafe operation. If an accessory is not being used with the blow gun, the safety nozzle MUST be assembled.
- Page 14 ASSEMBLY Assembling Inflation needle or tapered nozzle Fig. D The blow gun (c) and blow gun adapter (e) from the accessory kit is needed to use the inflator/deflator kit. (See Fig. C/Fig. D) 1. Attach the blow gun to hose. 2.
-
Page 15: Installation
INSTALLATION HOW TO SET UP YOUR COMPRESSOR. Location of the Air Compressor Locate the air compressor in a clean, dry and well ventilated area. The air compressor should be located at least 12" away from the wall or other obstructions that will restrict the flow of air. - Page 16 INSTALLATION GROUNDING INSTRUCTIONS (Fig. F) DANGER! Risk of Electric Shock. In the event of a short circuit, grounding reduces the risk of shock by providing an escape wire for the electric current. This air compressor must be properly grounded. The portable air compressor is equipped with a cord having a grounding wire with an appropriate grounding plug (see following illustrations).
-
Page 17: Operation
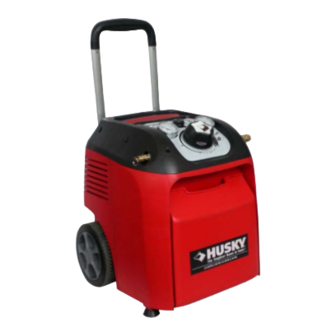
OPERATION Know Your Air Compressor (Fig.G) READ THIS OWNER'S MANUAL AND SAFETY RULES BEFORE OPERATING YOUR UNIT. Compare the illustrations with your unit to familiarize yourself with the location of various controls and adjustments. Save this manual for future reference Overload Protection Switch... - Page 18 OPERATION Regulator: Controls the air pressure shown on the outlet pressure gauge. Turn knob clockwise to increase pressure and counterclockwise to decrease pressure. Female Tire Chuck: Attaches to the hose end to be used to inflate tires. Note: To ensure correct tire pressure use a tire pressure gauge. Blow Gun: Ideal for blowing, cleaning, and inflating.
- Page 19 OPERATION Before Each Start-Up: 1. Place Off/Auto-On switch to "Off" and close air regulator. 2. Turn the regulator knob counterclockwise until it stops. Attach hose and accessories. Risk of Bursting. Too much air pressure causes a hazardous risk of bursting. Check the manufacturer's maximum pressure rating for air tools and accessories.
- Page 20 OPERATION How to Use Telescopic Handle and Wheels for Easier Mobility 1. Slide handle out until it locks into place.(Fig. I) Fig. I 2. Pull or push unit as shown. IMPORTANT: This handle is for pushing or pulling the unit. DO NOT lift the unit by this handle.
- Page 21 OPERATION USING THE TIRE PRESSURE GAUGE (Fig. K) Place the tire gauge opening on the valve stem of the tire and firmly hold in place for at least 2 seconds. If required check twice for accuracy. The side wall of your tire will specify the maximum PSI or KPA rating however the pressure level for everyday driving will be specified in your vehicles manual and should be followed.
-
Page 22: Maintenance
MAINTENANCE Customer Responsibilities Daily or after each use Before each use • Check Safety Valve • Drain Tank Risk of Unsafe Operation. Unit cycles automatically when power is on. When performing maintenance, you may be exposed to voltage sources, compressed air, or moving parts. - Page 23 MAINTENANCE To Drain Tank (Fig. L) NOTICE: Allow unit to cool before draining tank, drain valve becomes hot during operation. 1. Set the Off/Auto-On switch to "Off". 2. Turn the regulator knob counter clockwise to set the outlet pressure to zero. 3.
-
Page 24: Storage
STORAGE Before you store the air compressor, make sure you do the following: 1. Drain tank, see "To Drain Tank" paragraph in the "Maintenance" section of this manual for the correct procedure. Risk of Bursting. Water will condense in the air tank. If not drained, water will corrode and weaken the air tank causing a risk of air tank rupture. -
Page 25: Troubleshooting
TROUBLESHOOTING Risk of Unsafe Operation. Performing repairs may expose voltage sources, moving parts or compressed air sources. Personal injury may occur. Prior to attempting any repairs, unplug the air compressor and bleed off all air tank air pressure. PROBLEM CAUSE CORRECTION Excessive tank 1.Pressure switch does not... - Page 26 PROBLEM CAUSE CORRECTION Compressor is Prolonged excessive use of Decrease amount of air usage. not supplying air. Check the accessory air enough air to Compressor is not large requirement. If it is higher operate enough for air requirement. than the SCFM or pressure accessories.
-
Page 27: Part Lists
PART LISTS... - Page 28 PART LISTS Item No. Part No. Description 3390175 safety valve 31101110 regulator subassembly 3630275 pressure switch 3320297-1 copper pin 31901110 pressure gauge 3321175 quick-connect 3220375 screw 34109110 handle board (right) 34113110 switch button 34107110 handle 32201110 screw 34108110 handle board (left) 3220401 screw 34111110...
- Page 29 PART LISTS Item No. Part No. Description Ø10 clip ring 3290875 motor-pump assembly 3110175 soft tube 3421275-1 Ø14 clip ring 3390475 single direction valve 3320275 aluminium tube 3310275-2 tank 33302110 copper connector 3750251 drain valve 3290275 front housing 34103110 rubber feet 3420375 screw 32202108...
-
Page 30: Limited Warranty
LIMITED WARRANTY This product covered under this warranty is free from defects in material and workmanship for one (1) YEAR limited warranty on air compressor components. The Authorized Warranty Service will repair or replace, at its option, products or components which have failed within the warranty period. Service will be scheduled according to the normal work flow and business hours at the service centre location, and the availability of replacement parts.
Need help?
Do you have a question about the 41214 and is the answer not in the manual?
Questions and answers
need replacement hose for model 41214 1.5 gallon air compressor