Table of Contents
Advertisement
Quick Links
Advertisement
Table of Contents

Related Manuals for Bestok 5210GM


Summary of Contents for Bestok 5210GM
- Page 1 12MP 5210GM(GP) User Manual Thank you for purchasing 5210GM ( GP ) Hunting camera, please read this manual before using it. If you encounter problems when you are using this product , please contact the local dealers or contact us directly.
-
Page 2: Table Of Contents
Contents Product Information........................- 2 - 1.1 The Introduction of Product.................- 2 - 1.2 Application........................- 3 - 1.3 Package Contents....................- 3 - 1.4 Illustration........................- 4 - Quick Start..........................- 6 - 2.1 Installing the Battery..................... - 7 - 2.2 Installing the SD Card................... - 7 - 2.3 Setup Mode........................ -
Page 3: Product Information
Product Information 1.1 The Introduction of Product This is a far-infrared HD outdoor surveillance cameras (also called hunting cameras, animals surveillance cameras, plant observation cameras, etc.), it can be triggered by sudden change of ambient temperature caused by moving game in a region of interest (ROI), which is detected by a highly sensitive Passive Infra-Red (PIR) sensor, and then take pictures or video clips automatically. -
Page 4: Application
1.2 Application 1) Trail camera for hunting 2) Animal or event observation 3) Used for plant growth record or observation on research 4) Used for bee form safety surveillance or forest anti-cutting surveillance 5) Used for other outdoor surveillance or evidence collection 6) All other indoor/outdoor surveillance where invasion evidence needed 1.3 Package Contents A Digital... -
Page 5: Illustration
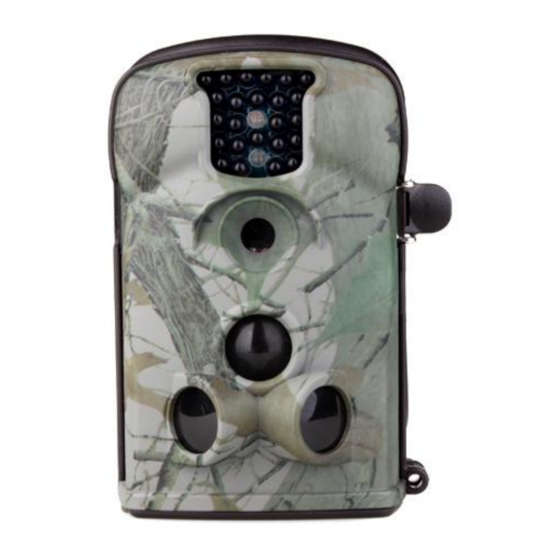
1.4 Illustration 1.4.1 Front View 1.4.2-1Internal Structure - 4 -... - Page 6 1.4.2-2Internal Structure 1.4.3-1 Bottom View - 5 -...
-
Page 7: Quick Start
1.4.3-2 Bottom View Quick Start If you are not familiar with the operation of this camera, the following instructions will help quick overview. Before doing operation,please make sure you have loaded batteries and plugged the SD cardcorrectly. Attention: If the SD card is not inserted correctly or its write-protect is enabled,the device will turn off automatically. -
Page 8: Installing The Battery
2.1 Installing the Battery Install the battery on the camera, please follow the instructions below: 1) Unlock the two buckles, open the camera and keep the power button in OFF position. 2) Open the battery box, install 8 AA batteries according to the direction of the positive and negative mark, ensure polarity matching and ensure that battery should be assembled in place. -
Page 9: Enter Live Mode
(depending on the camera setting) will be taken and saved to the SD card. Also,press to Play / Pause the video. 4) Press the REPLAY key to review/playback photos/videos on the LCDscreen, and you can magnify and shrink photos through buttons, or control the forward or backward of the video. -
Page 10: Function And Technical Parameters Setting
Function and Technical Parameters Setting 3.1 Functions Setting The camera comes with preset manufacturer settings. You can also change the settings to meet your needs Make sure the power button of camera is in the SET position. Press the MENU button to enter/exit the main menu and start a menu option through . - Page 11 8MP/12MP pictures according to your need. Please notice: Higher resolution produces better quality photos, but creates larger files that take more of the SD card capacity. In addition, larger files needs longer time to write in the SD card, this will influence the reflect speed of camera and cost more electric.
- Page 12 Sense Level Standard Select the sensitivity of the PIR sensor. High The High setting suits indoors and environments with little interference, while the Normal/Low suits outdoors and environments with more interference. Temperature also affects the sensitivity. The High setting is suitable when the ambient temperature is warm, and the Low setting is helpful in cold weather.
-
Page 13: Technical Parameters Setting
PC setting software can fill the quantity MMS. 0 represents unlimited , 1-99/day means the sent quantity you can choose. MMS Status Default setting is closed. If you want QVGA MMS work, choose VGA=640x480 or QVGA=320x240, if the original file is too large, in order to save time,MMS will change it to QVGA form and send . -
Page 14: Mms And Gprs Setting
Timer On/Off; Programmable Password setting 4-Digit Numbers Camera number Support the 4number composed by letters and numbers freely Time Lapse On/Off; 1 Second ~ 24 Hours Programmable Audio On /Off Languages English/Chinese/French/Norwegian/German/Spanish/Portu guese/Japanese/Russian/Czech/Italian/Romanian/Finnish MMS Status VGA = 640x480; QVGA = 320x240;OFF optional MMS Numbers “0”... - Page 15 4.1.2 Choose MMS option as shown in picture 4.1.3 Open the following interface: First, you need to choose how you like to set up the MMS Mode --Auto,then you need to choose the country - 14 -...
-
Page 16: Mms Manual Setting
the Mobile Phone Network Operator (MPNO),input the phone number and/or email address you’d like the MMS pictures to be sent to. You can enter up to three different phone numbers and/or email accounts. Note: The Phone Number and Email must be filled in at least one of them;... - Page 17 Note:The Phone Number and Email must be filled in at least one of them; other two Phone or Email can be left blank. Attention: The URL/APN/GATEWAY/PORT are very important, they must be filled in correctly or it will lead to MMS can not be used in normal, please consult using operator or provide the operator’s website, we would like to help finish the correct information! 4.2.2 Click on...
-
Page 18: Gprs Automatic Setting
4.2.4 Take out the SD card then insert it into camera. Switch to the TEST position.Check it whether set successfully or not (check method: open the MMS setting in menu, check whether the receivers’ numbers have existed in the camera or not.) 4.3 GPRS Automatic Setting Please prepare: 8 new AA batteries... - Page 19 4.3.3.1 Choose SMTP Mode --Auto,then choose your country and mobile operator,Fill in the recipient email address (1-4 email address optional). 4.3.3.2 If you don’t want to use Sender Default Mode,please Remove the tick of the Sender default mode.and fill in the sender email information: SMTP Server, SMTP Port, Email address and password - 18 -...
-
Page 20: Gprs Manual Setting
4.3.3.3 And then fill in the recipient email address (1-4 email address optional). 4.3.4 Click on to choose the directory to save the settings, usually under the root directory of the SD card (You need to insert the SD card in the SD card reader and plug it in your computer.) Then, click on . - Page 21 4.4.1 Choose SMTP Mode --Manual,Fill in the GPRS setting information:APN, ACCOUNT and PASSWORD,and then fill in recipient email address (1-4 email address optional). 4.4.2 If you don’t want to use Sender Default Mode,please Remove the tick of the Sender default mode. - 20 -...
- Page 22 4.4.3 Fill in the GPRS setting information:APN, ACCOUNT and PASSWORD,and fill in the sender email information: SMTP Server, SMTP Port, Email address and password 4.4.4 And then fill in the recipient email address (1-4 email address optional). Atterntion: The APN/ACCOUNT/PASSWORD are very important,they must be filled in the correctly.
-
Page 23: Trouble Shooting
4.4.4 Take out the SD card, then insert it into camera and start the menu parameters setting. Trouble Shooting 5.1 Firmware Upgrade We periodically release firmware update with new feature or performance enhancements. 5.2 Update Steps Copy the file "FWDLJA.bin" onto an empty memory card . ... - Page 24 If the camera takes unclear or ghosting photos, please check the following reasons: 1) Please check whether the camera shaking when at work 2) Please check when camera working,whether there is backlighting or strong light interference 3) Please check if there is dust or dirt on the lens in front of the camera lens. 4) Please check the camera distance is too close or too far.
- Page 25 2) Please confirm: data setting is correct. (Setting files include URL; APN; GATEWAY; PORT, correct information please contact local operators to ask or check) 3) Battery power shortage will lead to unsuccessful transmission. 4) Please check whether the SIM card and the card slot is contact. 5) Bad signal of using environment will lead to unsuccessful transmission.
-
Page 26: Warranty
Warranty Thank you for purchasing our products, we are proud of our products and technology. Meanwhile, we strongly recommend that you maintain your product well and ensure that you operate it with the guidelines of this manual. If your usage meets the requirement above, we will provide you with better and longer service.
Need help?
Do you have a question about the 5210GM and is the answer not in the manual?
Questions and answers