Table of Contents

Related Manuals for Bestok 8210A


Summary of Contents for Bestok 8210A
- Page 1 120°WIDE ANGLE HUNTING CAMERA 8210A User Manual Thank you for purchasing 8210A Hunting camera, for making best use of all the functions of this camera, please read this user’s manual carefully before you use the camera and keep it as handy reference.
-
Page 2: Table Of Contents
Contents Product Information........................- 3 - 1.1 The Introduction of Product.................- 3 - 1.2 Application..................错误!未定义书签。 1.3 Package Contents....................- 3 - 1.4Illustration........................- 4 - Quick Start..........................- 6 - 2.1 Installing the Battery..............错误!未定义书签。 2.2 Installing the SD Card..............错误!未定义书签。 2.3 Test and Setup Mode..............错误!未定义书签。 2.4 Enter Live Mode................ - Page 3 Cautions Be sure the camera’s power is switched off before inserting or removing SD card or batteries. It is recommended to use new high-performance alkaline AA batteries or rechargeable batteries, for prevent the liquid rot the battery depot. Please make sure that the battery polarity matches that on the battery cover.
-
Page 4: Product Information
Note:This device complies with protection class IP54.This means that the camera is protect from dust and water spray,and can be used regardless of the weather condition.However,proper protection from dust and water spray is only provided if the camera is correctly closed and all seals are intact and clean. -
Page 5: Illustration
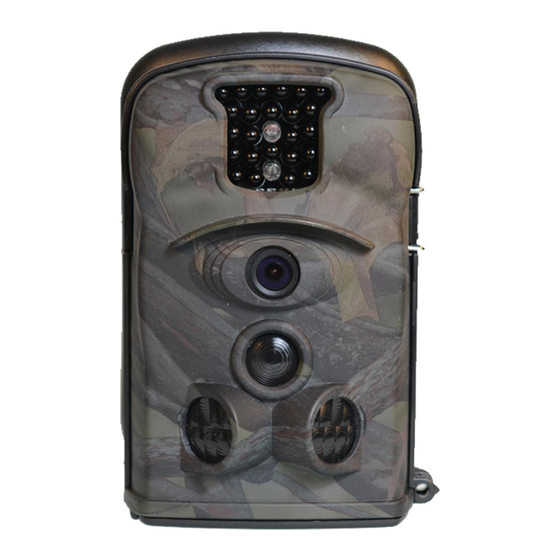
Illustration 1.3.1 Front View 1.3.2-1 Internal Structure - 4 -... - Page 6 1.3.2-2 Internal Structure 1.3.3-1 Bottom View - 5 -...
-
Page 7: Quick Start
1.3.3-2 Bottom View Quick Start If you are not familiar with the operation of this camera, the following instructions will help you get a quick overview. Before doing any operation, please make sure you have loaded batteries and plugged the SD card correctly. Attention: If the SD card is not inserted correctly or its write-protect is enabled,the device will turn off automatically. - Page 8 again until the cover clicks audibly into place. To increase the operating time, you can use an additional 4 x 1.5 V batteries in the battery compartment of the addtional battery box. ♦ To do this, carefully push the lock on the battery compartment cover upwards and open the cover.
- Page 9 ♦ To insert an SD/SDHC memory card into the memory card slot of the device, push it into the slot until it clicks into place.The contact surfaces of the memory card must be facing towards the front of the camera. ♦...
-
Page 10: Video Length
Press the buttons to select the desired menu entry which you can then activate with the OK button. If you change settings, you must always confirm your changes with "OK".Use the MENU button to navigate one menu level backwards. Mode To select whether photos or videos are to be recorded in motion detection mode. - Page 11 Audio recording If you want the camera to record sound when recording videos,select "On" here. Interval Use the buttons to select the minimum time period that the camera should wait before reacting to subsequent activation of the main sensor after the initial recording.
- Page 12 Press the buttons to set the hour for the start of the active phase. Then switch to the next field using the button. Press the buttons to set the minutes for the start of the active phase. Then switch to the next field using the button.
- Page 13 Language Here you can set English, German, Finnish, Swedish, Danish, French,Czech, Norwegian,Slovak,Russian,Italian, Dutch, Spanish or Portuguese as the menu language. Set Date & Time Here you can set the date format (YYYY/MM/DD, DD/MM/YYYY or MM/DD/YYYY), the time format (12/24 hrs) and the time and date. Use the buttons to switch between the values and change the selected value with the buttons.
-
Page 14: Default Settings
If you forget the number combination, proceed as follows to unlock the camera and to reset it to its factory default settings: Keep the RIGHT BUTTON pressed while moving the operating mode selector switch to the SET position. Keep the button pressed untill you see the boot picture. - Page 15 required light for making recordings possible. The LEDs emit light over a wide angle. This makes it possible to make night recordings at a distance of about 3 m to 20 m without overexposing the subject. However, reflective objects such as traffic signs can cause overexposure if they are located within the recording range.Please note that night exposures are made in black and white.
- Page 16 display. If the currently selected recording is a video, press the button to play back the video. Press the button again to stop the video.If you press the button, the video will run backwards to the beginning. If you now press the MENU button, the settings menu opens: If you do not select an option within three minutes, the menu will close automatically.
-
Page 17: Technical Parameters Setting
camera and the cinch plug to the video input of a TV set or the like. As soon as the jack plug is connected to the TV-out socket , the built-in screen is deactivated and the image is played back via the TV-out output .The operating mode selector switch must be set to the SET position. -
Page 18: Trouble Shooting
Programmable Audio On /Off Languages English/Chinese/French/Norwegian/German/Spanish/Portu guese/Japanese/Russian/Czech/Italian/Romanian/Finnish WiFi SD card 1/2/3 minutes, optional Battery Support 4/8 AA battery Standby time 3-6 months Interface TV output (NTSC); USB; SD card; 6V DC External Mounting Support Strap fixed and tripod fixed Waterproof IP54 Work Temperature -22~+158°F/-30 ~+70°C... - Page 19 with the service life of the batteries, use an additional 4 x 1.5 V batteries in the battery compartment of the tree mounting . The images are The camera is pointing Change the alignment overexposed. at reflective objects. of the camera. Direct sunlight may be Direct sunlight may be shining onto the device,...
-
Page 20: Warranty
Warranty Thank you for purchasing our products, we are proud of our products and technology. Meanwhile, we strongly recommend that you maintain your product well and ensure that you operate it with the guidelines of this manual. If your usage meets the requirement above, we will provide you with better and longer service.
Need help?
Do you have a question about the 8210A and is the answer not in the manual?
Questions and answers