Table of Contents
Advertisement
Quick Links
Advertisement
Table of Contents

Related Manuals for Curtis iMODE iP9844UK


Summary of Contents for Curtis iMODE iP9844UK
-
Page 2: Warnings And Precautions
Warnings and Precautions TO PREVENT IRE OR HOCK AZARDS, DO NOT EXPOSE THIS UNIT TO RAIN OR MOISTURE. This symbol, located on back or bottom of the unit, is intended to alert the user to the presence of un-insulated “dangerous voltage” within the product’s ’s enclosure that may be of sufficient magnitude to constitute a risk of electric shock to persons. -
Page 3: Location Of Controls
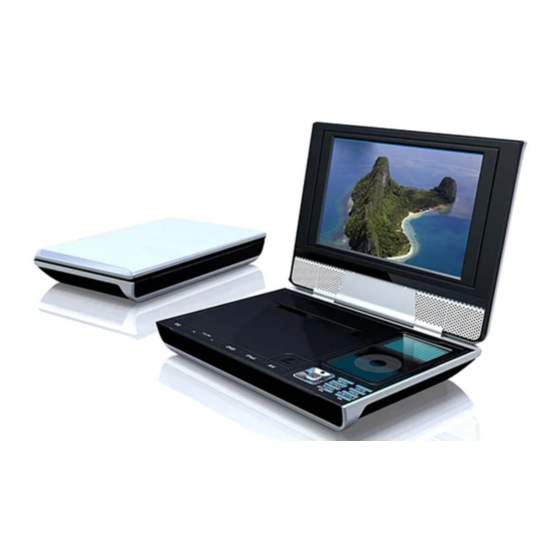
Location of Controls REMOTE SENSOR TFT PANEL STANDBY INDICATOR STANDBY POWER ADAPTOR JACK POWER INDICATOR BATTERY COMPARTMENT... -
Page 4: Play/Pause Button
Location of Controls STANDBY STANDBY BUTTON VOLUME DOWN BUTTON VOLUME UP BUTTON 10. AV BUTTON 11. DVD BUTTON 12. DVD COMPARTMENT DOOR BUTTON 13. IPOD BUTTON 14. SKIP BACKWARD BUTTON 15. STOP BUTTON 16. PLAY/PAUSE BUTTON 17. SKIP FORWARD BUTTON 18. -
Page 5: Features Defined
Features Defined REMOTE SENSOR Using remote control pointing at the remote sensor window to control the unit. TFT PANEL Show the video / picture in the TFT panel. STANDBY INDICATOR STANDBY red LED light, power on green LED light. POWER ADAPTER JACK To connect power adapter. POWER INDICATOR If use power adapter, the indicator will be light. - Page 6 Location of Controls POWER/STANDBY BUTTON NUMBER PAD BUTTON SETUP BUTTON VOLUME UP BUTTON MENU/PLAY LIST – BUTTON VOLUME DOWN BUTTON EQ BUTTON MUTE BUTTON WIDESCREEN BUTTON GOTO BUTTON SKIP FOWARD BUTTON SKIP BACKWARD BUTTON REWIND/ALBUM BUTTON FORWARD/ALBUM BUTTON REPEAT BUTTON STANDBY RANDOM/SHUFFLE BUTTON PLAY/PAUSE BUTTON...
- Page 7 Features Defined POWER / STANDBY BUTTON Press the button between standby and power on mode. NUMBER PAD BUTTON Press to select DVD chapters. SETUP BUTTON Press to open setup menu. VOLUME UP BUTTON Press to increase the volume sound. MEMU/PLAYLIST BUTTON To open DVD menu or select play-list down. VOLUME DOWN BUTTON Press to decrease the volume sound.
- Page 8 Installing a Battery in the Remote Warning There is danger of an explosion if you replace the battery incorrectly. Replace only with the same or equivalent battery. To install or replace the battery: 1 Pull the battery tray out of the remote. 2 If you are replacing the battery, remove the old battery and dispose of it properly.
-
Page 9: Ipod Adaptors
iPod Adaptors iPod Photo 40GB, 60GB iPod Color 60GB iPod Photo 20GB iPod Color 30GB iPod 20GB iPod U2 iPod Nano 1st Gen. iPod Nano 2nd Gen. iPod 40GB iPod 3rd Gen. 10GB, 15GB, 20GB iPod Video 60GB iPod Mini iPod Video 30GB... - Page 10 UNPACKING First inventory the contents of your Portable DVD player package: If any item should be damaged or missing, please contact your dealer without delay. Keep the packaging materials, you may need them to transport your player in the future.
-
Page 11: Using The Car Adapter
Quick Starting Guide 1. Connecting to an External Power Source Connect the power adapter (supplied with the player) to the side input and to a wall outlet. Do not use any other device otherwise specified by your dealer. 2. Open the protective cover The cover opens to a maximum 135 degree only, so please do not try to open it any further. -
Page 12: Connecting Headphones
Quick Starting Guide Connecting to a TV Step 1:connect the audio cables to AUDIO IN/OUT of the DVD player.. Step 2:connect the yellow cable to the VIDEO IN/OUT on the side of your player. CONNECTING HEADPHONES 1. Connect the headphones. Headphones with a 3.5 mm stereo plug can be connected. -
Page 13: System Connection
Quick Starting Guide SYSTEM CONNECTION Use audio cable (Red / White), video cable (Yellow) to connect from player to TV set and amplifier. CONNECT THE PLAYER TO TV SET BY AUDIO / AV CABLE Use audio cable (Red / White), video cable (Yellow) to connect the player and TV set. CONNECT OTHER MEDIA TO THE PLAYER Use audio cable (Red / White), video cable (Yellow) to connect from other media to player. - Page 14 Quick Starting Guide Language Disc Audio Subtitle Version Reset Language Disc Audio Subtitle Version Reset Language Disc Audio Subtitle Version Reset Language Disc Audio Subtitle Version Reset Press Enter and use the navigations key > English > Spanish on remote control to select the disc >...
- Page 15 Quick Starting Guide Language Disc Audio Subtitle Version Reset Display TV display Pause Mode Message Black Level Display TV display Pause Mode Message Black Level Display TV display Pause Mode Message Black Level Press Enter and use navigation key on >...
- Page 16 Quick Starting Guide Display TV display Pause Mode Message Black Level Display TV display Pause Mode Message Black Level Speaker 3D/EQ Press Enter and use navigations key on > Message to switch on Message or switch > > off Message then press Enter to confirm >...
-
Page 17: Fast Forward And Rewind
Quick Starting Guide Playing Back a Disc 1. Press TITLE to access the menu screen. 2. Press or the number buttons to select the title. 3. Press the ENTER or PLAY button. The DVD video player will start playback from the title selected. Note: You also can input the assigned number of the title to select it directly HOW TO PAUSE PLAYBACK (STILL PLAYBACK) -
Page 18: Locating A Title Using The Title Menu
Quick Starting Guide LOCATING A TITLE USING THE TITLE MENU You can locate a specific title using the title menu function, if a DVD video disc contains a title menu. 1 . Press the TITLE button On the LCD or TV screen, the title menu will appear. 2 . - Page 19 Quick Starting Guide Zooming a Picture This DVD video player allows you to zoom into a picture as well as shift the zoom point. Press ZOOM during normal playback or slow - motion. (To use the ZOOM button, it should be set ʻSHIFT ONʼ by pressing SHIFT.) The player magnifies in the center of the picture.
- Page 20 Quick Starting Guide Selecting the Camera Angle THIS DVD VIDEO PLAYER ALLOWS YOU TO SELECT FROM SEVERAL DIFFERENT ANGLES. If the DVD video disc was recorded with multiple angles, you have the option to change the camera angle of the scene you are watching. Press the ANGLE button while playing back a scene recorded with multiple angles (set shift on).
-
Page 21: Installing And Removing The Battery Pack
Quick Starting Guide When done, slide the Power button to OFF and also turn off the iPod. With the unit on, press the TFT MENU button on the remote The menu will appear. To adjust the Brightness, Contrast, Sharpness, Color, Hue or Reset select the desired option by using the navigation button on the remote control. -
Page 22: Use And Maintenance
Quick Starting Guide USE AND MAINTENANCE THIS UNIT IS SUPPLIED WITH HIGHLY- EFFECTIVE RECHARGEABLE BATTERY (LI-POLYMER). SUCH BATTERY PACK A HIGH STORAGE CAPACITY AND LOW LEVEL OF DEGRADATION. THE LATTER MEANS THAT THE BATTERY CAN ALSO BE RECHARGED WHEN ONLY PARTLY SPENT. Plug the AC adapter into the battery. - Page 23 Quick Starting Guide 2 . Long-term Storage (2 years , -20ºC to 35ºC) As long-term storage can accelerate battery self-discharge and lead to the deactivation of reactants, locations where the temperature ranges between 10ºC and 30ºC are suitable for long-term storage. When charge for the first time after long-term storage, deactivation of reactants may have led to increased battery voltage and decreased battery capacity.
-
Page 24: Limited Product Warranty
If your query remains unresolved, please feel free to email our support team at: Customer helpline at: 0 800 032 5264 Curtis International LTD warrants this product to be free from defects in materials and workmanship for 1 year on parts and 90 days on labor.
Need help?
Do you have a question about the iMODE iP9844UK and is the answer not in the manual?
Questions and answers