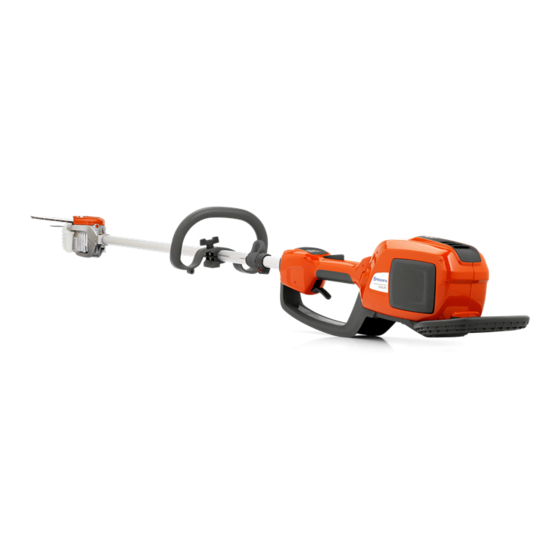
Husqvarna 536LiPX Operator's Manual
Hide thumbs
Also See for 536LiPX:
- Operator's manual (92 pages) ,
- Workshop manual (48 pages) ,
- Workshop manual (52 pages)

Related Manuals for Husqvarna 536LiPX


Summary of Contents for Husqvarna 536LiPX
- Page 1 Operator′s manual 536LiPX Please read the operator’s manual carefully and make sure you understand the instructions before using the machine. E E E E n n n n g g g g l l l l i i i i s s s s h h h h...
-
Page 2: Key To Symbols
KEY TO SYMBOLS Symbols on the machine: Symbols on the battery and/or on the battery charger: Translation of the original Swedish operating instruction. WARNING! A chain clearing saw is a This product must be dangerous tool if used carelessly or deposited at an incorrectly and can cause serious, even appropriate recycling... - Page 3 KEY TO SYMBOLS The following symbols and decals can be found on your chain clearing saw, battery and battery charger: S-561 82 Huskvarna, Sweden Typ QC 330 2014 Art.No. 966 73 06-01 PRI: 100V - 240V ~ 50-60Hz 330W max. SEC: 36V / 7A max WW/YY...
-
Page 4: Table Of Contents
CONTENTS Contents Note the following before starting: KEY TO SYMBOLS Symbols on the machine: ........2 Please read the operator's manual carefully. Symbols on the battery and/or on the battery charger: ..............2 WARNING! Long-term exposure to noise Symbols in the operator’s manual: ......2 can result in permanent hearing impairment. -
Page 5: Introduction
Congratulations on your choice to buy a Husqvarna product! Husqvarna is based on a tradition that dates back to 1689, when the Swedish King Karl XI ordered the construction of a factory on the banks of the Husqvarna River, for production of muskets. -
Page 6: What Is What
WHAT IS WHAT? What is what? Saw head 17 Battery indicator button Chain oil tank 18 Battery status Guide bar 19 Warning indicator (ERROR LED) Bar nut 20 SavE button Shaft 21 Activate and deactivate button Loop handle 22 Power on and warning indicator (ERROR LED) 23 Operator ′... -
Page 7: General Safety Precautions
GENERAL SAFETY PRECAUTIONS General power tool safety • Do not overreach. Keep proper footing and balance at all times. This enables better control of warnings the power tool in unexpected situations. • Dress properly. Do not wear loose clothing or Please read the operator’s manual carefully and make jewellery. - Page 8 GENERAL SAFETY PRECAUTIONS Battery tool use and care • Look out for spring back when cutting branches that are under tension. Once the tension in the wood • Recharge only with the charger specified by the fibers is released, the branch can hit the operator and/ manufacturer.
-
Page 9: Personal Protective Equipment
GENERAL SAFETY PRECAUTIONS • Only use replacement bars and chains specified WARNING! Never allow children to use or by the manufacturer. Incorrect replacement bars be in the vicinity of the machine. Since and chains may cause chain breakage and/or the machine is easy to start, children kickback. -
Page 10: Battery And Battery Charger
Never clean the battery or the battery charger with charger from Husqvarna. The batteries are software water. See instructions under the Maintenance encrypted. heading. Use only a Husqvarna original BLi battery in your • Store the battery out of reach of children. machine. •... -
Page 11: Machine's Safety Equipment
• the battery in the battery charger outdoors. • the battery in the rain or in wet conditions. Only use Chargers, Husqvarna QC, for charging the • the battery in direct sunlight. Husqvarna replacement batteries, BLi. Use the battery charger only when the surrounding temperature is between 5 °C and 40 °C. -
Page 12: Cutting Equipment
GENERAL SAFETY PRECAUTIONS Flashing warning indicator (3) and green LED (2) is lit Harness, quick release could indicate that: Check that the harness is not damaged. • it is not possible to apply full power and, at the same In an emergency situation, release yourself from machine time, activate the machine. - Page 13 GENERAL SAFETY PRECAUTIONS • Maintain the correct raker clearance! Follow our Guide bar instructions and use the recommended raker • Length (inches/cm) gauge. Too large a clearance increases the risk of kickback. • Chain pitch (inches). The spacing between the drive links of the chain must match the spacing of the teeth on the bar tip sprocket and drive sprocket.
- Page 14 GENERAL SAFETY PRECAUTIONS Saw chain (B). The cutting depth is determined by the difference in height between the two. • Saw chain pitch (inches). (The distance between three drive links, divided by two.) • When you sharpen a cutting tooth there are four important factors to remember.
- Page 15 GENERAL SAFETY PRECAUTIONS Sharpening cutting teeth maintain this radius or bevel when you adjust the raker clearance. Li-ion Li-ion To sharpen cutting teeth you will need a round file and a file gauge. • We recommend that you use our raker gauge to achieve the correct clearance and bevel on the raker lip.
- Page 16 GENERAL SAFETY PRECAUTIONS Tensioning the chain - Tighten the bar nut using the combination spanner. Check that the chain can be pulled round easily by hand. Li-ion Li-ion WARNING! A slack chain may jump off and cause serious or even fatal injury. •...
- Page 17 GENERAL SAFETY PRECAUTIONS throttle you should see a distinct line of oil on the light When the length of the cutting teeth has worn down to only 4 mm the chain must be replaced. surface. Chain drive sprocket Li-ion Li-ion What to do if lubrication does not work: Regularly check the degree of wear on the drive sprocket.
-
Page 18: Assembly
ASSEMBLY Fitting the loop handle chain should be tensioned until it does not sag from the underside of the bar. Li-ion Li-ion • Clip the loop handle onto the shaft. Note that the loop handle must be fitted between the arrows on the shaft. •... -
Page 19: Assembling The Branch Hook
ASSEMBLY Assembling the branch hook Assembling the harness to the backpack battery Assemble the twig guard with the two screws. • Remove the breast strap attachments to the harness with a pair of nippers or the like. Dismantling the shock guard (Dismantle if necessary) •... - Page 20 ASSEMBLY rig with the saw head is inclined slightly forward and somewhat towards the ground. • Put on the harness. • Tie a knot in the elastic cord and fasten it to the attachment eye on the carry strap. • Tie a knot in the elastic cord to find the correct balance and fasten the cord to the attachment on the breast strap.
-
Page 21: Battery Handling
BATTERY HANDLING Battery Connect the battery to the battery charger. The display shows the battery capacity and if there are any problems with the battery. The battery capacity is Regularly check that the battery charger and the battery displayed for 5 seconds after the machine is switched off are intact. -
Page 22: Transport And Storage
BATTERY HANDLING • Ensure the machine is cleaned and that a complete LED display Charging status service is carried out before long-term storage. The battery is 0%-25% • Transport guard must always be used for storage and LED 1 flashes. charged. -
Page 23: Starting And Stopping
Only use the machine for the purpose it was intended for. Connect battery to the machine NOTE! When using Husqvarna BLi batteries and depending on Use the power trigger to control the speed. the battery capacity, there may be deifferences in cutting NOTE! perfomance. -
Page 24: Working Techniques
WORKING TECHNIQUES General working instructions Basic safety rules IMPORTANT! This section takes up the basic safety rules for working Look around you: with a chain clearing saw. • To ensure that people, animals or other things cannot If you encounter a situation where you are uncertain affect your control of the machine. -
Page 25: Forestry Clearing
WORKING TECHNIQUES Always hold the machine with both hands. Hold the • On sloping ground you should work along the slope. It machine on the right side of your body. is much easier to work along a slope than it is to work up and down it. -
Page 26: Stem Limbing
WORKING TECHNIQUES Stem limbing • Never cut through the swelling at the root of the branch as this will slow down healing and increase the risk of fungal attack! WARNING! Never stand directly underneath a branch that is being cut. This could lead to serious or even fatal personal injury. -
Page 27: Maintenance
MAINTENANCE Inspection and maintenance • Dismantle the clip holding the washer and the chain drive gear. • Remove the washer. Li-ion Li-ion • Remove the chain drive gear and replace it with a new one. Cleaning WARNING! Always remove the battery before any maintenance on the machine. -
Page 28: Troubleshooting Schedule
MAINTENANCE Troubleshooting schedule Keypad Troubleshooting takes place from the keypad. Control panel Possible faults Possible action Green activate LED flashing. Low battery voltage. Charging the battery The power trigger and the activate Release the power trigger and the button are pressed at the same time. machine is active. -
Page 29: Maintenance Schedule
Check that the saw head is not damaged. Replace the saw head All service on the saw head must be carried out by if it is damaged. an authorized Husqvarna dealer. Replace the chain drive gear after approx.: 100 Check condition of Drive Sprocket. -
Page 30: Technical Data
Driving time and temperature are measured without load according to the operating cycle of 3 seconds operating and 15 seconds of idling. Use only a Husqvarna original BLi battery in your machine. Approved chargers for the specified batteries, BLi. Battery charger... -
Page 31: Ec Declaration Of Conformity
Husqvarna AB, SE-561 82 Huskvarna, Sweden, tel +46-36-146500 declares that the battery-operated chain clearing saw Husqvarna 536LiPX with serial numbers dating 2016 and onwards (the year is clearly stated on the rating plate, followed by the serial number) comply with the requirements of the COUNCIL’S DIRECTIVE: - of May 17, 2006 ”relating to machinery”... - Page 32 1157547-26 ´®z+YVh¶6_¨ ´®z+YVh¶6_¨ 2017-03-15...
Need help?
Do you have a question about the 536LiPX and is the answer not in the manual?
Questions and answers