Advertisement
Available languages
Available languages
Serial number | Número de serie
See rating Label on grill for serial number.
El número de serie se encuentra en la etiqueta de
especificaciones de la parrilla.
Date purchased | Fecha de compra
If you have questions or need assistance
during assembly, please call 1-888-430-7870.
Si tiene alguna pregunta o si Necesita
ayuda durante el Ensamblado, llámenos Al
1-888-430-7870.
#4984619
08/11/15 • G362-001-010801
463642316
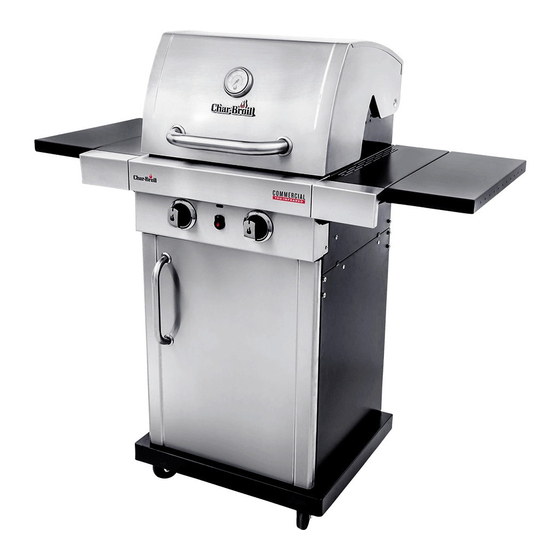
Commercial 2-Burner
Gas Grill
Advertisement
Table of Contents

Related Manuals for Char-Broil 463642316


Summary of Contents for Char-Broil 463642316
- Page 1 Commercial 2-Burner 463642316 Gas Grill Serial number | Número de serie See rating Label on grill for serial number. El número de serie se encuentra en la etiqueta de especificaciones de la parrilla. Date purchased | Fecha de compra If you have questions or need assistance during assembly, please call 1-888-430-7870.
-
Page 2: Table Of Contents
TABLE OF CONTENTS CAUTION For Your Safety ....... . . 2-4 For residential use only. - Page 3 WARNING CAUTION Using pots larger than 6 quarts in capacity could exceed Failure to follow all manufacturer’s instructions could result in weight limit of the side burner shelf or side shelf, resulting serious personal injury and/or property damage. in failure of grill cart components. CAUTION Read and follow all safety statements, assembly instructions, and use and care directions before attempting...
-
Page 4: Use And Care
Installation Safety Precautions LP Cylinder •The LP cylinder used with your grill must meet the •Use grill, as purchased, only with LP (propane) gas and the following requirements: regulator/valve assembly supplied. If your grill is Dual Fuel •Use LP cylinders only with these required measurements: 12" ready, a conversion kit must be purchased for use with (30.5cm) (diameter) x 18"... - Page 5 Connecting Regulator to the LP Cylinder LP Cylinder Exchange •Many retailers that sell grills offer you the option of replacing 1.LP cylinder must be properly secured onto grill. (Refer to assembly section.) your empty LP cylinder through an exchange service. Use only 2.Turn all control knobs to the OFF position.
- Page 6 WARNING WARNING • Outdoor gas appliance is not intended to be installed in or • Do not use grill until leak-tested. on a boat. • If a leak is detected at any time, STOP! Turn off gas at source and correct leak. •...
- Page 7 Ignitor Lighting WARNING • Do not lean over grill while lighting. 1. Turn gas burner control valves to (off). 2. Open lid during lighting or re-lighting. For Safe Use of Your Grill and to Avoid Serious Injury: 3. Turn ON gas at LP cylinder. •...
- Page 8 Burner Flame Check • Remove cooking grates and heat tents. Light burners, rotate knobs from HIGH to LOW. You should see a smaller flame in LOW position than seen on HIGH. Perform burner flame check on side burner, also. Always check flame prior to each use. If only low flame is seen refer to "Sudden drop or low flame"...
- Page 9 Cleaning the Burner Assembly Follow these instructions to clean and/or replace parts of burner CAUTION assembly or if you have trouble igniting grill. 1. Turn gas off at control knobs and LP cylinder. 2. Remove cooking grates and heat tents. SPIDER ALERT! 3.
-
Page 10: Limited Warranty
LIMITED WARRANTY This warranty only applies to units purchased from an authorized retailer. Manufacturer warrants to the original consumer-purchaser only that this product shall be free from defects in workmanship and materials after correct assembly and under normal and reasonable home use for the periods indicated below beginning on the date of purchase*. - Page 11 PELIGRO ADVERTENCIA ÍNDICE DE MATERIAS Por su propia seguridad ......11-13 Sólo para uso particular. No lo use para fines comerciales. Uso y mantenimiento .
- Page 12 ADVERTENCIA PELIGRO ADVERTENCIA El no cumplir con todas instrucciones del fabricante El uso de macetas de más de 6 cuartos de la capacidad puede ocasionar graves y/o daños materials. podría superar límite de peso de lado el quemador plataforma o lado plataforma lo que resulta en el fracaso de la parrilla carrito componentes.
- Page 13 Medidas de seguridad para la instalación Tanque de gas propano • El tanque de gas que use con su parrilla debe cumplir los • Utilice la parrilla, tal como se compró, sólo con LP siguientes requisitos: (propano), el gas y el regulador / válvula de montaje suministrado.
- Page 14 Cambio del tanque de gas Como conectar el regulador al tanque de gas propano • Muchos comerciantes minoristas que venden parrillas, le ofrecen la opción de cambiar su tanque de gas vacío mediante 1. El tanque de gas debe quedar bien fijado a la parrilla. un servicio de recambio.
- Page 15 ADVERTENCIA ADVERTENCIA • El aparato a gas para uso al aire libre no ha sido diseñado • No use la parrilla sin antes haber verificado que no tenga para ser instalado en embarcaciones. fugas. • El aparato a gas para uso al aire libre no ha sido •...
- Page 16 Cómo usar el encendedor ADVERTENCIA • No se incline sobre la parrilla al encenderla. 1. Gire las válvulas de control de gas del quemador a (apagado). Para usar su parrilla en forma segura y para evitar 2. Abra la tapa durante el encendido o al volver al encender. lesiones graves: 3.
- Page 17 Control de la llama del quemador • Retire las parrillas de cocción y los reguladores de llama. Encienda los quemadores y gire las perillas, de la graduación ALTA a la graduación BAJA. Deberá ver una llama más reducida en la graduación BAJA que en la graduación ALTA. Haga un control de la llama en el quemador lateral.
- Page 18 Cómo limpiar la unidad del quemador PELIGRO Siga estas instrucciones para limpiar o cambiar piezas de la ADVERTENCIA unidad del quemador, o si tiene problemas para encender la parrilla. 1. Cierre el paso de gas en las perillas de control y desde ¡ALERTA CONTRA el tanque de gas.
- Page 19 GARANTÍA LIMITADA Esta garantía es válida únicamente para las unidades adquiridas de los distribuidores autorizados. El fabricante le garantiza únicamente al consumidor- comprador original, que este producto no presentará defectos de mano de obra ni de materiales por el período indicado a continuación, contado desde la fecha de compra*, si se arma correctamente y se usa en el hogar, en condiciones normales y razonables.
-
Page 20: Assembly
ASSEMBLY/ ARMADO NOTE: DO NOT over tighten screws and washers that come into contact with porcelain coated surfaces. Over tightening may cause the porcelain coating to crack and break, resulting in exposed metal that will be prone to rust. Nota: NO apriete demasiado los tornillos y arandelas que entren en contacto con las superficies revestidas de porcelana. Si los aprieta demasiado, se puede quebrar y romper el revestimiento de porcelana lo que dejará... - Page 21 THIS SIDE UP ESTE LADO HACIA ARRIBA...
- Page 22 Note: remove the tie wraps Nota: retire los cordones de amarre Tie wrap Cordón de amarre...
- Page 25 Remove and reuse in next step Enlevez et réemploi dans l'étape suivante Retire y vuelva a usar en el siguiente paso Tighten the screws Apriete los tornillos...
- Page 26 Inspect your infrared grate before each use to ensure that the openings are not covered with debris. See the Grilling Guide for detailed cleaning instructions. Revise su parrilla infrarroja antes de cada uso para asegurarse que las aberturas no están cubiertas de escombros.
- Page 28 CAUTION Failure to install grease tray will cause hot grease to drip from bottom of grill with risk of fire or property damage. ADVERTENCIA Si no instala la bandeja para la grasa goteará grasa caliente desde el fondo de la parrilla, lo que puede ocasionar el riesgo de incendio o de daños materiales.
- Page 29 PRESS OPRIMA...
- Page 30 LP Cylinder (not included) Tanque de gas (no viene incluido) ADVERTENCIA CAUTION Una vez que el tanque haya quedado instalado, la válvula del tanque debe quedar orientada hacia la parte Cylinder valve must face to front of cart once tank is delantera del carrito.
-
Page 31: Troubleshooting
EMERGENCIES: If a gas leak cannot be stopped, or a fire occurs due to gas leakage, call the fire department. Emergencies Possible Cause Prevention/Solution Gas leaking from • Damaged hose. •Turn off gas at LP cylinder or at source on natural gas systems. Discontinue use of cracked/cut/burned hose. - Page 32 Troubleshooting (continued) Problem Possible Cause Prevention/Solution Sudden drop in gas flow or • Check for gas in LP cylinder. • Out of gas. low flame. • Excess flow valve tripped. • Turn off knobs, wait 30 seconds and light grill. If flames are still low, turn off knobs and LP cylinder valve.
- Page 33 CASOS DE EMERGENCIA: Si no se puede detener una fuga de gas, o si ocurre un incendio debido a una fuga de gas, llame a los bomberos. Emergencias Causas probables Medidas de prevención / solución Fugas de gas de mangueras •...
- Page 34 Resolución de problemas (continuación) Problema Causas probables Medidas de prevención / solución Caída repentina del flujo de • Se acabó el gas. • Verifique que el tanque de gas esté cargado. gas o llama reducida. • Cierre las perillas, espere 30 segundos y encienda la parrilla. Si las llamas •...
-
Page 35: Parts Diagram
PARTS DIAGRAM/ VISTA ESQUEMÁTICA DE PIEZAS... -
Page 36: Parts List
PARTS LIST Qty Description Qty Description TOP LID BOTTOM SHELF LOGO PLATE F/ LID TANK SCREW, F/ BOTTOM SHELF RUBBER BUMPER, W/ HOLE, F/ TOP LID RAIL, F/ GREASE TRAY LID BUMPER, ROUND GREASE TRAY HANDLE F/ LID HEAT SHIELD, F/ TANK BEZEL, F/ LID HANDLE CASTER, LOCKING THERMOMETER... - Page 37 LISTA DE PARTES Clave Cant. Descripción Clave Cant. Descripción TAPA SUPERIOR PANEL LATERAL IZQUIERDO DEL CARRITO PLACA DE LOGOTIPO PARA TAPA PANEL LATERAL DERECHO DEL CARRITO TOPE DE LA TAPA, C. ORIFICIO REFUERZO SUPERIOR DE LA PUERTA TOPE DE CAUCHO, REDONDO RIEL POSTERIOR ASA DE TAPA SUPERIOR REPISA INFERIOR...
-
Page 38: Hardware List
HARDWARE LIST/ LISTA DE HERRAJES Key/ Clave Description/ Descripción Qty/ Cant Picture/ Ilustra 1/4-20X1-1/2" Screw Tornillo de 1/4-20 x 1-1/2" 1/4-20x1/2" Screw Tornillo de 1/4 -20 x 1/2" Shoulder Screw Tornillo con pivote 1/4 Nut Tuerca de 1/4 #10-24X3/8" Screw Tornillo de No. -
Page 39: Registration Card
FOR US ONLY Text “Register” to “GRILLS” (474557) Envíe un mensaje de texto con la palabra “Register” a “GRILLS” (474557) - Page 40 ©2015 Char-Broil, LLC. Columbus, GA, 31902. Printed in China. Imprimé en China. Impreso en China. ©2015 Assembly instructions. ©2015 Assemblée des instructions. ©2015 Instrucciones de ensamblado.
Need help?
Do you have a question about the 463642316 and is the answer not in the manual?
Questions and answers
model # 463242516 where is the battery for the igniter and how to replace it
The battery for the igniter on the Char-Broil model 463242516 is a AAA alkaline battery. It is located inside the electronic ignition module. To replace it:
1. Locate the ignition button or module on the front control panel.
2. Unscrew or open the battery compartment.
3. Remove the old AAA battery.
4. Insert a new alkaline AAA battery, ensuring correct polarity.
5. Close the compartment securely.
Replace the battery if there is no spark or ignition noise.
This answer is automatically generated