Advertisement
Serial number | Numéro de série | Número de serie
See rating Label on grill for serial number.
Ce numéro se trouve sur l´étiquette signalétique sur
i´appareil.
El número de serie se encuentra en la etiqueta de
especificaciones de la parrilla.
Date purchased | Date d'chat | Fecha de compra
If you have questions or need assistance
during assembly, please call 1-888-430-7870.
Si vous avez des questions ou besoin d´aide
pendant l'assemblage, S'il vous plaît appelez
1-888-430-7870
Si tiene alguna pregunta o si Necesita
ayuda durante el Ensamblado, llámenos Al
1-888-430-7870
Convertit facilement de forme (LP)
propane liquide (NG) de gaz naturel
ENSEMBLE DE CONVERSION
#4584609
08/27/15 • G466-001-200801
463367016
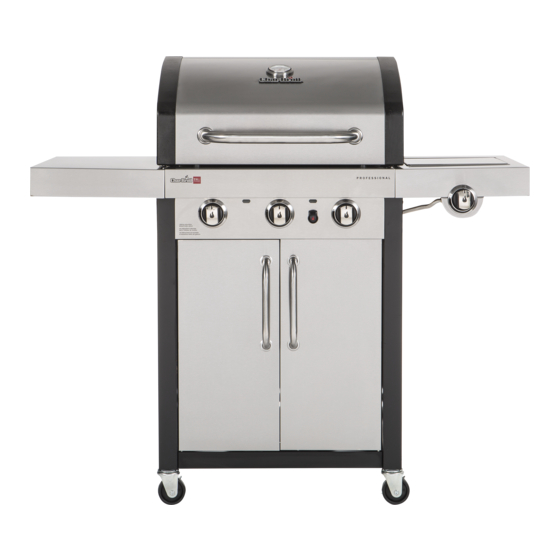
Professional
3-Burner Gas Grill
Advertisement

Related Manuals for Char-Broil 463367016


Summary of Contents for Char-Broil 463367016
- Page 1 Professional 463367016 3-Burner Gas Grill Serial number | Numéro de série | Número de serie See rating Label on grill for serial number. Ce numéro se trouve sur l´étiquette signalétique sur i´appareil. El número de serie se encuentra en la etiqueta de especificaciones de la parrilla.
-
Page 2: Table Of Contents
TABLE OF CONTENTS CAUTION For Your Safety ....... . . 2-4 For residential use only. - Page 3 WARNING CAUTION Using pots larger than 6 quarts in capacity could exceed Failure to follow all manufacturer’s instructions could result in weight limit of the side burner shelf or side shelf, resulting serious personal injury and/or property damage. in failure of grill cart components. CAUTION Read and follow all safety statements, assembly instructions, and use and care directions before attempting...
-
Page 4: Use And Care
Installation Safety Precautions LP Cylinder •The LP cylinder used with your grill must meet the •Use grill, as purchased, only with LP (propane) gas and the following requirements: regulator/valve assembly supplied. If your grill is Dual Fuel •Use LP cylinders only with these required measurements: 12" ready, a conversion kit must be purchased for use with (30.5cm) (diameter) x 18"... - Page 5 Connecting Regulator to the LP Cylinder LP Cylinder Exchange •Many retailers that sell grills offer you the option of replacing 1.LP cylinder must be properly secured onto grill. (Refer to assembly section.) your empty LP cylinder through an exchange service. Use only 2.Turn all control knobs to the OFF position.
- Page 6 WARNING WARNING • Outdoor gas appliance is not intended to be installed in or • Do not use grill until leak-tested. on a boat. • If a leak is detected at any time, STOP! Turn off gas at source and correct leak. •...
- Page 7 Ignitor Lighting WARNING • Do not lean over grill while lighting. 1. Turn gas burner control valves to (off). 2. Open lid during lighting or re-lighting. For Safe Use of Your Grill and to Avoid Serious Injury: 3. Turn ON gas at LP cylinder. •...
- Page 8 Burner Flame Check NOTE: Your grill may NOT be equipped with a Sideburner! • Remove cooking grates and heat tents. Light burners, rotate knobs from HIGH to LOW. You should see a smaller flame in Sideburner Ignitor Lighting LOW position than seen on HIGH. Perform burner flame check •...
- Page 9 Cleaning the Burner Assembly Follow these instructions to clean and/or replace parts of burner CAUTION assembly or if you have trouble igniting grill. 1. Turn gas off at control knobs and LP cylinder. 2. Remove cooking grates and heat tents. SPIDER ALERT! 3.
-
Page 10: Limited Warranty
LIMITED WARRANTY This warranty only applies to units purchased from an authorized retailer. Manufacturer warrants to the original consumer-purchaser only that this product shall be free from defects in workmanship and materials after correct assembly and under normal and reasonable home use for the periods indicated below beginning on the date of purchase*. -
Page 11: Assembly
ASSEMBLY/ ASSEMBLAGE/ ARMADO NOTE: DO NOT over tighten screws and washers that come into contact with porcelain coated surfaces. Over tightening may cause the porcelain coating to crack and break, resulting in exposed metal that will be prone to rust. REMARQUE: NE serrez PAS excessivement les vis et les rondelles qui sont en contact avec les surfaces au revêtement en porcelaine. - Page 13 Note: Retain tie wrap for bundling wires in later step. Remarque: Conservez les attaches de brûleur latéral valve tuyau pour la mise en faisceau des câbles lors d'une étape ultérieure. Nota: Conservar cierre de lazo de la manguera de la válvula del quemador lateral para atar cables en el paso posterior.
- Page 14 THIS SIDE UP CE CÔTÉ VERS LE HAUT Note: Untie match light chain and ESTE LADO HACIA ARRIBA hang inside cart for future use. Remarque : détachez la chaîne de l'allumette et suspendez-la dans le chariot pour utilisation future. Nota: Desamarre la cadena del palillo de encendido y cuélguela dentro del carrito para usarlo en el futuro.
- Page 15 CAUTION Failure to install grease tray will cause hot grease to drip from bottom of grill with risk of fire or property damage. ATTENTION Si le plateau d'écoulement de la graisse n'est pas installé, de la graisse chaude pourrait s'écouler de la partie inférieure du gril et provoquer un risque d'incendie ou des dommages matériels.
- Page 17 DANGER Burner must properly engage valve as shown. Failure to engage valve as shown may result in personal injury and/or property damage. DANGER Le brûleur doit être complètement inséré dans le robinet, de la façon illustrée. Tout manquement à l'insérer de la façon illustrée peut entraîner des blessures ou des dommages matériels.
- Page 18 WARNING Flame carry over tube must be installed as shown. Failure to install as shown may result in personal injury and/or property damage. AVERTISSEMENT Le tube de renvoi de flamme doit être installé de la façon illustrée. Tout manquement à l'installer de la façon illustrée peut entraîner des blessures ou des dommages matériels.
- Page 19 IMPORTANT: Infrared emitters must be placed keeping both flat walls overlapped to prevent any flare-up. IMPORTANT : Les émetteurs infrarouges doivent être placés de manière que les deux parois plates se chevauchent pour fournir une protection contre les flambées soudaines. IMPORTANTE: los emisores infrarrojos deben colocarse de tal forma que se empalmen las dos superficies planas para prevenir llamaradas.
- Page 21 Remove screws and washers Enlevez les vis et rondelles Retire los tornillos y arandelas Secure using screws that were removed from sideburner valve bracket Fixez le tout au moyen des vis enlevées du support de valve du brûleur latéral Fíjelo con los tornillos que retiró del soporte de la válvula del quemador lateral...
- Page 24 Tie wrap Attache Cordón de amarre Note: Use previously removed tie wrap(s) to bundle electrode wires. Do not loop electrode wires when bundling. Remarque : Utilisez les attaches enlevées précédemment pour la mise en faisceau des fils d'électrode. N'enroulez pas les fils d'électrode lors de la mise en faisceau.
- Page 25 PRESS OPRIMA APPUYEZ...
- Page 26 Inspect your infrared grate before each use to ensure that the openings are not covered with debris. See the Grilling Guide for detailed cleaning instructions. Inspectez votre grille infrarouge avant chaque utilisation pour vous assurer que les orifices ne sont pas recouverts de débris.
- Page 27 LP Cylinder (not included) Réservoir de gaz (non compris) Tanque de gas (no viene incluido) CAUTION Cylinder valve must face to front of cart once tank is attached. Failure to install cylinder correctly may allow gas hose to be damaged in operation, resulting in the risk of fire.
-
Page 28: Troubleshooting
EMERGENCIES: If a gas leak cannot be stopped, or a fire occurs due to gas leakage, call the fire department. Emergencies Possible Cause Prevention/Solution Gas leaking from • Damaged hose. •Turn off gas at LP cylinder or at source on natural gas systems. Discontinue use of cracked/cut/burned hose. - Page 29 Troubleshooting (continued) Problem Possible Cause Prevention/Solution Sudden drop in gas flow or • Check for gas in LP cylinder. • Out of gas. low flame. • Excess flow valve tripped. • Turn off knobs, wait 30 seconds and light grill. If flames are still low, turn off knobs and LP cylinder valve.
-
Page 30: Parts Diagram
PARTS DIAGRAM/ SCHÉMA DES PIÈCES / VISTA ESQUEMÁTICA DE PIEZAS... -
Page 31: Parts List
PARTS LIST Qty Description Qty Description TOP LID RIGHT DOOR, NO HANDLE TEMPERATURE GAUGE HANDLE, F/ DOOR BEZEL, F/ TEMP GAUGE DOOR BUSHING, F/ HANDLE LOGO PLATE LEFT SIDE SHELF HANDLE F/ TOP LID SIDEBURNER SHELF BEZEL, F/ HANDLE DRIP PAN, F/ SIDEBURNER RUBBER BUMPER, W/ HOLE, F/ TOP LID SILICONE RUBBER BUMPER, F/ SIDEBURNER RUBBER BUMPER, ROUND... -
Page 32: Hardware List
HARDWARE LIST/ LISTA DE HERRAJES/ LISTE DES FERRURES Key/ Réf./ Clave Description/ Description/ Descripción Qty/ Qté/ Cant Picture/ Illustré/ Ilustra 1/4-20x2-3/8" Screw Vis ¼-20× 2-3/8 Tornillo de 1/4 -20 x 2-3/8" 1/4-20x1-1/2" Screw Vis ¼-20×1½ po Tornillo de 1/4 -20 x 1-1/2"...
Need help?
Do you have a question about the 463367016 and is the answer not in the manual?
Questions and answers