Table of Contents
Advertisement
Advertisement
Table of Contents

Summary of Contents for RCA 11 Galileo Pro RCT6513W87 DK
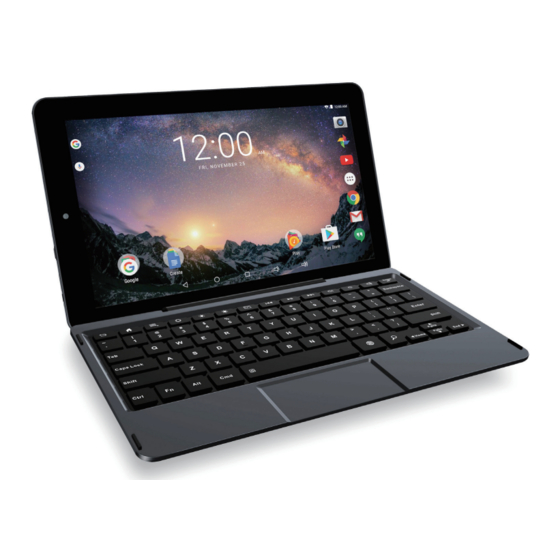
- Page 1 RCT6513W87 DK 11 Galileo Pro User Manual support.rcatablets.com Need help? Visit...
-
Page 2: Safety Precautions
Safety Precautions Equipment tested for compliance as a RCT6513W87 complete unit FCC Information This device complies with Part 15 of the FCC Rules. Operation is subject to the following two conditions: (1) This device may not cause harmful interference, and (2) this device must accept any interference received, including interference that may cause undesired operation. - Page 3 • Reorient or relocate the receiving antenna. • Increase the separation between the equipment and receiver. • Connect the equipment into an outlet on a circuit different from that to which the receiver is connected. • Consult the dealer or an experienced radio/TV technician for help.
- Page 4 Caution: Use of controls or adjustments or performance of procedures other than those specified may result in hazardous radiation exposure. Warning: the AC adapter is used as disconnect device and it should remain readily operable during intended use. In order to disconnect the mains plug from mains completely, the AC adapter should be disconnected from the mains socket outlet completely.
-
Page 5: Important Safety Instructions
IMPORTANT SAFETY INSTRUCTIONS PLEASE READ AND SAVE THIS FOR FUTURE REFERENCE Some of the following information may not apply to your particular product; however, as with any electronic product, precautions should be observed during handling and use. • Read these instructions. •... - Page 6 • Refer all servicing to qualified service personnel. Servicing is required when the apparatus has been damaged in any way, such as power-supply cord or plug is damaged, liquid has been spilled or objects have fallen into the apparatus, the apparatus has been exposed to rain or moisture, does not operate normally, or has been dropped.
-
Page 7: Table Of Contents
Contents Safety Precautions .............1 Important Safety Instructions ........4 Startup ..............7 Overview of Controls ............7 Buttons ................ 8 Keyboard ................ 9 Accessory ..............10 Navigating the Home Screen .......... 11 Connections ............. 15 Battery Management and Charging ....... 15 USB ................16 Headphone .............. -
Page 8: Startup
Startup Overview of Controls Front camera MIC (microphone) HDMI port DC jack Micro-USB port Headphone jack Power button USB port RESET microSD card slot Rear camera Volume+/- button Connector Item Description Microphone For voice input. HDMI port Connect to a TV or a display device. DC jack Connect with 5V DC charger. -
Page 9: Buttons
(not included). Buttons Power button Power the tablet On Press and hold the Power button until the RCA logo appears. Power the tablet Off Press and hold the Power Power off" button until the" message displays, then tap it and the tablet will be powered off. -
Page 10: Keyboard
Keyboard Overview Connector Use to connect the tablet to keyboard. Screen Off Press button to turn off the tablet screen, p r e s s o n t h e tablet to turn on the tablet screen. Keys Touch pad Remove tablet from keyboard EN-9... -
Page 11: Accessory
Tablet docking There are two ways to dock the tablet onto the keyboard. NOTE The keyboard connects to the tablet via the Connector. W h e n t h e c o n n e c t i o n i s s u c c e s s f u l , t h e t a b l e t w i l l automatically adjust its settings to use the keyboard. -
Page 12: Navigating The Home Screen
Navigating the Home Screen Status bar Google Search All Apps App icons App icons Volume-/+ icon Back Home Recent Apps EN-11... - Page 13 Notification & Status Bar Some indicators that inform you about the status of your tablet are shown at the top of the screen. Notification Shade Notifications may come from the system, a game, an application such as E-mail, or the music player. W hen No tifications are av a i l a b l e, r e l a te d i c ons will appear in the top left corner of the screen.
- Page 14 Item Description Message Received new message. Music The Google Play Music app is running. Wi-Fi Has a Wi-Fi Internet connection. Bluetooth Bluetooth is on. Play Store An update for an app is available. Home Screen Icons All Apps Tap the All Apps icon to enter the All Apps screen.
- Page 15 Back Tap Back icon to return to the previous screen. • The Back icon remains on the bottom of the screen at all times, allowing you to navigate back to the previous screen. • Once you go back to the Home screen, you can’t go back any further in your history.
-
Page 16: Connections
Connections Battery Management and Charging The tablet has a built-in rechargeable battery. Battery Icon The battery icon in the upper-right corner shows the battery level or charging status. Low battery Needs to be Full battery Charging charged Charging the Battery Use the AC Adapter or the Micro-USB port to charge the battery. -
Page 17: Usb
Note: In order to keep the battery working in best condition, please pay attention to the following: • The included AC adapter is for use with this unit only. Do not use it with other equipment. • Please do not charge the battery in high temperatures. •... -
Page 18: Headphone
Headphones Headphones can be connected to the tablet’s Headphone jack. To headphone jack Headphone (not included) MicroSD To microSD microSD card card slot (not included) Insert the microSD card into the tablet’s microSD slot until it clicks. To check the storage of the microSD card, go to Settings ->... -
Page 19: Hdmi
Notes: • You can use microSD card and microSDHC card (up to 128GB, SD card not included). • Never remove or insert microSD card in On mode. HDMI You can connect the unit to a TV or other display device using an HDMI cable through the HDMI port. -
Page 20: Wi-Fi
Wi-Fi Connect to a Wi-Fi Network Display 1. Go to Settings -> Wireless & networks, tap Wi-Fi to open the Wi-Fi screen and slide Wi-Fi to the ON position. 2. The device will scan Wi-Fi networks automatically and display the available names. •... -
Page 21: Bluetooth
5. If your network does not broadcast its SSID, tap Menu icon at the upper right corner and select Add network, and enter the Network SSID (name) of the network. If necessary, enter security or other network configuration details. Note: you can tap Menu icon at the upper-right corner in the Settings screen for advanced settings. - Page 22 1. Go to Settings -> Wireless & networks, tap Bluetooth to open the Bluetooth screen and slide Bluetooth to the ON position. 2. It will scan automatically and display the available bluetooth devices. 3. Tap an available bluetooth device name to pair with it and follow the instructions to complete the pairing.
-
Page 23: Basic Operation
Basic Operation First Time Operation Turning Your Tablet On for the First Time When using the tablet for the first time, you will be required to setup the following: 1. Select the language, then tap 2. Set the Wi-Fi. 3. If you have a Google Account, select "Yes". Then tap a network name to see more details or connect to it, and enter a password if necessary. - Page 24 Press & Hold In some instances, touching the item and h o l d i n g y o u r f i n g e r on it will present other options or menus. Drag or Swipe While holding an item such as an icon, it c a n s o m e t i m e s b e moved by dragging it to another area or screen.
-
Page 25: Google Now Tm
• Move apps or widgets: Press & hold an icon or widget, slowly to drag it to the screen edge, the screen will switch. • D e l e t e a p p s o r w i d g e t s : P r e s s & h o l d a n i c o n o r widget, when the "X"... -
Page 26: Google Play Tm
Using Voice Search After tapping the microphone icon, just say whatever it is you want Google to search for. Using Voice Actions There are many actions that the tablet can perform using "Voice Actions". For example, you can send emails, set alarms, play a song, or navigate to a website. -
Page 27: Settings
Settings Settings lets you configure the tablet, set app options, add accounts, and change other preferences. Wireless & networks Wi-Fi — Enable or disable Wi-Fi, and connect to a wireless network so that you can check email, search the Web, or access social media websites. - Page 28 Security — Set preferences for Screen security, Passwords, Device administration, Credential storage and Advanced. Language & input — Set preferences for Language, Keyboard & input methods, Speech and Mouse/trackpad. Accounts — You can add an email account or another type of account.
-
Page 29: Google Tm
Google A Google Account lets you organize and access your personal information from any computer or mobile device. Add an Account You can use multiple Google Accounts and Microsoft Exchange ActiveSync accounts on your tablet. You may also be able to add other kinds of accounts, depending on your apps. -
Page 30: Additional Information
Additional Information Trouble Shooting Tablet displays network or service error message • When you are located in places with poor signal, your tablet may lose its Wi-Fi connection. Try moving closer to the Wi-Fi router. Touch screen response is slow or incorrect If the tablet’s touch screen response is incorrect, please try the following: •... -
Page 31: Copyright And Trademark Notices
Tablet can not show video of opposite side during skype call • The Wi-Fi signal is poor. Please move closer to your wireless router, or disconnect other devices from your wireless router, or increase bandwidth of internet connection. • Please check the Wi-Fi setting. It's recommended to use an IEEE 802.11 b/g/n. -
Page 32: Specifications
The terms HDMI and HDMI High-Definition Multimedia Interface, and the HDMI Logo are trademarks or registered trademarks of HDMI Licensing LLC in the United States and other countries. About HDMI High-Definition Multimedia Interface (HDMI) is a high-speed digital interface that can transmit uncompressed high definition video and digital multichannel audio. -
Page 33: Limited Warranty
Limited Warranty AVC MULTIMEDIA (“AVC”) makes the following limited warranty. This limited warranty extend to the original consumer purchaser and is limited to non-commercial use of the product. One Year Parts & Labor Warranty AVC products purchased in the United States or Canada are warranted to be free from defects in materials or workmanship for a period of one year from the date of their original retail purchase. - Page 34 use the original carton box and packing material or an equivalent as designated by AVC. Your Responsibility (1) You must retain the original sale receipt to provide proof of purchase. (2) These warranties are effective only if the product is purchased and operated in the United States or Canada.
- Page 35 warranties, guarantees, agreements and similar obligations of manufacturer or seller with respect to the repair or replacement of any parts. In no event shall AVC be liable for consequential or incidental damages. No person, agent, distributor, dealer or company is authorized to change, modify or extend the terms of these warranties in any manner whatsoever.
Need help?
Do you have a question about the 11 Galileo Pro RCT6513W87 DK and is the answer not in the manual?
Questions and answers
Can gallio pro be hooked up to TV
Yes, the RCA Galileo Pro RCT6513W87 DK can be connected to a TV using an HDMI cable through its HDMI port. The HDMI cable is not included, and the HDMI settings must be enabled in the device's settings.
This answer is automatically generated
Trying to see if it will hook up to TV
How do you reset the computer it will not accept my Wi-Fi pass word
To reset the RCA 11 Galileo Pro RCT6513W87 DK, press and hold the power button for 8 seconds. If that does not work, insert a paper clip into the RESET hole on the back of the tablet, then press and hold the Power button for 4–5 seconds to turn it on.
This answer is automatically generated
I haven’t use my computer a long time I forgot my password to get into computer. How do I change that?