JVC KW-R910BT Instruction Manual
Hide thumbs
Also See for KW-R910BT:
- Instruction manual (48 pages) ,
- Instruction manual (31 pages) ,
- Instruction manual (32 pages)
Table of Contents
Advertisement
Available languages
Available languages
KW-R910BT
CD RECEIVER
INSTRUCTION MANUAL
RECEPTOR CON CD
MANUAL DE INSTRUCCIONES
RÉCEPTEUR CD
MANUEL D'INSTRUCTIONS
Please read all instructions carefully before
operation to obtain the best possible performance
from the unit.
Por favor lea detenidamente este manual para
comprender a fondo todas las instrucciones y
obtener un máximo disfrute de esta unidad.
Veuillez lires les instructions attentivement avant
d'utiliser l'appareil afin d'obtenir les meilleures
performances possibles de l'appareil.
For customer Use:
Enter below the Model No. and Serial No. which are
located on the top or bottom of the cabinet. Retain this
information for future reference.
Model No.
Serial No.
ENGLISH
ESPAÑOL
FRANÇAIS
GET0950-001A [J]
Advertisement
Chapters
Table of Contents

Related Manuals for JVC KW-R910BT


Summary of Contents for JVC KW-R910BT
- Page 1 ENGLISH ESPAÑOL FRANÇAIS KW-R910BT CD RECEIVER Please read all instructions carefully before INSTRUCTION MANUAL operation to obtain the best possible performance from the unit. RECEPTOR CON CD Por favor lea detenidamente este manual para MANUAL DE INSTRUCCIONES comprender a fondo todas las instrucciones y RÉCEPTEUR CD...
- Page 2 FCC NOTE JVC KENWOOD Corporation This equipment has been tested and found to comply with the limits for a Class B digital 2967-3, ISHIKAWA-MACHI, device, pursuant to Part 15 of the FCC Rules.
- Page 3 Para cumplimiento de la COFETEL: CAUTION “La operación de este equipo está sujeta a las siguientes dos condiciones: This equipment complies with FCC/IC radiation exposure limits set forth for an uncontrolled (1) es posible que este equipo o dispositivo no cause interferencia perjudicial y environment and meets the FCC radio frequency (RF) Exposure Guidelines in Supplement C (2) este equipo o dispositivo debe aceptar cualquier interferencia, incluyendo la que pueda to OET65 and RSS-102 of the IC radio frequency (RF) Exposure rules.
-
Page 4: Table Of Contents
CONTENTS BEFORE USE Warning BEFORE USE Do not operate any function that takes your attention away from safe driving. BASICS Caution Volume setting: GETTING STARTED • Adjust the volume so that you can hear sounds outside the car to prevent accidents. •... -
Page 5: Basics
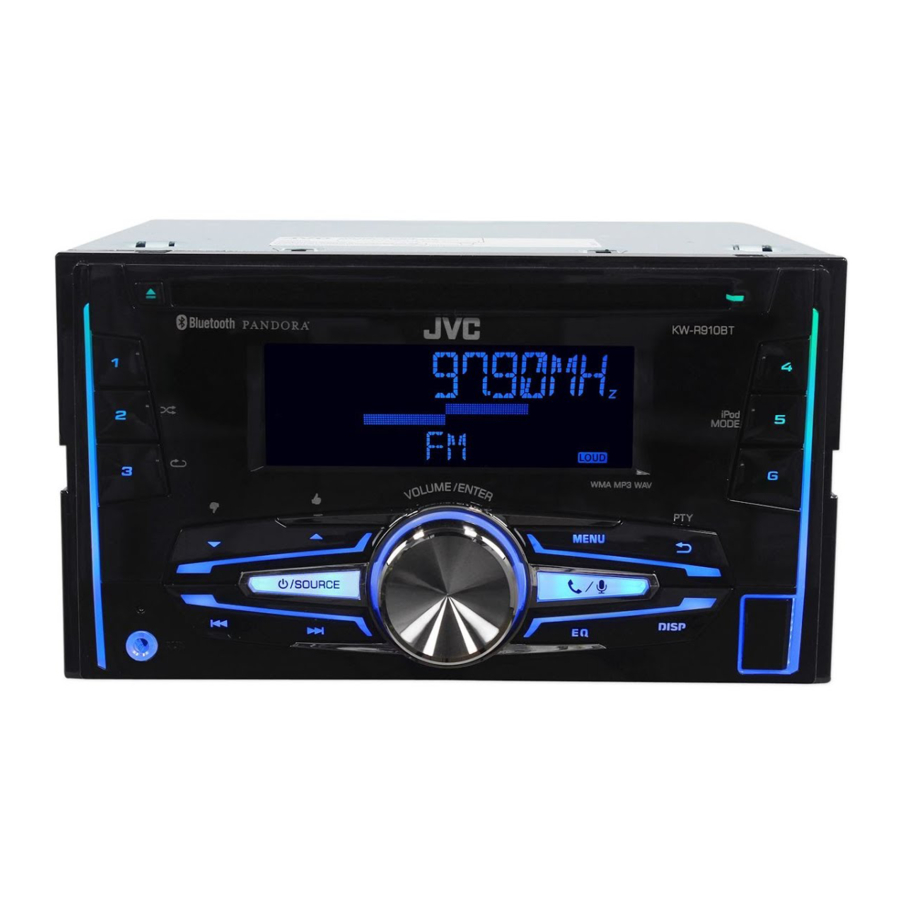
BASICS Faceplate Remote control (RM-RK52) Remote sensor Loading slot Display window (Do not expose to bright sunlight.) How to reset Your preset adjustments Pull out the insulation sheet will also be erased. when using for the first time. How to replace the battery Volume knob (turn/press) Do this (on the faceplate) -
Page 6: Getting Started
Turn the volume knob to select [24H/ 12H], then press the knob. activated). Turn the volume knob to select [12 HOUR] or [24 HOUR], then press the For details on how to update the firmware, see: knob. <http://www.jvc.net/cs/car/>. Press MENU to exit. * Not displayed when the corresponding source is selected. -
Page 7: Cd / Usb / Ipod
Fast-forward Repeat play * Press 3 B repeatedly to make a selection. • Audio CD or JVC Playlist Creator (JPC) / JVC Music Control (JMC) file ( 20): iPod/iPhone TRACK RPT, RPT OFF • MP3/WMA/WAV file: TRACK RPT, FOLDER RPT, RPT OFF USB input terminal •... - Page 8 CD / USB / iPod Select a track/file from a list Change the USB drive For iPod: Applicable only when [HEAD MODE] is selected. ( 5) When a smartphone (Mass Storage Class) is connected to the USB input Press MENU terminal, you can select its internal memory or external memory (such as an Turn the volume knob to make a selection, then press the knob.
-
Page 9: Radio
RADIO • To select a stored station: Press J / K or one of the number buttons (1 to 6). (or) Press MENU, then turn the volume knob to select a preset number and press the knob to confirm. Search for your favorite program (PTY Search) Available only for FM source. -
Page 10: Aux
RADIO Default: XX Use a portable audio player RADIO TIMER Turns on the radio at a specific time regardless of the current source. Connect a portable audio player (commercially available). 1 ONCE/ DAILY/ WEEKLY/ OFF: Select how often the timer will be turned 3.5 mm (1/8") stereo mini plug with “L”... -
Page 11: Pandora
Pandora® Preparation: Create a new station Install the latest version of the Pandora application onto your device Press MENU. (iPhone/ iPod touch), then create an account and log in to Pandora. Turn the volume knob to select [NEW STATION], then press the knob. •... -
Page 12: Iheartradio
Preparation: Do this Install the latest version of iHeart Link for JVC application onto your Pause or resume playback device (iPhone/ iPod touch), then create an account and log in to Press the volume knob (or press iHeartRadio. on RM-RK52). -
Page 13: Bluetooth
Refer to the instruction manual of the Bluetooth device for more information. Press B /SOURCE to turn on the unit. Search and select “JVC UNIT” on the Bluetooth device. “BT PAIRING” flashes on the display. Adjust the •... - Page 14 “CHECK MODE” appears. “SEARCH NOW USING time, the unit answers incoming call PHONE” “PIN IS 0000” scrolls on the display. automatically. ( 13) Search and select “JVC UNIT” on the Bluetooth device within Reject an incoming Press and hold or the volume knob. 3 minutes.
- Page 15 BLUETOOTH® Default: XX 1 Turn the volume knob to select a number (0 to 9) or character ( , #, +). DIAL NUMBER 2 Press S / T to move the entry position. MIC LEVEL –20 — +08 (0): The sensitivity of the microphone increases as the Repeat steps until you finish entering the phone number.
- Page 16 BLUETOOTH® Use Voice Recognition Make a call from memory Press and hold Press to enter Bluetooth mode. The connected phone (which has been paired the earliest) is activated. However, Press one of the number buttons (1 to 6). if priority device is connected, pressing and holding activate the priority Press the volume knob to call.
- Page 17 AUDIO Preparation: Select [ON] for [PANDORA] in [SRC SELECT]. ( 4) Shows the connected phone name using the JVC Smart Music Control * APPLICATION app. “ ” appears in front of the device name. You can listen to Pandora on your smart phone (Android OS) through Bluetooth on this unit.
-
Page 18: Audio Settings
AUDIO SETTINGS BLUETOOTH® Bluetooth audio player Do this Operations and display indications may differ according to their Select a preset Press EQ repeatedly. availability on the connected device. equalizer (or) Press EQ, then turn the volume knob within 2 seconds. Do this FLAT (default), HARD ROCK, JAZZ, POP, R&B, TALK, USER1, Playback Press B /SOURCE to select BT AUDIO. - Page 19 AUDIO SETTINGS Default: XX SUB.W LPF * THROUGH: All signals are sent to the subwoofer. ; LOW 55Hz / MID 85Hz / HIGH 120Hz: Audio signals with frequencies lower than EQ SETTING 55 Hz/ 85 Hz/ 120 Hz are sent to the subwoofer. EQ PRESET FLAT / HARD ROCK / JAZZ / POP / R&B / TALK / USER1 / USER2 / FADER * R06 — F06 (00): Adjusts the front and rear speaker output balance.
-
Page 20: Display Settings
DISPLAY SETTINGS Default: XX COLOR PRESET You can select a color for [ALL ZONE], [ZONE 1], [DISP ZONE], or [ZONE 2] separately. For [ALL ZONE], you can also select a color pattern. Default color: ALL ZONE: [COLOR 06], ZONE 1: [COLOR 06], DISP ZONE: [COLOR 01], ZONE 2: [COLOR 27] 1 Select a zone for setting. -
Page 21: More Information
• For more information about Bluetooth, visit the following WMA: 8 kHz — 48 kHz • The song order displayed on the selection menu of this unit JVC website: <http://www.jvc.net/cs/car/>. - Variable bit rate (VBR) files. may differ from that of the iPod/iPhone. -
Page 22: Troubleshooting
Control. • Check the cords and connections. • When you play audio file with song data added using the JVC Playlist Creator or JVC Music Control, you can search for audio file by Genres, Artists, Albums, Playlists, and Songs. “MISWIRING CHK WIRING THEN Check to be sure the terminals of the speaker wires are •... - Page 23 Make sure you have installed the latest version of the • Reload the disc or reattach the USB device. iHeart Link for JVC application on your device. The iPod/iPhone does not turn • Check the connection between this unit and iPod/ “PLS LOGIN”...
-
Page 24: Specifications
1 Check TROUBLESHOOTING 2 Reset the unit ( 3) Dynamic Range 90 dB 3 Contact (USA only) Channel Separation 85 dB Call: 1-800-252-5722 ( or ) visit: http://www.jvc.com MP3 Decode Compliant with MPEG-1/2 Audio Layer-3 WMA Decode Compliant with Windows Media Audio... - Page 25 SPECIFICATIONS USB Standard USB 1.1, USB 2.0 (Full speed) Maximum Output Power 50 W × 4 Compatible Devices Mass storage class Full Bandwidth Power 22 W × 4 (at less than 1% THD) File System FAT12/ 16/ 32 Speaker Impedance 4 Ω — 8 Ω Maximum Supply Current DC 5 V 1 A Preout Level/Load (CD) 2 500 mV/10 kΩ load (full scale) MP3 Decode Compliant with MPEG-1/2 Audio Layer-3 Preout Impedance...
- Page 26 Warning Part list for installation • The unit can only be used with a 12 V DC power supply, negative ground. • Disconnect the battery’s negative terminal before wiring and mounting. (A) Wiring harness (B) Flat head screw (C) Round head screw •...
-
Page 27: Connection
Wiring connection Signal cord (not supplied) Front output JVC Amplifier Rear/subwoofer output Fuse (10 A) Vehicle dashboard Microphone input jack ( 11) Antenna terminal Factory wiring To the steering Remote wire Light blue/yellow harness (vehicle) wheel remote (not supplied) STEERING control adapter... - Page 28 CONTENIDO ANTES DEL USO Advertencia ANTES DEL USO No utilice ninguna función que pueda desviar su atención mientras está conduciendo el vehículo. PUNTOS BÁSICOS Precaución Ajuste del volumen: PROCEDIMIENTOS INICIALES 4 • Ajuste el volumen a un nivel que le permita oír los ruidos del exterior para impedir accidentes. •...
-
Page 29: Puntos Básicos
PUNTOS BÁSICOS Placa frontal Mando a distancia (RM-RK52) Sensor remoto Ranura de carga Ventanilla de visualización (DO lo exponga a la luz solar brillante.) Cómo reinicializar También se borrarán los Retire la hoja aislante cuando se ajustes preestablecidos por utilice por primera vez. usted. -
Page 30: Procedimientos Iniciales
: Se cancela (la actualización no se activa). Gire la rueda de volumen para realizar los ajustes y, a continuación, Para obtener información sobre cómo actualizar el firmware, consulte: púlsela. <http://www.jvc.net/cs/car/>. Día Hora Minutos * No se visualiza cuando se ha seleccionado la fuente correspondiente. -
Page 31: Cd / Usb / Ipod
Pulse repetidas veces para realizar una selección. * reproducción ( 20) • CD de audio o archivo JVC Playlist Creator (JPC) / JVC Music Control (JMC) : TRACK RPT, iPod/iPhone RPT OFF Terminal de entrada USB • Archivo MP3/WMA/WAV: TRACK RPT, FOLDER RPT, RPT OFF •... - Page 32 CD / USB / iPod Seleccionar una pista/archivo de una lista Cambio del dispositivo USB Cuando se conecta un smartphone (clase de almacenamiento masivo) al terminal de Para iPod: Aplicable sólo cuando se selecciona [HEAD MODE] ( 5) entrada USB, puede seleccionar su memoria interna o externa (tal como una tarjeta SD) MENU Pulse para reproducir las canciones guardadas.
-
Page 33: Radio
RADIO • Para seleccionar una emisora programada: Pulse o uno de los botones numéricos ( Pulse MENU y, a continuación, gire la rueda de volumen para seleccionar un número de preajuste y púlsela para confirmar. Búsqueda de su programa favorito (Búsqueda PTY) Disponible solamente para la fuente FM. -
Page 34: Aux
RADIO Predeterminado: Uso de un reproductor de audio portátil RADIO TIMER Enciende la radio a una hora específica, independientemente de la fuente actual. Conecte un reproductor de audio portátil (disponible en el mercado). 1 ONCE DAILY WEEKLY : Selecciona la frecuencia de activación del temporizador. -
Page 35: Pandora
Pandora® Preparativos: Crear una emisora nueva Instale la última versión de la aplicación Pandora en su dispositivo (iPhone/ iPod touch) y, a continuación, cree una cuenta e inicie sesión en Pandora. MENU Pulse • Seleccione [ON] para [PANDORA] [SRC SELECT] ( 4) Gire la rueda de volumen para seleccionar [NEW STATION]... -
Page 36: Iheartradio
Preparativos: Para Hacer esto Instale la última versión de la aplicación iHeart Link for JVC en su dispositivo (iPhone/ Pausar o reanudar la reproducción Pulse la rueda de volumen (o pulse iPod touch) y, a continuación, cree una cuenta e inicie sesión en iHeartRadio. -
Page 37: Bluetooth
B /SOURCE Pulse para encender la unidad. Busque y seleccione “JVC UNIT” en el dispositivo Bluetooth. “BT PAIRING” parpadea en la pantalla. • En el caso de algunos dispositivos Bluetooth, puede ser necesario ingresar el número de identificación personal (código PIN) inmediatamente después de la búsqueda. - Page 38 “PIN IS 0000” se desplazan en la pantalla. ( 13) llamadas entrantes. Busque y seleccione “JVC UNIT” en el dispositivo Bluetooth en el lapso Rechazar una llamada de 3 minutos. Mantenga pulsado o la rueda de volumen.
- Page 39 BLUETOOTH® Predeterminado: DIAL NUMBER Gire la rueda de volumen para seleccionar un número (0 a 9) o un carácter ( , #, +). Pulse para mover la posición de ingreso. MIC LEVEL –20 — ( ): La sensibilidad del micrófono aumenta a medida que aumenta el Repita los pasos hasta finalizar el ingreso del número telefónico.
- Page 40 BLUETOOTH® Uso del reconocimiento de voz Realizar una llamada desde la memoria Pulse y mantenga pulsado Pulse para ingresar al modo Bluetooth. El teléfono conectado (que ha sido emparejado en primer término) se activa. No obstante, si se Pulse uno de los botones numéricos ( conecta el dispositivo prioritario, pulse y mantenga pulsado para activar el dispositivo Pulse la rueda de volumen para llamar.
- Page 41 : Muestra la dirección de la unidad. JVC Smart Music Control ha sido diseñada para ver el estado del receptor para automóvil JVC y realizar operaciones de control simples en los teléfonos inteligentes que ejecutan Android. Si desea conocer las operaciones de JVC Smart Music Control, visite el sitio web de JVC: <http://www.jvc.net/cs/car/>.
-
Page 42: Ajustes De Audio
AJUSTES DE AUDIO BLUETOOTH® Reproductor de audio Bluetooth Para Hacer esto Las operaciones y las indicaciones en pantalla difieren según su disponibilidad Seleccionar un Pulse repetidamente. en el dispositivo conectado. ecualizador preajustado Pulse y, a continuación, gire la rueda de volumen antes de Para Hacer esto que transcurran 2 segundos. - Page 43 AJUSTES DE AUDIO Predeterminado: LPF * SUB.W THROUGH 55Hz : Todas las señales se envían al subwoofer. ; / 85Hz HIGH 120Hz / : Las señales de audio con frecuencias inferiores a EQ SETTING 55 Hz/ 85 Hz/ 120 Hz se envían al subwoofer. EQ PRESET FLAT HARD ROCK...
-
Page 44: Ajustes De Visualización
AJUSTES DE VISUALIZACIÓN Predeterminado: COLOR PRESET ALL ZONE ZONE 1 Puede seleccionar por separado un color para [ ], [ DISP ZONE ZONE 2 ALL ZONE ] o [ ]. Para [ ], podrá seleccionar un patrón de color. Color predeterminado: ALL ZONE COLOR 06 ZONE 1... -
Page 45: Más Información
- iPod nano (3rd, 4th, 5th, 6th y 7th generation) WMA: 8 kHz — 48 kHz • Si desea más información acerca de Bluetooth, visite el sitio web de JVC: - iPhone, iPhone 3G, 3GS, 4, 4S, 5 - Archivos a una velocidad de bits variable (VBR). -
Page 46: Problemas
El sonido no se escucha. • Ajuste el volumen al nivel óptimo. • Cuando reproduce audio con datos de canciones añadidos mediante JVC Playlist Creator o JVC Music Control, puede • Inspeccione los cables y las conexiones. buscar archivos de audio por género, artista, álbum, lista de producción o canción. - Page 47 Asegúrese de haber instalado en su dispositivo, la última versión de la destellando. • Cargue el disco o vuelva a conectar el dispositivo USB. aplicación iHeart Link for JVC. El iPod/iPhone no se enciende o no • Verifique la conexión entre esta unidad y el iPod/iPhone.
-
Page 48: Especificaciones
1 Verifique la LOCALIZACIÓN Y SOLUCIÓN DE Separación de canales 85 dB PROBLEMAS MP3 decodificado Compatible con MPEG-1/2 Audio Layer-3 2 Reinicialice la unidad ( 3) WMA decodificado Compatible con Windows Media Audio 3 Llame al (solo EE.UU.) Llame al: 1-800-252-5722 ( o ) visite: http://www.jvc.com... - Page 49 ESPECIFICACIONES Estándar USB USB 1.1, USB 2.0 (Alta velocidad) Potencia de salida máxima 50 W × 4 Dispositivos compatibles Clase de almacenamiento masivo Potencia en todo el ancho de banda 22 W × 4 (a menos del 1% THD) Sistema de archivos FAT12/ 16/ 32 Impedancia del altavoz 4 Ω — 8 Ω Corriente de alimentación máxima 5 V CC 1 A Nivel de salida de preamplificador/carga (CD) 2 500 mV/10 kΩ...
- Page 50 Advertencia Lista de piezas para la instalación • La unidad puede utilizarse solamente con una fuente de alimentación de 12 V CC con negativo a masa. Mazo de conductores Tornillo de cabeza plana Tornillo de cabeza esférica • Desconecte el terminal negativo de la batería antes de realizar el cableado y el montaje. M5 ×...
- Page 51 Conexión del cableado Cable de señal (no suministrado) Amplificador Salida delantera de JVC Salida posterior/subwoofer Fusible (10 A) Salpicadero del vehículo Jack de entrada de micrófono Terminal de la antena Al adaptador del Mazo de cables de Cable remoto...
-
Page 52: Avant L'utilisation
TABLE DES MATIERES AVANT L’UTILISATION Avertissement AVANT L’UTILISATION N’utilisez aucune fonction qui risque de vous distraire de la conduite sure de votre véhicule. FONCTIONNEMENT DE BASE 3 Précautions Réglage du volume: PRISE EN MAIN • Ajustez le volume de façon à pouvoir entendre les sons extérieurs à la voiture afin d’éviter tout risque d’accident. •... -
Page 53: Fonctionnement De Base
FONCTIONNEMENT DE BASE Façade Télécommande (RM-RK52) Capteur de télécommande Fente d’insertion Fenêtre d’affichage (Ne l’exposez Pas à la lumière directe du soleil.) Comment réinitialiser Vos ajustements préréglés Retirez la feuille d’isolant lors de la sont aussi effacés. première utilisation. Comment remplacer la pile Bouton de volume (tournez/appuyez) Pour... -
Page 54: Prise En Main
Pour en savoir plus sur la mise à niveau du micrologiciel, référez-vous à: Tournez le bouton de volume pour choisir [CLOCK SET] , puis appuyez sur <http://www.jvc.net/cs/car/>. le bouton. * Pas d’affichage quand la source correspondante est sélectionnée. Tournez le bouton de volume pour faire les réglages, puis appuyez sur le bouton. -
Page 55: Cd / Usb / Ipod
* Répéter la lecture Appuyez répétitivement sur la touche pour faire un choix. ( 20) • CD Audio ou fichier JVC Playlist Creator (JPC) / JVC Music Control (JMC) : TRACK RPT, iPod/iPhone RPT OFF Prise d’entrée USB • Fichier MP3/WMA/WAV: TRACK RPT, FOLDER RPT, RPT OFF •... - Page 56 CD / USB / iPod Sélectionnez une plage/fichier à partir d’une liste Changez le lecteur USB Quand un smartphone (périphérique à mémoire de grande capacité) est connecté à la Pour iPod: Fonctionne uniquement quand [HEAD MODE] est sélectionné. ( 5) prise d’entrée USB, vous pouvez sélectionnez sa mémoire interne ou sa mémoire externe MENU Appuyez sur...
-
Page 57: Radio
RADIO • Pour choisir une station mémorisée: Appuyez sur ou sur l’une des touches numériques ( à (ou) Appuyez sur MENU , puis tournez le bouton de volume pour choisir un numéro préréglé, puis appuyez sur le bouton pour valider. Recherche de votre programme préféré... -
Page 58: Aux
RADIO Défaut: Utilisation d’un lecteur audio portable RADIO TIMER Met la radio sous tension à une heure spécifique quelle que soit la source actuelle. Connectez un lecteur audio portable (en vente dans le commerce). 1 ONCE DAILY WEEKLY : Sélectionnez la fréquence de mise en service de la Mini fiche stéréo de 3,5 mm (1/8 pouces) avec connecteur minuterie. -
Page 59: Pandora
Pandora® Préparation: Créez une nouvelle station Installez la dernière version de l’application Pandora sur votre appareil (iPhone/ iPod touch), puis créez un compte et connectez-vous sur Pandora. MENU Appuyez sur • Sélectionnez [ON] pour [PANDORA] dans [SRC SELECT] ( 4) Tournez le bouton de volume pour choisir [NEW STATION] , puis appuyez... -
Page 60: Iheartradio
Préparation: Pour Faire Installez la dernière version de l’application iHeart Link for JVC sur votre appareil (iPhone/ Mettez en pause ou reprenez la Appuyez sur le bouton de volume iPod touch), puis créez un compte et connectez-vous sur iHeartRadio. -
Page 61: Bluetooth
B /SOURCE Appuyez sur pour mettre l’appareil sous tension. Cherchez et sélectionnez “JVC UNIT” sur le périphérique Bluetooth. “BT PAIRING” clignote sur l’affichage. • Pour certains périphériques Bluetooth, il se peut que vous ayez besoin d’entrer le code PIN (numéro d’identification personnel) immédiatement après la recherche. - Page 62 “CHECK MODE” apparaît. “SEARCH NOW USING PHONE” l’appareil répond automatiquement aux appels “PIN IS 0000” défile sur l’affichage. entrants. ( 13) Cherchez et sélectionnez “JVC UNIT” sur le périphérique Bluetooth Refus d’un appel entrant avant 3 minutes. Maintenez enfoncé ou le bouton de Réalisez (A), (B) ou (C) en fonction de ce qui apparait sur l’affichage.
- Page 63 BLUETOOTH® Défaut: DIAL NUMBER Tournez le bouton de volume pour sélectionner un numéro (0 à 9) ou un caractère ( , #, +). MIC LEVEL –20 — ( ): La sensibilité du microphone augmente quand le numéro augmente. S / T Appuyez sur pour déplacer la position d’entrée.
- Page 64 BLUETOOTH® Utilisation de la reconnaissance vocale Pour passer un appel à partir de la mémoire Maintenez enfoncée Appuyez sur pour entrer en mode Bluetooth. Le téléphone connecté (qui a été apparié le plus tôt) est activé. Cependant, si un périphérique Appuyez sur l’une des touches numériques ( à...
- Page 65 La source est sélectionnée automatiquement et le lecture démarre. de cet appareil. • Vous pouvez commander iHeartRadio de la même façon que iHeartRadio pour iPod/ JVC Smart Music Control est conçu pour voir l’état de l’autoradio JVC et réaliser des iPhone. ( 10) commandes simple à...
-
Page 66: Réglages Audio
RÉGLAGES AUDIO BLUETOOTH® Lecteur audio Bluetooth Pour Faire Les opérations et les indications de l’affichage peuvent différer en fonction de Choisissez Appuyez répétitivement sur leur disponibilité sur le périphérique connecté. un égaliseur (ou) préréglé Appuyez sur , puis tournez le bouton de volume avant 2 Pour Faire secondes. - Page 67 RÉGLAGES AUDIO Défaut: LPF * SUB.W THROUGH 55Hz : Tous les signaux sont envoyés au caisson de grave. ; / 85Hz HIGH 120Hz / : Les signaux audio avec des fréquences inférieures à 55 Hz/ EQ SETTING 85 Hz/ 120 Hz sont envoyés sur le caisson de grave. EQ PRESET FLAT HARD ROCK...
-
Page 68: Réglages D'affichage
RÉGLAGES D’AFFICHAGE Défaut: COLOR PRESET ALL ZONE ZONE 1 Vous pouvez sélectionner une couleur séparément pour [ ], [ DISP ZONE ZONE 2 ALL ZONE ] ou [ ]. Pour [ ], vous pouvez aussi sélectionner un motif de couleur. Couleur par défaut: ALL ZONE COLOR 06... -
Page 69: Plus D'informations
être différent de celui de iPod/iPhone. WMA: 8 kHz — 48 kHz • Pour plus d’informations sur Bluetooth, consulter le site Web JVC suivant: • Si certaines opération ne sont pas effectuées correctement ou comme vous - Fichiers à débit binaire variable (VBR). -
Page 70: Guide De Dépannage
Le son ne peut pas être entendu. • Ajustez le volume sur le niveau optimum. • Quand vous reproduisez un fichier audio avec des données de chanson ajoutée en utilisant JVC Playlist Creator ou • Vérifiez les cordons et les connexions. - Page 71 Assurez-vous que vous avez bien installé la dernière version de • Remettez le disque en place ou reconnectez le périphérique USB. l’application iHeart Link for JVC sur votre appareil. iPod/iPhone ne peut pas être mis sous • Vérifiez la connexion entre cet appareil et l’iPod/iPhone.
-
Page 72: Spécifications
En cas de problèmes, essayez ce qui suit: Décodage MP3 Compatible avec le format MPEG-1/2 Audio Layer-3 1 Vérifiez la section GUIDE DE DÉPANNAGE Décodeur WMA Compatible Windows Media Audio 2 Réinitialisez l’appareil ( 3) 3 Contactez (USA uniquement) Appelez: 1-800-252-5722 ( ou ) consultez: http://www.jvc.com... - Page 73 SPÉCIFICATIONS Standard USB USB 1.1, USB 2.0 (Vitesse maximale) Puissance de sortie maximum 50 W × 4 Périphériques compatibles À mémoire de grande capacité Pleine Puissance de Largeur de Bande 22 W × 4 (avec moins de 1% DHT) Système de fichiers FAT12/ 16/ 32 Impédance d’enceinte 4 Ω — 8 Ω Courant d’alimentation maximum CC 5 V 1 A Niveau de préamplification/charge (CD)
- Page 74 Avertissement Liste des pièces pour l’installation • L’appareil peut uniquement être utilisé avec une alimentation de 12 V CC, à masse négative. • Déconnectez la borne négative de la batterie avant le câblage et le montage. Faisceau de fils Vis à tête plate Vis à...
- Page 75 Connexions Cordon de signal (non fournie) Sortie avant JVC Amplificateur Sortie arrière/caisson de grave Fusible (10 A) Tableau de bord du véhicule Prise d’entrée du microphone Borne de l’antenne Faisceau de câbles de À l’adaptateur de Bleu clair/jaune l’usine (véhicule) Fil de télécommande...
- Page 76 Such marks are used under license. • The Bluetooth® word mark and logos are registered trademarks owned by Bluetooth SIG, Inc. and any use of such marks by JVC KENWOOD Corporation is under license. Other trademarks and trade names are those of their respective owners.
Need help?
Do you have a question about the KW-R910BT and is the answer not in the manual?
Questions and answers