Crown CTs 1200 Operation Manual
Cts series 2-channel models multi-channel models
Hide thumbs
Also See for CTs 1200:
- Catalog (83 pages) ,
- Operation manual (32 pages) ,
- Reference manual (9 pages)
Table of Contents
Advertisement
Page 3: 2-channel models
CTs 600
CTs 1200
CTs 2000
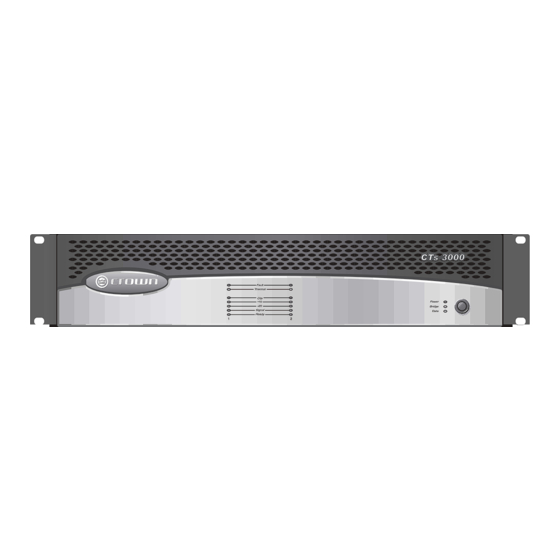
CTs 3000
CTs Series Operation Manual
Obtaining Other Language Versions: To obtain information in another language about the use of this product, please contact your local
Crown Distributor. If you need assistance locating your local distributor, please contact Crown at 574-294-8000.
This manual does not include all of the details of design, production, or variations of the equipment. Nor does it cover every possible
situa tion which may arise during installation, operation or maintenance.
The information provided in this manual was deemed accurate as of the publication date. However, updates to this information may have
occurred. To obtain the latest version of this manual, please visit the Crown website at www.crownaudio.com.
Trademark Notice: Com-Tech, BCA, Crown, Crown Audio, Amcron and Multi-Mode are registered trademarks of Crown International.
IQwic, PIP and PIP2 are trademarks of Crown International. Other trademarks are the property of their respective owners.
© 2008 by Crown Audio
®
, Inc. 1718 W. Mishawaka Rd., Elkhart, Indiana 46517-9439 U.S.A. Telephone: 574-294-8000
Page 31: Multi-channel models
CTs 4200
CTs 8200
137000-5A
1/08
Advertisement
Table of Contents
Troubleshooting

Related Manuals for Crown CTs 1200


Summary of Contents for Crown CTs 1200
- Page 1 To obtain the latest version of this manual, please visit the Crown website at www.crownaudio.com. Trademark Notice: Com-Tech, BCA, Crown, Crown Audio, Amcron and Multi-Mode are registered trademarks of Crown International. IQwic, PIP and PIP2 are trademarks of Crown International. Other trademarks are the property of their respective owners. CTs Series Operation Manual ©...
-
Page 2: Important Safety Instructions
Important Safety Instructions Important Safety Instructions Importantes Instructions de Sécurité Importantes Instructions de Sécurité Read these instructions. Read these instructions. Keep these instructions. Keep these instructions. Heed all warnings. Heed all warnings. Follow all instructions. Follow all instructions. Do not use this apparatus near water. Do not use this apparatus near water. - Page 3 CTs Power Amplifi ers Operation Manual CTs 2-Channel Series CTs 600 CTs 1200 CTs 2000 CTs 3000 page 3...
- Page 4 CTs Power Amplifi ers THIS PAGE INTENTIONALLY LEFT BLANK page 4 Operation Manual...
-
Page 5: Declaration Of Conformity
CTs Power Amplifi ers Crown Audio, Inc. ISSUED BY: Crown Audio, Inc. 1718 W. Mishawaka Road Elkhart, Indiana 46517 U.S.A. European Representative’s Name and Address: David Budge 10 Harvest Close Yateley GU46 6YS United Kingdom Equipment Type: Commercial Audio Power Amplifi ers... -
Page 6: Table Of Contents
Table of Contents Important Safety Instructions ...2 CTs 2-Channel Models...3 Declaration of Conformity ...5 1 Welcome ...8 1.1 Features ...8 2 How to Use This Manual ...9 3 Setup ...10 3.1 Unpack Your Amplifi er ...10 3.2 Install Your Amplifi er ...10 3.3 Ensure Proper Cooling ...10 3.4 Choose Input Wire and Connectors ...11 3.5 Choose Output Wire and Connectors ...11... - Page 7 CTs Power Amplifi ers Table of Contents CTs Multi-Channel Models ...31 Declaration of Conformity ... 32 1 Welcome ... 33 1.1 Features ... 33 2 How to Use This Manual ... 33 3 Setup ... 34 3.1 Unpack Your Amplifi er ... 34 3.2 Install Your Amplifi...
-
Page 8: Features
8 1 Welcome Building on the foundation of the Com-Tech ® • Series, the Crown CTs Series offers new ® fl exi bility and value for installed sound. The Com-Tech Series was the fi rst to offer • independent selection of high- and low- impedance opera tion for a specifi... -
Page 9: How To Use This Manual
It does not cover every aspect of installation, setup or operation that might occur under every condition. For addi tional information, please consult Crown’s Amplifi er Application Guide (available online at www.crownaudio.com), Crown Tech Support, your system installer or retailer. -
Page 10: Install Your Amplifi Er
If damage is found, notify the transpor tation company immediately. Only you can ini tiate a claim for shipping damage. Crown will be happy to help as needed. Save the shipping carton as evidence of damage for the shipper’s inspection. -
Page 11: Choose Output Wire And Connectors
(see Figure 3.5). To prevent the possibility of short-circuits, wrap or otherwise insulate exposed loudspeaker cable connectors. For best results, Crown recom mends Panduit part #PV10-10LF-L or equivalent terminal fork. Screw spacing is shown in Figure 3.5. -
Page 12: Wire Your System
Bridge-Mono mode. Refer to Section 3.5 for output connector pin assignments. NOTE: Crown provides a reference of wiring pin assign ments for commonly used connector types in the Crown Amplifi er Application Guide available at www.crownaudio.com. -
Page 13: Bridge-Mono 140V/200V Mode
CTs Power Amplifi ers 3 Setup 3.6.3 Dual 70V/100V Mode Typical input and output wiring, along with Atten uator and Mode Switch settings are shown in Fig ures 3.10 and 3.11. Make sure the Mode switch is set to the “Dual” position when operating in Dual mode. -
Page 14: Dual Mode With "Y" Input
“Y” Input Switch to ON. OUTPUTS: Connect the Channel 1 speaker’s positive (+) lead to Channel 1 positive terminal of amp; repeat for negative (–). Connect the Channel 2 speaker’s positive (+) lead to Channel 2 positive terminal of amp; repeat for negative (–). -
Page 15: Connect To Ac Mains
For help with determining your system’s optimum gain structure (signal levels) please refer to the Crown Ampli fi er Application Guide, available online at www.crownaudio.com. Operation Manual 4 Operation 4.1 Precautions... -
Page 16: Front Panel Controls And Indicators
4 Operation 4.2 Front Panel Controls and Indicators A. Fault Indicator Red LED, one per channel, fl ashes when the amplifi er output channel has stopped operating. Usually this means that the amplifi er must be serviced. B. Thermal Indicator Red LED, one per channel, illuminates when the channel has shut down, or is very near shutting down, due to thermal stress... -
Page 17: Back Panel Controls And Connectors
CTs 2000/3000 back panel is shown. CTs 600/1200 look slightly different near the Reset button. M. Power Cord Connector Standard 15 amp IEC inlet. A circuit breaker located near the IEC power inlet protects the amplifi er from excessive AC current draw. N. Reset Switch Resets the circuit breaker that protects the power supply. -
Page 18: Advanced Features And Options
SOA. Limiting is proportional and kept to an absolute minimum- only what is required to prevent the possibility of output transistor damage. This level of protection enables Crown to increase output transistor utilization while also greatly increasing amplifi er reliability. page 18 5.1.3 Fault... -
Page 19: Input Sensitivity Switches
PIP2 modules. The CTs Series 2-channel models do not accept earlier PIP modules. Visit the Crown website at www.crownaudio.com, or contact Crown Customer Service, for descriptions of available PIP and PIP2 modules. Figure 5.3 T-170V Figure 5.4 TP-170V (back view) -
Page 20: Nominal Attenuation Settings
5 Advanced Features and Options 5.3.1 Nominal Attenuation Settings The signal level for each input can be attenuated repeatably by adjusting the 21-step Level Control (see Section 4.3). Figure 5.5 shows the attenuation in dB for each detent. The setting of the input-sensitivity switch varies the actual attenation as shown. -
Page 21: Troubleshooting
fl ashing. POSSIBLE REASON: • The amplifi er channel has stopped operat ing. Refer the unit to an authorized Crown Service Center. CONDITION: Distorted sound. POSSIBLE REASON: • Load is wired incorrectly or Stereo/Mono mode switch is set incorrectly. Check both. - Page 22 6 Troubleshooting page 22 CONDITION: No sound, even though the amp has power. Power LED is on with out fl ashing and the amp is receiving an input sig nal. Signal indicator is fl ashing. POSSIBLE REASON: • Speakers not connected.
-
Page 23: Specifi Cations
CTs Power Amplifi ers 7 Specifi cations Minimum Guaranteed Power (20 Hz - 20 kHz) 2-ohm Dual (per ch.) 4-ohm Dual (per ch.) 8-ohm Dual (per ch.) 16-ohm Dual (per ch.) 70V Dual (per ch.) 100V Dual (per ch.) 4-ohm Bridge 8-ohm Bridge 16-ohm Bridge 100V Bridge... - Page 24 7 Specifi cations Performance Maximum Input Level Before input compression Absolute maximum Load Impedance (Note: Safe with all types of loads) Stereo Bridge Mono Voltage Gain (at maximum level setting) 8/4 Ohm Operation 26 dB 70V Operation 100V Operation Input Sensitivity 2/4/8 ohms 100 V 26 dB gain...
- Page 25 CTs Power Amplifi ers 7 Specifi cations Figure 7.2 CTs 600/1200 Typical Crosstalk vs. Frequency Figure 7.1 CTs 600/1200 Typical Frequency Response (1 W, 8 ohms) Figure 7.3 CTs 600/1200 Typical Damping Factor vs. Frequency Operation Manual page 25...
- Page 26 CTs Power Amplifi ers 7 Specifi cations Figure 7.5 CTs 2000/3000 Typical Crosstalk vs. Frequency Figure 7.4 CTs 2000/3000 Typical Frequency Response (1W) Figure 7.6 CTs 2000/3000 Typical Damping Factor vs. Frequency page 26 Operation Manual...
-
Page 27: Ac Power Draw And Thermal Dissipation
CTs Power Amplifi ers 8 AC Power Draw and Thermal Dissipation AC Power Draw and Thermal Dissipation: Pink noise 12dB crest factor, bandwidth limited 22Hz to 22kHz. Typical line impedance used. Measurements made with 120VAC mains. Line current figures for 230VAC units derived by multiplying 120VAC figures by 0.5. Data based on all channels driven. - Page 28 8 AC Power Draw and Thermal Dissipation AC Power Draw and Thermal Dissipation: Pink noise 12dB crest factor, bandwidth limited 22Hz to 22kHz. Typical line impedance used. Measurements made with 120VAC mains. Line current figures for 230VAC units derived by multiplying 120VAC figures by 0.5. Data based on all channels driven.
- Page 29 CTs Power Amplifi ers 8 AC Power Draw and Thermal Dissipation AC Power Draw and Thermal Dissipation: Pink noise 12dB crest factor, bandwidth limited 22Hz to 22kHz. Typical line impedance used. Measurements made with 120VAC mains. Data based on all channels driven. Line current figures for 230VAC units derived by multiplying 120VAC figures by 0.5.
- Page 30 8 AC Power Draw and Thermal Dissipation AC Power Draw and Thermal Dissipation: Pink noise 12dB crest factor, bandwidth limited 22Hz to 22kHz. Typical line impedance used. Measurements made with 120VAC mains. Data based on all channels driven. Line current figures for 230VAC units derived by multiplying 120VAC figures by 0.5. Line current figures for 100VAC units (not shown) are 1.2 times the line current figures of 120VAC units.
-
Page 31: Cts Multi-Channel Models
CTs Power Amplifi ers CTs Multi-Channel Series CTs 4200 CTs 8200 Operation Manual page 31... -
Page 32: Declaration Of Conformity
EN 61000-3-3:1995 Limitation of Voltage Fluctuations and Flicker in Low-Voltage Supply Systems Rated Current 16A EN 55022:1992 + A1: 1995 & A2:1997 Limits and Methods of Measurement of Radio Disturbance Characteristics of ITE: Radiated, Class B Limits; Conducted, Class B... -
Page 33: Welcome
3U chassis and four channels in a 2U chassis. Building on the foundation of the Com-Tech ® Series, Crown’s CTs Series offers new fl exibility • Selectable constant-voltage (70V/100V) or and value for installed sound applications. The low-impedance (8/4 ohm) operation for Com-Tech Series were the fi... -
Page 34: Setup
If damage is found, notify the transpor tation company immediately. Only you can ini tiate a claim for shipping damage. Crown will be happy to help as needed. Save the shipping carton as evidence of damage for the shipper’s inspection. -
Page 35: Choose Input Wire And Connectors
3.4 shows connector pin assignments for unbalanced wiring. When possible, use balanced wiring for signal input, which provides better rejection of unwanted noise and hum. For more information, refer to the Crown Amplifi er Application Guide, available online at www.crownaudio.com NOTE: Custom wiring should only be performed by qualifi... -
Page 36: Wire Your System
CH 3 DUAL DUAL BRIDGE Figure 3.7 System Wiring and Control Settings, Dual Mode, 70V. CTs Power Amplifi ers See the Crown Amplifi er Appli cation Guide, available online at www.crownaudio.com, for pin assignments for commonly used connector types. Output panel... -
Page 37: Bridge-Mono 16/8 Mode
CH 1 CH 4 CH 3 DUAL DUAL BRIDGE Figure 3.9 System Wiring and Control Settings, Bridge-Mono Mode, 100V See the Crown Amplifi er Appli cation Guide, available online at www. crownaudio.com, for pin assignments for commonly used connector types. -
Page 38: Connect To Ac Mains
If you ever need to make any wiring or installation changes, don’t forget to disconnect the power cord. For help with determining your system’s optimum gain structure (signal levels) please refer to the Crown Amplifi er Application Guide, available online at www.crownaudio.com. Under-Voltage Over-Voltage... -
Page 39: Operation
1 channel. Due to the amplifi er’s output protection, such a confi g uration may result in premature clipping, speaker damage or a blown power fuse. Remember: Crown is not liable for damage that results from overdriving other system compo nents. page 39... -
Page 40: Front Panel Controls And Indicators
4 Operation 4.2 Front Panel Controls and Indicators Note: CTs 8200 is shown. Some CTs 4200 features are in different locations. A. Bridge Mode Indicator Yellow LED, one per channel pair, illumi nates when the channel pair’s Mode Switch is set to the “Bridge” position. If Mode switch is changed while amplifi... -
Page 41: Back Panel Controls And Connectors
Note: CTs 8200 is shown. Some CTs 4200 features are in different locations. K. AC Power Cord Connector Standard IEC type 320 inlet. 120V models: 15-amp. 220-240V models: 10-amp. Voltage is indicated above IEC inlet. L. Output Connectors One four-pole terminal strip for every two chan nels with touch-proof cover. -
Page 42: Advanced Features And Options
If an amplifi er channel requires service, the correspond- ing Fault indicator will illuminate to alert the user of this condition. If this occurs, return the amplifi er to the Crown factory or to an authorized Crown service center. 5.1.3 Fault Isolation Topology (FIT) Crown’s new FIT (Fault Isolation Topology) design... -
Page 43: Channel Level Control
CTs Power Amplifi ers 5 Advanced Features and Options 5.2.4 Channel Level Control The signal level for each input can be attenu ated accurately by adjusting the 21-step Level Control (see Section 4.2). Figure 5.2 shows the amount of attenuation in dB for each detent. Note: Attenuation per detent varies with operat ing mode since gain varies with operating mode. -
Page 44: Options
5 Advanced Features and Options 5.3 Options Below are some available options. For current options, visit the Crown website at www. crownau dio.com. 5.3.1 Control Modules VCA-MC (VCA module): See Figure 5.3. Pro vides independent remote level control for each channel. -
Page 45: Troubleshooting
The amplifi er output level is so high that the power supply fuse has blown. Verify that input levels and output impedances are within safe ranges. Refer the unit to an authorized Crown service center for fuse replacement. CONDITION: Power indicator is fl ashing. - Page 46 6 Troubleshooting page 46 CONDITION: No sound, even though the amp has power. Power LED is on without fl ashing and the amp is receiving an input signal. Signal indicator is fl ashing. • Speakers not connected. • Open circuit due to speaker failure.
-
Page 47: Specifi Cations
CTs Power Amplifi ers 7 Specifi cations CTs 4200: MINIMUM GUARANTEED POWER Dual Mode Channels Driven 4 Ohm 8 Ohm Figure 7.1 CTs 4200 70V (25 Ohm) at 0.1% THD Power Chart Bridge-Mono Mode Channel Pairs Driven 8 Ohm 16 Ohm 100V (50 Ohm) * Constant Voltage full bandwidth power ratings support 100 Hz - 20 kHz due to automatic high-pass filters. -
Page 48: Operation Manual
7 Specifi cations The following specifi cations apply to all models in Dual 8/4 ohm mode with 8-ohm loads unless otherwise specifi ed. Performance Frequency Response (at 1 watt, 20 Hz - 20 kHz) Phase Response (at 1 watt, 10 Hz - 20 kHz) Signal to Noise Ratio below rated power (20 Hz to 20 kHz) Total Harmonic Distortion (THD) at 1 watt, from 20 Hz to 20 kHz Intermodulation Distortion (IMD) 60 Hz and 7 kHz at 4:1,... - Page 49 CTs Power Amplifi ers 7 Specifi cations Figure 7.4 CTs 8200 Typical Phase Response (1 W) Figure 7.3 CTs 8200 Typical Frequency Response (1 W) Figure 7.5 CTs 8200 Typical Damping Factor vs. Frequency Operation Manual page 49...
- Page 50 CTs Power Amplifi ers 7 Specifi cations Figure 7.6 CTs 8200 Typical Output Impedance vs. Frequency Figure 7.7 CTs 8200 Typical Crosstalk vs. Frequency page 50 Operation Manual...
-
Page 51: Ac Power Draw And Thermal Dissipation
CTs Power Amplifi ers 8 AC Power Draw and Thermal Dissipation AC Power Draw and Thermal Dissipation: Pink noise 12dB crest factor, bandwidth limited 22Hz to 22kHz. Typical line impedance used. Measurements made with 120VAC mains. Line current figures for 230VAC units derived by multiplying 120VAC figures by 0.5. Data based on all channels driven. - Page 52 8 AC Power Draw and Thermal Dissipation AC Power Draw and Thermal Dissipation: Pink noise 12dB crest factor, bandwidth limited 22Hz to 22kHz. Typical line impedance used. Measurements made with 120VAC mains. Line current figures for 230VAC units derived by multiplying 120VAC figures by 0.5. Data based on all channels driven.
-
Page 53: Service
Complete the Crown Audio Factory Service Information A Service Return Authorization (SRA) is required for form, in the back of this manual, when returning a Crown product being sent to the factory for repair. An SRA can be product to the factory or authorized service center. The completed online at www.crownaudio.com/support/... -
Page 54: Warranty
ITEMS EXCLUDED FROM THIS CROWN WARRANTY This Crown Warranty is in effect only for failure of a new Crown product which occurred within the Warranty Period. It does not cover any product which has been damaged because of any... - Page 55 “Crown” in this warranty. ITEMS EXCLUDED FROM THIS CROWN- WARRANTY This Crown Warranty is in effect only for failure of a new Crown product which occurred within the Warranty Period. It does not cover any product which has been damaged because of any...
- Page 56 CTs Power Amplifi ers NOTES page 56 Operation Manual...
-
Page 57: Factory Service Information Form
Online registration is also available at http://crownweb.crownintl.com/webregistration. Warranty is only valid within the country in which the product is purchased. When this form is used to register your product, it may be mailed or faxed. Crown Audio, Inc. 1718 W Mishawaka Rd Elkhart IN 46517 Please note that some information is required. - Page 58 CTs Power Amplifi ers THIS PAGE INTENTIONALLY LEFT BLANK page 58 Operation Manual...
-
Page 59: Product Registration Form
CTs Power Amplifi ers Shipping Address: Crown Audio Factory Service, 1718 W. Mishawaka Rd., Elkhart, IN 46517 SRA #: __________________(If sending product to Crown factory service.) Individual or Business Name: ____________________________________________________________________________________________________________________________________________________________ Phone #: __________________________________________________ Street Address (please, no P.O. Boxes): _____________________________________________________________________________________________________________________________________________________...
Need help?
Do you have a question about the CTs 1200 and is the answer not in the manual?
Questions and answers