Table of Contents
Advertisement
Quick Links
Advertisement
Table of Contents

Related Manuals for Ubiquiti airMAX AM-3G18-120


Summary of Contents for Ubiquiti airMAX AM-3G18-120
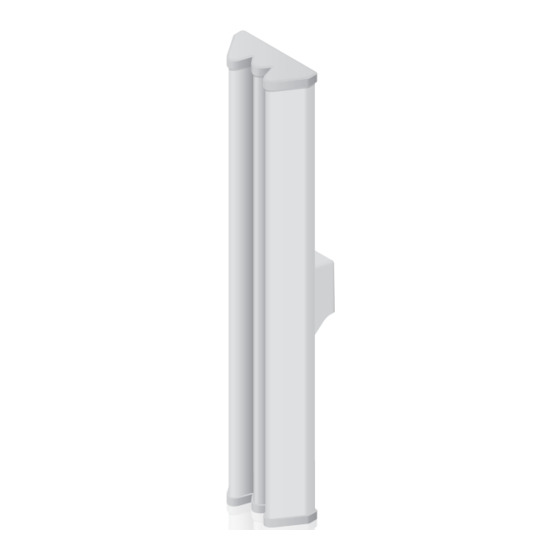
- Page 1 3 GHz 2x2 MIMO BaseStation Sector Antenna Model: AM-3G18-120...
-
Page 3: Package Contents
Introduction Introduction Thank you for purchasing the Ubiquiti Networks airMAX 3 GHz ™ 2x2 MIMO BaseStation Sector Antenna, model AM-3G18-120. This Quick Start Guide is designed to walk you through the installation of the antenna. Package Contents 3 GHz 2x2 MIMO... -
Page 4: Installation Requirements
Ethernet connections and should be grounded through the AC ground of the PoE. We recommend that you protect your networks from the most brutal environments and devastating ESD attacks with industrial-grade shielded Ethernet cable from Ubiquiti Networks . For more details, visit www.ubnt.com/toughcable ™... -
Page 5: Hardware Installation
Hardware Installation Hardware Installation 1. Attach the RF Cables to the connectors labeled Chain 0 and Chain 1 on the RocketM. 2. Attach the RocketM to the Rocket Mount Bracket. a. Align the mounting tabs on the back of the RocketM with the four mounting slots on the bracket. - Page 6 airMAX AM-3G18-120 Quick Start Guide ™ 3. Connect the other ends of the RF Cables to the RF Connectors on the antenna. 4. Slide the Protective Shroud down over the RocketM until it locks onto the Rocket Mount Bracket. Note: If you have trouble locking the shroud into place, try adjusting the placement of the RF Cables.
- Page 7 Hardware Installation 5. Attach the Slotted U Bracket to the upper Mounting Lugs of the antenna, and secure it with two M8 Serrated Flange Nuts. 6. Attach the other U Bracket to the lower Mounting Lugs of the antenna, and secure it with two M8 Serrated Flange Nuts.
- Page 8 airMAX AM-3G18-120 Quick Start Guide ™ 7. Insert two M8x135 Carriage Bolts into each Pole Bracket. 8. Attach each Pole Bracket to each U Bracket using two M8x20 Serrated Flange Bolts. Hand-tighten only.
- Page 9 Hardware Installation 9. To mount the antenna to the pole, attach the Pole Clamps to the lower and upper Pole Brackets in the following steps: Note: The mounting assembly can accommodate a Ø 1.5" - 3.0" pole. a. Slide the Pole Clamp over the two M8x135 Carriage Bolts of the lower Pole Bracket.
- Page 10 airMAX AM-3G18-120 Quick Start Guide ™ b. Slide the Pole Clamp over the two M8x135 Carriage Bolts of the upper Pole Bracket. Secure it with two M8 Serrated Flange Nuts. Upper Bracket Connection Overview M8x20 Serrated Flange Bolt M8 Serrated Flange Nut Pole Pole M8x135...
- Page 11 Hardware Installation 10. The antenna has an electrical downtilt of 3˚. To further adjust the elevation angle, loosen the two M8x20 Serrated Flange Bolts on the Slotted U Bracket. Slide the antenna to the desired tilt. (The upper bracket may slide along the pole, depending on the angle of the elevation tilt.) Tighten all bolts and nuts to approximately 14 N-m (10 lb-ft) or less to avoid deforming the pole.
-
Page 12: Specifications
airMAX AM-3G18-120 Quick Start Guide ™ Specifications AM-3G18-120 Dimensions 735 x 144 x 78 mm Weight 5.9 kg (Mount Included) Frequency 3.3 - 3.8 GHz Gain 17.3 - 18.2 dBi HPOL Beamwidth 118° (6 dB) VPOL Beamwidth 121° (6 dB) Elevation Beamwidth 6°... -
Page 13: Safety Notices
Buyer for breach of warranty and shall constitute fulfillment of all liabilities of UBIQUITI NETWORKS with respect to the quality and performance of the Products. UBIQUITI NETWORKS reserves the right to inspect all defective Products (which must be returned by Buyer to UBIQUITI NETWORKS factory freight prepaid). -
Page 14: Warranty Conditions
(IV) All Ethernet cabling runs use CAT5 (or above) shielded cabling. Disclaimer: UBIQUITI NETWORKS does not warrant that the operation of the products is error-free or that operation will be uninterrupted. In no event shall UBIQUITI NETWORKS be responsible for damages or claims of any nature or description relating to system performance, including coverage, buyer’s selection of products for buyer’s application and/or... -
Page 15: Rohs/Weee Compliance Statement
Compliance RoHS/WEEE Compliance Statement English European Directive 2002/96/EC requires that the equipment bearing this symbol on the product and/or its packaging must not be disposed of with unsorted municipal waste. The symbol indicates that this product should be disposed of separately from regular household waste streams. - Page 16 airMAX AM-3G18-120 Quick Start Guide ™ Français La directive européenne 2002/96/CE exige que l’équipement sur lequel est apposé ce symbole sur le produit et/ou son emballage ne soit pas jeté avec les autres ordures ménagères. Ce symbole indique que le produit doit être éliminé...
-
Page 17: Declaration Of Conformity
UBIQUITI NETWORKS device, megfelel a vonatkozó alapvetõ [Hungarian] követelményeknek és az 1999/5/EC irányelv egyéb elõírásainak. Íslenska Hér me l sir UBIQUITI NETWORKS yfir ví a UBIQUITI NETWORKS device, er í samræmi vi grunnkröfur og a rar kröfur, sem ger ar eru í [Icelandic] tilskipun 1999/5/EC. - Page 18 AM-3G18-120 Quick Start Guide ™ Latviski Ar o UBIQUITI NETWORKS deklar , ka UBIQUITI NETWORKS device, atbilst Direkt vas 1999/5/EK b tiskaj m pras b m un citiem ar to saist [Latvian] tajiem noteikumiem. Lietuviškai UBIQUITI NETWORKS deklaruoja, kad šis UBIQUITI NETWORKS įrenginys atitinka esminius reikalavimus ir kitas 1999/5/EB...
-
Page 20: Ubiquiti Networks Support
Email: support@ubnt.com Phone (9 a.m. - 5 p.m. PST): 408-942-1153 Online Resources Wiki Page: wiki.ubnt.com Support Forum: forum.ubnt.com Downloads: downloads.ubnt.com w w w . u b n t . c o m © 2012 Ubiquiti Networks, Inc. All rights reserved.
Need help?
Do you have a question about the airMAX AM-3G18-120 and is the answer not in the manual?
Questions and answers