
Summary of Contents for Casio IT-9000WM Series
- Page 1 CASIO IT-9000WM Series Quick Start Guide (Version 1.00) CASIO Computer Co., Ltd. Copyright ©2012. All rights reserved. March 2012 ...
-
Page 2: Table Of Contents
Chapter 2. Prerequisites Skills Required Hardware Required Software Required Chapter 3. Installing BDK to PC Application Development Installing CASIO BDK Files Installing Library Installing Online Help Chapter 4. Connecting Power Supply to Cradle HA-L60IO HA-L62IO Chapter 5. Connecting IT-9000 to PC... - Page 3 Ltd. in Tokyo Japan. Information in this document is subject to change without advance notice. CASIO Computer Co., Ltd. makes no representations or warranties with respect to the contents or use of this manual and specifically disclaims any express or implied warranties of merchantability or fitness for any particular purpose.
-
Page 4: Editorial Record
Editorial Record Manual Version Date edited Page Content 1.00 March 2012 Original version ... -
Page 5: Preface
The best methods of connecting to your development system are covered and step by step instructions for installing and testing the CASIO Basic Development Kit (BDK) are included. The purpose of this guide is to get you to the point where you can start development; you should refer to the library manuals for detailed information on the specific APIs. -
Page 6: Product Overview
1. Product Overview 1.1 Features at a Glance IT-9000 has been designed using the new concept of the Human-centered Design Processes and is capable of performing a wide variety of powerful functions. The following is a brief overview of the features available on the IT-9000 series handheld terminals. For further detail on the hardware specifications, refer to IT-9000 Series Hardware Manual. - Page 7 Capable of scanning industrial standard bar code symbologies UPC-A, UPC-E, EAN8(JAN8), EAN13(JAN13), Codabar(NW-7), Code39, Interleaved 2 of 5(ITF), MSI, Code93, Code128(EAN128(※1)), ISBT, IATA, Code11, RSS-14, RSS Limited, RSS Expanded, Code32 2D Stacked: Code49, PDF417, MicroPDF, Codablock F, Aztec, QR Code(Model 2), MicroQR, MaxiCode, DataMatrix(ECC000/050/080/100/140/200), Composite, TLC39, RSS-14 Stacked, RSS Expanded Stacked, CSC 2D Matrix:...
-
Page 8: Library
1.2 Library The IT-9000WM Basic Development Kit ("BDK") provides various libraries including those listed in the table. Table 1.1 Library Description System Library Library that is used to control the system. Imager Library Library that is used to control the built-in CMOS Imager. NFC Library Library that is used to control to communicate with IC card. -
Page 9: Development Manuals
1.3 Development Manuals The IT-9000WM Basic Development Kit ("BDK") provides various development reference manuals as described in the table below. Table 1.3 Development Manual Description Quick Start Guide This reference manual. Software Manual Reference manual that describes software specifications in detail for all the software integrated in the IT-9000 handheld terminal. -
Page 10: Prerequisites
2. Prerequisites 2.1 Skills Required The following skills are required by developers aiming to develop application software for the IT-9000 terminal. • Windows programming • A good knowledge of one or more of the following. - Visual C++ (Native or Manage code) - Visual Basic .NET - Visual C# - Browser based applications (not covered in this guide) -
Page 11: Hardware Required
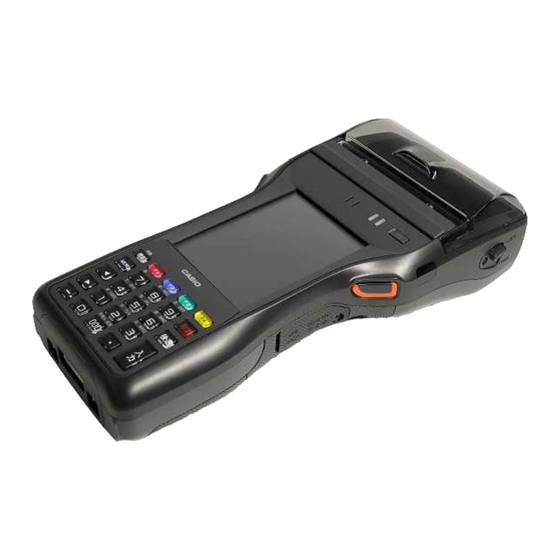
2.2 Hardware Required The following models of the IT-9000 series and dedicated options are available. Table 2.1 List of available models Image W-WAN W-LAN Extnsion Model no. Printer Camera Scanner (802.11 b/g) Slot IT-9000-05E IT-9000-05E-CN IT-9000-G05E IT-9000-GMC25E IT-9000-25E IT-9000-G25E IT-9000-GC25E IT-9000-GM35E IT-9000E-MC25E... - Page 12 External views of IT-9000 and dedicated options Figure 2.1 ...
-
Page 13: Software Required
• Microsoft Windows Mobile 6.5 Developer Tool Kit (Not mandatory) http://www.microsoft.com/downloads/details.aspx?displaylang=en&FamilyID=20686a1d-97a8- 4f80-bc6a-ae010e085a6e CASIO IT-9000WM BDK Download the IT-9000WM BDK from http://www2.casio.co.jp/system_en/pa/PADealer/ (The site requires your user name and password. Enter your user name and password as issued by CASIO.) ... -
Page 14: Installing Bdk To Pc
For detail, refer to Chapter 2.3 "Software Required". 2. Installing CASIO BDK to PC Install CASIO's BDK ("Basic Development Kit") and various libraries if necessary. For installation method, refer to Chapter 3.2 "Installing CASIO BDK Files". 3. Connecting IT-9000 to PC (via either ActiveSync or Windows Mobile Device Center) Connect IT-9000 to PC via Microsoft's ActiveSync (for Windows XP or Windows Server 2003) or via Windows Mobile Device Center (for Windows Vista or later). -
Page 15: Installing Casio Bdk Files
CD-ROM media. http://www2.casio.co.jp/system_en/pa/PADealer/ (The site requires your user name and password. Enter your user name and password as issued by CASIO.) Notes: • If your PC runs in the Windows Vista or later OS, first you must disable the User Account Control ("UAC") by following the process below before installing the CASIO BDK Files. - Page 16 Installation Steps 1. When the CASIO IT-9000WM BDK CD-ROM is inserted in the drive of PC, the following menu screen appears automatically. Figure 3.1 The version number in the figure may differ from that of your CD. 2. Click Installation List in Figure 3.1. The installation screen appears.
-
Page 17: Installing Library
3. When the Library is installed in PC, the Help file (*.chm) is installed in the following folder. C:\Program Files\CASIO\MBSYS\HELP The Help file can be accessed by navigating to Start menu → All Programs → CASIO Basic Development Kit → Help... -
Page 18: Installing Online Help
3.4 Installing Online Help Besides the Help file described in the previous page, the Online Help is also available for the below development platforms. The installation of the Online Help is initiated in the Installation List. • Microsoft Visual Studio 2008 •... -
Page 19: Connecting Power Supply To Cradle
2. After connecting the power cable to the AC adaptor, plug in the plug to an electrical outlet. 3. Make sure the selector switch on the back of the cradle is set to position B. A:Using as USB Host. B:Using as USB Client. ※Only the USB device which Casio verified is supported. Figure 4.2 ... - Page 20 4. Connect a USB cable (DT-380USB) to the USB client port on the back of the cradle, and then connect the other end of the cable to the PC. USB host port is used when connecting the cradle with other USB peripheral devices. 5.
-
Page 21: Ha-L62Io
3. Set the selector switch on the back of the Ethernet cradle to the port that will be used. Set the switch to "LAN" to use the LAN port or to "USB" to use the USB port. LAN:Connect to LAN. A:Using as USB Host. B:Using as USB Client. ※Only the USB device which Casio verified is supported. Figure 4.4 ... - Page 22 4. Before using the cradle ports, remove the caps from the ports. When using a LAN, connect one end of the LAN cable to the LAN port and the other end to the PC or hub. When using a USB connection, connect one end of the USB cable (DT-380USB) to the USB port and the other end to the PC.
-
Page 23: Connecting It-9000 To Pc
5. Connecting IT-9000 to PC To make connection establishment with PC, use one of the methods, depending on the OS your PC runs, described below. • ActiveSync 4.5 (for Windows XP or Windows Server 2003, or any other OS earlier installable) Use the ActiveSync to connect IT-9000 to PC if the PC runs in Windows XP or Windows Server 2003. -
Page 24: Connection Via Usb Cradle
5.1 Connection via USB Cradle Before making connection using ActiveSync or Windows Mobile Device Center, check the USB Connection settings on the terminal. Follow the steps below: 1. Navigate to Start → Settings → System tab → USB Connection. 2. -
Page 25: Activesync Connection Via Usb
Chapter 5.2.1. You already have the USB driver and ActiveSync in your development environment. If you do not yet have the cradle driver on your PC, download the USB driver files “wceusbsh.inf” and “wceusbsh.sys” from the CASIO web site and copy them to an appropriate folder. - Page 26 3. Pause the installation when the menu in Figure 5. is displayed; you have to install the driver at this point. Figure 5.3 4. Connect the USB cable to the PC and the other end to the USB Cradle and also the AC adaptor to the USB Cradle.
- Page 27 8. Then, choose Install from a list or specific location [Advanced] radio button in the menu. Figure 5.5 9. Click Next > button. Figure 5.6 ...
- Page 28 10. Choose Windows CE USB Devices icon. Figure 5.7 11. Click Have Disk… button. Figure 5.8 12. Click Browse… button. Select “wceusbsh.inf” from the folder you created in step 6. Figure 5.9 ...
- Page 29 15. A menu might be displayed to prompt you to install “wceusbsh.sys”. This happens if “wceusbsh.sys” is not in the same folder as “wceusbsh.inf”. Download this file from the CASIO Web Site and follow the prompts to specify the location of “wceusbsh.sys”.
- Page 30 16. Now the installation of the driver is finished. Figure 5.12 17. Now go back to the ActiveSync Installation Wizard that you left on the desktop. Click Next > button. Figure 5.13 ...
- Page 31 18. Now the connection is established. You can choose either partnership option according to your needs. Then click Next > button. Figure 5.14 19. Now the connection is completed. You can start up Visual Studio and create a program and deploy it to the IT-9000.
-
Page 32: If Activesync Is Already Installed
5.2.2 If ActiveSync Is Already Installed This is the procedure if ActiveSync is already installed on the PC. You just need to let the PC recognize the IT-9000 and install the cradle driver as in steps 6 to 16 in Chapter 5.2.1. 1. - Page 33 3. On the IT-9000, in Control Panel, choose the PC Connection option. Confirm that PC Connection is set to “USB Default”. If not, choose ‘USB Default’ and tap OK button. Figure 5.18 4. When the IT-9000 is mounted on the USB Cradle, a menu to prompt to install the driver is displayed.
-
Page 34: Windows Mobile Device Center Via Usb
5.3 Windows Mobile Device Center via USB To establish connection via USB interface with PC runs in Windows Vista, use Windows Mobile Device Center ("WMDC"). The IT-9000 is setting to ActiveSync/WMDC by default. Follow the steps below: 1. Install WMDC to the PC, if not installed. 2. -
Page 35: Connection Via Wlan
5.4 Connection via WLAN To establish communication between IT-9000 with WLAN module integrated (see Table 2.1 for applicable models) and PC via WLAN configuration, follow the steps, 1 to 6, below to set up a WLAN configuration on IT-9000. After setting up the configuration, be sure to perform a site survey prior to starting communication via WLAN. - Page 36 2. Tap Basic tab. Set up each parameter in the tab by referring to the descriptions for the parameters in Table 5.3. Figure 5.21 Table 5.3 Parameter Description SSID Enter the SSID of the network you want to connect to. Security Disable None.
- Page 37 If EAP-TLS radio button in Authentication field is selected, tap the EAP-Properties button that appears when selecting the EAP-TLS radio button to set the following settings. Table 5.5 Parameters in Description Default EAP-Properties screen User name Input a user name in alphanumeric (maximum 100 None alphanumeric).
- Page 38 4. Tap Detail Settings tab. Figure 5.232 Table 5.7 Field / Radio Buttons Description Default When WLAN is not hide popup Hides popup window when WLAN is not connected to a connected to a network. network show popup Shows popup window when WLAN is not connected to a network.
- Page 39 5. If OK button is clicked, the screen in Figure 5.243 appears. Tap OK button to perform a reset on the terminal so that the setting takes effect. Figure 5.243 6. Check to make sure that the connection has been established using the NetSearch utility, and then navigating to the Ping function in there.
-
Page 40: Connection Via Ethernet Cradle
5.5 Connection via Ethernet Cradle This chapter describes how to establish a high speed LAN connection on the WLAN non-integrated models with HA-L62IO Ethernet cradle. Follow the steps below: 1. Connect the dedicated AC adapter to the Ethernet cradle as described in Chapter 4.2. 2. -
Page 41: Accessing Shared Network Drive On Your Lan
5.6 Accessing Shared Network Drive on Your LAN Assuming you have a valid network connection established, you can access shared drives on your PC from the File Explorer on IT-9000. The following shows the steps to initiate this. 1. Configure a network connection on IT-9000. 2. -
Page 42: Direct Tcp/Ip Connection From Visual Studio
5.7 Direct TCP/IP Connection from Visual Studio If you have a network connection to IT-9000 (for example, via WLAN or the Ethernet cradle) then you can establish a direct link to the development PC without using ActiveSync. For Visual Studio 2005 1. - Page 43 9. Choose Windows Mobile 6 Professional Device in the list of Devices: and click Connect button. The screen in Figure 5.6 if appear indicates the success of connection establishment. Figure 5.68 ...
-
Page 44: Setting Up The Development Environment
6. Setting Up the Development Environment 6.1 Installing CAB Files 1. After installing the library files, the CAB files in Table 6.1 will be installed in the folder below. C:\Program Files\CASIO\MBSYS\CAB Table 6.1 Library CAB file Preinstalled System Library en_SystemLibWM.ARMV4I.CAB... -
Page 45: Visual Studio 2005
6.2 Visual Studio 2005 The procedures for remote-debug using IT-9000 in the development of VB.NET and/or C# application are described in this section. Follow the steps in Chapter 5 "Connecting IT-9000 to PC" before checking the steps below to confirm that you can connect to IT-9000 from Visual Studio 2005. -
Page 46: Device Emulator
• Windows Mobile 6 Professional SDK Refresh http://www.microsoft.com/downloads/details.aspx?familyid=06111A3A-A651-4745-88EF-3D4 8091A390B&displaylang=en • Windows Mobile 6 Emulator Image for CASIO IT-9000 (Mandatory) • IO Simulator (Mandatory) Notes: To use Microsoft Device Emulator 3.0, follow the steps below. • Install the IT-9000 ExportSDK and Device Emulator of the IT-9000 BDK. - Page 47 Please check “Run this program as an administrator” of property from opening Explorer. (Ex. Execute I/O simulator in Windows Vista as administrator.) Figure 7.1 These program have installed the following location as default setting. • Device emulator C:\Program Files\Microsoft Device Emulator\1.0\DeviceEmulator.exe • I/O simulator C:\Program Files\Common Files\CASIO\Emulator\DevIoSim.exe ...
-
Page 48: Starting Up The Device Emulator
IT-9000WM. 2. Make sure that the IT-9000WM Device Emulator has started up on the screen. See Figure 7.2. 3. Navigate to Start menu → All Programs → CASIO Device IO Simulator and click IO Simulator. 4. Make sure that the IO Simulator has started up on the screen. See Figure 7.3. -
Page 49: Using The Device Emulator
7.3 Using the Device Emulator 7.3.1 IT-9000WM Device Emulator The IT-9000WM Device Emulator emulates various operations carried out by the actual IT-9000 on the PC's screen such as mouse operation, input on PC's keyboard, displaying execution of applications, and operations by actual devices such as the scanner. Figure 7.4 shows an emulated IT-9000 on the screen of a PC. -
Page 50: I/O Simulator
7.3.2 I/O Simulator The I/O Simulator simulates registration of bar codes, generation of low battery warning, detection of terminal being mounted on the cradle. Registration of bar code symbologies Registration Click ADD1D or ADD2D button (circled in red in Figure 7.5) to go into the bar code registration mode. - Page 51 Registration of bar code and note Enter bar code data in the Code field (see Figure 7.7) and a note about the bar code in the Note field if necessary. Click OK button to complete the bar code registration. Figure 7.7 Completion of registration After completion of the bar codes registration, the screen in Figure 7.8 shows a list of bar codes...
- Page 52 Editing registered bar code content Highlight a bar code in the list of registered bar codes (see Figure 7.8) and click Edit button. Figure 7.9 appears for editing the bar code and its information. Figure 7.9 Deleting registered bar code content Highlight a bar code in the list of registered bar codes (see Figure 7.8) and click the Del button.
- Page 53 Barcode Reader By selecting a registered barcode,it can be read into the emulator Select any barcode and then click the emulator trigger key ...
- Page 54 Detection of Terminal in Cradle and Low Battery Warning If you check the Cradle and Low Battery boxes in STATE SETTING field (see Figure 7.11), the Simulator simulates the respective events in the emulator. Figure 7.11 I/O Box If this box is checked, a notification is issued that the connection between the IT-9000WM Device Emulator and cradle has been established.
- Page 55 Indications The I/O Simulator expresses a change of state that occurred in the IT-9000WM Device Emulator. When the IT-9000WM Device Emulator turns on the LED, the LED icon (LED2) in the I/O Simulator also turns on. See Figure 7.12. Vibration When the IT-9000WM Device Emulator vibrates, the vibration icon in the I/O Simulator also turns on.
-
Page 56: Connecting Via Activesync
7.3.3 Connecting via ActiveSync If debugging with the IT-9000WM Device Emulator is carried out in Visual Studio 2008 or Visual Studio 2005, or transmission/reception of a file with the Device Emulator is carried out, ActiveSync must be used. Setting ActiveSync 1. - Page 57 Connection via ActiveSync The way to establish connection of the Device Emulator via ActiveSync is; 3. Start up the Device Emulator by referring to Chapter 7.2 "Starting Up the Device Emulator". 4. Start up Visual Studio 2008 or Visual Studio 2005, and then navigate to Tools → Device Emulator Manager.
-
Page 58: Debugging Applications
7.4 Debugging Applications This chapter describes how to debug your application using the Device Emulator. Before starting to "Build", establish a connection between the IT-9000WM Device Emulator and your PC via ActiveSync by referring to Chapter 7.3 "Using the Device Emulator". For the basic order of developing an application, refer to Chapter 8 "Visual Studio". - Page 59 2. Similar to ordinary debugging operations with an actual IT-9000, the Device Emulator allows break point setting (circled in red in Figure 7.20) in the source code and step-by-step debugging. Figure 7.20 Note: If the Device Emulator does not allows break point setting in the source code step-by-step, install Microsoft .NET Compact Framework 2.0 SP2 into your PC.
-
Page 60: Visual Studio
IT-9000 have different name spaces and names from those available for the previous CASIO handheld terminals. They are not compatible with the ones in the previous CASIO library. The exceptions are DT-X7, DT-X11, and IT-600 that use the same libraries. -
Page 61: Developing In C
4. Choose Include files in Show directories for:. 5. If the installation folder has not been registered, append the following. C:\Program Files\CASIO\MBSYS\include 6. Choose Library files in Show directories for:. 7. If the files have not been registered, append the following. - Page 62 Choose Windows Mobile 6 Professional SDK in the Installed SDKs field and click > button. Figure 8.2 3. Click Next > button while IT-9000 is kept being highlighted in the Selected SDKs field. Figure 8.3 4. Choose Console Application for the Application type in the Application Settings menu, and click Finish button.
- Page 63 6. Append the source code below in the main function of SmartDeviceApp.cpp. DWORD result; TCHAR msg[16]; result = SysSetLED(LED_RED, 5, 8, 8); if(result == TRUE) result = SysGetLED(); switch(result & 0x0000000F) { case LED_OFF: wcscpy_s( msg, _countof(msg), TEXT("LED_OFF") ); break;...
- Page 64 7. Choose Properties in the Project of Visual Studio 2008 or Visual Studio 2005, and navigate to Configuration Properties → Linker → Input → Additional Dependencies and then append SystemLib.lib (see red circle in Figure 8.4). Figure 8.4 8. Choose Windows Mobile 6 Professional Device for the Target Device to establish connection with the PC.
-
Page 65: Developing In Vb.net
1. Create a new VB.NET Smart Device Application in Visual Studio. 2. In Solution Explorer, right-click References and click Add Reference… 3. Click Browse and navigate to the folder where you have stored the CASIO .NET library files. Highlight SystemLibNet.dll and click it to open. Click OK button. - Page 66 5. In the event function for the button to click, add the following code. Dim result As Int32 Dim msg As String result = Calib.SystemLibNet.Api.SysSetLED( _ Calib.SystemLibNet.Def.LED_RED, 5, 8, 8) '.NET vales of "true" and "false" are "-1" and "0" respectively. If result = -1 Then result = Calib.SystemLibNet.Api.SysGetLED() Select Case (result And &HF)
-
Page 67: Developing In C
1. Create a new C# Smart Device Application in Visual Studio .NET. 2. In Solution Explorer, right click References and click Add Reference… 3. Click Browse and navigate to the folder where you have stored the CASIO .NET library files. Highlight SystemLibNet.dll and click Open. Click OK button. - Page 68 5. Add a button to your form, rename it LED and double click it and then add the following code: Int32 result = new Int32(); string msg; result = SystemLibNet.Api.SysSetLED(SystemLibNet.Def.LED_RED, 5, 8, 8); // .Net values "true" and "false" are "-1" and "0" respectively. if(result == -1) result = SystemLibNet.Api.SysGetLED();...
- Page 69 6. Choose Windows Mobile 6 Professional Device for the Target Device to establish connection with the PC. 7. Select Deploy <name of project> on Build menu. 8. The source code will be compiled and the application will be copied to IT-9000. By default, it will be copied to \Program Files\<name of project>...
-
Page 70: Resources
9. Resources Microsoft's own http://msdn.microsoft.com/mobility/ is an extremely comprehensive resource for programmers targeting WindowsCE .NET based devices. It includes links to most other useful web based resources. You will find detailed Software and Library manuals on http://world.casio.com/system/pa. ...
Need help?
Do you have a question about the IT-9000WM Series and is the answer not in the manual?
Questions and answers