Table of Contents
Advertisement
Available languages
Available languages
CITY MULTI Control System
and Mitsubishi Mr. Slim Air Conditioners
MA Remote Controller
Instruction Book
Prior to use, thoroughly read the instructions in this manual to use the product correctly.
Retain for future reference.
Make sure that this CD-ROM and the Installation Manual are passed on to any future users.
To ensure safety and proper operation of the remote controller, the remote controller should
only be installed by qualified personnel.
PAR-32MAAG
<ORIGINAL>
English
Deutsch
Français
Nederlands
Русский
Český
Slovenský
Magyar
Polski
Български
Advertisement
Chapters
Table of Contents

Related Manuals for Mitsubishi Electric PAR-32MAAG


Summary of Contents for Mitsubishi Electric PAR-32MAAG
- Page 1 <ORIGINAL> English Deutsch CITY MULTI Control System and Mitsubishi Mr. Slim Air Conditioners Français MA Remote Controller PAR-32MAAG Nederlands Instruction Book Русский Český Slovenský Magyar Polski Български Prior to use, thoroughly read the instructions in this manual to use the product correctly.
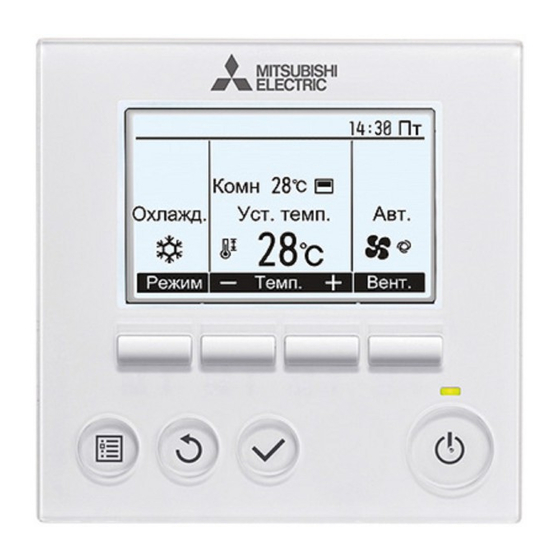
- Page 2 Product features Feature 1 Large, easy-to-see display Cool Set temp. Full-dot LCD display with large characters for easy viewing Mode Temp. Feature 2 Simple button arrangement Feature 3 Large, easy-to-press buttons Buttons are arranged according to usage to allow for intuitive navigation.
-
Page 3: Table Of Contents
Contents Safety precautions ........4 Names and functions of controller components..6 Controller interface ........... 6 Display ..............8 Read before operating the controller ..10 Menu structure ............10 Icon explanations ............ 11 Basic operations ........12 Power ON/OFF ............12 Operation mode, temperature, and fan speed settings ..14 Navigating through the menu ....18 Main menu list ............ -
Page 4: Safety Precautions
Safety precautions • Thoroughly read the following safety precautions before using the unit. • Observe these precautions carefully to ensure safety. WARNING Indicates a risk of death or serious injury. CAUTION Indicates a risk of serious injury or structural damage. •... - Page 5 This controller is designed for exclusive use with the cloth, and wipe off water with a dry cloth. Building Management System by Mitsubishi Electric. The use of this controller for with other systems or To avoid damage to the controller, provide protection for other purposes may cause malfunctions.
-
Page 6: Names And Functions Of Controller Components
Names and functions of controller components Controller interface Function buttons... - Page 7 The functions of the function buttons 1 ON/OFF button change depending on the screen. Press to turn ON/OFF the indoor unit. Refer to the button function guide that appears at the bottom of the LCD for the functions they serve on a given screen.
-
Page 8: Display
Names and functions of controller components Display The main display can be displayed in two different modes: "Full" and "Basic." The factory setting is "Full." To switch to the "Basic" mode, change the setting on the Main display setting. (Refer to page 48.) Full mode * All icons are displayed for explanation. - Page 9 1Operation mode Page 14 Page 26, 28, 43 Indoor unit operation mode appears here. Appears when the On/Off timer (Page 26), Night setback (Page 43), or Auto-off timer 2Preset temperature Page 15 (Page 28) function is enabled. Preset temperature appears here. appears when the timer is disabled by the centralized control system.
-
Page 10: Read Before Operating The Controller
Read before operating the controller Menu structure Main menu Press the Page 22 Vane•Louver•Vent. (Lossnay) MENU button. Page 24 High power Move the cursor Timer to the desired Page 26 On/Off timer item with the F1 and Auto-Off timer Page 28 F2 buttons, Weekly timer Page 30... -
Page 11: Icon Explanations
Service Refer to the indoor unit Installation Test run Manual. Refer to the indoor unit Installation Input maintenance info. Manual. Function setting Refer to the Installation Manual. (Mr. Slim) Function setting Refer to page 52. (City Multi) Lossnay (City Multi only) Refer to the Installation Manual. -
Page 12: Basic Operations
Basic operations Power ON/OFF Button operation Press the ON/OFF button. The ON/OFF lamp will light up in green, and the operation will start. Press the ON/OFF button again. The ON/OFF lamp will come off, and the operation will stop. - Page 13 Operation status memory Remote controller setting Operation mode Operation mode before the power was turned off Preset temperature Preset temperature before the power was turned off Fan speed Fan speed before the power was turned off Settable preset temperature range Operation mode Preset temperature range Cool/Dry...
-
Page 14: Operation Mode, Temperature, And Fan Speed Settings
Basic operations Operation mode, temperature, and fan speed settings Button operation Operation mode Press the F1 button to go through the operation modes in the order of "Cool, Dry, Fan, Auto, and Room Heat." Select the desired operation mode. Cool Set temp. - Page 15 Preset temperature <Cool, Dry, Heat, and Auto (single set point)> Press the F2 button to decrease the preset temperature, and press the F3 button to Room increase. Cool Set temp. Auto •Refer to the table on page 13 for the settable temperature range for different operation modes.
- Page 16 Basic operations Press the F1 or F2 button to move the cursor Set Temp. to the desired temperature setting (cooling or heating). Preset temperature Press the F3 button to decrease the selected for cooling temperature, and F4 to increase. Main display: Preset Cursor Temp.
-
Page 18: Navigating Through The Menu
Navigating through the menu Main menu list Setting and display Setting details Reference items page Vane•Louver•Vent. Use to set the vane angle. (Lossnay) •Select a desired vane setting from five different settings. Use to turn ON/OFF the louver. •Select a desired setting from "ON" and "OFF." Use to set the amount of ventilation. -
Page 19: Restrictions For The Sub Remote Controller
Setting and display Setting details Reference items page Night setback Use to make Night setback settings. •Select "Yes" to enable the setting, and "No" to disable the setting. The temperature range and the start/stop times can be set. * Clock setting is required. * 1ºC increments Filter information Use to check the filter status. -
Page 20: Navigating Through The Main Menu
Navigating through the menu Navigating through the Main menu Button operation Accessing the Main menu Main Main menu Press the MENU button. Vane·Louver·Vent. (Lossnay) High power Timer Weekly timer The Main menu will appear. OU silent mode Main display: Cursor Page Item selection Press F1 to move the cursor down. - Page 21 Saving the settings OU silent mode Select the desired item, and press the SELECT Tue Wed Thu Fri Sat Sun Start Stop Silent button. The screen to set the selected item will appear. Setting display: Exiting the Main menu screen Press the RETURN button to exit the Main menu and return to the Main display.
-
Page 22: Controller Operation-Function Settings
Controller operation-Function settings Vane•Louver•Vent. (Lossnay) Button operation Accessing the menu Select "Vane•Louver•Vent. (Lossnay)" from the Main Main menu Vane·Louver·Vent. (Lossnay) Main menu (refer to page 20), and press the High power Timer SELECT button. Weekly timer OU silent mode Main display: Cursor Page Vane setting... - Page 23 Louver setting Press the F4 button to turn the louver swing ON and OFF. Vane Vent. Louver (Sample screen on City Multi) Vent. setting Press the F3 button to go through the ventilation setting options in the order of "Off," "Low,"...
-
Page 24: High Power
Controller operation-Function settings High power Function description High-power operation function allows the units to operate at higher-than-normal capacity so that the room air can be conditioned to an optimum temperature quickly. This operation will last for up to 30 minutes, and the unit will return to the normal operation mode at the end of the 30 minutes or when the room temperature reaches the preset temperature, whichever is earlier. -
Page 25: Clock
Clock Button operation Select "Initial setting" from the Main menu (refer Main Main menu Maintenance to page 20), and press the SELECT button. Initial setting Service Main display: Clock setting is required before making the Cursor Page following settings. • On/Off timer •... -
Page 26: Timer (On/Off Timer)
Controller operation-Function settings Timer (On/Off timer) Main Button operation Select "Timer" from the Main menu (refer to page Main Main menu 20), and press the SELECT button. Vane·Louver·Vent. (Lossnay) High power Timer Weekly timer OU silent mode Main display: Cursor Page The On/Off timer will not work in the following cases: when On/Off timer is disabled, during an error, during... - Page 27 Change the setting with the F3 or F4 button. Timer On/Off timer: No (disable)/Yes (enable) On/Off timer / Yes • On: Operation start time • (settable in 5-minute increments) Repeat No / * Press and hold the button to rapidly advance Select: the numbers.
-
Page 28: Timer (Auto-Off Timer)
Controller operation-Function settings Timer (Auto-Off timer) Main Button operation Bring up the Timer setting screen. Timer (Refer to page 26.) On/Off timer Repeat Select "Auto-Off", and press the SELECT Auto-Off Stop in --- min button. Setting display: Cursor The Auto-Off timer will not work in the following cases: when Auto-Off timer is disabled, during an error, during check (in the service menu), during test run, during remote controller diagnosis, during Function setting, when... - Page 29 Press the SELECT button to save the settings. Auto-Off timer Auto-Off Stop in Select: Cursor Time A confirmation screen will appear. Auto-Off timer Auto-Off Stop in Navigating through the screens Changes saved • To go back to the Main menu ..MENU button Main menu: •...
-
Page 30: Weekly Timer
Controller operation-Function settings Weekly timer Main Button operation Select "Weekly timer" from the Main menu (refer Main Main menu to page 20), and press the SELECT button. Vane·Louver·Vent. (Lossnay) High power Timer Weekly timer OU silent mode Main display: The Weekly timer will not work in the following cases: Cursor Page when the On/Off timer is enabled, when the weekly timer... - Page 31 The weekly timer setting screen will appear and Weekly timer Mon Tue Wed Thu Fri Sat Sun the current settings will be displayed. Up to eight operation patterns can be set for each day. Input display: Move the cursor to the desired day of the week Select Page with the F1 or F2 button, and press the...
-
Page 32: Ou Silent Mode
Controller operation-Function settings OU silent mode Main Function description This function allows the user to set the time periods in which priority is given to quiet operation of outdoor units over temperature control. Set the start and stop times each day of the week for the quiet operation. - Page 33 The OU silent mode setting screen will appear. OU silent mode Mon Tue Wed Thu Fri Sat Sun Start Stop Silent To make or change the setting, move the cursor to the desired day of the week with the F1 or Select: F2 button, and press the F3 button to select it.
-
Page 34: Restriction
Controller operation-Function settings Restriction Setting the temperature range restriction Button operation Select "Restriction" from the Main menu (refer to Main Main menu page 20), and press the SELECT button. Restriction Energy saving Night setback Filter information Error information Main display: Cursor Page The current settings will appear. - Page 35 Change the settings with the F3 or F4 button. Temp. range Temp. range No / • Temp. range: No (unrestricted) or Cool·Dry Yes (restricted) Heat Auto • Cool•Dry: Upper and lower limit temperature (1ºC increments) Select: Cursor Temp. • Heat: Upper and lower limit temperature (1ºC increments) •...
- Page 36 Controller operation-Function settings Restriction Operation lock function To enable the operation lock function, set the item "Operation locked" to " Yes". Button operation Bring up the Restriction setting screen. (Refer to Restriction page 34.) Operation locked On/Off Mode Set temp. Vane Move the cursor to "Operation locked"...
- Page 37 will appear on the Main display in the Full mode when the operation lock function setting is enabled. Room Cool Set temp. Auto Operation guide that corresponds to the locked function will be suppressed. Mode (When Set temp. is locked)
-
Page 38: Energy Saving
Controller operation-Function settings Energy saving Main Automatic return to the preset temperature After the Auto return function is enabled, when the operation mode change or ON/OFF operation is performed from this remote controller, the set temperature automatically returns to the required temperature regardless of the set time. - Page 39 The screen to make the settings for the Auto return automatic return to the preset temperature will Auto return No / Cool: After appear. back to Heat: After back to Select: Move the cursor to the desired item with the F1 Cursor Cursor or F2 button out of "Auto return,"...
- Page 40 <Sample screens when the Auto return function is enabled> Example: Lower the Set temp. to 24ºC (75ºF). 60 minutes later, the Set temp. will be back to 28ºC (83ºF). minutes later Cool Set temp. Auto Cool Set temp. Auto Cool Set temp.
- Page 41 Controller operation-Function settings Energy saving Main Setting the energy-saving operation schedule Button operation Bring up the "Energy saving" screen. (Refer to Energy saving page 38.) Auto return Cool: min, Heat: min, Schedule Move the cursor to the "Schedule," and press the Mon Tue Wed Thu Fri Sat Sun Setting display: SELECT button.
- Page 42 The setting change/day of the week selection Energy saving Mon Tue Wed Thu Fri Sat Sun screen will appear. Up to four operation patterns can be set for each day. Input: Move the cursor to the desired day of the week Select with the F1 or F2 button, and press the F3 button to select it.
-
Page 43: Night Setback
Controller operation-Function settings Night setback Main Function description This control starts heating operation when the control object group is stopped and the room temperature drops below the preset lower limit temperature. Also, this control starts cooling operation when the control object group is stopped and the room temperature rises above the preset upper limit temperature. - Page 44 Move the cursor to the desired item with the F1 or Night setback Night setback No / F2 button out of Night setback No (disable)/Yes Temp. range - 28 (enable), Temp. range, Start time, or Stop time. Start 23:00 Stop 5:00 Change the settings with the F3 or F4 button.
-
Page 45: Manual Vane Angle
Controller operation-Function settings Manual vane angle Main Button operation Select "Maintenance" from the Main menu (refer Main Main menu to page 20), and press the SELECT button. Maintenance Initial setting Service Main display: Cursor Page Select "Manual vane angle" with the F1 or F2 Maintenance menu button, and press the SELECT button. - Page 46 The current vane setting will appear. Manual vane angle Select the desired outlets from 1 through 4 with the F1 or F2 button. Outlet: "1," "2," "3," "4," and "1, 2, 3, 4, (all outlets)" • Select: Outlet Angle Press the F3 or F4 button to go through the option in the order of "No setting (reset),"...
- Page 47 *Draft reduction The [Draft reduction] mode keeps the vane angle more horizontal than the angle of Step 1 so that the airflow will not be directed toward the people. This function can be set only for one outlet. This function cannot be set for models with two or three outlets. In the Draft reduction mode, the airflow may cause the ceiling discoloration.
-
Page 48: Main Display
Controller operation-Function settings Main display Button operation Select "Initial setting" from the Main menu (refer Main Main menu Maintenance to page 20), and press the SELECT button. Initial setting Service Main display: Cursor Page Move the cursor to the "Main display" with Initial setting menu the F1 or F2 button, and press the SELECT Main/Sub... -
Page 49: Contrast
Contrast Button operation Select "Initial setting" from the Main menu (refer Main Main menu Maintenance to page 20), and press the SELECT button. Initial setting Service Main display: Cursor Page Move the cursor to the "Contrast" with the F1 or Initial setting menu F2 button, and press the SELECT button. -
Page 50: Language Selection
Controller operation-Function settings Language selection Function description The desired language can be set. The language options are English, French, German, Spanish, Italian, Portuguese, Swedish, and Russian. Button operation Select "Initial setting" from the Main menu (refer Main Main menu to page 20), and press the SELECT button. Maintenance Initial setting Service... - Page 51 Move the cursor to the language you desire with Language selection the F1 through F4 buttons, and press the English Deutsch Français Nederlands SELECT button to save the setting. Р Čeština Magyar Polski Select: Cursor Cursor When the power is on for the first time, the Language selection screen will be displayed.
-
Page 52: Function Setting (City Multi)
Controller operation-Function settings Function setting (City Multi) Function description Make the indoor units' function settings from the remote controller as necessary. The following settings should be made only for City Multi units and as necessary. • Refer to the Installation Manual for how to make the settings for Mr. Slim units. •... - Page 53 The Function Setting screen will appear. Function setting Press the F1 or F2 button to move the cursor M-NET address Function No. to one of the following: M-NET address, function Data Function / Conf setting number, or setting value. Then, press the Select: F3 or F4 button to change the settings to the Cursor...
-
Page 54: Maintenance
Maintenance Filter information will appear on the Main display in the Full mode when it is time to clean the filters. Room Wash, clean, or replace the filters when this Cool Set temp. Auto sign appears. Refer to the indoor unit Instructions Manual for details. - Page 55 Select "OK" with the F4 button. Filter information Reset filter sign? Cancel A confirmation screen will appear. Filter information Filter sign reset Navigating through the screens • To go back to the Main menu ..MENU button Main menu: • To return to the previous screen ..RETURN button When the is displayed on the Main display in the Full mode, the system is centrally...
-
Page 56: Troubleshooting
Troubleshooting Error information When an error occurs, the following screen will appear. Check the error status, stop the operation, and consult your dealer. Button operation Error code, error unit, refrigerant address, unit Error information Error code model name, and serial number will appear. Error unit Ref. - Page 57 Press the F4 button or the ON/OFF button to Error information Error code reset the error that is occurring. Error unit Ref. address Unt# Model name Serial No. Errors cannot be reset while the ON/OFF Reset error: Reset button operation is prohibited. Page Reset blinks...
-
Page 58: No Occupancy Auto-Off
No occupancy Auto-OFF The following screen will appear for the 3D i-See sensor panel model when the unit is stopped due to the No occupancy Auto-OFF function of the energy saving option. Refer to the indoor unit Instruction Book for the 3D i-See sensor setting. -
Page 59: Specifications
Specifications Controller specifications Specification Product size 120(W) x 120(H) x 19(D) mm (4 3/4 x 4 3/4 x 3/4 [in]) (not including the protruding part) Net weight 0.25 kg (9/16 lb.) Rated power supply voltage 12 VDC (supplied from indoor units) Power consumption 0.3 W Usage environment... -
Page 60: Function List (As Of March 1, 2016)
Function list (as of March 1, 2016) : Supported : Unsupported Function City Multi Mr. Slim Required password Operation/ Power ON/OFF Display Operation mode switch Room temperature setting Auto (dual set point) mode Fan speed setting Vane angle setting Louver setting Ventilation setting High power operation Auto descending panel... -
Page 61: List Of Functions That Can/Cannot Be Used In Combination
List of functions that can/cannot be used in combination High On/Off Auto-off Weekly Temperature Operation Auto Energy Night power timer timer timer silent range lock return saving setback mode schedule High power On/Off timer Auto-off timer Weekly timer OU silent mode Temperature range... - Page 62 а CITY MULTI Mitsubishi Mr. Slim К а а МА PAR-32MAAG Р а а Русский Для того, чтобы эксплуатировать это изделие правильным образом, внимательно прочтите указания в этом руководстве перед использованием. Сохраните руководство для использования в качестве справочника в дальнейшем.
- Page 63 Характеристики изделия Особенность 1 Большой, легко читаемый дисплей О а . У . Растровый ЖК-дисплей с большими символами для облегчения чтения Р Т Особенность 2 Простое расположение кнопок Особенность 3 Большие, легко нажимаемые кнопки Кнопки расположены в соответствии со своим назначением, что...
- Page 64 Содержание Меры предосторожности ......4 Названия и функции компонентов контроллера ...6 Интерфейс контроллера......... 6 Индикация ............... 8 Прочтите перед работой с контроллером ...10 Структура меню ............. 10 Объяснение значков ..........11 Основные операции .......12 ВКЛ/ВЫКЛ питания ..........12 Настройки режима работы, температуры и скорости вентилятора ... 14 Навигация...
-
Page 65: Меры Предосторожности
Меры предосторожности • Тщательно прочтите следующие правила соблюдения техники безопасности перед использованием изделия. • Для обеспечения безопасности строго соблюдайте указанные меры. Указывает на опасность смертельного исхода или ПРЕДОСТЕРЕЖЕНИЕ тяжелой травмы. ВНИМАНИЕ Указывает на опасность получения тяжелой травмы или повреждения оборудования. •... - Page 66 кой тканью, смоченной в воде с мягким моющим средством, удалите моющее средство влажной вания только с системой управления зданием разработки Mitsubishi Electric. Использование тканью, а затем удалите воду сухой тканью. контроллера с другими системами или для других целей может стать причиной неисправ- Во...
-
Page 67: Названия И Функции Компонентов Контроллера
Названия и функции компонентов контроллера Интерфейс контроллера Функциональные кнопки... - Page 68 Функции функциональных кнопок 1 Кнопка ВКЛ/ВЫКЛ меняются в зависимости от экрана. Нажмите, чтобы включить или См. подсказку по функциям кнопок, которая отображается в нижней выключить внутренний блок. части ЖК-экрана для функций, которые работают в данном окне. 2 Кнопка ВЫБОР При централизованном управлении системой...
-
Page 69: Индикация
Названия и функции компонентов контроллера Индикация Главное окно может отображаться в двух разных режимах: «полный» и «Базовый». Заводской настройкой по умолчанию являются «полный» режим отображения. Чтобы переключиться в «Базовый» режим, измените параметр в настройке главного окна. (См. стр. 48.) Полный режим отображения * Все... - Page 70 1Режим работы Стр. 14 Стр. 26, 28, 43 Отображается, когда включена функция Здесь отображается режим работы внутреннего блока. «Таймер ВКЛ/ВЫКЛ» (Стр. 26), «Ночной режим» (Стр. 43) или «Автоотключение» 2Заданная температура Стр. 15 (Стр. 28) таймера. Здесь отображается заданная температура. появляется, когда таймер отключен 3Часы...
-
Page 71: Прочтите Перед Работой С Контроллером
Прочтите перед работой с контроллером Структура меню Главное меню Нажмите Стр. 22 Угол•Жалюзи•Вент. (Lossnay) кнопку МЕНЮ . Стр. 24 Макс. мощность Переместите Таймер курсор на Стр. 26 Таймер ВКЛ/ВЫКЛ желаемый элемент с Таймер автоотключения Стр. 28 помощью Таймер на неделю Стр. -
Page 72: Объяснение Значков
Сервисное обслуживание См. руководство по установке Пробный пуск внутреннего блока. См. руководство по установке Ввод информации об отладке внутреннего блока. Настройка функций См. руководство по установке. (Mr. Slim) Настройка функций См. стр. 52. (City Multi) Lossnay (только для City Multi) См. -
Page 73: Основные Операции
Основные операции ВКЛ/ВЫКЛ питания Кнопочное управление ВКЛ Нажмите кнопку ВКЛ/ВЫКЛ . Индикатор ВКЛ/ВЫКЛ будет гореть зеленым цветом, начнется работа. ВЫКЛ Нажмите кнопку ВКЛ/ВЫКЛ снова. Индикатор ВКЛ/ВЫКЛ будет погашен, работа будет остановлена. - Page 74 Память состояния работы Настройка удаленного контроллера Режим работы Режим работы перед выключением питания Заданная температура Заданная температура перед выключением питания Скорость вентилятора Скорость вентилятора перед выключением питания Настраиваемый диапазон задаваемой температуры Режим работы Диапазон заданных температур Охлаждение/сушка 19 ~ 30 ºC (67 ~ 87 ºF) Нагрев...
-
Page 75: Настройки Режима Работы, Температуры И Скорости Вентилятора
Основные операции Настройки режима работы, температуры и скорости вентилятора Кнопочное управление Режим работы Нажмите кнопку F1 для перехода между режимами П работы в порядке «Охлажд., Сушка, Вент., Авт. и К Нагрев». Выберите желаемый режим работы. О а У . А . О... - Page 76 Заданная температура <«Охлажд.», «Сушка», «Нагрев», и «Авт.» (одно заданное значение)> Нажмите кнопку F2 , чтобы уменьшить П заданную температуру, а чтобы увеличить – К нажмите кнопку F3 . О а У . А . •Задаваемые диапазоны температур для различных режимов работы см. в таблице на стр. 13. Р...
- Page 77 Основные операции Нажмите кнопку F1 или F2 для У . перемещения стрелки к необходимой настройке температуры (охлаждения или Заданная температура нагрева). для охлаждения О а : Нажмите кнопку F3 для уменьшения Заданная Т С а температура выбранной температуры и F4 для для...
-
Page 79: Навигация По Меню
Навигация по меню Список главного меню Установка и Подробные настройки Стр. отображение элементов Угол•Жалюзи•Вент. Исползайте для установки угла наклона. •Выберите желаемую настройку угла из 5 возможных. (Lossnay) Используйте, чтобы включить или выключить жалюзи. •Выберите желаемый параметр из «ВКЛ» и «ВЫКЛ». Используйте... -
Page 80: Ограничения Для Вспомогательного Контроллера
Установка и Подробные настройки Стр. отображение элементов Ночной режим Используйте для настройки ночного режима. •Выберите «Да» для включения параметра, выберите «Нет» для отключения параметра. Могут быть заданы диапазон температур и моменты запуска и останова. * Требуется настройка часов. * шаг в 1ºC Информация... -
Page 81: Навигация По Главному Меню
Навигация по меню Навигация по главному меню. Кнопочное управление Доступ к главному меню Г а Г а Нажмите кнопку МЕНЮ . У а .(Lossnay) Ма . Та Та а Отобразится Главное меню. Т О а : С а С а а... - Page 82 Сохранение настроек Т Выберите нужный элемент и нажмите кнопку П В С Ч П С В П С Т ВЫБОР . Отобразится окно для задания выбранного У а а элемента. Выход из окна главного меню П Нажмите кнопку ВОЗВРАТ для выхода из главного...
-
Page 83: Настройка Функций Работы Контроллера
Настройка функций работы контроллера Угол•Жалюзи•Вент. (Lossnay) Кнопочное управление Доступ к меню Выберите «Угол•Жалюзи•Вент. (Lossnay)» Г а Г а У а .(Lossnay) из Главное меню (см. стр. 20), и нажмите Ма . Та кнопку ВЫБОР . Та а Т О а : С... - Page 84 Настройка жалюзи Нажмите кнопку F4 перевести ход жалюзи в П положение ВКЛ или ВЫКЛ. В В В В В В У В Жа (Снимок экрана для City Multi) Настройка вентилятора Нажмите кнопку F3 для перехода между П вариантами настройки вентиляции в следующем Н...
-
Page 85: Макс. Мощность
Настройка функций работы контроллера Макс. мощность Описание функции Функция работы в режиме максимальной мощности позволяет блокам работать с отдачей, превышающей нормальную, поэтому воздух в комнате может быть быстро доведен до оптимальной температуры. Работа в этом режиме может продолжаться до 30 минут, блок вернется в режим нормальной работы через... -
Page 86: Часы
Часы Кнопочное управление Выберите «Основные настройки» из Главное Г а Г а О а а меню (см. стр. 20), и нажмите кнопку О а ВЫБОР . С а О а : Предварительная настройка часов необходима С а С а а для... -
Page 87: Таймер (Таймер Вкл/Выкл)
Настройка функций работы контроллера Таймер (Таймер ВКЛ/ВЫКЛ) Main Кнопочное управление Выберите «Таймер» из Главное меню Г а Г а (см. стр. 20), и нажмите кнопку ВЫБОР . У а .(Lossnay) Ма . Та Та а Функция «Таймер ВКЛ/ВЫКЛ» не будет работать Т... - Page 88 Измените настройку с помощью кнопки F3 Та или F4 . Та ВКЛ/ВЫКЛ Н Да ВКЛ Таймер ВКЛ/ВЫКЛ: Нет (отключен)/Да (включен) • ВЫКЛ П Н Да ВКЛ: Время начала работы • (задается с шагом в 5 минут) В * Для быстрого увеличения чисел нажмите и С...
-
Page 89: Таймер (Таймер Автоотключения)
Настройка функций работы контроллера Таймер (Таймер автоотключения) Main Кнопочное управление Открытие окна настройки таймера. Та (См. стр. 26.) Та ВКЛ/ВЫКЛ Да ВКЛ ВЫКЛ П Н Выберите «Автоотключение» и нажмите кнопку А Н ВЫБОР . О а а На а: С а... - Page 90 Нажмите кнопку ВЫБОР , чтобы сохранить А а а настройки. А Н Да О а В С а В Откроется окно с запросом подтверждения. А а а А Н Да О а Навигация по экранам И а • Для возврата в Главное меню ..кнопка МЕНЮ Г...
-
Page 91: Таймер На Неделю
Настройка функций работы контроллера Таймер на неделю Main Кнопочное управление Выберите «Таймер на неделю» из Главное Г а Г а меню (см. стр. 20), и нажмите кнопку ВЫБОР . У а .(Lossnay) Ма . Та Та а Функция «Таймер на неделю» не будет работать Т... - Page 92 Будет открыто окно настройки таймера на Та а неделю и отображены текущие настройки. П В С Ч П С В К Для каждого дня может быть задано до 8 моделей работы. С помощью кнопки F1 или F2 переместите Э а а: В...
-
Page 93: Тих.реж.нар
Настройка функций работы контроллера Тих.реж.нар Main Описание функции Эта функция позволяет пользователю задавать периоды времени, в которых будет отдаваться преимущество тихой работе наружных блоков при управлении по температуре. Установите моменты запуска и останова работы в тихом режиме для каждого дня недели. Выберите желаемый уровень тихого режима из «Нормальный», «Средний» или «Тихий». Кнопочное... - Page 94 Будет отображен экран настроек тихого Т П В С Ч П С В режима. П С Т Для задания или изменения этой настройки, В с помощью кнопки F1 или F2 переместите В курсор на требуемый день недели и нажмите кнопку F3 для его выбора. (Можно выбирать несколько...
-
Page 95: Ограничение
Настройка функций работы контроллера Ограничение Задание ограничения диапазона температур Кнопочное управление Выберите «Ограничение» из Главное меню Г а Г а (см. стр. 20), и нажмите кнопку ВЫБОР . О а Э Н И а И а а О а : С... - Page 96 Измените настройки с помощью кнопки F3 или F4 . Т а а Т . Д а а Н Да •Темп. диапазон: Нет (неограничен) или О . С а Да (ограничен) На • Охл.•Сушка: верхняя и нижняя предельная температура А . (шаг...
- Page 97 Настройка функций работы контроллера Ограничение Функция блокирования управления Чтобы включить функцию блокирования управления, задайте «Да» для «Управл. блокир.». Кнопочное управление Открытие окна настройки ограничений. О а (См. стр. 34.) У а Н В /В Р У . У Переместите курсор на «Управл. блокир.» и Э...
- Page 98 будет отображаться в главном окне в П режиме «полный», когда включена функция блокирования управления. К Подсказка для работы, соответствующая О а У . А . блокированной функции, будет скрыта. Р В » (Когда блокирована функция «Уст. темп.
-
Page 99: Энергосбережение
Настройка функций работы контроллера Энергосбережение Main Автоматический возврат к заданной температуре Если включена функция Автовозврат, при выполнении с этого пульта ДУ операции смены режима или включения/выключения заданная температура автоматически возвращается к требуемой температуре независимо от заданного времени. Кнопочное управление Выберите «Энергосбережение» из Главное Г... - Page 100 Отобразится экран настроек для функции А а автовозврата к заданной температуре. А а Н Да О а а а На Переместите курсор к нужному элементу с а а В помощью кнопки F1 или F2 над С а С а «Автовозврат», «Охлаждение» или «Нагрев». Измените...
- Page 101 <Снимки экранов при включенной функции автовозврата> Пример: уменьшить Уст. темп. до 24ºC (75ºF). Через 60 минут Уст. темп. вернется к значению 28ºC (83ºF). П П П минут спустя О а У . А . О а У . А . О...
- Page 102 Настройка функций работы контроллера Энергосбережение Main Настройка расписания работы в режиме энергосбережения Кнопочное управление Открытие окна настройки Энергосбережение. Э (См. стр. 38.) А а Да О На .: Ра а Н Переместите курсор на «Расписание» и П В С Ч П...
- Page 103 Отобразится экран изменения настройки и Э П В С Ч П С В выбора дня недели. К Для каждого дня может быть задано до 4 моделей работы. В С помощью кнопки F1 или F2 переместите В курсор на требуемый день недели и нажмите кнопку...
-
Page 104: Ночной Режим
Настройка функций работы контроллера Ночной режим Main Описание функции Функция управляет началом нагрева, когда группа управления объектом остановлена, а комнатная температура упала ниже заданного нижнего предела температуры. Кроме того, эта функция запускает охлаждение, когда группа управления объектом остановлена, а комнатная температура... - Page 105 Переместите курсор на требуемый элемент с Н Н Н Да помощью кнопки F1 или F2 над «Ночной режим» Т а а - 28 «Нет» (выключить) или «Да» (включить), «Темп. На а 23:00 К 5:00 диапазон», временем начала и временем окончания. В...
-
Page 106: Ручная Установка Угла
Настройка функций работы контроллера Ручная установка угла Main Кнопочное управление Выберите «Отладка» из Главное меню Г а Г а (см. стр. 20), и нажмите кнопку ВЫБОР . О а а О а С а О а : С а С а а... - Page 107 Отобразятся текущие настройки угла дефлектора. Р а а а а Выберите требуемые выпуски с 1 по 4 с помощью кнопки F1 или F2 . В Выпуск: «1», «2», «3», «4» и «1, 2, 3, 4» (все магазины). • В У Нажимайте...
- Page 108 *Уменьшение сквозняка Режим [Уменьшение сквозняка] ставит лопасти в более горизонтальное положение, чем в режиме Уровень1, чтобы воздушный поток не был направлен на людей. Эта функция задается только для одного выхода. Эта функция не задается для моделей с двумя или тремя выходами. В...
-
Page 109: Настр. Осн. Экрана
Настройка функций работы контроллера Настр. осн. экрана Кнопочное управление Выберите «Основные настройки» из Главное Г а Г а О а а меню (см. стр. 20), и нажмите кнопку О а ВЫБОР . С а О а : С а С а а... -
Page 110: Констрастность
Констрастность Кнопочное управление Выберите «Основные настройки» из Главное Г а Г а О а а меню (см. стр. 20), и нажмите кнопку О а ВЫБОР . С а О а : С а С а а Переместите курсор на «Констрастность» М... -
Page 111: Выбор Языка
Настройка функций работы контроллера Выбор языка Описание функции Может быть задан желаемый язык. Могут быть заданы следующие языки: английский, французский, немецкий, испанский, итальянский, португальский, шведский и русский. Кнопочное управление Выберите «Основные настройки» из Главное Г а Г а меню (см. стр. 20), и нажмите кнопку О... - Page 112 Переместите курсор на желаемый язык с В а помощью кнопок F1 – F4 и нажмите кнопку English Deutsch Français Nederlands ВЫБОР для сохранения настройки. Р Čeština Magyar Polski В С а С а При первом включении питания будут отображен экран выбора языка. Выберите желаемый язык. Система...
-
Page 113: Настройка Функции (City Multi)
Настройка функций работы контроллера Настройка функции (City Multi) Описание функции Проверьте установки функции внутренних блоков, используя пульт дистанционного управления, если это необходимо. Следующие настройки должны выполняться только для устройств City Multi, а также при • необходимости. Обратитесь к Руководству по установке для получения информации о том, как выполнить •... - Page 114 Появится экран «Настройка функций». На а Нажмите клавишу F1 или F2 , чтобы M-NET а Ф переместить стрелку к одному из следующих Да У . / К действий: «M-NET адрес», номер «Настройки Ф функций» или заданного значения. Затем В С а...
-
Page 115: Отладка
Отладка Информация о фильтре П будет отображаться в главном окне в режиме «полный», когда наступит время К очистить фильтры. О а У . А . Промойте, очистите или замените фильтры при появлении этого символа. См. техническую документацию для Р Т В... - Page 116 Выберите «ОК» с помощью кнопки F4 . И а С а а? О а ОК Откроется окно с запросом подтверждения. И а С а а Навигация по экранам • Для возврата в Главное меню ..кнопка МЕНЮ Г а • Для возврата к предыдущему экрану ..кнопка ВОЗВРАТ П...
-
Page 117: Устранение Неисправностей
Устранение неисправностей Информация о неисправностях При возникновении ошибки отобразится следующее окно. Проверьте статус ошибки, остановите работу и свяжитесь с дилером. Кнопочное управление И а а Будут отображены код ошибки, блок с К ошибкой, адрес обращения, название модели О а В А... - Page 118 Нажмите кнопку F4 или кнопку ВКЛ/ВЫКЛ И а а для сброса произошедшей ошибки. К О а В А а . С Неисправности нельзя сбросить, если С : К а а функция ВКЛ/ВЫКЛ запрещена. С . С мигание Выберите «ОК» с помощью кнопки F4 . С...
-
Page 119: Автооткл. При Незанятости
Автооткл. при незанятости Следующий экран отображается на панели 3D i-See sensor при остановке модуля в результате срабатывания функции Автооткл. при незанятости опции энергосбережение. См. описание настройки 3D i-See sensor в инструкции внутреннего модуля. П В а А а 31/Д 12:59... -
Page 120: Технические Характеристики
Технические характеристики Технические характеристики контроллера Технические характеристики Размер изделия 120 (Ш) x 120 (В) x 19 (Г) мм (4 3/4 x 4 3/4 x 3/4 [дюма]) (без учета выступающих частей) Масса нетто 0,25 кг (9/16 фунта) Номинальная мощность 12 В (питание от внутренних блоков) напряжения... -
Page 121: Список Функций (По Состоянию На 1 Март 2016 Года)
Список функций (по состоянию на 1 март 2016 года) : Поддерживается : Неподдерживается Функция City Multi Mr. Slim Запрос пароля Работа/ ВКЛ/ВЫКЛ питания Отображение Переключатель режима работы Установка температуры в комнате Режим Авт. (два заданных значения) Установка скорости вентилятора Настройка угла отклонения дефлектора Настройка... -
Page 122: Список Функций, Которые Могут (Не Могут) Использоваться В Сочетании
Список функций, которые могут (не могут) использоваться в сочетании. Макс. Таймер Таймер авто- Таймер на Тих.реж. Диапазон Управл. Автовозврат Расписание Ночной работы в мощность ВКЛ/ВЫКЛ отключения неделю нар температур блокир. режим режиме энер- госбережения Макс. мощность Таймер ВКЛ/ВЫКЛ Таймер автоотключения Таймер... - Page 123 • Restriction of Hazardous Substances 2011/65/EU • Electromagnetic Compatibility Directive 2004/108/EC HEAD OFFICE: TOKYO BLDG. , 2-7-3, MARUNOUCHI, CHIYODA-KU, TOKYO 100-8310, JAPAN Authorized representative in EU: MITSUBISHI ELECTRIC EUROPE B.V. HARMAN HOUSE, 1 GEORGE STREET, UXBRIDGE, MIDDLESEX UB8 1QQ, U.K. MANUFACTURE: MITSUBISHI ELECTRIC CORPORATION Air-conditioning &...
Need help?
Do you have a question about the PAR-32MAAG and is the answer not in the manual?
Questions and answers