
Summary of Contents for Nexcom NDiS 541
- Page 1 NEXCOM International Co., Ltd. Multi-Media Solutions Digital Signage Platform NDiS 541 User Manual NEXCOM International Co., Ltd. www.nexcom.com Published September 2009...
-
Page 2: Table Of Contents
Key Features ..................1 COM RX/TX Connector ..............15 Hardware Specifications ................2 DC Power Input ................16 Main Board (NDiB 541) ................2 Power Switch Button ..............16 NDiS 541 System ..................4 Copyright © 2009 NEXCOM International Co., Ltd. All Rights Reserved. NDiS 541 User Manual... - Page 3 Installing a TV Tuner Module ..............43 Appendix A: Video Driver Installation and Settings Installing the Video Driver ..............47 Appendix B: Audio Driver Installation and Settings Installing the Audio Driver ..............59 Copyright © 2009 NEXCOM International Co., Ltd. All Rights Reserved. NDiS 541 User Manual...
-
Page 4: Preface
Acknowledgements The product(s) described in this manual complies with all applicable Euro- NDiS 541 is a trademark of NEXCOM International Co., Ltd. All other prod- pean Union (CE) directives if it has a CE marking. For computer systems to uct names mentioned herein are registered trademarks of their respective remain CE compliant, only CE-compliant parts may be used. -
Page 5: Rohs Compliance
< 0.1% or 1,000ppm, and Polybrominated diphenyl Ethers (PBDE) < 0.1% or 1,000ppm. In order to meet the RoHS compliant directives, NEXCOM has established an engineering and manufacturing task force in to implement the intro- duction of green products. The task force will ensure that we follow the... -
Page 6: Warranty And Rma
Replace with 3rd party products if needed. the RMA number apply process. If RMA goods can not be repaired, NEXCOM will return it to the cus- tomer without any charge. Customers can send back the faulty products with or without acces- sories (manuals, cable, etc.) and any components from the card, such as... -
Page 7: Safety Information
There is a danger of explosion if battery is incorrectly replaced. Replace only with the same or equivalent type recommended by the manufactur- er. Discard used batteries according to the manufacturer’s instructions. Copyright © 2009 NEXCOM International Co., Ltd. All Rights Reserved. NDiS 541 User Manual... -
Page 8: Safety Precautions
11. All cautions and warnings on the equipment should be noted. 19. The computer is provided with CD drives that comply with the ap- propriate safety standards including IEC 60825. viii Copyright © 2009 NEXCOM International Co., Ltd. All Rights Reserved. NDiS 541 User Manual... -
Page 9: Technical Support And Assistance
Technical Support and Assistance Conventions Used in this Manual Warning: Information about certain situations, which if not 1. For the most updated information of NEXCOM products, visit NEX- observed, can cause personal injury. This will prevent injury to COM’s website at www.nexcom.com. -
Page 10: Global Service Contact Information
Z.I. des Amandiers, 17, Rue des entrepreneurs Tel: +44-1908-267121 78420 Carrières sur Seine, France Fax: +44-1908-262042 Tel: +33 (0)1 71 51 10 20 http://www.nexcom.eu Fax: +33 (0)1 71 51 10 21 http://www.nexcom.eu Copyright © 2009 NEXCOM International Co., Ltd. All Rights Reserved. NDiS 541 User Manual... - Page 11 Fax: +86-25-8315-3489 http://www.nexcom.cn China-Shenzhen Office Western Room 708, Block 210, Tairan Industry & Trading Place, Futian Area, Shenzhen, China 518040 TEL: +86-755-833 27203 FAX: +86-755-833 27213 http://www.nexcom.cn Copyright © 2009 NEXCOM International Co., Ltd. All Rights Reserved. NDiS 541 User Manual...
-
Page 12: Package Contents
Preface aCkage ontents Before continuing, verify that the NDiS 541 package that you received is complete. Your package should have all the items listed in the following table. Item Name Specification 60233ATA16X00 SATA CABLE SATA FEMALE 7-PIN 60233PW102X00 SATA POWER CABLE SATA 15-PIN TO 3022H-04 4-PIN PITCH 5.08mm, L:... -
Page 13: Ordering Information
The following provides ordering information for NDiS 541. • NDiS 541 (P/N: 10W00054100X0) - AMD Athlon™ 64 / 64 X2 family processor - AMD 780E/SB710 chipset xiii Copyright © 2009 NEXCOM International Co., Ltd. All Rights Reserved. NDiS 541 User Manual... -
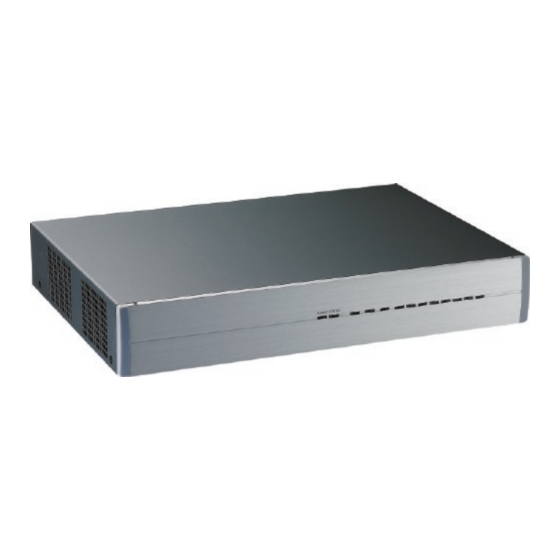
Page 14: Chapter 1: Product Introduction
• AMD 780E/SB710 solution • 1 x 2.5” SATA HDD / SATA DOM • 4 x HDMI • ATI Radeon E2400 GPU • 4 x Audio Copyright © 2009 NEXCOM International Co., Ltd. All Rights Reserved. NDiS 541 User Manual... -
Page 15: Hardware Specifications
Supports DDR2 800MHz SDRAM with unbuffered and non-ECC memory module up to 4GB • The supported memory capacity will depend on the memory size al- located by the OS Copyright © 2009 NEXCOM International Co., Ltd. All Rights Reserved. NDiS 541 User Manual... - Page 16 - Four USB 2.0 ports - Two USB ports with Type A double-stack each on Edge I/O - 2x5 pin-header x1 for USB x2. Supports u-DOC x1. Copyright © 2009 NEXCOM International Co., Ltd. All Rights Reserved. NDiS 541 User Manual...
-
Page 17: Ndis 541 System
Relative humidity (non-condensing): 90% • Color - Black • Mounting - Wall mount bracket • Cooling system - Main chip’s heat sink and 2 high speed system fans Copyright © 2009 NEXCOM International Co., Ltd. All Rights Reserved. NDiS 541 User Manual... - Page 18 - Test time: 1 hour per axis - Total test time: 3 hours Shock • 30g peak acceleration (16 msec. duration) - HDD Certificate • • FCC Class A Copyright © 2009 NEXCOM International Co., Ltd. All Rights Reserved. NDiS 541 User Manual...
-
Page 19: Getting To Know Ndis 541
The COM port supports RS232 compatible serial devices. Wifi Antenna Hole Used to install the Wifi antenna. Power Switch Press to power-on or power-off the system. Copyright © 2009 NEXCOM International Co., Ltd. All Rights Reserved. NDiS 541 User Manual... - Page 20 Used to connect a speaker. Used to connect USB 2.0/1.1 devices. COM Terminal Port Supports 4x RS232 compatible serial devices. +12V DC Input Used to plug a DC power cord. Copyright © 2009 NEXCOM International Co., Ltd. All Rights Reserved. NDiS 541 User Manual...
-
Page 21: Mechanical Dimensions
Line out 4 COM 4 COM 6 COM 2 HDMI-A1 HDMI-A2 HDMI-B1 HDMI-B2 LAN/USB COM 1 COM 3 COM 5 DC12V Line out 1 Line out 3 Copyright © 2009 NEXCOM International Co., Ltd. All Rights Reserved. NDiS 541 User Manual... -
Page 22: Chapter 2: Jumpers And Connectors
This chapter describes how to set the jumpers on the motherboard. Note tronic components. Humid environment tend to have less static electric- that the following procedures are generic for all NDiS 541. ity than dry environments. A grounding strap is warranted whenever danger of static electricity exists. -
Page 23: Jumper Settings
(on) and open (off). Two-Pin Jumpers: Open (Left) and Short (Right) Three-Pin Jumpers: Pins 1 and 2 Are Short Copyright © 2009 NEXCOM International Co., Ltd. All Rights Reserved. NDiS 541 User Manual... -
Page 24: Locations Of The Jumpers And Connectors
NDiS 541 system. It shows IRDA the locations of the jumpers and con- nectors. SMBUS FAN1 FAN2 SATA PWR FAN3 COM1 USB1 HDMI1 HDMI2 HDMI3 HDMI4 CON1 Copyright © 2009 NEXCOM International Co., Ltd. All Rights Reserved. NDiS 541 User Manual... -
Page 25: Jumpers
Connector location: JP4 Connector location: JP2 Pin No. Status Function Description Pin No. Status Function Description Open (default) Normal Short (default) VBAT IN Short Reset# Short Clear CMOS Copyright © 2009 NEXCOM International Co., Ltd. All Rights Reserved. NDiS 541 User Manual... -
Page 26: Connector Pin Definitions
HDMI D2N HDMI D1P Definition Definition HDMI_GND HDMI D1N HDMI D0P HDMI_GND LOUT_L1 LOUT_L2 HDMI D0N HDMI LKP HDMI_GND HDMI LKN LOUT_R1 LOUT_R2 HDMI_CTL_CLK HDMI_CTL_SDA HDMI_GND HDMI_HDP Copyright © 2009 NEXCOM International Co., Ltd. All Rights Reserved. NDiS 541 User Manual... -
Page 27: Dual Usb And Lan Ports
USB1_N Definition Definition USB0_P USB1_P USB0_VCC USB_0# USB_0 U0_GND USB1_VCC USB_1# USB_1 U1_GND LAN_VCC LAN_MDI0P LAN_MDI0N LAN_MDI1P LAN_MDI1N LAN_MDI2P LAN_MDI2N LAN_MDI3P LAN_MDI3N LAN_LED1+ LAN_ACTLED# LAN_LED2+ LAN_LED2- Copyright © 2009 NEXCOM International Co., Ltd. All Rights Reserved. NDiS 541 User Manual... -
Page 28: Serial (Rs232) Ports
TXD-6 RXD-6 Definition Definition TXD-4 SP_DCD_A SP_RXD_A RXD-4 SP_TXD_A SP_DTR_A TXD-5 RXD-5 SP_DSR_A TXD-3 SP_RTS_A SP_CTS_A TXD-3 SP_RI_A SP_DCD_B SP_RXD_B SP_TXD_B SP_DTR_B SP_DSR_B SP_RTS_B SP_CTS_B SP_RI_B Copyright © 2009 NEXCOM International Co., Ltd. All Rights Reserved. NDiS 541 User Manual... -
Page 29: Dc Power Input
Chapter 2: Jumpers and Connectors DC Power Input Power Switch Button Connector size: 4-pin power jack ATX switch, unlock Connector location: CN8 Definition +12V +12V Copyright © 2009 NEXCOM International Co., Ltd. All Rights Reserved. NDiS 541 User Manual... -
Page 30: Internal Connectors
SATA Power Connector SATA DOM Power Connector Connector size: 1x4 pin Connector size: 2-pin, JST 2.54 mm pitch Connector location: J7 Connector location: J8 Definition Definition +V12S +V5S Copyright © 2009 NEXCOM International Co., Ltd. All Rights Reserved. NDiS 541 User Manual... -
Page 31: Udoc Connector
Connector size: 10-pin header, 2.0 mm pitch Connector size: 1x5 (2.0mm) Connector location: J9 Connector location: JP5 Definition Definition Definition +5V_ATX VCC5 VCC5 USB4# USB5# IR_RX USB4 USB5 IR_TX Copyright © 2009 NEXCOM International Co., Ltd. All Rights Reserved. NDiS 541 User Manual... -
Page 32: Smbus Connector
Connector size: 1x4 (2.54mm) Connector size: Standard Serial ATAII 7P (1.27mm) Connector location: JP6 Connector location: CN5, CN9 Definition Definition +3.3V SMB0_CLK SATA_TXP0 - SMB0_DAT SATA_TXN0 SATA_RXN0 SATA_RXP0 Copyright © 2009 NEXCOM International Co., Ltd. All Rights Reserved. NDiS 541 User Manual... -
Page 33: Fan Connectors
NO DATA TRANSFER ON SATA Yellow SATA ACTIVE Definition Power Status LED +12_ATX Connector location: LED4 FAN SPEED LED Color Status Dark POWER OFF Green +5V POWER ON OK Copyright © 2009 NEXCOM International Co., Ltd. All Rights Reserved. NDiS 541 User Manual... -
Page 34: Mini-Pcie Slots
Connector location: CN6, CN7 PCIE_TX1- SMB1_DAT PCIE_TX1+ USB_6N_L USB_6P_L +V3.3A_MINI +V3.3A_MINI LED_WLAN_N +V1.5S_MINI Definition Definition +V3.3A_MINI WAKE0# +V3.3_MINI +1.5S_MINI PCIE_MINI_CLKREQ#1 GPP_CLK1_N GPP_CLK1_P MINICARD1_DIS# PCIE_RST# PCIE_RX1- +V3.3A_MINI PCIE_RX1+ +V1.5S_MINI SMB1_CLK Copyright © 2009 NEXCOM International Co., Ltd. All Rights Reserved. NDiS 541 User Manual... -
Page 35: Chapter 3: System Setup
Remove the screws that are on one side of the chassis. Right View 3. Remove the screws that are at the rear of the chassis. Left View Rear View Copyright © 2009 NEXCOM International Co., Ltd. All Rights Reserved. NDiS 541 User Manual... - Page 36 Chapter 3: System Setup 4. Slide the cover backward then remove it from the chassis. Copyright © 2009 NEXCOM International Co., Ltd. All Rights Reserved. NDiS 541 User Manual...
-
Page 37: Installing A Dimm
2. Push the ejector tabs which are at the ends of the socket outward. This 1. Locate for the DIMM sockets on the board. indicates that the socket is unlocked. DIMM Ejector sockets Copyright © 2009 NEXCOM International Co., Ltd. All Rights Reserved. NDiS 541 User Manual... - Page 38 Notch on the module Key on the socket Copyright © 2009 NEXCOM International Co., Ltd. All Rights Reserved. NDiS 541 User Manual...
-
Page 39: Installing The Cpu
Make sure all power cables are unplugged before you install the CPU. CAUTION! CAUTION! • The CPU socket must not come in contact with anything other than the CPU. Avoid unnecessary exposure. Copyright © 2009 NEXCOM International Co., Ltd. All Rights Reserved. NDiS 541 User Manual... - Page 40 90 angle. Make sure the lever is lifted to this angle otherwise the CPU will not fit in properly. Lever CPU socket Copyright © 2009 NEXCOM International Co., Ltd. All Rights Reserved. NDiS 541 User Manual...
- Page 41 Pin 1 CAUTION! CAUTION! socket may bend the pins and damage the CPU. CPU Socket Handle the CPU by its edges and avoid touching the pins. Copyright © 2009 NEXCOM International Co., Ltd. All Rights Reserved. NDiS 541 User Manual...
- Page 42 When you later place the heat sink on top of the secured in the socket. CPU, the compound will disperse evenly. Side tab Copyright © 2009 NEXCOM International Co., Ltd. All Rights Reserved. NDiS 541 User Manual...
- Page 43 Heat sink Mounting Mounting hole screw Copyright © 2009 NEXCOM International Co., Ltd. All Rights Reserved. NDiS 541 User Manual...
-
Page 44: Installing The Udoc Module
Installing the uDOC Module 1. Locate for the uDOC connector on the board. 2. Install the provided mounting stud as shown in the illustration below. uDOC connector Mounting stud Copyright © 2009 NEXCOM International Co., Ltd. All Rights Reserved. NDiS 541 User Manual... - Page 45 4. Secure the uDOC module with the provided mounting screw. the uDOC connector that is on the board then press it down firmly. Mounting screw uDOC module uDOC connector uDOC module (solder side) Copyright © 2009 NEXCOM International Co., Ltd. All Rights Reserved. NDiS 541 User Manual...
-
Page 46: Installing A Wireless Lan Module
Mini PCI Express slot Wireless LAN module Mini PCI Express slot Copyright © 2009 NEXCOM International Co., Ltd. All Rights Reserved. NDiS 541 User Manual... - Page 47 3. Push the module down then secure it with mounting screws. 4. Attach one end of the RF cable onto the module. RF cable Mounting screws RF cable Copyright © 2009 NEXCOM International Co., Ltd. All Rights Reserved. NDiS 541 User Manual...
- Page 48 6. Remove the WIFI antenna hole cover that is located at the rear panel of the cable. the chassis. WIFI antenna hole cover Antenna jack Ring 2 Ring 1 Copyright © 2009 NEXCOM International Co., Ltd. All Rights Reserved. NDiS 541 User Manual...
- Page 49 Chapter 3: System Setup 7. Mount the WIFI antenna jack to the antenna hole then connect an external antenna to the WiFi antenna jack. Antenna Copyright © 2009 NEXCOM International Co., Ltd. All Rights Reserved. NDiS 541 User Manual...
-
Page 50: Installing A Sata Hard Drive
The drive bay included in the package is used to hold a SATA hard 2. Insert the four dampers into the dampter mounting holes. drive. Damper Damper Drive Bay Damper Damper Copyright © 2009 NEXCOM International Co., Ltd. All Rights Reserved. NDiS 541 User Manual... - Page 51 4. Turn to the other side of the bay then use the provided mounting screws to secure the SATA drive to the drive bay. Mounting screw Drive bay SATA drive Connector side of the SATA drive Copyright © 2009 NEXCOM International Co., Ltd. All Rights Reserved. NDiS 541 User Manual...
- Page 52 5. The photo below shows the screws mounted on the drive bay. 6. Connect the SATA data cable and SATA power cable to the SATA drive. SATA power cable SATA drive located underneath SATA data cable Copyright © 2009 NEXCOM International Co., Ltd. All Rights Reserved. NDiS 541 User Manual...
- Page 53 7. The mounting holes on the drive bay are used to secure the bay to the 8. Locate for the mounting studs on the board. chassis. Mounting hole Mounting hole Mounting stud Mounting hole Mounting hole Copyright © 2009 NEXCOM International Co., Ltd. All Rights Reserved. NDiS 541 User Manual...
- Page 54 10. Locate for the SATA data connector and the SATA power connector the board then use the provided mounting screws to secure the drive on the board. bay in place. SATA data connector SATA power connector Copyright © 2009 NEXCOM International Co., Ltd. All Rights Reserved. NDiS 541 User Manual...
- Page 55 Chapter 3: System Setup 11. Connect the SATA data cable and SATA power cable to the connec- tors. SATA power cable SATA data cable Copyright © 2009 NEXCOM International Co., Ltd. All Rights Reserved. NDiS 541 User Manual...
-
Page 56: Installing A Tv Tuner Module
RF cable attached to the module Mini PCI Express slot TV Tuner module Copyright © 2009 NEXCOM International Co., Ltd. All Rights Reserved. NDiS 541 User Manual... - Page 57 3. Push the module down then secure it with mounting screws. 4. Insert the 2 rings (ring 1 then ring 2) into the TV antenna jack. RF cable Ring 2 Ring 1 TV antenna jack Copyright © 2009 NEXCOM International Co., Ltd. All Rights Reserved. NDiS 541 User Manual...
- Page 58 5. Remove the TV antenna hole cover that is located at the rear panel of 6. Mount the TV antenna jack to the TV antenna hole. the chassis. TV antenna hole cover TV antenna jack Copyright © 2009 NEXCOM International Co., Ltd. All Rights Reserved. NDiS 541 User Manual...
- Page 59 Chapter 3: System Setup 7. Connect an external TV antenna to the TV antenna jack. TV antenna Copyright © 2009 NEXCOM International Co., Ltd. All Rights Reserved. NDiS 541 User Manual...
-
Page 60: Appendix A: Video Driver Installation And Settings
Installing the Video Driver 1. Insert the provided CD into a CD-ROM drive. 3. Open the required system folder, for instance XP32. 2. Open the VGA folder. D:\NDiB541_DRIVER\VGA D:\NDiB541_DRIVER Copyright © 2009 NEXCOM International Co., Ltd. All Rights Reserved. NDiS 541 User Manual... - Page 61 Appendix A: Video Driver Installation and Settings 4. Run Setup. 5. Click Next to begin installing the driver. D:\NDiB541_DRIVER\VGA\XP32 Copyright © 2009 NEXCOM International Co., Ltd. All Rights Reserved. NDiS 541 User Manual...
- Page 62 Appendix A: Video Driver Installation and Settings 6. Read the license agreement then click Yes. 7. Select Express then click Next. Copyright © 2009 NEXCOM International Co., Ltd. All Rights Reserved. NDiS 541 User Manual...
- Page 63 Appendix A: Video Driver Installation and Settings 8. Setup is running Install .NET 2.0. Click “Yes, I want to restart my computer now” then click Finish. Copyright © 2009 NEXCOM International Co., Ltd. All Rights Reserved. NDiS 541 User Manual...
- Page 64 You can also right-click anywhere on your desktop then select Double-click System. On the Hardware tab, click Device Manager. Catalyst(TM) Control Center. The list below shows the VGA driver successfully installed in the sys- tem. Copyright © 2009 NEXCOM International Co., Ltd. All Rights Reserved. NDiS 541 User Manual...
- Page 65 12. Select Advanced then click Next. Selecting Advanced allows you to 13. Click Yes to switch from the Catalyst Control Center Basic view to the configure all the available settings. Advanced view. Copyright © 2009 NEXCOM International Co., Ltd. All Rights Reserved. NDiS 541 User Manual...
- Page 66 16) explain how to configure your display using the selected ATI Radeon X1200 series. These same procedures also apply when config- uring displays using the ATI Radeon E2400. Copyright © 2009 NEXCOM International Co., Ltd. All Rights Reserved. NDiS 541 User Manual...
- Page 67 16. If Display 1 and Display 3 are connected to NDiS 540, you can enable 17. Display Manager has reconfigured the settings for Display 3. Click Yes Display 3. to continue. Copyright © 2009 NEXCOM International Co., Ltd. All Rights Reserved. NDiS 541 User Manual...
- Page 68 Appendix A: Video Driver Installation and Settings 18. Display 3 is now enabled and is identified as Display 3. 19. Select the display mode. Copyright © 2009 NEXCOM International Co., Ltd. All Rights Reserved. NDiS 541 User Manual...
- Page 69 21. If you have selected the “Extend Main onto digital panel” mode, your the previous step, drag Display 3 under Display 1 so that an extended display will appear as shown below. space will appear under Display 1. Copyright © 2009 NEXCOM International Co., Ltd. All Rights Reserved. NDiS 541 User Manual...
- Page 70 23. If you have selected the “Stretch Main vertically onto display panel” panel” mode, your display will appear as shown below. mode, your display will appear as shown below. Copyright © 2009 NEXCOM International Co., Ltd. All Rights Reserved. NDiS 541 User Manual...
- Page 71 Appendix A: Video Driver Installation and Settings 24. Click Apply to save the settings. Copyright © 2009 NEXCOM International Co., Ltd. All Rights Reserved. NDiS 541 User Manual...
-
Page 72: Appendix B: Audio Driver Installation And Settings
Installing the Audio Driver 3. In the Audio Driver folder, run Setup. 1. Insert the provided CD into a CD-ROM drive. 2. Open the Audio Driver folder. Copyright © 2009 NEXCOM International Co., Ltd. All Rights Reserved. NDiS 541 User Manual... - Page 73 Appendix B: Audio Driver Installation and Settings 4. Click Next to begin installing the driver. 5. Select “Continue Anyway” to install the 1st audio driver. Copyright © 2009 NEXCOM International Co., Ltd. All Rights Reserved. NDiS 541 User Manual...
- Page 74 Appendix B: Audio Driver Installation and Settings 6. Select “Continue Anyway” to install the 2nd audio driver. 7. Select “Continue Anyway” to install the 3rd audio driver. Copyright © 2009 NEXCOM International Co., Ltd. All Rights Reserved. NDiS 541 User Manual...
- Page 75 To open Device Manager, click Start, and then click Control Panel. Double-click System. On the Hardware tab, click Device Manager. The list below shows the audio drivers successfully installed in the sys- tem. Copyright © 2009 NEXCOM International Co., Ltd. All Rights Reserved. NDiS 541 User Manual...
- Page 76 Appendix B: Audio Driver Installation and Settings 10. Click Next. 11. To install the 4th audio driver, click Next. Copyright © 2009 NEXCOM International Co., Ltd. All Rights Reserved. NDiS 541 User Manual...
- Page 77 Appendix B: Audio Driver Installation and Settings 12. Select “Continue Anyway”. 13. Click Finish. Copyright © 2009 NEXCOM International Co., Ltd. All Rights Reserved. NDiS 541 User Manual...
- Page 78 To open Device Manager, click Start, and then click Control Panel. Run Media Player Classic for 4 simultaneous times. Click the View Double-click System. On the Hardware tab, click Device Manager. menu then select Options. Copyright © 2009 NEXCOM International Co., Ltd. All Rights Reserved. NDiS 541 User Manual...
- Page 79 Appendix B: Audio Driver Installation and Settings 16. Select different IDT Audio, “IDT Audio1 (00200000)”, “IDT Audio1 (2) (00200000)”, “IDT Audio1 (3) (00200000)” and “IDT Audio1 (4) (00200000)”, for each audio output. Copyright © 2009 NEXCOM International Co., Ltd. All Rights Reserved. NDiS 541 User Manual...
-
Page 80: Appendix C: Watchdog Timer
If bit-3 is Minute Mode, the count mode is 1/1000 min.) Read / Write Description Select WDTO# count mode. Logical device number 0: Second Mode 1: Minute Mode Copyright © 2009 NEXCOM International Co., Ltd. All Rights Reserved. NDiS 541 User Manual... - Page 81 00h: Time-out Disable 01h: Time-out occurs after 1 second/minute 02h: Time-out occurs after 2 seconds/minutes 03h: Time-out occurs after 3 seconds/minutes ............... FFh: Time-out occurs after 255 seconds/minutes Copyright © 2009 NEXCOM International Co., Ltd. All Rights Reserved. NDiS 541 User Manual...
- Page 82 - O 4E, 07 <Enter> - O 4F, 08 <Enter> - O 4E, F6 <Enter> - O 4F, 04 (Where “04” is 1 sec. and “FF” is 255 sec.) Copyright © 2009 NEXCOM International Co., Ltd. All Rights Reserved. NDiS 541 User Manual...
-
Page 83: Appendix D: Power Consumption
DC Input: 12V DC Mode Current Total Watts Full 5.55A 66.60 Idle 3.91A 46.92 Standby (S3) 1.59A 19.08 * WLAN, USB x4, 2GB x1, DVI x4, 80GB SATA HDD Copyright © 2009 NEXCOM International Co., Ltd. All Rights Reserved. NDiS 541 User Manual...
Need help?
Do you have a question about the NDiS 541 and is the answer not in the manual?
Questions and answers