
Related Manuals for Panasonic KX-TS2305HGW


Summary of Contents for Panasonic KX-TS2305HGW
- Page 1 Integrated Telephone System KX-TS2305HGW Model No. Pulse-or-tone dialing capability Operating Instructions PLEASE READ BEFORE USE AND SAVE.
- Page 2 Before Initial Use Thank you for purchasing your new Panasonic integrated telephone. For your future reference Serial No. Date of purchase (found on the bottom of the unit) Name and address of dealer Accessories (included) ∑ Handset ....one ∑...
-
Page 3: Table Of Contents
Contents Preparation Location of Controls ....... . . 14 Settings..........15 Installing the Batteries . -
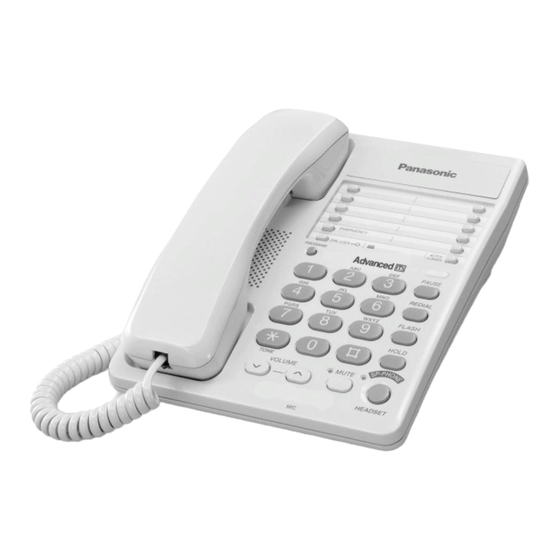
Page 4: Location Of Controls
Location of Controls (DIAL\LOCK) Button (p. 21) (PROGRAM) Button (p. 7, 12) (TONE) Button (p. 17) RINGER Selector (p. 8) Headset Jack (p. 23) One-Touch Auto Dial Buttons (p. 14) (AUTO/LOWER) Button (p. 12, 15) Ringer Indicator (p. 11) (_) (^) VOLUME Buttons (p. -
Page 5: Settings
≥—Speakerphone (p. 10, 11) ≥—Programming (p. 7) Connecting the Handset/Telephone Line Cord After connection, lift the handset to check for a dial tone. Handset Handset Cord Telephone Line Cord LINE DATA To Single-Line Telephone Jack ≥Use only a Panasonic Handset for the KX-TS2305HGW. -
Page 6: Connecting A Communication Device
“ Settings Connecting a Communication Device If you connect a communication device (computer, modem, fax, answering machine, etc.) to the telephone line, you can connect it through this unit using the DATA jack. After connecting the handset and telephone line cord (p. 5), connect the communication device telephone line cord to the DATA jack. -
Page 7: Programming Summary Of Preparations
“ Programming Summary of Preparations You can program the following functions. See the corresponding pages for function details. Make sure that a call is not put on hold. (PROGRAM) Press (MUTE) Press ≥To set the call restriction, press (1). (page 22) ≥To change the flash time, press (2). -
Page 8: Selecting The Dialing Mode
“ Settings Selecting the Dialing Mode You can select the dialing mode by programming. If you have touch tone service, set to “Tone”. If rotary or pulse service is used, set to “Pulse”. Your phone comes from the factory set to “Tone”. Make sure that a call is not put on hold. -
Page 9: Wall Mounting
Wall Mounting This unit can be mounted on a wall. Pull down the handset hook until it locks, so the tab holds the handset. Tuck the telephone line cord inside the wall mounting adaptor, and push it in the direction of the arrow. ≥“UP”... -
Page 10: Making Calls
Making Calls You can make a call by simply lifting the handset. To hang up, place the handset on the cradle. Using the speakerphone (SP-PHONE/HEADSET) Press VOLUME (_), (^) ≥The indicator lights. Dial a phone number. ≥If you misdial, press (SP-PHONE/HEADSET) and start again from step 1. -
Page 11: Answering Calls
To put a call on hold (HOLD) Press ≥The SP-PHONE/HEADSET indicator light flashes. ≥If using the handset, you can place it on the cradle. ≥During the hold, the caller will hear music. For canceling music, see page 18. To release the hold If the handset is on the cradle, lift the handset. -
Page 12: Speed Dialer
Speed Dialer Storing Phone Numbers in Memory You can store up to 10 phone numbers in memory. The dialing buttons ) function as memory stations. Do not press any memory stations before storing to prevent misoperation. Make sure that a call is not put on hold. (PROGRAM) Press (PROGRAM) -
Page 13: Dialing A Stored Number
To erase a stored number (PROGRAM) Press ≥The MUTE indicator flashes. (AUTO/LOWER) Press Press a memory station number ( ) for the phone number to be erased. ≥A long beep sounds. ≥The MUTE indicator light goes out. ≥The unit will return to the standby mode. Dialing a Stored Number (SP-PHONE/HEADSET) Lift the handset or press... -
Page 14: One-Touch Dialer
One-Touch Dialer Storing Phone Numbers in Memory You can store up to 20 phone numbers in the one-touch auto dial buttons (10 numbers in UPPER memory locations, 10 numbers in LOWER memory locations). Do not press any one-touch auto dial buttons before storing to prevent misoperation. - Page 15 “ To store in a LOWER memory location (PROGRAM) Press ≥The MUTE indicator flashes. Enter a phone number, up to 22 digits. ≥If you enter a wrong number, press (PROGRAM) and start again from step 1. (AUTO/LOWER) Press Press one of the one-touch auto dial buttons. ≥A long beep sounds.
-
Page 16: Dialing A Stored Number
“ One-Touch Dialer Dialing a Stored Number From an UPPER memory location: (SP-PHONE/HEADSET) Lift the handset or press Press the required one-touch auto dial button. ≥The stored number is dialed. From a LOWER memory location: (SP-PHONE/HEADSET) Lift the handset or press (AUTO/LOWER) Press Press the required one-touch auto dial button. -
Page 17: Special Features
Special Features “ (DIAL\LOCK) (PROGRAM) (PAUSE) (FLASH) (TONE) (HOLD) (MUTE) For Call Waiting Service Users (FLASH) Press if you hear a call-waiting tone while talking. ≥The first call is put on hold and you can answer the second call. ≥To return to the first caller, press (FLASH) again. ≥If this function does not operate properly, consult your telephone company. -
Page 18: Muting Your Conversation
“ Special Features Muting Your Conversation (MUTE) Press while talking. ≥The MUTE indicator lights. ≥The other party cannot hear you but you can hear them. ≥To resume the conversation, press (MUTE) again. Turning Music Played During the Hold ON/OFF You can turn ON/OFF playing music during the hold as follows. Your phone comes from the factory set to ON. -
Page 19: Flash Button
“ FLASH Button (FLASH) Pressing allows you to use special features of your host PBX such as transferring an extension call or accessing special telephone services (optional) such as call waiting. Selecting the flash time The flash time depends on your telephone exchange or host PBX. You can select the following flash times: “80, 90, 100, 110, 200, 250, 300, 400, 600, 700 ms (milliseconds)”. -
Page 20: Setting The Pin Code
4-digit number. (PROGRAM) Press ≥A long beep sounds. ≥The MUTE indicator light goes out. ≥The unit will return to the standby mode. Please write down your PIN code. If you forget your PIN code, consult your nearest Panasonic service center. -
Page 21: Dial Lock
“ Dial Lock You can prevent others from making a call to any number except the one pre-programmed in the memory of the EMERGENCY button. Once you locked the dialing buttons, even emergency numbers cannot be dialed. Only incoming calls are accepted until the dial lock is canceled. Before using this feature, we recommend (EMERGENCY) storing an emergency number in the memory... -
Page 22: Call Restriction
“ Special Features Call Restriction You can prevent the unit from dialing phone numbers beginning with specified digit(s) (1 digit or 2 digits). Phone numbers with the restricted leading digits cannot be dialed out. To set the call restriction Make sure that a call is not put on hold. (PROGRAM) (PROGRAM) Press... -
Page 23: Using The Optional Headset
Using the Optional Headset “ Plugging the optional headset into the unit allows a hands-free phone conversation. Please use only a Panasonic KX-TCA89EX. Connecting the Optional Headset to the Unit Connect the optional headset to the headset jack as shown below. - Page 24 “ Using the Optional Headset Making/Answering Calls Make sure to install the batteries. VOLUME (_), (^) (SP-PHONE/HEADSET) and Indicator (SP-PHONE/HEADSET) Press to make or answer a call. ≥The SP-PHONE/HEADSET indicator flashes. ≥If you misdial when making a call, press (SP-PHONE/HEADSET) twice and dial again.
-
Page 25: Battery Replacement
Battery Replacement If the speakerphone does not work, it may be the time to replace the batteries. Replace the batteries within 1 minute to keep the programmed settings. 1. Press down in the direction of the arrow and remove the cover. 2. -
Page 26: Before Requesting Help
Before Requesting Help Problem Remedy The unit does not work. ≥Check the settings (p. 5–9). ≥Remove the batteries and reinstall them to reset the unit. The unit does not ring. ≥The RINGER selector is set to OFF. Set to HIGH or LOW (p. 8). You cannot dial. -
Page 27: Safety Instructions
Safety Instructions Take special care to follow the safety suggestions listed below. Installations Environment 1) Do not use this unit near water—for example, near a bathtub, washbowl, sink, etc. Damp basements should also be avoided. 2) The unit should be kept away from heat sources such as radiators, kitchen range, etc. - Page 28 WARNING: TO PREVENT FIRE OR SHOCK HAZARD, DO NOT EXPOSE THIS PRODUCT TO RAIN OR ANY TYPE OF MOISTURE. If there is any trouble, disconnect the unit from the telephone line and connect a known working phone. If the known working phone operates properly, do not reconnect the unit to the telephone line until the trouble has been repaired.
Need help?
Do you have a question about the KX-TS2305HGW and is the answer not in the manual?
Questions and answers