Table of Contents
Advertisement
Advertisement
Table of Contents

Related Manuals for Creative ZEN ZEN Touch 20GB


Summary of Contents for Creative ZEN ZEN Touch 20GB
- Page 2 Creative Zen Touch Information in this document is subject to change without notice and does not represent a commitment on the part of Creative Technology Ltd. No part of this manual may be reproduced or transmitted in any form or by any means, electronic or mechanical, including photocopying and recording, for any purpose without the written permission of Creative Technology Ltd.
- Page 3 Contents...
-
Page 4: Table Of Contents
Before You Begin Introduction ... xi Minimum System Requirements ... xi 1 A Tour of Your Player Your Player at a Glance ... 1-1 Using the touch pad control ... 1-3 Select ... 1-3 Selecting menu options ... 1-4 Selecting list and confirmation box options ... 1-4 2 Getting Started Charging the Battery ... - Page 5 Repeat track ... 3-5 Repeat all ... 3-5 Shuffle ... 3-6 Shuffle repeat ... 3-6 Track once ... 3-7 Managing your Music ... 3-8 Finding a Music Track in Music Library ... 3-9 Adding Music Tracks to the Selected Music list ... 3-10 Viewing Track Information in Music Library ...
- Page 6 4 Software Applications About Creative MediaSource and NOMAD Explorer ... 4-1 Appendixes A Technical Specifications Size ... A-1 Weight (includes the rechargeable battery) ... A-1 Memory ... A-1 Capacity ... A-1 Battery Type ... A-1 Battery Life (playback time) ... A-1 Operating Conditions ...
- Page 7 Playback Icons ... B-3 Play Mode Icons ... B-4 C Frequently Asked Questions AutoPlay ... C-1 Features ... C-2 General ... C-2 Maintenance ... C-4 Usage ... C-5...
-
Page 8: Before You Begin
Before You Begin... -
Page 9: Introduction
Before You Begin Introduction Thank you for purchasing Creative’s new multi-format player, Creative Zen Touch! Your player can store thousands of songs in its music library, and comes equipped with an USB 2.0 connector, so you can transfer audio tracks and data quickly and easily. -
Page 10: Tour Of Your Player
A Tour of Your Player... -
Page 11: Your Player At A Glance
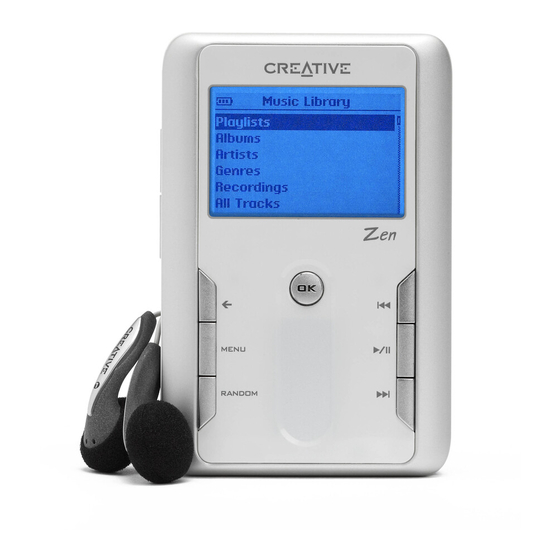
A Tour of Your Player Your Player at a Glance Back button Menu button Random button Touch pad control Front view A Tour of Your Player 1-1 Liquid Crystal Display (LCD) OK button Previous button Play/Pause button Next button... -
Page 12: Side Views
Power button Volume Increase button Volume Decrease button Reset button Side views Earphone connector port Top view Power adapter connector Lock switch A Tour of Your Player 1-2... -
Page 13: Using The Touch Pad Control
Using the touch pad control Select The touch pad control is one of the most important features of your player. In this document, we will use the term, “Select”, to mean that you should use the touch pad control to scroll through options, and then select the option by pressing the OK button. -
Page 14: Selecting Menu Options
Depending on the screen you are in, you can have different menu options. You can also choose options from a list or a confirmation box. Selecting menu You can use the touch pad control to scroll to selections in menus. For example, if you are looking at the Menu screen: options 1. - Page 15 Button OWER ❍ Turns the player on and off. ❍ Displays the main menu, which contains most of your player’s features. REVIOUS ❍ Goes to the beginning of the current track, or to the previous track. ❍ Moves back within a track when you press and hold the button.
- Page 16 Button AUSE ❍ Starts, pauses or continues playback. OLUME NCREASE ❍ Increases the volume. OLUME ECREASE ❍ Decreases the volume. ❍ Goes to previously accessed screens in the menu. What It Does ❍ To play a track from Music Library screens, press this button.
- Page 17 Button ANDOM UTTON ❍ Plays random tracks in your player. TOUCH PAD CONTROL OK button for selecting options Upper section for fast ❍ Scrolls up and down menus. scrolling upwards. ❍ Selects menu options. Middle section for normal scrolling upwards or downwards. Lower section for fast scrolling downwards.
-
Page 18: Getting Started
Getting Started... -
Page 19: Charging The Battery
Getting Started Charging the The high performance lithium-ion battery supplied with your player needs to be fully charged before you use it. The battery is fully charged in Battery approximately four hours. You can charge the battery using either the power adapter or the USB cable. -
Page 20: Using The Usb Cable
Connect the USB cable to your player and computer’s USB ports, as shown cable in Figure 2-2. Make sure that your player is turned off, and Creative MediaSource or NOMAD Explorer is closed before charging using the USB port. The Power button blinks blue when the battery is charging. -
Page 21: Power Source And Level Indicators
Power Source Your player displays one of the following icons, depending on the battery’s charged status or the power source (battery or electrical power). and Level Indicators Icon ❍ your player is running from external power ❍ your player is running from battery power ❍... -
Page 22: Setting Up Your Player
Setting Up 1. Make sure that your player is NOT connected to your computer. 2. Insert the Zen Touch CD into your CD-ROM drive. Your Player The Zen Touch CD supports Windows AutoPlay mode and starts running automatically. If not, you need to enable your CD-ROM drive's auto- insert notification feature. -
Page 23: Transferring Music And Data
Music files can be encoded into the supported formats (MP3, WMA or WAV Creative MediaSource and NOMAD Explorer file formats), and then transferred to your player with Creative MediaSource Help. Organizer. Data files can also be transferred to and stored in your player, for example, you can transfer a large data file from one computer to another. -
Page 24: Downloading From The Internet
Downloading To get MP3 files from the Internet, use a search engine to locate sites with MP3 content. You can also try out these sites (web sites listed here are from the Internet correct at the time of this document’s release): ❍... -
Page 25: Ripping From A Cd
The first phase in making an MP3 file is extracting audio data from an audio CD. To extract audio data, you will need a CD-ROM drive that can extract digital audio data, and a program known as a ripper. With Creative MediaSource Organizer, you can rip tracks from most audio CDs. This program uses the CD-ROM drive to read the audio tracks from the audio CD and stores it on your hard disk. -
Page 26: Playing And Managing Your Music
Playing and Managing Your Music... -
Page 27: Playing Music
To save the Selected Music list as a playlist, see "Saving the Selected Music list as a playlist" on page 3-19. To add audio tracks to your player’s Music Library, refer to the Creative MediaSource Help. Playing and Managing Your Music 3-1... -
Page 28: Playing The Selected Music List
Playing the Follow these steps to play the Selected Music list. Selected Music list 1. Press the Play/Pause button The Play icon the Selected Music list begin playing. The Now Playing screen shows the track that is being played back or the track that has been selected. -
Page 29: Playing All Tracks In Your Player
Playing all tracks in Follow these steps to play all audio tracks in your player. your player 1. Press the Menu button 2. Select Music Library. 3. Select All Tracks. 4. Select any track. A list appears. 5. Select Play. All the tracks in your player are automatically added to the Selected Music list and are played. -
Page 30: Play Modes
Play Modes Your player has Play Modes that allow you to change how your Selected Music list is played. The following Play Modes are available: ❍ Normal ❍ Repeat track ❍ Repeat all ❍ Shuffle ❍ Shuffle repeat ❍ Track once Play Modes are disabled by enabling the “Normal”... -
Page 31: Repeat Track
Repeat track You can choose to repeat a track. 1. Press the Menu button 2. Select Play Mode. A list appears. 3. Select Repeat Track. The Repeat Track icon repeated continuously until you stop it. Repeat all You can choose to repeat the whole Selected Music list. 1. -
Page 32: Shuffle
Shuffle The Shuffle play mode can be used once (“Shuffle”). 1. Press the Menu button 2. Select Play Mode. A list appears. 3. Select Shuffle. The Shuffle icon random and played back. The Selected Music list stops playing once all the tracks in the Selected Music list are played back once. -
Page 33: Track Once
Track once When the Selected Music list is played normally, every track in the Selected Music list is played, from the first to the last. When the Track Once play mode is enabled, however, playback stops once the current track ends. 1. -
Page 34: Managing Your Music
All Tracks All transferred tracks can be found in the "All Tracks" category, but depending on your Creative MediaSource settings, tracks can also be found Modifying or renaming in other categories. For example, take a fictitious track called "Toffee Apple... -
Page 35: Finding A Music Track In Music Library
Finding a Music In the following example, you will be shown how to find a track by navigating through Music Library. Track in Music Library 1. Press the Menu button 2. Select Music Library. 3. Select an audio category. For example, if you want to find a track in a particular album, select Albums. -
Page 36: Adding Music Tracks To The Selected Music List
Adding Music Audio selections from Music Library can either be added sequentially after selections already in the Selected Music list ("Add to Selected") or replace Tracks to the the Selected Music list ("Play"). Selected Music To add an entire audio category to the Selected Music list list 1. - Page 37 To add a track to the Selected Music list 1. Press the Menu button 2. Select Music Library. 3. Select an audio category. For example, if you want to add a track in a particular album, select Albums. 4. Select the sub-category. For example, under Albums, select an album. A list appears.
- Page 38 To replace the Selected Music list with an entire audio category 1. Press the Menu button 2. Select Music Library. 3. Select an audio category. For example, if you want to replace the Selected Music list with an entire album, select Albums. 4.
-
Page 39: Viewing Track Information In Music Library
Viewing Track Detailed information about tracks in Music Library is readily available. This includes the track’s title, artist, album, genre, as well as the track’s length. Information in To view information about tracks in Music Library Music Library 1. Press the Menu button 2. -
Page 40: Deleting Music Tracks From Music Library
Deleting Music This action permanently deletes a track or an entire audio category from your player. Tracks from To delete a track Music Library 1. Press the Menu button 2. Select Music Library. 3. Select an audio category. For example, if you want to find a track in a particular album, select Albums. - Page 41 To delete an entire audio category 1. Press the Menu button 2. Select Music Library. 3. Select an audio category. For example, select Albums. 4. Select the sub-category. For example, under Albums, select the album title you want to delete. A list appears. 5.
-
Page 42: Using The Selected Music List
Using the You can do more than play audio selections in the Selected Music list. You can: Selected Music ❍ View information about tracks in the Selected Music list list ❍ Remove tracks ❍ Save the Selected Music list as a playlist Viewing track Information about tracks in the Selected Music list can be easily accessed and viewed. -
Page 43: Removing Music Tracks From The Selected Music List
Removing music Tracks selected for playback are copied to the Selected Music list. If a track is deleted from the Selected Music List, it continues to be present in Music tracks from the Library. To delete audio completely, tracks, albums, artists or genres must be Selected Music deleted from Music Library as shown in "Deleting Music Tracks from Music list... - Page 44 To remove all tracks from the Selected Music list 1. Select Clear Selection. A confirmation box appears, asking you if you want to remove all tracks in the Selected Music list. 2. Select Yes. All audio selections are removed from the Selected Music list. Playing and Managing Your Music 3-18...
-
Page 45: Saving The Selected Music List As A Playlist
Saving the If you like the contents and arrangement of your current Selected Music list, you can choose to save it as a playlist for retrieval and playback later. Selected Music list as a playlist 1. Press the Menu button 2. - Page 46 6. Select the letters on the list to form a name for your playlist. This name appears in the box at the bottom of the screen. Note: When entering letters into the box, you can switch from upper to lower case (or vice-versa) by simply selecting the letter and holding down the OK button.
-
Page 47: Setting User Preferences
Setting User Your player offers many configuration options. You can ❍ construct an owner’s name for your player Preferences ❍ enhance your music by selecting or defining your own EQ setting ❍ set the LCD screen’s backlight duration ❍ set the contrast level for your player’s screen ❍... -
Page 48: Owner
Owner This option constructs an owner’s name for your player. 1. From the Settings menu, select Owner. A list appears. 2. Select the letters and numbers to form a name. Each letter and number selected is entered into the entry area. 3. -
Page 49: Backlight Time
5. Select Custom EQ. Four vertical control levers will appear in the display. Each lever represents successively higher frequencies that can be controlled. 100 Hz controls bass frequencies, 800 Hz and 3 KHz adjust the mid-range and low-treble frequencies. 12 KHz controls the highest treble frequencies. -
Page 50: Contrast
Contrast This option sets the contrast level for your player’s screen. The lower the number, the lower the contrast. 1. From the Settings menu, select Contrast. A list appears. 2. Select the contrast setting that you want. Idle Shutdown This option specifies how long your player remains inactive before it automatically shuts down. -
Page 51: Language
To tap the touch pad control to select options, instead of pressing the OK button 1. From the Settings menu, select TouchPad. 2. Select Tap to Select. 3. Select the option that you want. To adjust the sensitivity of your touch pad control 1. -
Page 52: Accessing The Information Screen
Accessing the Your player’s Information screen shows you your player’s: ❍ Version — your player’s firmware version so that you know if you can upgrade Information the firmware Screen ❍ Total Space — the total amount of space in your player for storing music or data ❍... -
Page 53: Locking And Unlocking Your Player
Locking and Locking your player will disable all buttons on the player. This feature is useful when you do not want any buttons (for example, Play/Pause) pressed unlocking your accidentally. Player To lock your Slide the Lock switch to the right. The player is locked. player To unlock your Slide the Lock switch to the left. -
Page 54: Software Applications
Software Applications... -
Page 55: About Creative Mediasource And Nomad Explorer
MediaSource on page 2-4). and NOMAD Creative MediaSource is the best way to organize and transfer audio to and Explorer from your player. You can also use Creative MediaSource to burn audio CDs. Creative NOMAD Explorer helps you manage your player's data files. -
Page 56: A Technical Specifications
Technical Specifications... -
Page 57: Size
Technical Specifications 2.70" (W) x 4.12" (H) x 0.87" (D) or 68.60 mm x 104.60 mm x ❑ Size 22.00 mm 7.16 oz (203 g) ❑ Weight (includes the rechargeable battery) 16 MB ❑ Memory 20 GB hard drive ❑ Capacity Lithium-ion battery (rechargeable) ❑... -
Page 58: Operating Conditions
Wave (at 16, 22.05, 24, 32, 44.1 and 48 kHz) ❑ Up to 74 dB (Headphones) ❑ Channel Separation <0.1% ❑ 20 Hz~20000 Hz ❑ Frequency Response Upgradeable via Internet ❑ Operating System/ Firmware ** Firmware upgrades are available from www.creative.com Technical Specifications A-2... -
Page 59: Headphone Out
1/8" (3.50 mm) stereo minijack, 20 mW per channel, 32 ohms ❑ Headphone Out impedance at 1 kHz Large 160 x 104 pixel EL backlit display, in Blue ❑ LCD Display USB 2.0/USB 1.1 ❑ Data Connector Parametric equalization ❑ Technical Specifications A-3... -
Page 60: B Onscreen Diagram And Icon Guide
Onscreen Diagram and Icon Guide... -
Page 61: Information Diagrams
Onscreen Diagram and Icon Guide Information The following icons appear on the screen when the associated playback action is used. Diagrams Diagram ❍ Your computer is actively managing your player. Warning: Do not disconnect your player while your computer is still actively managing it. ❍... - Page 62 If an error occurs, you may see any one of the following diagrams, indicating the general nature of the problem. Diagram Likely Causes ❍ unexpected power loss while saving settings ❍ physical defects ❍ numerous high- impact shocks ❍ battery is too depleted, player cannot start up ❍...
-
Page 63: Playback Icons
Playback Icons The following icons are commonly found in the Selected Music screen. Icon Action/Meaning ❍ Play ❍ Pause ❍ Forward ❍ Reverse ❍ Skip forward ❍ Skip back Onscreen Diagram and Icon Guide B-3... -
Page 64: Play Mode Icons
Play Mode Icons Icon Action/Meaning ❍ Repeat Track ❍ Repeat All ❍ Shuffle Repeat ❍ Shuffle Once ❍ Play Track Once Onscreen Diagram and Icon Guide B-4... -
Page 65: C Frequently Asked Questions
Frequently Asked Questions... -
Page 66: Autoplay
This section covers questions you might have while using your player. It has been divided into a few categories for your easy reference. For further assistance, you may wish to consult our self-help tool “Knowledge Base”. Go www.creative.com AutoPlay What do I do when the installation does not start automatically after the Installation CD is inserted? The AutoPlay feature in your Windows system may not be enabled. -
Page 67: Features
Where can I get official information on my player? Visit www.NOMADWorld.com for updates and downloads relating to your player, Creative’s MP3 players and accessories. My player seems to have frozen. Is there anything I can do? You can reset your player. Push the end of a thin object (for example, a straightened paperclip) into the Reset hole. - Page 68 You may see this message when installing this driver or update. If you do, you may choose to click the Continue Anyway button. Creative has tested this driver or update on Windows XP, and it does not impair or destabilize your computer.
-
Page 69: Maintenance
DO NOT Select the Reload starts rebuilding Music Library. Firmware option unless you have downloaded a newer firmware version for your player, or have been advised to do so by the Creative Customer Services center. Frequently Asked Questions C-4... -
Page 70: Usage
No. The adapter may not be compatible with your player, and may even damage it. You should get a replacement adapter from Creative at www.NOMADworld.com, or your local Creative office/distributor. Can I transfer DRM protected WMA files to my player? Yes. - Page 71 I have to recharge the battery quite often. Is there anything I can do to make it last longer? Generally, any operation requiring the player to access the hard disk uses battery power. Consequently, filling your player to capacity is not recommended.
Need help?
Do you have a question about the ZEN ZEN Touch 20GB and is the answer not in the manual?
Questions and answers