Table of Contents
Advertisement
Advertisement
Table of Contents

Subscribe to Our Youtube Channel
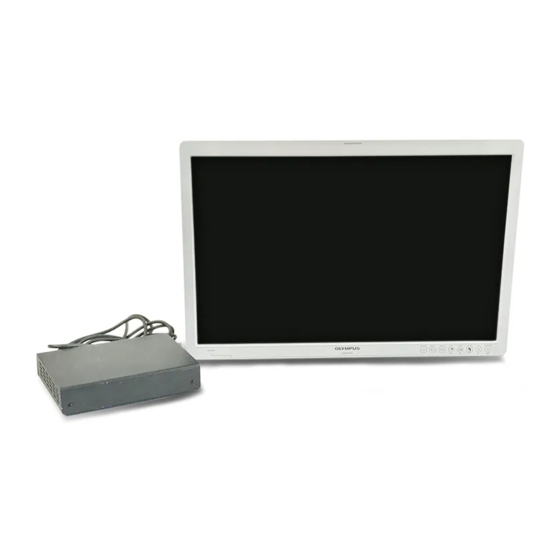
Related Manuals for Olympus OEV261H


Summary of Contents for Olympus OEV261H
- Page 1 INSTRUCTIONS HIGH DEFINITION LCD MONITOR OEV261H...
-
Page 3: Table Of Contents
Inspection of the displayed image........... Chapter 5 Screen Menu and Operation of Front Panel..PRESET button................INPUT button .................. MENU button .................. PIP button ..................POP button ..................SCAN button ................... FUNCTION buttons (F1, F2/ENTER)..........Status display.................. High definition LCD monitor OEV261H... - Page 4 Storage ................... Disposal ..................Chapter 9 Inspections............... Chapter 10 Troubleshooting ............10.1 Troubleshooting guide ..............10.2 Returning the monitor for repair ............Appendix..................System chart .................... Transportation, storage, and operation environment/specifications..EMC information..................Maintenance .................. High definition LCD monitor OEV261H...
-
Page 5: Labels And Symbols
Labels and Symbols Labels and Symbols Safety-related labels and symbols are attached to the instrument at the locations shown below. If labels or symbols are missing or illegible, contact Olympus. High definition LCD monitor Serial number Electrical rating Potential equalization... - Page 6 Labels and Symbols AC adapter The rating plate of the AC adapter is on the underside of the adapter. Serial number Electrical rating High definition LCD monitor OEV261H...
-
Page 7: Important Information - Please Read Before Use
Important Information — Please Read Before Use Intended use This instrument has been designed to be used with Olympus endoscopes, light source, video system center, camera control units and endoscopic ultrasound centers for endoscopic diagnosis and video observation. Do not use this instrument for any purpose other than its intended use. -
Page 8: Instrument Compatibility
Some problems that appear to be malfunctions may be correctable by referring to Chapter 10, “Troubleshooting”. If the problem cannot be resolved using the information, contact Olympus. High definition LCD monitor OEV261H... -
Page 9: Signal Words
− The concentration of oxygen is high. − Oxidizing agents (such as nitrous oxide (N O)) are present in the atmosphere. − Flammable anesthetics are present in the atmosphere. Otherwise, explosion or fire may result because this monitor is not explosion-proof. High definition LCD monitor OEV261H... - Page 10 Some problems may be correctable by referring to the following procedure. Damage or irregularity in the instrument may compromise patient or operator safety and may result in more severe equipment damage. High definition LCD monitor OEV261H...
- Page 11 Chapter 10, “Troubleshooting”. If the problem cannot be resolved by the described remedial action, be sure to contact Olympus for repair as described in Section 10.2, “Returning the monitor for repair” on page 83. •...
- Page 12 Olympus. • Always use the power cord and connection cables that were shipped with the monitor or mobile workstation.
- Page 13 Otherwise, this instrument may fall due to improper attachment, injury may result. • Remove the wall-hanging bracket when not used. Otherwise people moving in the vicinity of the monitor could get caught on the bracket and be injured. High definition LCD monitor OEV261H...
- Page 14 AC receptacle. • In an environment exposed to drastic temperature fluctuations, condensation may build up on inside the LCD screen. This may lower the quality of the screen and may damage it. High definition LCD monitor OEV261H...
- Page 15 LCD screen and cause blurring. • This monitor may become hot after an extended period of operation, but this does not indicate a malfunction. • High-frequency electrosurgical equipment can cause slight interference on the monitor display. High definition LCD monitor OEV261H...
-
Page 16: Outline
Important Information — Please Read Before Use Outline The 26 inch OEV261H LCD display panel has been designed for use as a medical monitor. The OEV261H is an LCD monitor designed to be used with Olympus endoscopes, light sources, video system centers, camera control units and ultrasound centers. -
Page 17: Chapter 1 Checking The Package Contents
Match all items in the package with the components shown below. Inspect each item for damage. If the instrument is damaged, a component is missing or, you have any questions, do not use the monitor; immediately contact Olympus. High definition LCD monitor... -
Page 18: Chapter 2 Controls And Their Functions
Chapter 2 Controls and Their Functions Video monitor unit Front Tally Front panel (page 15) Rear Rear panel (page 17) Tally lamp When a LCD panel backlight or inverter circuit is malfunctioning, the lamp flashes orange. High definition LCD monitor OEV261H... -
Page 19: Front Panel
FACTORY : Factory default settings INPUT button ( Selects the input terminal for PORT A and PORT B signals. Two images displayed in PIP or POP are called PORT A and PORT B in this manual. High definition LCD monitor OEV261H... - Page 20 Press to confirm settings in a menu or to go to a submenu. The buttons are made of plastic film. Do not use pointed objects such as fingernails, pens or screwdrivers to press the buttons, as the resulting damage or deformation could prevent proper contact. High definition LCD monitor OEV261H...
-
Page 21: Rear Panel
/RGB terminal (BNC) This is the YP /RGB signal input terminal. OUT : This is the input signal output terminal. Regardless of On/Off of the power supply, the YP /RGB input signal is output at all times. High definition LCD monitor OEV261H... - Page 22 1 kΩ. Making a connection to the OUT terminal will automatically release the 1 kΩ termination. ∗3: When a device is connected to the OUT terminal, 1080p and computer input and other broadband signals may distort character outlines and other details. High definition LCD monitor OEV261H...
-
Page 23: Ac Adapter
This switch turns the AC adapter on and off. AC POWER LED This lamp lights green when the AC POWER switch is set to on. DC OUT terminal This is the DC output terminal. This terminal enables connection of a DC cord. High definition LCD monitor OEV261H... -
Page 24: Chapter 3 Installation And Connection
Prepare this monitor and compatible equipment (shown in the “System chart” in the Appendix) before each use, and refer to the instruction manuals of each system component. Install and connect the equipment as following pages. High definition LCD monitor OEV261H... -
Page 25: Installing The Monitor
Fix the monitor onto a 100 × 200 mm monitor mount using the six screws provided. Or fix the monitor onto a 100 × 100 mm monitor mount using the four screws provided. For installation procedures, refer to the instruction manual for the monitor mount. High definition LCD monitor OEV261H... - Page 26 Do not install the monitor on mobile workstations other than those listed in this instruction manual. Otherwise, the mobile workstation may tip, injury to the operator or damage of the monitor/equipment on the mobile workstation may result. High definition LCD monitor OEV261H...
-
Page 27: Installing The Ac Adapter
Level position: correct Vertical position: incorrect • This instrument may become hot after an extended period of operation. Do not place heat-sensitive material near this instrument. High definition LCD monitor OEV261H... -
Page 28: Connection To An Ac Mains Power Supply
Connect the power cord to the AC IN terminal on the AC adapter (see Figure 3.1). Use the supplied screw (for securing power cord) and the power cord hook to secure the power cord to the AC adapter. Power cord hook Screw Figure 3.1 High definition LCD monitor OEV261H... - Page 29 Slide the DC cord into the DC IN terminal on the monitor until it locks in place (see Figure 3.3). Figure 3.3 Connect the power cord to the wall mains outlet. The power cord supplied with this should be connected to the wall mains outlet or mobile workstation. High definition LCD monitor OEV261H...
-
Page 30: Chapter 4 Inspection And Setup Before Use
Chapter 10, “Troubleshooting”. If this cannot restore the normal operation, contact Olympus. Using the LCD monitor (OEV261H) while an irregularity is suspected does not only result in malfunction but may also cause an electric shock, injury and/or fire. -
Page 31: Inspection Of The Displayed Image
Observe the palm of a hand, for example, with the endoscope and confirm that the endoscopic image is normal. Confirm that there are no cracks in the LCD panel. High definition LCD monitor OEV261H... -
Page 32: Chapter 5 Screen Menu And Operation Of Front Panel
Chapter 5 Screen Menu and Operation of Front Panel Chapter 5 Screen Menu and Operation of Front Panel PRESET button Previously recorded Olympus settings or user original settings can be loaded, and user original settings can be saved. Load of recorded settings to select... - Page 33 Video system center OTV-S7Pro, OTV-S7V ∗1 ∗1 Camera control unit OTV-SP1C , OTV-SP1C-G ∗1 ∗1 Video system OTV-SI , OTV-SC It does not use PRESET A – E, I, J ∗1: Need to change the setting of input terminal. High definition LCD monitor OEV261H...
- Page 34 PORT A INPUT Y/C PORT A INPUT Y/C GPI5 UNDEF UNDEF UNDEF GPI6 UNDEF UNDEF UNDEF GPI7 UNDEF UNDEF UNDEF GPI8 UNDEF UNDEF UNDEF CONTROL CONTROL LOCK FRONT LOCK MENU MENU MENU INPUT PORT A SDI1 PORT B High definition LCD monitor OEV261H...
- Page 35 PORT A INPUT Y/C GPI5 UNDEF UNDEF UNDEF GPI6 UNDEF UNDEF UNDEF GPI7 UNDEF UNDEF UNDEF GPI8 UNDEF UNDEF UNDEF CONTROL CONTROL LOCK FRONT LOCK MENU MENU MENU INPUT PORT A SDI1 SDI1 SDI1 PORT B SDI2 DVI-D1 High definition LCD monitor OEV261H...
- Page 36 UNDEF GPI5 UNDEF UNDEF UNDEF GPI6 UNDEF UNDEF UNDEF GPI7 UNDEF UNDEF UNDEF GPI8 UNDEF UNDEF UNDEF CONTROL CONTROL LOCK FRONT LOCK MENU MENU MENU INPUT PORT A SDI1 SDI1 PORT B DVI-D1 SDI2 DVI-D1 High definition LCD monitor OEV261H...
- Page 37 PORT A INPUT RGB/YP GPI2 PORT A INPUT VIDEO GPI3 GPI4 PORT A INPUT Y/C GPI5 UNDEF GPI6 UNDEF GPI7 UNDEF GPI8 UNDEF CONTROL CONTROL LOCK FRONT LOCK MENU INPUT PORT A SDI1 PORT B SDI2 High definition LCD monitor OEV261H...
- Page 38 Press [Enter] and a confirmation menu appears on the monitor. to move the cursor. Select [YES] and press [ENTER] to save the user original settings; the FILE SAVE submenu reappears. Select [NO] and press [ENTER] or [PRESET] to cancel; the FILE SAVE submenu reappears. High definition LCD monitor OEV261H...
-
Page 39: Input Button
∗ When the control lock is engaged, the key mark appears on the monitor and operation is disabled. INPUT button The input terminal for PORT A and PORT B signals can be selected. to move the cursor up, down, left, and right. High definition LCD monitor OEV261H... -
Page 40: Menu Button
Refer to Chapter 6, “Submenu Operations”. ∗ To exit the MENU, either press the MENU button again or wait for 120 seconds. High definition LCD monitor OEV261H... - Page 41 Chapter 5 Screen Menu and Operation of Front Panel ∗ For a list of the items in the MENU, refer to the following. High definition LCD monitor OEV261H...
-
Page 42: Pip Button
∗ PIP button operations are disabled when the FLIP button is used. ∗ When the control lock is engaged, the key mark appears and operation is disabled. ∗ An example showing the PIP DISPLAY POSITION at (the top right of the screen). High definition LCD monitor OEV261H... -
Page 43: Pop Button
∗ POP button operations are disabled when the FLIP button is used. ∗ When the control lock is engaged, the key mark appears and operation is disabled. ∗ An example of POP DISPLAY POSITION in MODE1. High definition LCD monitor OEV261H... -
Page 44: Scan Button
∗ When the control lock is engaged, the key mark appears on the monitor and operation is disabled. ∗1: Function Name: Indicates the name of a function. Select display or hide. ∗2: Function Status: Shows the status of the selected function. High definition LCD monitor OEV261H... -
Page 45: Status Display
Dual screen display • The first line displays the names of the input terminals for both PORT A and B. The second line displays signal format. The third line displays PIP, POP and control lock status. High definition LCD monitor OEV261H... - Page 46 It may also indicate that the format selected in the “INPUT CONFIG” menu does not match the input signal. • “NO SIGNAL” appears if no signal is input. • “UNSUPPORT SIGNAL” and “NO SIGNAL” may not be properly displayed. High definition LCD monitor OEV261H...
- Page 47 Table 5.1 When signals other than the above mentioned are input, “UNSUPPORT SIGNAL” is displayed. ∗1: Only compatible with VESA (Video Electronics Standards Association) Reduced Blanking (Clock: 154 MHz, Hsync: positive logic, Vsync: negative logic). High definition LCD monitor OEV261H...
-
Page 48: Chapter 6 Submenu Operations
Press [ENTER] and the set submenu setting turns green. to change the set value. Use [ENTER] to confirm the change; the submenu selection screen reappears. Use [MENU] to cancel the change; the submenu selection screen reappears. High definition LCD monitor OEV261H... - Page 49 • DVI-COMP. Selects COMP. input. DVI-D2 Selects the format of signals input to the DVI-D2 input terminal. • DVI-VIDEO Selects component input. • DVI-COMP. Selects COMP. input. Fiber adapter is connected to this DVI-D2 terminal. High definition LCD monitor OEV261H...
-
Page 50: Comp
Use [ENTER] to confirm the change; the submenu selection screen reappears. Use [MENU] to cancel the change; the submenu selection screen reappears. ∗ These settings are used for each RGB-COMP. and HD15 input terminal. High definition LCD monitor OEV261H... - Page 51 800 × 600 (60 Hz) 1050 1024 × 768 (60 Hz) 1344 1280 × 768 (60 Hz) 1680 1280 × 1024 (60 Hz) 1688 1600 × 1200 (60 Hz) 2160 1920 × 1200 (60 Hz) 2080 High definition LCD monitor OEV261H...
-
Page 52: Video Config
∗1: To use USER ∗∗ adjustable settings 0 – 63, select USER and press ENTER once so that USER changes to light blue. Then use to change ∗∗. Press ENTER once more to change USER back to white and confirm the setting. High definition LCD monitor OEV261H... -
Page 53: White Balance
[ENTER]. to change the set value. Use [ENTER] to confirm the change; the submenu selection screen reappears. Use [MENU] to cancel the change; the submenu selection screen reappears. High definition LCD monitor OEV261H... - Page 54 Adjusts the BIAS for the blue component. • –512 to 0 to 511 (default value: 0) RESET Resets the COLOR TEMP. adjustments to their factory default settings. Each COLOR TEMP. selected using GAIN and BIAS was restored to its factory default. High definition LCD monitor OEV261H...
-
Page 55: Video Input
See page 54 for a description of a setup procedure. Adjusts RED GAIN 0 – 60 (default value: 30) GREEN Adjusts GREEN GAIN 0 – 60 (default value: 30) BLUE Adjusts BLUE GAIN 0 – 60 (default value: 30) High definition LCD monitor OEV261H... - Page 56 HD signal: MODE3 to 7 described above enable only 1080i (60 Hz/59.94 Hz/50 Hz) or 1080p (60 Hz/59.94 Hz/50 Hz) HD signals, other HD signals are impossible. target screen target screen Normal screen PIP screen See page 61 for a description of a scan size. High definition LCD monitor OEV261H...
- Page 57 • 0 – 30 SHARPNESS V Sets vertical sharpness. When COMP. input is selected, the set value is — (line). This cannot be selected, nor any other selection can be made. • 0 – 30 High definition LCD monitor OEV261H...
- Page 58 Setting COLOR MODE Select COLOR MODE in the INPUT submenu screen and press [ENTER]. The screen for selecting COLOR MODE appears. to select a COLOR MODE (1 – 10) and press [ENTER]. The ITEM selection screen appears. High definition LCD monitor OEV261H...
- Page 59 [YES] and press [ENTER]. • The settings are now saved and the previous screen reappears. • To cancel previous settings, select [NO] and press [ENTER]. The settings are not saved and the previous screen reappears. High definition LCD monitor OEV261H...
- Page 60 MODE7 MODE7 MODE7 SCAN SIZE SD MODE2 MODE2 MODE2 MODE2 MODE2 MODE2 MODE2 MODE2 MODE2 MODE2 MONO PHASE CHROMA BRIGHT CONTRAST SHARPNESS HIGH HIGH HIGH HIGH HIGH HIGH MODE SHARPNESS H 0 SHARPNESS V 0 High definition LCD monitor OEV261H...
- Page 61 MODE7 MODE7 MODE7 SCAN SIZE SD MODE2 MODE2 MODE2 MODE2 MODE2 MODE2 MODE2 MODE2 MODE2 MODE2 MONO PHASE CHROMA BRIGHT CONTRAST SHARPNESS HIGH HIGH HIGH HIGH HIGH HIGH MODE SHARPNESS H 0 SHARPNESS V 0 High definition LCD monitor OEV261H...
- Page 62 MODE3 MODE3 MODE3 SCAN SIZE SD MODE2 MODE2 MODE2 MODE2 MODE2 MODE2 MODE2 MODE2 MODE2 MODE2 MONO PHASE CHROMA BRIGHT CONTRAST SHARPNESS HIGH HIGH HIGH HIGH HIGH HIGH MODE SHARPNESS H 0 SHARPNESS V 0 High definition LCD monitor OEV261H...
- Page 63 SCAN SIZE HD SCAN SIZE SD MODE2 MODE2 MODE2 MODE2 MODE2 MODE2 MODE2 MODE2 MODE2 MODE2 MONO PHASE CHROMA BRIGHT CONTRAST SHARPNESS HIGH HIGH HIGH HIGH HIGH HIGH MODE SHARPNESS H 0 SHARPNESS V 0 High definition LCD monitor OEV261H...
- Page 64 MODE7 MODE7 MODE7 SCAN SIZE SD MODE2 MODE2 MODE2 MODE2 MODE2 MODE2 MODE2 MODE2 MODE2 MODE2 MONO PHASE CHROMA BRIGHT CONTRAST SHARPNESS HIGH HIGH HIGH HIGH HIGH HIGH MODE SHARPNESS H 0 SHARPNESS V 0 High definition LCD monitor OEV261H...
- Page 65 Magnifies special area 1 (1422 × 1064) of an HD signal to horizontal panel size (1920). MODE5 Magnifies special area 1 (1422 × 1064) of an HD signal to vertical panel size (1200). MODE6 Magnifies special area 2 (1280 × 1008) of an HD signal to horizontal panel size (1920). High definition LCD monitor OEV261H...
-
Page 66: System Config
Press [ENTER] and the set submenu setting turns green. to change the set value. Use [ENTER] to confirm the change; the submenu selection screen reappears. Use [MENU] to cancel the change; the submenu selection screen reappears. High definition LCD monitor OEV261H... - Page 67 Power save operation is not activated. • ON ..........The backlight dims when no signal (NO SIGNAL) lasts 60 seconds or longer. Signal input or front panel operation will restore the backlight to its normal brightness. High definition LCD monitor OEV261H...
-
Page 68: Function
Press [ENTER] and the set submenu setting turns green. to change the set value. Use [ENTER] to confirm the change; the submenu selection screen reappears. Use [MENU] to cancel the change; the submenu selection screen reappears. High definition LCD monitor OEV261H... - Page 69 ∗3: When the same INPUT is selected for both PORT A/B, both PORT A/B comes available. ∗4: When signals input via RGB-COMP or HD15 is selected, “INVALID FUNCTION” appears to indicate that operation is disabled. ∗5: When POP is not selected, “INVALID FUNCTION” appears to indicate that operation is disabled. High definition LCD monitor OEV261H...
-
Page 70: Window Config
Pressing when the cursor is at the top changes the cursor back to the tab selection. Pressing when the cursor is at the bottom moves the cursor to the top. High definition LCD monitor OEV261H... - Page 71 • ......Top right of the screen • ......Bottom right of the screen POP (Picture out In dual screen display, the PORT A screen appears to the Picture) left of the PORT B screen. High definition LCD monitor OEV261H...
- Page 72 PORT B video on the right screen. • MODE2...PORT B video appears on the left screen and the PORT A video on the right screen. An example showing POP DISPLAY position in MODE2. High definition LCD monitor OEV261H...
- Page 73 ∗4: In POP mode, the POP DISPLAY POSITION setting is also reflected. ∗5: An example showing PIP DISPLAY POSITION at (the top right of the screen). ∗6: An example of POP DISPLAY POSITION in MODE1. High definition LCD monitor OEV261H...
- Page 74 • Bottom left (600, 982) • Top right (1780, 98) • Bottom right (1780, 982) MODE5 • Top left (865, 177) • Bottom left (865, 902) • Top right (1643, 177) • Bottom right (1643, 902) High definition LCD monitor OEV261H...
-
Page 75: Remote Config
Enables and disables all GPI functions enabled by GPI ENABLE. Assigning a function to a Pin allows you to enable separate GPI control for each item. MENU operations are not available when this function is enabled. Operation is interlocked with GPI status. High definition LCD monitor OEV261H... - Page 76 • PORT B INPUT SDI2 • PORT B INPUT DVI-D1 • PORT B INPUT DVI-D2 ∗1: When the same INPUT is selected for both PORT A and B, both PORT A and B comes available. High definition LCD monitor OEV261H...
-
Page 77: 6.10 Control
Press [ENTER] and the set submenu setting turns green. Press to select and then use to change the set value. Use [ENTER] to confirm the change; the submenu selection screen reappears. Use [MENU] to cancel the change; the submenu selection screen reappears. High definition LCD monitor OEV261H... - Page 78 ∗1: The menu can be displayed when the control lock is engaged. ∗2: Selecting MENU, the key mark is displayed in each submenu. Selecting ALL, the key mark is displayed for STATUS, FUNCTION, MENU, INPUT and PRESET. High definition LCD monitor OEV261H...
-
Page 79: Chapter 7 Remote Specifications
Connected: MODE3, Open: OFF PORT A SCAN SIZE MODE5 Switches PORT A scan size. ∗4 Level operation: Connected: MODE5, Open: OFF PORT A SCAN SIZE MODE7 Switches PORT A scan size. ∗4 Level operation: Connected: MODE7, Open: OFF High definition LCD monitor OEV261H... - Page 80 PORT A INPUT SDI2 Switches PORT A input system to SDI2. Level operation: ∗2 Connected: ON, Open: OFF PORT A INPUT DVI-D1 Switches PORT A input system to Level operation: DVI-D1. ∗2 Connected: ON, Open: OFF High definition LCD monitor OEV261H...
- Page 81 ∗4: These modes have the following priority: MODE3 > MODE7 > MODE5. Operating conditions For information on the operating conditions of PIP, POP and FLIP control, see the operating conditions for each respective item. High definition LCD monitor OEV261H...
-
Page 82: Chapter 8 Care, Storage, And Disposal
Wipe the surface of the monitor using a soft, lint-free cloth moistened with 70% ethyl or isopropyl alcohol to remove dust, dirt, etc. Dry the monitor with a clean, lint-free cloth. High definition LCD monitor OEV261H... -
Page 83: Storage
Store the monitor at room temperature in the horizontal in a clean, dry and stable location. Disposal When disposing of this monitor or any of its components, follow all applicable national and local laws and guidelines. High definition LCD monitor OEV261H... -
Page 84: Chapter 9 Inspections
Conventional after-sales service that replaces parts when they malfunction should therefore be combined with a regularly conducted comprehensive service plan to maintain normal operation and prevent unforeseen problems with the equipment. High definition LCD monitor OEV261H... -
Page 85: Chapter 10 Troubleshooting
Troubles or failures other than those listed in the following table need repair. As repair performed by persons who are not qualified by Olympus could cause patient or user injury and/or equipment damage, be sure to contact Olympus for repair. - Page 86 This symptom may be caused by a Turn the power monitor off, wait flashes orange. malfunctioning LCD panel backlight or 10 seconds or more and turn the power on inverter circuit. again. If the abnormality cannot be solved, contact Olympus. High definition LCD monitor OEV261H...
-
Page 87: 10.2 Returning The Monitor For Repair
Chapter 10 Troubleshooting 10.2 Returning the monitor for repair Olympus is not liable for any injury or damage that occurs as a result of repairs attempted by non-Olympus personnel. When returning the monitor for repair, contact Olympus. With the monitor, include a description of the malfunction or damage and the name and telephone number of the individual at your location who is most familiar with the problem. -
Page 88: Appendix
For further details, contact Olympus. If combinations of equipment other than those shown below are used, the full responsibility is assumed by the medical treatment facility. High definition LCD monitor OEV261H... - Page 89 EVIS EXERA II xenon light source (CLV-180) ∗1 EVIS EXERA xenon light source (CLV-160) These equipment may not be available in some areas. ∗1 Scope cable This product enclosed with the dotted line conforms to EMC (Ed.3). ∗2 High definition LCD monitor OEV261H...
- Page 90 VISERA Xenon light source Videoscope (CLV-S45) Xenon light source (CLV-S40) Halogen light source (CLH-SC) These equipment may not be available in some areas. ∗1 This product enclosed with the dotted line conforms to EMC (Ed.3). ∗2 High definition LCD monitor OEV261H...
- Page 91 Appendix Connection cables for OEV261H (Video system centers CV-260SL, CV-260, CV-180, CV-165, CV-160, CV-145, endoscopic ultrasound centers EU-ME1, EU-M2000, EU-M60, EU-M30S, EU-C2000 and EU-C60) Video cables HDTV Monitor Monitor Monitor SDI cable monitor cable cable cable cable cable video MAJ-1464...
- Page 92 Appendix Connection cable for OEV261H (Video system centers CV-260SL, CV-260, CV-180, CV-165, CV-160, CV-145, endoscopic ultrasound centers EU-M2000, EU-M60, EU-M30S, EU-C2000 and EU-C60) Remote cable HDTV monitor remote HDTV monitor remote cable MAJ-1161 (4 m), cable MAJ-1465 (15 m) MAJ-1230 (7 m) EVIS video system center –...
- Page 93 Appendix Connection cables for OEV261H (Video system centers OTV-S7Pro, OTV-S7V, camera control units OTV-SPIC and OTV-SPIC-G, video system OTV-SI, OTV-SC) Video cables Monitor Monitor RGB cable Y/C cable BNC cable SDI cable cable cable MH-984 MH-985 MB-677 MAJ-1464 MAJ-1462 MAJ-921...
-
Page 94: Transportation, Storage, And Operation Environment/Specifications
LCD monitor (OEV261H) Power supply: 24 V DC, 5A 5 V DC, 0.03A AC adapter AC IN: 100 – 240 V, 50/60 Hz, 1.6 – 0.6 A DC OUT: 24 V 5.0 A, 5 V 0.03 A High definition LCD monitor OEV261H... - Page 95 HDCP compatible Vertical frequency: 50.0 – 60.0 Hz Horizontal frequency: 31.5 – 67.5 kHz Dot clock: 25 – 165 MHz Control signal input: GPI input D-SUB 9-pin × 1 RS-232C input D-SUB 9-pin × 1 High definition LCD monitor OEV261H...
- Page 96 DC OUT 5 V, 1 A output: Storage of settings Settings are stored if LAST is selected as the value of [POWER ON SETUP] in SYSTEM CONFIG submenu when the power switch is turned off. High definition LCD monitor OEV261H...
- Page 97 Electronic Equipment, this symbol indicates that the product must not be disposed of as unsorted municipal waste, but should be collected separately. Refer to your local Olympus distributor for return and/or collection systems available in your country Applied standards; This instrument complies with the standards IEC 60601-1-2: 2001 listed in the left column.
-
Page 98: Emc Information
Voltage Complies This instrument stabilizes its own radio variability and has no effect fluctuations/flicker such as flicker in lighting apparatus. emissions IEC 61000-3-3 High definition LCD monitor OEV261H... - Page 99 It is recommended to use this instrument by (50/60 Hz) maintaining enough distance from any magnetic field equipment that operates with high current. IEC 61000-4-8 is the AC mains power supply prior to application of the test level. High definition LCD monitor OEV261H...
- Page 100 • Electromagnetic interference may occur on this instrument near a high-frequency electrosurgical equipment and/or other equipment marked with the following symbol: High definition LCD monitor OEV261H...
- Page 101 Portable and mobile RF communications equipment such as cellular phones should be used no closer to any part of this instrument, including cables than the recommended separation distance calculated from the equation applicable to the frequency of the transmitter. High definition LCD monitor OEV261H...
-
Page 102: Maintenance
Maintenance Maintenance Olympus recommends having Olympus endoscopic equipment (endoscopes, reprocessors, light sources etc.) inspected by an Olympus certified service technician at least once a year, to maintain the proper function of the equipment. High definition LCD monitor OEV261H... - Page 104 ©2009 OLYMPUS MEDICAL SYSTEMS CORP. All rights reserved. No part of this publication may be reproduced or distributed without the express written permission of OLYMPUS MEDICAL SYSTEMS CORP. OLYMPUS is a registered trademark of OLYMPUS CORPORATION. Trademarks, product names, logos, or trade names used in this document are generally registered trademarks or trademarks of each company.
- Page 105 Manufactured by 2951 Ishikawa-cho, Hachioji-shi, Tokyo 192-8507, Japan Fax: (042)646-2429 Telephone: (042)642-2111 Distributed by 3500 Corporate Parkway, P.O. Box 610, Center Valley, PA 18034-0610, U.S.A. Fax: (484)896-7128 Telephone: (484)896-5000 5301 Blue Lagoon Drive, Suite 290 Miami, FL 33126-2097, U.S.A. Fax: (305)261-4421 Telephone: (305)266-2332 (Premises/Goods delivery) Wendenstrasse 14-18, 20097 Hamburg, Germany (Letters) Postfach 10 49 08, 20034 Hamburg, Germany Fax: (040)23773-4656 Telephone: (040)23773-0...
Need help?
Do you have a question about the OEV261H and is the answer not in the manual?
Questions and answers