
Subscribe to Our Youtube Channel
Related Manuals for Interlogix TruVision TVF-5201


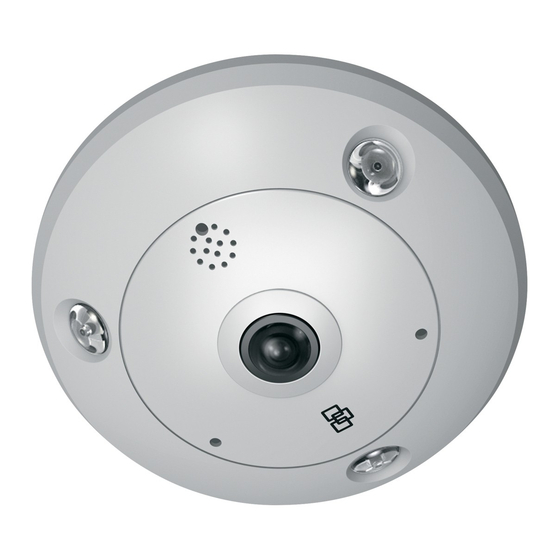
Summary of Contents for Interlogix TruVision TVF-5201
- Page 1 TruVision 6MP and 12MP 360° Camera Configuration Manual P/N 1073657-EN • REV A • ISS 11OCT19...
- Page 2 Copyright © 2019 United Technologies Corporation. Interlogix is part of UTC Climate, Controls & Security, a unit of United Technologies Corporation. All rights reserved. Trademarks and Trade names used in this document may be trademarks or patents registered trademarks of the manufacturers or vendors of the respective products.
-
Page 3: Table Of Contents
Content Introduction 3 Network access 4 Checking your web browser security level 4 Activating the camera 5 Overview of the camera web browser 7 Camera configuration 12 Local configuration 12 Configuration 13 Defining the system time 15 Defining RS-485 settings 16 Maintenance 16 Configuring the network settings 18 Recording parameters 25... - Page 4 RTSP authentication 77 IP address filter 77 Defining the security service 78 Restore default settings 79 Import/export a configuration file 79 Upgrade firmware 79 Reboot camera 81 Camera operation 82 Log on and off 82 Live view mode 82 Play back recorded video 82 Snapshots 85 Search event logs 85 Operating PTZ control 87...
-
Page 5: Introduction
Introduction This is the configuration manual for the following TruVision IP camera models: TVF-5201 (TruVision 6MPx 360° IP Dome, indoor, 1.29 mm) TVF-5202 (TruVision 12MPx 360° IP Dome, indoor, 1.29 mm) TVF-5203 (TruVision 6MPx 360° IP Dome, outdoor, 1.29 mm) ... -
Page 6: Network Access
Network access This manual explains how to configure the camera over the network with a web browser. TruVision IP cameras can be configured and controlled using Microsoft Internet Explorer (IE) and other browsers. The procedures described use Microsoft Internet Explorer (IE) web browser. Checking your web browser security level When using the web browser interface, you can install ActiveX controls to connect and view video using Internet Explorer (the camera is not compatible with Microsoft Edge). -
Page 7: Activating The Camera
To add the camera’s IP address to Internet Explorer’s list of trusted sites: 1. Open Internet Explorer. 2. Click Tools, and then Internet Options. 3. Click the Security tab and then select the trusted sites icon. 4. Click the Sites button. - Page 8 For the camera to enable DHCP by default, you must activate the camera via TruVision Device Manager. Please refer to the following section, “Activation via TruVision Device Manager”. 3. Enter the password in the password field. Note: A valid password range must be between 8 and 16 characters. You can use a combination of numbers, lower and upper case letters, and special characters: _ - , * &...
-
Page 9: Overview Of The Camera Web Browser
5. Change the device IP address to the same subnet with your computer by either modifying the IP address manually or checking the check box of Enable DHCP. 6. Input the password and click the Save button to activate your IP address modification. - Page 10 Figure 1: Browser interface (Live view shown) Name Description Live view Click to view live video. Playback Click to play back video. Picture Click to search snapshots. Application Click to enter the heat map statistics interface and search, view, download the counting data stored in the local storage or network storage.
- Page 11 Name Description Display control. See Table 1 below for further information. PTZ control. See “Operating PTZ control” on page 87 for further information. Display control You can select a display mode for the layout of the live view window. The description of each display mode is shown in the table below.
- Page 12 Name Description Panoramic view. Live view with four PTZ views. Live view with one 360° view and three PTZ views. Live view with a four-PTZ-fusion view. In display mode, Software display means that the obtained live view video is decoded using the CPU of your PC that is running the web browser.
- Page 13 Live view with a cylinder view Live view with one 360° view and three PTZ views TruVision 6MP and 12MP 360° Camera Configuration Manual...
-
Page 14: Camera Configuration
Camera configuration This chapter explains how to configure the cameras through a web browser. Once the camera hardware has been installed, configure the camera’s settings through the web browser. You must have administrator rights in order to configure the cameras over the internet. -
Page 15: Configuration
Parameters Description Options include: TCP, UDP, MULTICAST and HTTP. TCP: Ensures complete delivery of streaming data and better video quality, yet the real-time transmission will be affected. UDP: Provides real-time audio and video streams. HTTP: Allows the same quality as of TCP without setting specific ports for streaming under some network environments. - Page 16 Figure 3: Configuration window (Device Information window selected) Parameters Description 1. System Displays the basic device information including serial number and the current firmware version, time settings, RS-485 serial port parameters, maintenance, and about the system. See pages 15 and 16 for further information. Security Defines who can use the camera, their passwords and access privileges, RTSP authentication, IP address filter, and telnet access.
-
Page 17: Defining The System Time
Parameters Description 10 Intersection Analysis Intersection Analysis is used to monitor the human flow in an intersection-like scene. See “Intersection analysis” on page 66 for further information. Defining the system time NTP (Network Time Protocol) is a protocol for synchronizing the clocks of network devices, such as IP cameras and computers. -
Page 18: Defining Rs-485 Settings
4. Select Enable DST to enable the DST function, and set the start and end dates of the DST period. 5. Click Save to save changes. Defining RS-485 settings The RS-485 serial port is used to control extra devices that support the 485 protocol (Pelco D or Pelco P), such as PTZ devices, lighting devices or other devices. - Page 19 Figure 4: Maintenance window Parameters Description Reboot Reboot the device Default Restore Reset all the parameters, except the IP parameters and user information, to the default settings. Default Restore all the parameters to the factory default. Notes: • After restoring the default settings, the IP address is also restored to the default IP address, please be careful for this action.
-
Page 20: Configuring The Network Settings
Configuring the network settings Accessing the camera through a network requires that you define certain network settings. Use the “Network” folder to define the network settings. See Figure 5 below for further information. Figure 5: Network window (TCP/IP window shown) Menu tabs Description TCP/IP... - Page 21 Menu tabs Description 239.255.255.255. Only specify this option if you are using the multicast function. Some routers prohibit the use of multicast function in case of a network storm. Enable Multicast Discovery: Enables the automatic detection of the online network camera via private multicast protocol in the LAN. DNS Server: Specifies the DNS server for your network.
- Page 22 Menu tabs Description QoS (Quality of Service) can help solve the network delay and network congestion by configuring the priority of data sending. Enable the option in order to solve network delay and network congestion by configuring the priority of data sending. See page 24 for setup information.
- Page 23 To define the PPPoE parameters: 1. From the menu toolbar, click Configuration > Network > PPPoE. 2. Select Enable PPPoE to enable this feature. 3. Enter User Name, Password, and Confirm password for PPPoE access. 4. Click Save to save changes. To define the port parameters: 1.
- Page 24 To define the FTP parameters: 1. From the menu toolbar, click Configuration > Network > FTP. 2. Configure the FTP settings, including server address, port, user name, password, directory, and upload type. Anonymous: Select the check box to enable the anonymous access to the FTP server.
- Page 25 Attached Snapshot: Select the check box of Attached Snapshot if you want to send emails with attached alarm images. Interval: This is the time between two actions of sending attached images. Authentication: If your email server requires authentication, select this check box to use authentication to log in to this server.
- Page 26 Click to save the settings. -or- To create a certificate request: Click the Create button beside “Create Certificate Request”. Enter the country, host name/IP and the other information requested. 3. Click to save the settings. Download the certificate request and submit it to the trusted certificate authority for signature, such as Symantec or RSA.
-
Page 27: Recording Parameters
Note: The switch or router to which the camera is connected must also support the IEEE 802.1X standard, and a server must be configured. Please apply and register a user name and password for 802.1X in the server. Recording parameters You can adjust the video and audio recording parameters to obtain the picture quality and file size best suited to your needs. - Page 28 Parameter descriptions Bit Rate Control: Specifies whether variable or fixed bit rate is used. Variable produces higher quality results suitable for video downloads and streaming. Default is Constant. Video Quality: Specifies the quality level of the image. It can be set when variable bit rate is selected.
- Page 29 To configure audio settings: From the menu toolbar, click Configuration > Video/Audio > Audio. To configure ROI settings: 1. From the menu toolbar, click Configuration > Video/Audio > ROI. 2. Draw the region of interest on the image. Up to four regions can be drawn. 3.
-
Page 30: Video Image
For example, with an Interlogix NVR (please check Interlogix website for the latest NVR models supporting this feature), you can draw a virtual line in the NVR playback window, and search the objects or people crossing this virtual line. Note: Only cross line and intrusion detection can support dual-VCA mode. - Page 31 Figure 7: Camera image settings menu – Display Settings tab Parameter Description 1. Image Settings Auto D/N Switch The camera automatically switches between day and night modes. All image settings remain the same for both modes. The image settings are: Image Adjustment, Exposure Settings, Day/Night Switch, Backlight Settings, White Balance, Image Enhancement, and Video Adjustment.
- Page 32 Parameter Description Scheduled D/N The camera switches between the day and night modes according to the Switch schedule configured (see figure below). The start and end times shown are for day mode. The other time period is for night mode. There are three tabs to configure the day/night settings: Common: The settings are identical for both day and night modes for Exposure Settings, Day/Night Switch, and Video Adjustment.
- Page 33 Parameter Description Smart Supplement When enabled, it can avoid over exposure issue. Light IR Light Select On/OFF to Enable/disable IR. On: The IR LEDs are ON when the camera changes to night mode. Off: The IR LEDs are OFF when the camera changes to night mode Note: The IR LEDs are always OFF in day mode.
-
Page 34: Osd (On Screen Display)
Parameter Description Video Standard Select 50 Hz or 60 Hz. Select the value depending on the video standards; normally 50 Hz for PAL standard and 60 Hz for NTSC standard. Capture Mode It's the selectable video input mode to meet the different demands of field of view and resolution. -
Page 35: Privacy Masks
6. Select the time and date formats from the Time format Date format drop-down list boxes. 7. Select a display mode for the camera from the Display Mode drop-down list box. Display modes include: • Transparent & Not flashing. The image appears through the text. •... -
Page 36: Picture Overlay
Figure 8: Camera image settings menu – Privacy mask window To add privacy mask area: 1. From the menu toolbar, click Configuration > Image > Privacy Mask. 2. Select the Enable Privacy Mask check box. 3. Click Draw Area. 4. Click and drag the mouse in the live video window to draw the mask area. Note: You are allowed to draw up to four areas on the same image. -
Page 37: Motion Detection Alarms
To add a picture: 1. From the menu toolbar, click Configuration > Image > Picture Overlay. 2. Click Browse to select a picture. 3. Click Upload to upload it. 4. Select the Enable Picture Overlay check box to enable the function. 5. - Page 38 Figure 9: Motion detection window Defining a motion detection alarm requires the following tasks: 1. Area settings: Define the on-screen area that can trigger a motion detection alarm and the detection sensitivity level (see Figure 9, item 1). 2. Arming schedule: Define the schedule during which the system detects motion (see Figure 9, item 2).
- Page 39 Note: You can draw up to 8 motion detection areas on the same image. 5. Click Stop Drawing to finish drawing. Click Clear All to delete all areas marked and restart drawing. 6. Move the Sensitivity slider to set the sensitivity of the detection. All areas will have the same sensitivity level.
- Page 40 Trigger Alarm Output Trigger external alarm outputs when an event occurs. Select “Select All” or each individual alarm output. Note: This option is only supported by cameras that support alarm output. Trigger Recording Triggers the recording to start in the camera. Click Save to save changes.
- Page 41 7. Move the Sensitivity slider to set the sensitivity of the detection for the selected areas. 8. Move the Percentage slider to set the proportion of the object that must occupy the defined area to trigger an alarm. 9. Click Save to save the changes for that area.
-
Page 42: Video Tampering
Trigger Alarm Output Trigger external alarm outputs when an event occurs. Check “Select All” or each individual alarm output. Note: This option is only supported by cameras that support alarm output. Trigger Recording Triggers the recording to start in the camera. 14. -
Page 43: Alarm Inputs And Outputs
Send Email Send an email to a specified address when there is a motion detection alarm. Note: You must configure email settings before enabling this option. See “To set up the email parameters” on page 22 for further information. If you want to send the event snapshot together with the email, select the Attached Snapshot option. -
Page 44: Exception Alarms
Trigger Recording Triggers the recording to start in the camera. 5. Click Save to save changes. To define an alarm output: 1. From the menu toolbar, click Configuration > Basic Event > Alarm Output. 2. Select one alarm output channel from the Alarm Output drop-down list. -
Page 45: Audio Exception Detection
To define exception alarms: 1. From the menu toolbar, click Configuration > Basic Event > Exception. 2. Under Exception Type, select an exception type from the drop-down list. 3. Specify the linkage method when an event occurs. Select one or more response methods for the system when a tamper-proof alarm is triggered. - Page 46 2. Select the Audio Loss Exception check box to enable the audio loss detection function. 3. Select the Sudden Increase of Sound Intensity Detection check box to detect sudden increase in sound in the surveillance scene. You can set the detection sensitivity and threshold for the sudden increase in sound.
-
Page 47: Intrusion Detection
Send Email Sends an email to a specified address when there is a motion detection alarm. Note: You must configure email settings before enabling this option. See “To set up the email parameters” on page 22 for further information. If you want to send the event snapshot together with the email, select the Attached Snapshot option. - Page 48 To define intrusion detection: 1. From the menu toolbar, click Configuration > Alarm/Event > Intrusion Detection. 2. Select the Enable Intrusion Detection check box to enable the function. 3. Click Draw Area, and then draw a rectangle on the image as the defense region. When you draw the rectangle, all lines should connect end-to-end to each other.
-
Page 49: Cross Line Detection
Send Email Send an email to a specified address when there is a motion detection alarm. Note: You must configure email settings before enabling this option. See “To set up the email parameters” on page 22 for further information. If you want to send the event snapshot together with the email, select the Attached Snapshot option. - Page 50 To define cross line detection: 1. From the menu toolbar, click Configuration > Alarm Event > Cross Line. 2. Select the Enable Cross Line detection check box to enable the function. 3. Click Draw Area. A crossing plane appears on the image. 4.
-
Page 51: Region Entrance Detection
Send Email Send an email to a specified address when there is a motion detection alarm. Note: You must configure email settings before enabling this option. See “To set up the email parameters” on page 22 for further information. If you want to send the event snapshot together with the email, select the Attached Snapshot option. - Page 52 2. Select the Enable check box to enable the function. 3. Select the region to be configured from the drop-down list. 4. Click the Draw Area button and then draw a rectangle on the image as the designated region. When you draw the rectangle, all lines should connect end-to-end to each other. Up to four areas are supported.
-
Page 53: Region Exiting Detection
9. Click Arming Schedule to set the arming schedule. 10. Click Linkage Method to select the linkage methods. Select one or more response methods for the system when a region entrance detection alarm is triggered. 11. Click Save to save the settings. Region exiting detection Region exiting detection function detects people, vehicle or other objects which exit from a pre-defined virtual region, and some certain actions can be taken when the... -
Page 54: Unattended Baggage Detection
Min. Size: The minimum size of a valid target. Targets smaller than this will not trigger detection. 6. Click Stop Drawing when finish drawing. 7. Drag the slider to set the sensitivity value. Sensitivity: Range [1-100]. Sensitivity stands for the percentage of the body part of an acceptable target that exits the pre-defined region. -
Page 55: Object Removal Detection
2. Select the Enable check box to enable the function. 3. Select the region to be configured from the drop-down list. 4. Click the Draw Area button and then draw a rectangle on the image as the designated region. When you draw the rectangle, all lines should connect end-to-end to each other. Up to four areas are supported. - Page 56 2. Select the Enable check box to enable the function. 3. Select the region to be configured from the drop-down list. 4. Click Area Settings and click Draw Area to start the area drawing. 5. Click on the live video to specify the four vertexes of the detection region, and right click to complete drawing.
-
Page 57: Recording Schedule
10. Repeat the above steps to configure other regions. Up to four regions can be set. You can click the Clear button to clear all pre-defined regions. 11. Click Arming Schedule to set the arming schedule. 12. Click Linkage Method to select the linkage methods. - Page 58 Overwrite The camera record is overwritten when Overwrite is enabled. Recording stream You can select Main Stream (Normal) or Substream for the recording stream. To set up a recording schedule: 1. From the menu toolbar, click Configuration > Storage > Record Schedule.
-
Page 59: Snapshot Parameters
configure the settings in the Motion Detection (see page 35) and Alarm Input (see page 41) windows. • Motion & Alarm: Video will be recorded when the motion and alarm are triggered at the same time. Besides configuring the recording schedule, you have to configure the settings in the Motion Detection (see page 35) and Alarm Input (see page 41) windows. - Page 60 Figure 13: Snapshot menu To set up scheduled snapshots: 1. From the menu toolbar, click Configuration > Storage > Snapshot. 2. Select Enable Timing Snapshot check box to enable continuous snapshots. 3. Select the desired format of the snapshot, such as JPEG. 4.
-
Page 61: Formatting The Storage Devices
3. Select the desired format of the snapshot, such as JPEG. 4. Select the desired resolution and quality of the snapshot. 5. Enter the time interval between two snapshots. Select the unit of time from the drop- down list: milliseconds or seconds. 6. -
Page 62: Configuring Nas Settings
2. Select the HDD No. tab to select the storage. 3. Click Format. A window appears to check your formatting permission. 4. Click to start formatting. To define the quota for recordings and snapshots: 1. Under Quota, enter the quota percentage for snapshots and recordings. 2. -
Page 63: People Counting
2. Enter the IP address of the network disk, and the NAS folder path. 3. Click Save to save the settings. People counting This function helps calculate the number of people entering or exiting a configured area and is primarily used with entrances or exits. Note: It is recommended to install the camera directly above the entrance/exit and aimed down at the entry/exit point to improve counting accuracy. - Page 64 3. Under the Rule submenu, click on the left of the live view image and draw a red count area. 4. Set the detection line. Draw a yellow detection line on the live video to detect and count the objects entering or exiting across the line.
- Page 65 B. Arming schedule: 1. Under the Rule submenu, click Arming Schedule to edit the arming schedule. 2. Click on the time bar and drag the mouse to select the time period. Note: Click the selected time period. You can adjust the time period to the desired time by either moving the time bar or input the exact time period.
-
Page 66: Heat Map
• You can upload people counting data to alarm recipient and client software through SDK and HTTP (if configured). To upload real-time data, select the Real-Time Upload Data check box. To upload data regularly, set the Data Statistics Cycle as desired. Note: If data uploading by HTTP is required, set up the HTTP Data Transmission parameters. - Page 67 1) Click Draw Area to draw a detection area. Draw an area by left-clicking the end- points in the live view window, and right-clicking to complete the area drawn. Note: Click Select All to select the whole live view window as the configured area.
-
Page 68: Intersection Analysis
6. Under Email Reports, select the frequency of sending email reports (daily report, weekly report, monthly report, or annual report). Heat map reports will be sent to all configured email addresses (see page 22 for information on setting up email addresses). - Page 69 Note: The detection of targets is influenced by the validity parameters and minimum and maximum size of targets, which are set under the Heat Map menu. See “Heat map” on page 64. Figure 14: Intersection analysis window To set up the intersection analysis: 1.
-
Page 70: Application
Application You can search, view, and download the counting data on people counting, heat map statistics, and intersection analysis that is stored in the local storage or network storage. An SD card must be installed in the camera in order to have the Application menu appear in the camera web browser. - Page 71 4. Select the start time and then click Counting. The counting result displays in the statistic result area. Click Table, Bar Chart, or Line Chart to display the result in different ways. Example of table format: Example of bar chart: Example of line chart: TruVision 6MP and 12MP 360°...
-
Page 72: Heat Map Statistics
Note: If you select Table to display the statistics, click the Export button to export the data to an Excel file. Heat map statistics A heat map is a graphical representation of data represented by colors. The heat map function of the camera is usually used to analyze the visit times and dwell time of people in a configured area. - Page 73 Figure 16: Example of a space heat map weekly report Time heat map: Dwell time People number of the pre-defined area is calculated by hour, day, or month. Click the Export button to export the data to an Excel file. Figure 17: Example of a time heat map weekly report Note: It is recommended that you do not adjust the electronic lens after the installation is completed as this may cause some inaccuracy to the data.
-
Page 74: Intersection Analysis Statistics
Intersection analysis statistics When enabled, the intersection analysis function lets you view and download the intersection analysis data from the Application tab. It displays the direction of flow of people in the configured area. You can display the data in different charts. An example of the results of an analysis is shown in Figure 18 below. - Page 75 To obtain intersection analysis statistics: 1. From the menu toolbar, click Application > Intersection Analysis Report. 2. Select a Flow In entrance from the drop-down list. 3. Select the report type: Daily report, Weekly report, Monthly report, or Annual report. •...
-
Page 76: Camera Management
Camera management This chapter describes how to use the camera once it is installed and configured. The camera is accessed through a web browser. User management This section describes how to manage users. You can: Add or delete users ... - Page 77 Admin: This is the system administrator. The administrator can configure all settings. Only the administrator can create and delete user accounts. Admin cannot be deleted. Operator: This user can only change the configuration of his/her own account. An operator cannot create or delete other users.
- Page 78 4. Assign the user a password. Passwords can have up to 16 alphanumeric characters. 5. Select the type of user from the drop-down list. The options are Viewer and Operator. 6. Assign permissions to the user. Check the desired options: Basic Permissions Camera Configuration Remote: Parameters Settings...
- Page 79 RTSP authentication You can specifically secure the stream data of the live view. Figure 20: RTSP authentication window To define RTSP authentication: 1. From the menu toolbar, click Configuration > Security > RTSP Authentication. 2. Select the RTSP Authentication type Digest/basic Digest in the drop-down list...
- Page 80 To define the IP address filter: 1. From the menu toolbar, click Configuration > Security > IP Address Filter. 2. Select the Enable IP Address Filter check box. 3. Select the type of IP Address Filter in the drop-down list: Forbidden or Allowed. 4.
- Page 81 The camera will select the corresponding firmware file automatically. Cookies and data in the web browser are automatically deleted when the firmware is updated. To upgrade firmware version: 1. Download on to your computer the latest firmware from our web site at: www.interlogix.com/video TruVision 6MP and 12MP 360° Camera Configuration Manual...
- Page 82 - Or - www.firesecurityproducts.com 2. When the firmware file is downloaded to your computer, extract the file to the desired destination. Note: Do not save the file on your desktop. 3. From the menu toolbar, click Configuration > Camera Configuration >...
- Page 83 Reboot camera It is easy to reboot the camera remotely. To reboot the camera through the web browser: 1. In Camera Configuration > System, click the Maintenance tab. 2. Click the Reboot button to reboot the device. 3. Click in the pop-up message box to confirm reboot operation. TruVision 6MP and 12MP 360°...
- Page 84 Camera operation This chapter describes how to use the camera once it is installed and configured. Log on and off You can easily log out of the camera browser window by clicking the Logout button on the menu toolbar. You will be asked each time to enter your user name and password when logging in.
- Page 85 Figure 24: Playback window Name Description Search calendar Click the day required to search. Search Start search. Timeline The timeline bar displays the 24-hour period of the day being played back. It moves left (oldest) to right (newest). The bar is color-coded to display the type of recording.
- Page 86 To play back recorded video 1. Select the date and click the Search button. The searched video is displayed in the timeline. 2. Click Play to start playback. While playing back a video, the timeline bar displays the type and time of the recording. The timeline can be manually scrolled using the mouse.
- Page 87 Snapshots Click Picture to enter the interface to search for snapshots. You can search, view, and download the snapshots stored in the local storage or network storage. Notes: • Make sure that the HDD, NAS, or memory card are properly configured before you carry out the snapshot search.
- Page 88 Figure 25: Log window 1. Major Type 4. Start search 2. Minor Type 5. Save searched logs 3. Start and end search time You can search for recorded logs by the following criteria: Major type: There are three types of logs: Alarm, Exception, and Operation. You can also search all logs.
- Page 89 To search logs: 1. From the menu toolbar, click to display the Log window. 2. In the Major Type and Minor Type drop-down list, select the desired option. 3. Select start and end time of the log. 4. Click Search to start your search.
- Page 90 Preset and preset tours Presets are defined locations of a PTZ dome camera that allow you to quickly move the PTZ dome camera to a desired position. A preset tour is a memorized series of presets. The camera stays at a preset for a set dwell time before moving on to the next preset.
- Page 91 To set a preset tour: Before you start: At least two presets are required to set a preset tour. 1. Click the icon to enter the preset tour configuration interface. 2. Select a path number from the drop-down list, and click the icon to configure preset tour path.
- Page 92 Index events search logs, 85 exception alarms alarm inputs types, 42 set up, 41 alarm outputs set up, 41 alarm types firmware upgrade, 79 motion detection, 35 use TruVision Navigator, 80 archive files recorded files, 84 snapshots of recorded files, 84 hard drive archived files capacity, 59...
- Page 93 setup, 12 network settings SDHC card 802.1x, 24 formatting, 59 DDNS, 20 free space available, 59 FTP, 22 self-signed certificate set up, 23 local camera parameters, 12 snapshot setup port parameters, 21 event-triggered snapshots, 57 PPPoE, 21 scheduled snapshots, 57 QoS, 24 snapshots SNMP, 21...
Need help?
Do you have a question about the TruVision TVF-5201 and is the answer not in the manual?
Questions and answers