Table of Contents

Related Manuals for KERAFLO TANKTRONIC


Summary of Contents for KERAFLO TANKTRONIC
- Page 1 TANKTRONIC 0118 921 9920 ® info@keraflo.co.uk INSTALLATION www.keraflo.co.uk GUIDE Solutions brought to you Hurlstones Keraflo Ltd, Unit 1, Woodley Park Estate, 59-69 Reading Road, Woodley, Reading Berkshire RG5 3AN TT/21A-01...
- Page 2 The Close Level is the maximum desired water level inside the This alarm will trigger when the High Tanktronic can be used as an independent tank. The valve(s) will close when this (maximum) Level is reached and the monitoring system or installed with valve has not shut off.
-
Page 3: Single Tank
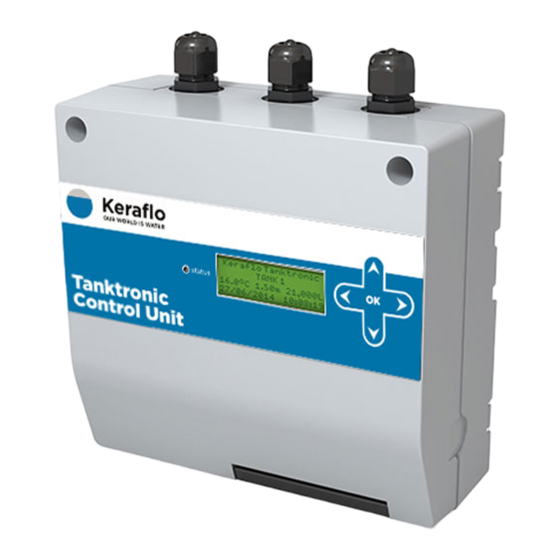
Twin Tank (common valve) Typical System Layout Vent box Main control unit Valve assembly Sensor assembly Sensor assembly Twin Tank (separate valves) Main Vent box control unit Valve Valve assembly assembly Sensor assembly Sensor assembly 0118 921 9920 | info@keraflo.co.uk | www.keraflo.co.uk... - Page 4 Take care not to trap the ribbon cable when closing the unit. Align the subsidiary module to the main control unit using the tabs. It is also possible to mount the main control unit on a DIN Rail. 0118 921 9920 | info@keraflo.co.uk | www.keraflo.co.uk...
- Page 5 NOTE: Do not cut the sensor cable and take care not the damage the clear plastic tube at the centre of the cable. To sensor/s 0118 921 9920 | info@keraflo.co.uk | www.keraflo.co.uk...
- Page 6 Close Level, will increase the delay. If the control valve Tanktronic sends a closing pulse to the Commissioning and Testing fails to close or does not close quickly pilot valve, causing water pressure to build...
-
Page 7: Normal Installation
(e.g. 150 mm) between the Close Level and the Overflow Level of the warning pipe (see diagram opposite). This will allow for some imbalance in water levels between the tanks. 0118 921 9920 | info@keraflo.co.uk | www.keraflo.co.uk... -
Page 8: Wiring Connections
L N E (not supplied) Tanktronic requires a normal 240v mains Ensure cables are fed through the cable glands as displayed and cables power supply from a switched fused 3A are free to access the tanks, valves supply. -
Page 9: Initial Start-Up
LED will flash red to indicate the system read ‘Initialising…’ The status LED is has not been set up and to indicate it is in constant amber. an alarmed status. The LED will continue to flash red until Tanktronic has been set-up correctly. Tanktronic Initialising... Keraflo Tanktronic <... - Page 10 CONFIGURATION 3. CONFIGURATION 4. AUTO SET-UP FOR TANK FILLING To set-up Tanktronic for use with a new or Auto set-up will use the default factory empty tank, auto set-up can be used. settings for alarm and temperature levels Twin Tanks with Separate Depending on the system layout, it may be as well as the fill settings.
- Page 11 The unit has been configured with default settings: Area: 10.0m Alarm Level H: 0.20m Close Level: 1.20m Alarm Level L: 0.20m Fill Delay: 0.20m Alarm Temp H: 20.0 Alarm Temp L: 0118 921 9920 | info@keraflo.co.uk | www.keraflo.co.uk...
-
Page 12: High Temperature Alarm
Save and return to the Config menu. to set the maximum Repeat for subsequent tanks if necessary. water temperature. Save and return to the Config menu. Repeat for subsequent tanks if necessary. 0118 921 9920 | info@keraflo.co.uk | www.keraflo.co.uk... -
Page 13: Level Offset
The following message will appear. ‘Are you sure?’ Yes or No. Select ‘Yes’ Then select: Level Offset Use the buttons to set the necessary Level Offset. Exit to HOME screen. Level Offset 0118 921 9920 | info@keraflo.co.uk | www.keraflo.co.uk... -
Page 14: Specification
26 CONFIGURATION CONFIGURATION 7. TANK AREA SET-UP Specification Setting the Tank Area will allow Tanktronic Save and return to Config menu. Valve to calculate the volume of stored water Repeat for subsequent tanks if necessary. Max working pressure: 10 bar when the sensor is submerged. - Page 15 MENU screen: sensors/tanks can be monitored/filled with the addition of each main control unit. For Tanktronic will now issue a Low Level Tank 1 example, to use Tanktronic with four tanks, Alarm, until the minimum level is reached you would need two main control units.
-
Page 16: Additional Functionality
MAIN MENU screen: release the black select button. If you need to reset Tanktronic completely, Closed = Sensor is in alarmed state or has To change or disable the PIN, just use to return it to its original settings select a device switched to the closed position. -
Page 17: Sensor Setup
Repeat the process for subsequent the water’. sensors, scrolling to select additional Press to exit. sensor names. Select and calibration will begin. The sensor has now been set up on the system. 0118 921 9920 | info@keraflo.co.uk | www.keraflo.co.uk... - Page 18 VFC Output 4 Level L Address (Opened/Closed) Alarm System Reboot Temp H Alarm Factory Reset Temp L Area Advanced Config Calibrate Sensor Level Offset Solutions Sensor Address brought Solenoid to you Address Hurlstones 0118 921 9920 | info@keraflo.co.uk | www.keraflo.co.uk...
Need help?
Do you have a question about the TANKTRONIC and is the answer not in the manual?
Questions and answers