Table of Contents
Advertisement
Available languages
Available languages
CORDED ELECTRIC SNOW THROWER
ATTACH YOUR RECEIPT HERE
Serial Number
Questions, problems, missing parts? Before returning to your retailer, call our customer
service department at 1-888-3KOBALT (1-888-356-2258), 8 a.m. - 8 p.m., EST,
Monday - Friday.
PH19164
Purchase Date
1
ITEM #1314197
MODEL #A081002
Español p. 21
Advertisement
Chapters
Table of Contents

Related Manuals for Kobalt A081002


Summary of Contents for Kobalt A081002
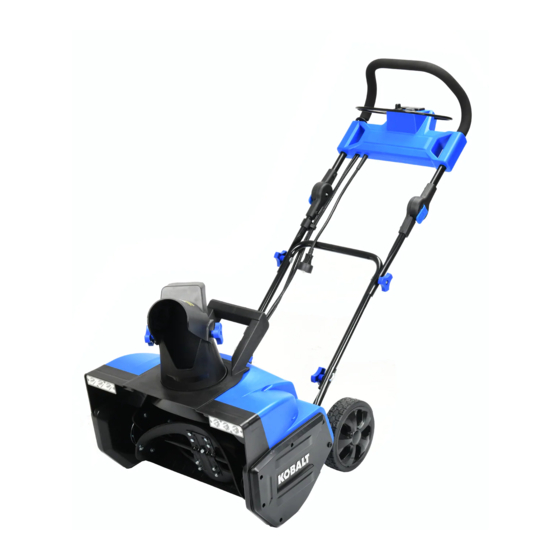
- Page 1 ITEM #1314197 CORDED ELECTRIC SNOW THROWER MODEL #A081002 Español p. 21 ATTACH YOUR RECEIPT HERE Serial Number Purchase Date Questions, problems, missing parts? Before returning to your retailer, call our customer service department at 1-888-3KOBALT (1-888-356-2258), 8 a.m. - 8 p.m., EST, Monday - Friday.
-
Page 2: Table Of Contents
TABLE OF CONTENTS Product Specifications......................2 Package Contents ........................3 Symbols ..........................4 Safety Information ........................5 Preparation ...........................8 Assembly Instructions ......................9 Operating Instructions ......................11 Operating tips........................14 Care and Maintenance......................15 Troubleshooting ........................18 Warranty ..........................19 Replacement Parts List ......................20 PRODUCT SPECIFICATIONS SPECIFICATIONS Rated Voltage 120 V ~60 Hz Power 15 A... -
Page 3: Package Contents
PACKAGE CONTENTS PART DESCRIPTION PART DESCRIPTION Handle bar Cable clip Switch bar level Auxiliary handle Safety switch button Lower handle Change-over switch Wheels LED light switch Chute deflector Switch box Deflector knob Upper handle Discharge chute Extension cord restraint hook Side cover Handle locks Impeller... -
Page 4: Symbols
SYMBOLS Some of the following symbols may be used on this product. Please study them and learn their meaning. Proper interpretation of these symbols will allow you to operate the product better and safer. SYMBOLS NAME DESIGNATION/EXPLANATION Volts Voltage Amperes Current Hertz Frequency (cycles per second) -
Page 5: Safety Information
SYMBOLS The following signal words and meanings are intended to explain the levels of risk associated with this product. SYMBOL SIGNAL MEANING Indicates an imminently hazardous situation, which, if not avoided, DANGER will result in death or serious injury. Indicates a potentially hazardous situation, which, if not avoided, WARNING could result in death or serious injury. - Page 6 SAFETY INFORMATION offs, etc., without properly adjusting the angle of the snow discharge. Keep children and pets away from the work area. • Do not operate the power tool at high speeds on slippery surfaces. Look behind when backing up and exercise caution.
- Page 7 particularly small children, and pets. • Thoroughly inspect the area where the equipment is to be used and remove all stones, sticks, wires, bones, and other foreign objects. • Stop the blade(s) when crossing gravel drives, walks, or roads. • Read the operating and service instruction manual carefully. Be thoroughly familiar with the controls and the proper use of the equipment.
-
Page 8: Preparation
• To prevent the appliance cord from disconnecting from the extension cord during operation, make a knot with the two cords as shown in Table 1. • Do not abuse the cord. Never pull the snow thrower by the cord or yank the cord to disconnect it from the receptacle. -
Page 9: Assembly Instructions
ASSEMBLY INSTRUCTIONS WARNING • Do not allow familiarity with this product to make you careless. Remember that a careless fraction of a second is sufficient to inflict serious injury. • Do not use any attachments or accessories not recommended by the manufacturer of this product. - Page 10 2. DISCHARGER CHUTE ASSEMBLY • Position the chute deflector over the discharge chute and align the holes, placing the washer between the deflector and the chute. Chute deflector Washer Deflector knob Discharge chute • Secure the carriage bolts and knobs. Make sure the knobs are tightened.
-
Page 11: Operating Instructions
OPERATING INSTRUCTIONS WARNING Before operating the snow thrower, carefully examine the electrical cord. If the cord is damaged, do not use the snow thrower. Replace or repair the damaged cord immediately. NOTE: Before using this machine, make sure that the power source you will use complies with the specifications detailed in this manual. - Page 12 • Note that the snow thrower has a polarized male plug – one prong in the plug is slightly longer and wider than the other. The extension cord female end should be likewise polarized so that the extension cord fits snugly into the appliance plug. 2.
- Page 13 Always orient the discharge chute in the opposite direction from where you, bystanders, surrounding vehicles or windows are located. The discharge chute can be adjusted 180 degrees by pressing the change-over switch. Rotate the chute control crank clockwise to move the discharge chute to the left and counterclockwise to move the chute to the right.
-
Page 14: Operating Tips
OPERATING TIPS WARNING If the snow thrower hits a foreign object while it is in use, the object could be thrown in the direction of the operator or a bystander. Thrown objects could cause serious personal injury. Keep the area to be cleared free of all foreign objects that may be picked up and thrown by the impeller. -
Page 15: Care And Maintenance
CARE AND MAINTENANCE 1. REPLACING THE IMPELLER NOTE: When replacing worn impellers, pay close attention to any different types of bolts and nuts and where they are positioned. This will ensure that the new impellers are installed properly and securely. •... - Page 16 • Install the new scraper bar and fasten it securely to the snow thrower with the screws. The screws that secure the scraper bar 3. REPLACING THE BELT NOTE: Under normal operating conditions, it should not be necessary to replace the auger belt. However, should the auger jam or malfunction, the belt could be damaged.
- Page 17 • Use your right hand to press the belt with the ribbed side down. While holding the belt down with your right hand, use your left hand to turn the auger forward so that the auger pulley rotates in a clockwise direction. The belt will be gradually pushed down onto the pulley.
-
Page 18: Troubleshooting
• Store the snow thrower in a clean, dry place. Cover it in order to provide added protection. TROUBLESHOOTING If you still have questions or an unresolved issue after going through this troubleshooting guide, or just want to speak to a Kobalt product expert, please call our Kobalt customer service department at 1-888-356-2258. PROBLEM... -
Page 19: Warranty
WARRANTY 5-YEAR LIMITED WARRANTY This electric snow thrower is warranted to the original purchaser from the original purchase date for five (5) years subject to the warranty coverage described herein. This electric snow thrower is warranted for the original user to be free from defects in material and workmanship. If you believe that the electric snow thrower is defective at any time during the specified warranty period, simply return the electric snow thrower along with proof of purchase to the place of purchase for a free replacement or refund, or call 1-888-356-2258 for warranty service. -
Page 20: Replacement Parts List
REPLACEMENT PARTS LIST For replacement parts, call our customer service department at 1-888-3KOBALT (1-888-356-2258), 8 a.m. - 8 p.m., EST, Monday - Friday. PART DESCRIPTION PART# Handle knob/Deflector knob 202028000132 Cable clip 8343-515101-0100130 Rubber washer 8202-660101-0000130 Chute crank rod 8206-517001-0000030 Carriage bolt 8SBJD08-30D Square J-bolt... - Page 21 ARTÍCULO #1314197 EQUIPO QUITANIEVE ELÉCTRICO CON CABLE MODELO #A081002 Español p. 21 ADJUNTE SU RECIBO AQUÍ Número de serie Fecha de compra ¿Preguntas, problemas, piezas faltantes? Antes de volver a la tienda, llame a nuestro Departamento de Servicio al Cliente al 1-888-3KOBALT (1-888-356-2258), de lunes a viernes de 8 a.m.
-
Page 22: Especificaciones Del Producto
ÍNDICE Especificaciones del producto.....................22 Contenido del paquete .......................23 Símbolos ..........................24 Información de seguridad ....................25 Preparación ........................28 Instrucciones de ensamblaje ....................29 Instrucciones de funcionamiento ..................31 Consejos para la operación....................34 Cuidado y mantenimiento....................35 Solución de problemas .......................38 Garantía ..........................39 Lista de piezas de repuesto ....................40 ESPECIFICACIONES DEL PRODUCTO ESPECIFICACIONES Rango de voltaje... -
Page 23: Contenido Del Paquete
CONTENIDO DEL PAQUETE PIEZA DESCRIPCIÓN PIEZA DESCRIPCIÓN Barra de manija Sujetador del cable Nivel de barra de interruptor Manija auxiliar Botón del interruptor de seguridad Manija inferior Interruptor de intercambio Ruedas Interruptor de la luz LED Deflector del conducto Caja del interruptor Perilla del deflector Manija superior Conducto de descarga... -
Page 24: Símbolos
SÍMBOLOS Algunos de los siguientes símbolos pueden aplicarse al uso de este producto. Obsérvelos y aprenda su significado. La interpretación correcta de estos símbolos le permitirá utilizar el producto de manera eficaz y segura. SÍMBOLOS NOMBRE DESIGNACIÓN/EXPLICACIÓN Voltios Voltaje Amperios Corriente Hertz Frecuencia (ciclos por segundo) -
Page 25: Información De Seguridad
SÍMBOLOS Se usan las siguientes indicaciones y sus significados para explicar los niveles de riesgo asociados a este producto. SÍMBOLO INDICACIÓN SIGNIFICADO Indica una situación de peligro inminente que, de no evitarse, PELIGRO ocasionará la muerte o lesiones graves. Indica una situación potencialmente peligrosa que, de no ADVERTENCIA evitarse, puede resultar en la muerte o en lesiones graves. - Page 26 INFORMACIÓN DE SEGURIDAD • No use la herramienta eléctrica a alta velocidad en superficies resbaladizas. Mire hacia atrás cuando haga marcha atrás y tenga cuidado. • Utilice gafas o gafas de seguridad que cumplan con las normas ANSI Z87.1. • Use la herramienta eléctrica con luz de día o una buena luz artificial. Asegúrese de que las luces estén encendidas si utiliza el producto en condiciones de poca iluminación •...
- Page 27 • Nunca permita que los niños utilicen una herramienta eléctrica. Mantenga el área de operación libre de cualquier persona, en especial, niños pequeños y mascotas. • Inspeccione minuciosamente el área donde se utilizará la herramienta y retire todas las piedras, las varillas, los cables, los huesos y cualquier otro objeto extraño que encuentre.
-
Page 28: Preparación
• Para evitar que el cable del electrodoméstico se desconecte de la extensión eléctrica durante el uso, haga un nudo con los dos cables como se muestra en la Tabla 1. Tabla 1. Método para asegurar la extensión eléctrica Juego de cables Cable del electrodoméstico (A) Ate el cable como se muestra (B) Conecte el enchufe y el tomacorriente... -
Page 29: Instrucciones De Ensamblaje
INSTRUCCIONES DE ENSAMBLAJE ADVERTENCIA • No se descuide por el hecho de conocer cómo funciona el producto. Recuerde que un descuido de una fracción de segundo es suficiente para provocar lesiones graves. • No utilice ningún acoplamiento o accesorio que el fabricante de este producto no recomiende. •... - Page 30 2. ENSAMBLAJE DEL CONDUCTO DE DESCARGA • Coloque el deflector del conducto sobre el conducto de descarga, alinee los orificios y coloque la arandela entre el deflector y el conducto. Deflector del conducto Arandela Perilla del deflector Conducto de descarga •...
-
Page 31: Instrucciones De Funcionamiento
INSTRUCCIONES DE FUNCIONAMIENTO ADVERTENCIA Antes de operar el equipo quitanieve, examine cuidadosamente el cable eléctrico. No use el equipo quitanieve si el cable está dañado. Repare o reemplace inmediatamente el cable dañado. NOTA: antes de utilizar esta máquina, asegúrese de que la fuente de alimentación que va a utilizar cumple con las especificaciones detalladas en este manual. - Page 32 • Tenga en cuenta que el equipo quitanieve tiene un enchufe macho polarizado (una clavija en el enchufe es ligeramente más larga y ancha que la otra). El extremo hembra de la extensión eléctrica debe tener la misma polarización para que la extensión eléctrica encaje perfectamente en el enchufe del electrodoméstico.
- Page 33 Siempre oriente el conducto de descarga en la dirección opuesta al lugar donde se encuentra usted, los transeúntes, los vehículos circundantes o las ventanas. El conducto de descarga se puede ajustar en 180 grados con solo presionar el interruptor de intercambio.
-
Page 34: Consejos Para La Operación
CONSEJOS DE OPERACIÓN ADVERTENCIA Si el equipo quitanieve golpea un objeto extraño durante su uso, el objeto podría arrojarse en la dirección del operador o un transeúnte. Los objetos lanzados podrían ocasionar lesiones personales graves. Mantenga el área que desea despejar libre de objetos extraños que el impulsor podría recoger y arrojar. -
Page 35: Cuidado Y Mantenimiento
CUIDADO Y MANTENIMIENTO 1. REEMPLAZO DEL IMPULSOR NOTA: cuando reemplace los impulsores desgastados, preste mucha atención a los diferentes tipos de pernos y tuercas, así como a su posición. Esto asegurará que los nuevos impulsores se instalen de forma adecuada y segura. •... - Page 36 • Instale la barra raspadora nueva y sujétela firmemente al equipo quitanieve con los tornillos. Los tornillos que fijan la barra raspadora 3. REEMPLAZO DE LA CORREA NOTA: en condiciones normales de funcionamiento, no debería ser necesario sustituir la correa de la barrena. Sin embargo, si la barrena se atasca o funciona mal, la correa podría dañarse.
- Page 37 • Use su mano derecha para presionar la correa con el lado estriado hacia abajo. Mientras sujeta la correa con la mano derecha, gire la barrena hacia delante con la mano izquierda para que la polea de la barrena gire en dirección de las manecillas del reloj.
-
Page 38: Solución De Problemas
Si todavía tiene preguntas o un problema no resuelto después de leer esta guía de solución de problemas, o si simplemente desea hablar con un experto en productos Kobalt, por favor llame a nuestro Departamento de Servicio al Cliente de Kobalt al 1-888-356-2258. -
Page 39: Garantía
GARANTÍA 5 AÑOS DE GARANTÍA LIMITADA Este equipo quitanieve eléctrico está garantizado para el comprador original desde la fecha de compra original durante cinco (5) años y está sujeto a la cobertura de garantía que se describe en el presente. Este equipo quitanieve eléctrico tiene una garantía para el usuario original contra defectos en los materiales y la mano de obra. -
Page 40: Lista De Piezas De Repuesto
LISTA DE PIEZAS DE REPUESTO Para obtener piezas de repuesto, llame a nuestro Departamento de Servicio al Cliente al 1-888-3KOBALT (1-888-356-2258) de lunes a viernes de 8 a.m. a 8 p.m., hora estándar del Este. PIEZA DESCRIPCIÓN PIEZA # Perilla de la manija/perilla del deflector 202028000132 Sujetador del cable 8343-515101-0100130...
Need help?
Do you have a question about the A081002 and is the answer not in the manual?
Questions and answers
The motor is 'cooked'. Is it feasible, too costly, or buy a new one?
It is feasible to repair a Kobalt A081002 motor if it is damaged. The context advises inspecting the power tool for damage after striking a foreign object and repairing any damage before restarting and using it. It does not suggest immediately replacing the motor, implying that repair is an acceptable and recommended option.
This answer is automatically generated