Table of Contents
Advertisement
Quick Links
Advertisement
Table of Contents

Related Manuals for Hasselblad H5D


Summary of Contents for Hasselblad H5D
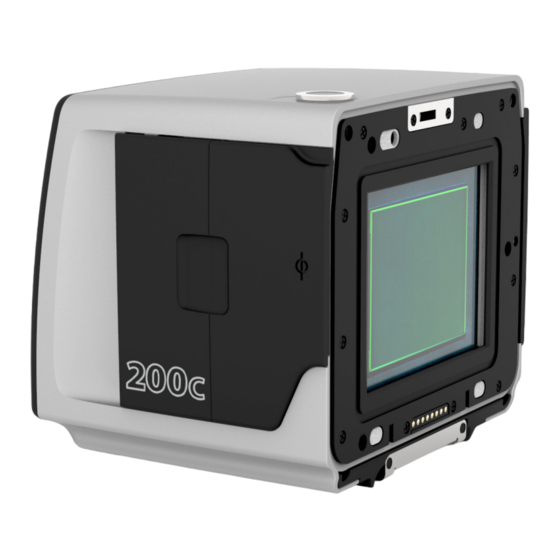
- Page 1 SENSOR UNIT USER MANUAL...
-
Page 2: Introduction
INTRODUCTION Photo: Bryn Griffiths © / Hasselblad Masters... - Page 3 The H5D sensor unit series heralds a step up that is noticeably greater than before. There are changes and many are 'from the ground up'. The H spirit thrives but has now matured to reinforce further its position in the rapidly changing world of digital imaging.
- Page 4 Hasselblad does its best to produce the best; there is no other way to achieve the Hasselblad star quality. The H5D sensor units have a good deal in common.
-
Page 5: Table Of Contents
CONTENTS Introduction Show Preview System requirements Large format camera Warnings & restric tions WiFi Ser vice General over view – About controls and displays Par ts, components, but tons Flash /strobe Sensor unit General Sensor unit display General ... -
Page 6: System Requirements
WARNINGS, RESTRICTIONS AND RECOMMENDATIONS • If you want to power the H5D sensor unit from a PC laptop (as opposed to a Macintosh laptop), you must ensure that the FireWire port on the computer is capable of supplying power. Please note the following: Most recent Macintosh computers are compatible, both desktops and laptops. -
Page 7: Par Ts, Components, But Tons
PARTS, COMPONENTS, BUTTONS AND CONTROLS – OVERVIEW All of the items named on this page are described in greater detail elsewhere in this manual. Battery Adapter/ Flash sync out port external power port Flash sync in port Ready light Menu button P2 button Display button P1 button... -
Page 8: Sensor Unit
Main support for sensor unit. H3/H4D users please note the Safety catch orientation of the plug on the H5D! Prevents inadvertent removal of sensor unit. ‘Sensor plane’ index For physical focus measurement in critical close-up work. CF-card cover FireWire port For computer connection (please carefully note the orientation of the FireWire plug when inserting into the sensor unit). -
Page 9: Sensor Unit Display
SENSOR UNIT DISPLAY AND CONTROLS − OVERVIEW When shooting, the sensor unit can display the information most often required for a quick ISO setting Capture settings check. The unit’s buttons, grip scroll counter wheels and camera buttons are used to navigate the main menu and change settings. -
Page 10: General
GENERAL Photo: Dmitry Ageev © / Hasselblad Masters... -
Page 11: Power Modes
POWER MODES The H5D sensor unit can be set at three active modes − ON, Display Off and Sleep. In these active modes, battery con- sumption is least in Sleep mode and most in ON mode. The sensor unit displays are dimmed accordingly. However, after... -
Page 12: Inser Ting/Removing Cf Cards
USING COMPACT FLASH MEMORY CARDS When using a compact-flash card, the H5D sensor unit is completely self- contained. No additional wires or connectors need to be attached. The recommended type is UDMA/type 4 /60MBs (400x) or better. Please see the Appendix in this manual for a list of recommended cards. -
Page 13: Format Ting Cf Cards
N o t e Only UDMA/type 4/60MBs (or 400x) All CF cards should be formatted in cards or better are recommended for the sensor unit before first-time use! H5D sensor unit use. See full list in ‘Appendix’ in this manual. -
Page 14: Removing/At Taching Sensor Unit
SENSOR UNIT – INTRODUCTION The captured image is temporarily stored internally on a CF With untethered use, the management of captures is handled card in the sensor unit or onto a computer hard disk when by the sensor unit. In tethered use, captures are handled and tethered using Phocus. -
Page 15: Cleaning Sensor Unit F Ilter
If dust manages to get between the IR filter and sensor, it can only be removed at the Has- selblad factory. Contact your Hasselblad dealer or Hasselblad Service Center for assistance. TETHERED TO A COMPUTER WITH ... -
Page 16: Capture F Iles
.jpeg etc. The H5D sensor units can capture files and store them as Hasselblad RAW format files or Hasselblad RAW + JPEG formats simultaneously. (not applicable to 60 Mpix / 50MS/200MS models). Hasselblad RAW files are initially stored in the 3FR format which is a proprietary Hasselblad format for the temporary storage of captures. -
Page 17: Phocus
Phocus uses Hasselblad Natural Color Solution (HNCS) to pro- the result is exactly what you would expect from Hasselblad – vide ultimate image quality in every image you create. With simply stunning image quality. - Page 18 Battery Adaptor Kit: 3053310 The new Battery Adapter for H5D and H4D-60 cameras can be used to power a sensor unit in situations where power is not available through FireWire. This is especially useful when using a sensor unit on a technical camera on location.To capture Multi shot images you will have to be connected to Phocus software via a firewire cable.
-
Page 19: Exposure Control
EXPOSURE CONTROL Photo: Martin Schubert © / Hasselblad Masters... - Page 20 ISO & WHITE BALANCE Both ISO and White Balance can be set either via the sensor unit or, when tethered, via Phocus. For the sensor unit display, settings can be changed with the Zoom button. In Phocus there is a specific tool to control the unit settings when tethered.
-
Page 21: Navigating The Menus
NAVIGATING THE MENUS Photo: Hengki Koentjoro © / Hasselblad Masters... -
Page 22: Sensor Unit Menu
BASIC DESCRIPTION OF SENSOR UNIT MENU ITEMS By using the buttons on the control panel you can navigate down through the various levels in the menu. Below is an overview of the setting options available. Sets the light sensitivity of the sensor. White Balance Sets the color temperature of the ambient light. -
Page 23: Navigating Menu And Set Tings On Su
OVERVIEW OF NAVIGATING MENU AND SETTINGS ON SENSOR UNIT. Navigating the menu and accessing the settings on the sensor unit are achieved by pressing the appropriate buttons sur- rounding the display. Note that some of the buttons are modal and so have dual functions which is indicated by the designa- tion that appears closest to that particular button when navigating. -
Page 24: Previews And Browsing
PREVIEWS & BROWSING Photo: Dmitry Ageev © / Hasselblad Masters... -
Page 25: Cf Cards
PREVIEW MODES Use the Display button to cycle through the available pre- Two additional screens also available, accessible from the Histogram screen: view modes which are: • Combined Histogram: • Standard preview: Shows a preview image overlaid with a histogram display- Shows a preview image surrounded by a display of a few ing the three components: red blue and green. -
Page 26: Browsing
HISTOGRAM TYPES There are three types of histogram representation available: Histogram and Full details, Combined histogram and Histogram mode. Histogram and Full details Combined Histogram Histogram mode In Histogram and Full details mode, In Combined Histogram mode, the In Histogram mode, the individual you can read a list of camera set- RBG channels are represented to... -
Page 27: Zoom In / Out
ZOOMING IN AND OUT There are four views in Browse mode. Zoom in by using the the Zoom in ( ) / out ( ) buttons. Zoomed View is reached by zooming in from the Standard View. When zoomed in, you can select the area of interest by using the navigation button. -
Page 28: Sensor Unit Settings
SENSOR UNIT SETTINGS Photo: Hengki Koentjoro © / Hasselblad Masters... -
Page 29: Sensor Unit Menu Layout
BASIC OVERVIEW OF SENSOR UNIT MENU The menu is structured in a manner similar to very many digitally controlled personal devices and should be familiar to most. Once the menu is accessed navigation, selection and confirmation are made by the various buttons beneath the display. After pressing the MENU button, the first screen presents the main divisions: ISO, White balance and Quality –... -
Page 30: Iso & Wb Set Ting On Sensor Unit
ISO SETTING MENU > ISO ISO and White Balance can be set either on the sensor unit or, when tethered, via Phocus. 1. Press MENU. 2. Navigate to ISO (use the Navigator). 3. Press the the ZOOM button to step through the available settings. 4. -
Page 31: Wb Grey Card
WHITE BALANCE SETTING BY USING A ‘GREY CARD’: • Make the first shot a grey card/Qp card close-up and then There are two ways to make manual white/grey balance set- make the adjustment in Phocus for the session. tings using a ‘Grey card’ or ‘Qp card’. If colour accuracy is not critical, you can use any neutrally coloured area or surface •... -
Page 32: Storage
STORAGE SETTINGS > STORAGE Storage includes three entries: Create new folder, Delete and Format. CREATE NEW FOLDER MENU > STORAGE > FORMAT See section in “Previews & Browsing” chapter. DELETE MENU > STORAGE > DELETE Delete allows you to make single or multiple deletes of captures. 1. -
Page 33: Settings
SETTINGS SETTINGS > USER INTERFACE LANGUAGE MENU > SETTINGS > USER INTERFACE > LANGUAGE T i p Language choice is retained but can be changed at any time. Choose between: If the sensor unit has been set to a English, German, French, Italian, Spanish, Japanese, Chinese and Korean. -
Page 34: Date & Time
DATE & TIME MENU > SETTINGS > USER INTERFACE > DATE & TIME The unit has an internal clock that keeps track of the date and time. This informa- tion is used to mark each shot with the date and time at which it was taken. It is also used to label folders with the date on which each folder was created. -
Page 35: Custom Options
, Spirit Level , Focus Confirm, Live View (50c/50cWiFi/50cMS/200cMS models only) Only when using an H5D/H5X camera body. • Display Off MENU > SETTINGS > CUSTOM OPTIONS > DISPLAY OFF Sets the amount of elapsed time before the display is turned off. See ‘Power Modes’... -
Page 36: Image Orientation
SENSOR UNIT AND VIEW / LARGE FORMAT CAMERAS For optimum use, the H5D sensor unit can also be used with view cameras (with the appropriate adapter and cables). The exposure time set on the unit sets the maximum length of exposure. The default setting is 1/8 sec and this is the setting that can be kept for all exposures from 1/8 sec through 1/2000sec. -
Page 37: Wifi
The Wi-Fi mode allows the Hasselblad Phocus Mobile application on an Apple iPhone, iPod or an Apple iPad to work in the same way as when a camera is tethered to a computer. Note that no camera control is available unless a H5D camera body is attached to the sensor unit. - Page 38 CONNECT DIRECTLY TO AN IPHONE/IPOD/IPAD (DIRECT (AP) MODE) (H5D-50c Wi-Fi model only) 1. Enter the Wi-Fi menu. 2. Make sure Wi-Fi is set to OFF. When changed from ON to OFF, a quick re-start will take place. The menu will be entered automatically.
- Page 39 If the network is WPA2 encryption), enter enu” WI-FI CONNECTION (H5D-50c Wi-Fi model only) CONTINUED and by using the navia- MENU > SETTINGS > WIFI > WIFI ON > PASSWORD hen use the plus or er in that position. The If the network is password protected using WPA or WPA2 encryption, then a password must also be entered at this point.
- Page 40 RED: Not connected. GREEN: Connected to BLUE: Connected to the Wi-Fi network but both the Wi-Fi network not to Phocus Mobile. and to Phocus Mobile. SETTINGS > GPS Only possible with the H5D/H5X camera body and the GIL GPS accessory...
-
Page 41: Service
H5D/H5X camera body. Should always be set to 1. Tethered power This setting is only valid when using an H5D/H5X camera body. When the sensor unit is used on an- other camera, the setting should always be set to “Host”. -
Page 42: Flash /Strobe
FLASH / STROBE Photo: Bara Prasilova © / Hasselblad Masters... -
Page 43: General
FLASH / STROBE When using external flash units, the connection should be made as shown in the illustration below. Flash sync out Flash sync in To lens sync (3.5mm plug) (2.5mm plug) connector To flash unit The image above shows the flash sync in and out connectors. The image to the left shows these connections with the battery adaptor kit in place. - Page 44 Speed and capture control. Two systems are supported by Hasselblad, from Schneider and Rollei. Both of these systems comprise a battery or mains powered control unit, connection interface to the electronic shutter / lens connection interface to a digital capture unit (not used in this case) and flash synchronisation output.
- Page 45 Unlike the Schneider system, the Rollei Lens Control - S must be used in conjunction with a control panel. This will allow use of a Hasselblad sensor unit in a studio or portable situation, either working tethered to a computer with Phocus running or working untethered capturing to Compact Flash media.
- Page 46 # 1005393 SCHNEIDER – USB INTERFACE The Schneider USB adapter is supported via a single cable connected to the Hasselblad sensor unit. Aperture, shutter speed settings and capture are controlled via the Schneider software with ‘Camera’ on the sensor back...
- Page 47 ITEM NO. SUPPLIER FLASH SYNC CONNECTION WITH MANUAL / COPAL SHUTTERS Camera Sync Cable from lens to digital capture unit 50300122 Hasselblad Flash generator Sync Cable with protecting fuse 50300136 Hasselblad FLASH SYNC CONNECTION WITH ELECTRONIC SHUTTERS – SCHNEIDER Power Supply / Charger...
-
Page 48: Multi Shot
MULTI SHOT Photo: Martin Schubert © / Hasselblad Masters... - Page 49 However, in single shot mode both the models also function exactly as a standard model with all the specifications, fea- tures and benefits of regular H5D sensor units. Download the H5D-200cMS and H5D-50cMS datasheets from www.hasselblad.com for a full description.
- Page 50 MULTI SHOT When utilising the 50cMS or 200cMS digital backs with a technical camera you will need to ensure you are using an electronic shutter with your chosen lens. This is the only way to enable the multi shot exposures to take place. The recommended method is to utilise a USB based shutter control as this will enable Phocus to intiate the exposure sequence once the basic settings have been carried out in the shutter controllers software ( Shutter speed and required aperture).
-
Page 51: Appendix
APPENDIX Photo: Bryn Griffiths © / Hasselblad Masters... -
Page 52: Technical Specifications
96 × 85 × 63 mm 96 × 85 × 63 mm 96 × 85 × 63 mm Weight 657 g 657 g 657 g * Victor Hasselblad AB reserves the right to make changes without notice to the above specifications. - Page 53 96 × 85 × 63 mm 96 × 85 × 80 mm 96 × 85 × 80 mm Weight 610 g 610 g 877 g 877 g * Victor Hasselblad AB reserves the right to make changes without notice to the above specifications.
-
Page 54: Recommended Cf Cards
6. Save the chosen selection by pressing entry from with zoom button). the top button RECOMMENDED CF CARDS FOR H5D SENSOR UNITS Please ensure you format all Card type Size GB Marked speed previously unused cards in the sensor unit before use. -
Page 55: Problems, Equipment Care And Service
PROBLEMS, EQUIPMENT CARE & SERVICE Loss: Hasselblad equipment is much sought after and you should take The H5D is a very sophisticated camera system that relies on much in- obvious steps to prevent theft. Never leave it visible in an unattended formation being passed and processed to and from each modular back car, for example. - Page 56 DEVICE COMPLIANCE INDUSTRY CANADA STATEMENT This device complies with part 15 of the FCC Rules. Operation is subject This device complies with Industry Canada’s licence-exempt RSSs. Op- to the following two conditions: (1) This device may not cause harmful eration is subject to the following two conditions: (1) This device may interference, and (2) this device must accept any interference received, not cause interference;...
-
Page 57: Index
INDEX About P1 & P2 But tons 9, 35 Appendix Phocus Power modes Power O f f Bat ter y adapter kit Preview modes Bat ter y life Problems Bat ter y status Protec tive baseplate Bat ter y warning Browsing But tons, par ts, components Recommended CF cards... - Page 58 Victor Hasselblad AB. The images in this manual were not taken with a Hasselblad H5D. They are used for illustrative purposes only and are not intended to represent the image quality produced by a Hasselblad H5D.
Need help?
Do you have a question about the H5D and is the answer not in the manual?
Questions and answers