
Related Manuals for Klarstein Iceberg Breeze


Summary of Contents for Klarstein Iceberg Breeze
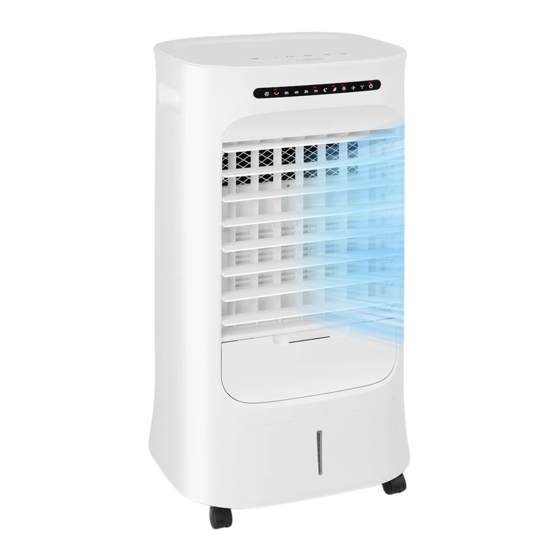
- Page 1 Iceberg Breeze Luftkühler Air Cooler Enfriador de aire Rafraîchisseur d’air Raffreddatore d’aria 10035854...
-
Page 3: Table Of Contents
Sehr geehrter Kunde, wir gratulieren Ihnen zum Erwerb Ihres Gerätes. Lesen Sie die folgenden Hinweise sorgfältig durch und befolgen Sie diese, um möglichen Schäden vorzubeugen. Für Schäden, die durch Missachtung der Hinweise und unsachgemäßen Gebrauch entstehen, übernehmen wir keine Haftung. Scannen Sie den folgenden QR-Code, um Zugriff auf die aktuellste Bedienungsanleitung und weitere Informationen rund um das Produkt zu erhalten. -
Page 4: Sicherheitshinweise
SICHERHEITSHINWEISE • Prüfen Sie vor der Benutzung die angegebene Spannung auf dem Typenschild. Schließen Sie das Gerät nur an Steckdosen an, die der Spannung des Geräts entsprechen. • Halten Sie das Netzkabel fern von heißen Oberflächen und scharfkantigen Gegenständen. • Verlegen Sie das Kabel nicht unter einem Teppich und decken Sie es auch nicht mit anderen Gegenständen oder Stoffen ab. - Page 5 • Stellen Sie das Gerät nur auf Untergründe, die unempfindlich gegen Nässe und hohe Luftfeuchtigkeit sind. Es kann immer mal vorkommen, dass beim Ein- und Ausbau des Wassertanks ein paar Tropfen danebengehen. Sollte das der Fall sein, wischen Sie die Wassertropfen umgehend weg. •...
-
Page 6: Geräteübersicht
GERÄTEÜBERSICHT Bedienfeld Hintere Abdeckung Display Luftfilter Vertikale Lüftungsschlitze Wabenfilter Horizontale Lüftungsschlitze Kabelaufwickelung Wassertankabdeckung Rollen Vordere Abdeckung Fernbedienung Wasserstandsanzeiger Eispacks Obere Abdeckung WARNUNG Verletzungsgefahr! Verwenden Sie nur Zubehör und Ersatzteile, die in der Bedienungsanleitung angegeben sind. Die Verwendung von anderen als den in der Bedienungsanleitung angegebenen Teilen kann zu Verletzungen und Schäden am Gerät führen. -
Page 7: Bedienfeld
BEDIENFELD Taste Funktionsbeschreibung Kühlmodus Ein- oder Ausschalten des Kühlmodus Schwingmodus Ein- oder Ausschalten der Schwingfunktion Einstellen des Timers (Start-Timer und Aus-Timer) auf Timer 1 bis 15 Stunden Wählen Sie den Wind-Modus aus: Modus Natürlicher Wind oder Schlafmodus Geschwindigkeit Einstellung der Lüftergeschwindigkeit Ein/Aus Ein- und Ausschalten des Geräts... -
Page 8: Display-Leuchtanzeigen
DISPLAY-LEUCHTANZEIGEN LED-Anzeige Funktionsbeschreibung Leuchtet, wenn der Kühlmodus aktiviert ist. Kühlmodus Blinkt, wenn der Wasserstand im Wassertank unter 2 Liter sinkt. Schwingmodus Leuchtet, wenn die Schwingfunktion aktiviert ist. Stunden: 8h Anzeige der Stundenzahl des aktivierten Timers. Stunden: 4h Detaillierte Informationen entnehmen Sie der Stunden: 2h Beschreibung der Timer-Einstellung. -
Page 9: Fernbedienung
FERNBEDIENUNG Taste Funktionsbeschreibung Ein/Aus Gerät ein- und ausschalten Timer Einstellen des Timers (Start-Timer und Aus-Timer) Schwingmodus Ein- oder Ausschalten der Schwingfunktion Geschwindigkeit Einstellen der Lüftergeschwindigkeit Wählen Sie den Wind-Modus aus: Modus Natürlicher Wind oder Schlafmodus Kühlmodus Ein- oder Ausschalten des Kühlmodus Hinweise zur Benutzung der Fernbedienung 1. -
Page 10: Bedienung
Batterie in die Fernbedienung einsetzen Minuspol (-) Pluspol (+) 1. Der Deckel des Batteriefachs kann durch leichtes Herunterziehen entfernt werden. 2. Legen Sie die Batterie in das Batteriefach ein. Achten Sie dabei auf den Minus- und Pluspol der Batterie. 3. Setzen Sie den Deckel des Batteriefachs wieder ein und befestigen Sie ihn richtig. BEDIENUNG Hinweis: Betreiben Sie das Gerät nicht ohne eingesetzten Luftfilter! Ohne den Luftfilter wird das Innere des Gerätes stark verschmutzt. - Page 11 • Nachdem der Kühlmodus verwendet wurde, können Sie ihn ausschalten. • Drücken Sie die Ein/Aus-Taste (21). Speicherfunktion Wenn Sie das Gerät nach der Erstinbetriebnahme wieder einschalten, werden die für die Betriebsart gewählten Einstellungen gespeichert. Ein eventuell aktivierter Timer wird nicht im Gerät gespeichert. Bei Stromausfall oder bei Unterbrechung der Stomzufuhr, wird der Speicher gelöscht.
- Page 12 • Drücken Sie zweimal die Modus-Taste (19), um in den Schlafmodus zu schalten. Die LED-Leuchte für den Modus Schlafmodus (28) blinkt. Die Einstellungszyklus für den Windmodus ist wie folgt: Natürlicher Normaler Wind Schlafmodus Wind (keine Anzeige) Zyklus Natürlicher Wind Dieser Modus imitiert den Effekt des natürlichen Windes, der durch Drücken der Geschwindigkeitstaste (20) in 3 Lüfterstufen (Hoch, Mittel, Niedrig) eingestellt werden kann.
- Page 13 2. Wenn der Ventilator auf den Schlafmodus und die Lüfterstufe Mittel eingestellt ist, läuft er eine halbe Stunde lang mit mittlerem natürlichen Wind und schaltet dann bis zum Ende der voreingestellten Zeit oder bis zum Abschalten auf schwachen natürlichen Wind. 3.
- Page 14 Die Stunden-LEDs für den Start-Timer leuchten wie folgt auf: ZEIT 1 h 2 h 3 h 4 h 5 h 6 h 7 h 8 h 9 h 10 h 11 h 12 h 13 h 14 h 15 h LED 1 h √ √ √ √ √ √ √ √ LED 2 h √ √...
-
Page 15: Wassertank Befüllen
Auto-Stopp-Funktion Nach 24 Stunden Dauerbetrieb schaltet sich das Gerät automatisch ab. Gerät ausschalten WARNUNG Stromschlaggefahr! Fassen Sie den Netzstecker nicht mit nassen oder feuchten Händen. • Schalten Sie das Gerät aus. • Ziehen Sie den Netzstecker immer am Stecker und nicht am Kabel aus der Steckdose. -
Page 16: Transport Und Lagerung
WARNUNG Verletzungsgefahr! Die Flüssigkeit in den Eispacks kann gesundheitsschädlich sein! Falls die Flüssigkeit verschluckt wurde, suchen Sie sofort einen Arzt auf. Falls die Flüssigkeit mit Ihren Augen in Kontakt gekommen ist, spülen Sie sie mit Wasser aus und suchen Sie sofort einen Augenarzt auf. -
Page 17: Reinigung Und Wartung
• Legen Sie keine Geräte oder Gegenstände auf das Gerät, um zu verhindern, dass es beschädigt wird. • Entfernen Sie die Batterien aus der Fernbedienung. REINIGUNG UND WARTUNG Empfohlene Intervalle für Reinigung und Wartung Pflege und Wartung Vor jeder Nach Min. - Page 18 Hinweise zur Reinigung und Wartung WARNUNG Stromschlaggefahr! Fassen Sie den Netzstecker nicht mit nassen oder feuchten Händen an. • Schalten Sie das Gerät aus und ziehen Sie den Netzstecker aus der Steckdose. • Ziehen Sie dabei den Netzstecker immer am Stecker und nicht am Kabel aus der Steckdose.
- Page 19 Reinigung des Luftfilters Hinweis: Wenn das Filtersieb längere Zeit nicht gereinigt wird, kann dies die Funktionsfähigkeit des Geräts beeinträchtigen, z. B. den Luftstrom reduzieren und den Geräuschpegel erhöhen. Reinigen Sie den Luftfilter einmal im Monat. • Nehmen Sie den Luftfilter an der Rückseite des Gehäuses heraus, tauchen Sie Wabenfilter und Filterrahmen zusammen einige Male in Wasser und lassen Sie den Filter anschließend an der Luft trocknen.
-
Page 20: Fehlerbehebung
FEHLERBEHEBUNG WARNUNG Stromschlaggefahr! Reparaturen am Gerät und Arbeiten an den elektrischen Komponenten dürfen nur von einem qualifizierten Fachbetrieb durchgeführt werden! Versuchen Sie nicht, das Gerät selbst zu reparieren. Das Gerät wurde während der Produktion mehrfach auf einwandfreie Funktionstüchtigkeit überprüft. Sollten dennoch Funktionsstörungen auftreten, überprüfen Sie die folgenden Punkte: Problem Lösungsansatz... - Page 21 Es tritt Wasser aus. Prüfen Sie das Gerät auf Lecks. Überprüfen Sie den Wassertank auf festen Sitz. Der Wassertank lässt sich Prüfen Sie, ob der Mechanismus zum Absenken der nicht einsetzen. Pumpe ausgelöst wurde. Wenn die Pumpe im unteren Bereich zu sehen ist, wird der Wassertank blockiert. Schieben Sie die Pumpe nach oben, bis der Schalter zum Absenken der Pumpe sichtbar ist.
-
Page 22: Hinweise Zur Entsorgung
HINWEISE ZUR ENTSORGUNG Befindet sich die linke Abbildung (durchgestrichene Mülltonne auf Rädern) auf dem Produkt, gilt die Europäische Richtlinie 2012/19/EU. Diese Produkte dürfen nicht mit dem normalen Hausmüll entsorgt werden. Informieren Sie sich über die örtlichen Regelungen zur getrennten Sammlung elektrischer und elektronischer Gerätschaften. - Page 23 Dear Customer, Congratulations on purchasing this device. Please read the following instructions carefully and follow them to prevent possible damages. We assume no liability for damage caused by disregard of the instructions and improper use. Scan the QR code to get access to the latest user manual and more product information.
-
Page 24: Safety Instructions
SAFETY INSTRUCTIONS • Check the voltage on the rating plate before use. Only connect the appliance to sockets which correspond to the voltage of the appliance. • Keep the appliance and cable away from sources of heat, sharp objects or anything that may cause damage. - Page 25 • With each and every change of tank content, completely remove residual water from the equipment. To prevent nucleation, remove residual water from the equipment and water tank every time after three days of use. WARNING Risk of electric shock! Work on the electrical components may only be carried out by an authorised specialist company! PRODUCT DESCRIPTION The air cooler lowers the room temperature to a comfortable degree by ventilating...
-
Page 26: Device Overview
DEVICE OVERVIEW Control panel Rear housing Display Air filter Vertical air outlet Honeycomb filter Horizontal air outlet Power cord rewinder panel Water tank cover Castors Front housing Remote control Water level indicator Ice packs Top cover WARNING Risk of injury! Only use the accessories and spare parts specified in the operating instructions. -
Page 27: Control Panel
CONTROL PANEL Button Function description Cooling mode Switching the air cooling mode on or off. Oscillation mode Switching the swing function on or off. Timer Setting the timer (start timer and off timer) to 1-15 hours. Mode Select the wind mode: Natural wind or sleep mode. Speed Setting the fan speed. -
Page 28: Display Light Indicators
DISPLAY LIGHT INDICATORS LED indicator Function description Illuminated when air cooling mode is activated. Cooling mode Flashes when water tank is less than 2 liters. Oscillation mode Illuminated when swing function is activated. Hours: 8h Indication of the number of hours of the activated Hours: 4h timer. -
Page 29: Remote Control
REMOTE CONTROL Button Function description On/Off Switching the appliance on or off. Timer Setting the timer (start timer and off timer). Oscillation Switching the swing function on or off. Speed Setting the fan speed. Mode Select the wind mode: Natural wind or sleep mode. Cooling mode Switching the cooling mode on or off. -
Page 30: Operation
Inserting the battery in the remote control negative (-) positive (+) 1. The cover of the battery compartment can be removed by gently pulling it down. 2. Insert the battery into the battery compartment. Pay attention to the negative and positive poles of the battery. - Page 31 • After the cooling mode is used, you can switch it off. • Press the On/Off button (21). Memory function If you switch the appliance back on after initial start-up, the settings selected for the operating mode are saved. Any activated timer is not saved in the appliance. If there is a power failure or if the power supply is interrupted, the memory is deleted.
- Page 32 The wind mode setting cycle is as follows: Natural Normal wind Sleep mode wind (no display) cycle Natural wind mode This mode imitates the effect of natural wind, which can be adjusted in 3 fan speeds (High, Medium, Low) by pressing the speed button (20). Natural wind mode with fan speed High High (50 s) –...
- Page 33 Note: If you activate the cooling mode and there are less than 2 litres in the water tank, an alarm signal sounds - even in sleep mode. Setting wind speed Press the speed button (20) to set the desired fan speed as follows: •...
- Page 34 Press the timer button (18) several times in standby mode to set the time until the appliance switches off in the following order: The hour LEDs for the off timer light up as follows: TIME 1 h 2 h 3 h 4 h 5 h 6 h 7 h 8 h...
- Page 35 FILLING THE WATER TANK • Switch off the appliance and unplug the mains plug before filling the water tank. • Open the water tank cover and fill with water or ice. • Make sure that the maximum permissible water level is not exceeded. •...
-
Page 36: Transport And Storage
TRANSPORT AND STORAGE Note: If you store or transport the appliance improperly, the appliance may be damaged. Observe the following information regarding transport and storage of the appliance. Transport To make it easier to move and transport the appliance, it is equipped with wheels and a carrying handle. -
Page 37: Cleaning And Maintenance
CLEANING AND MAINTENANCE Recommended intervals for cleaning and maintenance Care and Before every Min. every Min. every Min. every At least maintenance start-up needed 2 weeks 4 weeks 6 weeks annually Clean the water √ √ tank Check the air inlets and outlets for dirt and foreign objects √... - Page 38 Notes on cleaning and maintenance WARNING Risk of electric shock! Do not touch the mains plug with wet or damp hands. • Switch off the appliance and remove the mains plug from the socket. • Always pull the mains plug by the plug and not by the cable from the socket. Visual inspection of the inside of the appliance 1.
-
Page 39: Troubleshooting
TROUBLESHOOTING WARNING Risk of electric shock! Repairs to the appliance and work on the electrical components may only be carried out by a qualified specialist company! Do not attempt to repair the appliance yourself. The appliance has been checked for proper functioning several times during production. If malfunctions occur nonetheless check the appliance according to the following points: Problem Solution approach... - Page 40 The appliance is running, Check whether cooling mode is activated. The but there is no air cooling LED indicator for the cooling mode (22) should be or pump operation. illuminated. Check the filling level of the water tank (see section “Filling the water tank”).
-
Page 41: Hints On Disposal
HINTS ON DISPOSAL According to the European waste regulation 2012/19/EU this symbol on the product or on its packaging indicates that this product may not be treated as household waste. Instead it should be taken to the appropriate collection point for the recycling of electrical and electronic equipment. - Page 43 Chère cliente, cher client, Toutes nos félicitations pour l’acquisition de ce nouvel appareil. Veuillez lire attentivement et respecter les instructions de ce mode d’emploi afin d’éviter d’éventuels dommages. Nous ne saurions être tenus pour responsables des dommages dus au non-respect des consignes et à...
-
Page 44: Consignes De Sécurité
CONSIGNES DE SÉCURITÉ • Avant d‘utiliser l‘appareil, vérifiez sa tension sur la plaque signalétique. Ne branchez l‘appareil que sur des prises dont la tension correspond à ce le de l‘appareil. • Tenez le câble à l‘écart des surfaces chaudes et des objets aux angles pointus. •... - Page 45 • Changez l‘eau du réservoir au plus tard tous les 3 jours. MISE EN GARDE Risque de choc électrique ! Les travaux sur les composants électriques ne peuvent être effectués que par une entreprise spécialisée autorisée ! PRÉSENTATION DU PRODUIT Le rafraîchisseur d‘air abaisse la température ambiante à...
-
Page 46: Aperçu De L'appareil
APERÇU DE L‘APPAREIL Panneau de commande Cache arrière Écran Filtre à air Volets de ventilation verticaux Filtre en nid d'abeille Volets de ventilation horizontaux Enroulement du câble Couvercle du réservoir d'eau Roulettes Cache avant Télécommande Indicateur de niveau d'eau Packs réfrigérants Cache supérieur MISE EN GARDE Risque de blessure ! N‘utilisez que des accessoires et des pièces de... -
Page 47: Panneau De Commande
PANNEAU DE COMMANDE Touche Description de la fonction Mode Pour allumer ou éteindre le mode rafraîchissement rafraîchissement Mode oscillation Pour allumer ou éteindre le mode oscillation Réglage de la minuterie (de démarrage ou d'arrêt) de 1 Minuterie à 15 heures Choisissez le mode de ventilation : Vent naturel ou mode Mode nuit... -
Page 48: Voyants Lumineux De L'affichage
VOYANTS LUMINEUX DE L‘AFFICHAGE Voyant LED Description de la fonction S'allume lorsque le mode de rafraîchissement est Mode activé. Clignote lorsque le niveau d'eau dans le rafraîchissement réservoir d'eau descend en dessous de 2 litres. Mode oscillation S'allume lorsque la fonction oscillation est activée. Heures : 8h Affiche le nombre d'heures de la minuterie activée. -
Page 49: Télécommande
TÉLÉCOMMANDE Touche Description de la fonction Marche / Arrêt Pour allumer et éteindre l'appareil Minuterie Réglage de la minuterie (de démarrage ou d'arrêt) Mode oscillation Pour allumer et éteindre la fonction oscillation Vitesse Réglage de la vitesse de ventilation Choisissez le mode de ventilation : Vent naturel ou mode Mode nuit Mode... -
Page 50: Utilisation
Insertion de la pile dans la télécommande Pôle négatif (-) Pôle positif (+) 1. Le couvercle du compartiment à piles se retire en le tirant doucement vers le bas. 2. Placez la pile dans le compartiment. Respectez les pôles négatif et positif de la pile. 3. - Page 51 • Une fois le mode de rafraîchissement utilisé, vous pouvez le désactiver. • Appuyez sur le bouton Marche / Arrêt (21). Fonction mémoire Lorsque vous remettez l‘appareil en marche après la première mise en service, le mode de fonctionnement reste mémorisé. Toute minuterie activée ne sera pas enregistrée par l‘appareil.
- Page 52 voyant LED du mode vent naturel (29) clignote. • Appuyez deux fois sur mode (19) pour passer en mode veille. Le voyant LED du mode veille (28) clignote. Le cycle de réglage du mode vent est le suivant : Vent Vent normal Mode nuit naturel...
- Page 53 2. Si le ventilateur est en mode nuit et à vitesse moyenne, il fonctionnera pendant une demi-heure avec un vent naturel moyen, puis passera à un vent naturel faible jusqu‘à la fin du temps prédéfini ou jusqu‘à ce que vous l‘éteigniez. 3.
- Page 54 Les LED des heures de la minuterie de démarrage s‘allument comme suit DURÉE 1 h 2 h 3 h 4 h 5 h 6 h 7 h 8 h 9 h 10 h 11 h 12 h 13 h 14 h 15 h LED 1 h √ √ √ √ √ √ √ √ LED 2 h √...
-
Page 55: Remplissage Du Réservoir D'eau
du mode d‘oscillation (23) s‘allume. Fonction auto stop L‘appareil s‘éteint automatiquement après 24 heures de fonctionnement continu. Pour éteindre l‘appareil MISE EN GARDE Risque de choc électrique ! Ne touchez jamais la fiche d‘alimentation avec les mains mouillées ou humides. •... -
Page 56: Transport Et Stockage
MISE EN GARDE Risque de blessure ! Le liquide contenu dans les blocs de glace peut être nocif pour votre santé ! Si vous avalez ce liquide, consultez immédiatement un médecin. Si le liquide est entré en contact avec vos yeux, rincez-les avec de l‘eau et consultez immédiatement un ophtalmologiste. -
Page 57: Nettoyage Et Entretien
NETTOYAGE ET ENTRETIEN Intervalles recommandés pour le nettoyage et l‘entretien Nettoyage et Avant Suivant Au moins Au moins Au moins Au moins entretien chaque toutes toutes toutes une fois utilisation besoins les 2 les 4 les 6 par an semaines semaines semaines Nettoyage du... - Page 58 Remarques sur le nettoyage et l‘entretien MISE EN GARDE Risque de choc électrique ! Ne touchez pas la fiche d‘alimentation avec les mains mouillées ou humides. • Éteignez l‘appareil et débranchez la fiche de la prise. • Débranchez toujours l‘appareil en tirant sur la fiche et non sur le câble. Contrôle visuel de l‘intérieur de l‘appareil 1.
- Page 59 Nettoyage du filtre à air Remarque : Si le filtre n‘est pas nettoyé pendant une longue période, le fonctionnement de l‘appareil peut être altéré, par ex. réduire le débit d‘air peut être réduit et le niveau de bruit augmenté. Nettoyez le filtre à air une fois par mois. •...
-
Page 60: Résolution Des Problèmes
RÉSOLUTION DES PROBLÈMES MISE EN GARDE Risque de choc électrique ! Les réparations de l‘appareil et les interventions sur les composants électriques ne doivent être effectuées que par une entreprise spécialisée ! N‘essayez pas de réparer l‘appareil vous-même. L‘appareil a été vérifié plusieurs fois pendant la production et devrait fonctionner parfaitement. - Page 61 Fuite d'eau. Vérifiez que l'appareil ne fuit pas. Vérifiez que le réservoir d'eau est bien installé. Impossible d'installer le Vérifiez que le mécanisme d'abaissement de la pompe réservoir d'eau. s'est déclenché. Si la pompe est visible dans la zone inférieure, le réservoir d'eau est bloqué. Faites glisser la pompe vers le haut jusqu'à...
-
Page 62: Informations Sur Le Recyclage
INFORMATIONS SUR LE RECYCLAGE Vous trouverez sur le produit l’image ci-contre (une poubelle sur roues, barrée d‘une croix), ce qui indique que le produit se trouve soumis à la directive européenne 2012/19/ UE. Renseignez-vous sur les dispositions en vigueur dans votre région concernant la collecte séparée des appareils électriques et électroniques. - Page 63 Estimado cliente, Le felicitamos por la adquisición de este producto. Lea atentamente las siguientes instrucciones y sígalas para evitar posibles daños. No asumimos ninguna responsabilidad por los daños causados por el incumplimiento de las instrucciones y el uso inadecuado. Escanee el siguiente código QR para obtener acceso a la última guía del usuario y más información sobre el producto.
-
Page 64: Indicaciones De Seguridad
INDICACIONES DE SEGURIDAD • Antes de utilizar el aparato, compruebe la tensión en la placa técnica del mismo. Conecte el aparato a tomas de corriente que se adecuen a su tensión. • Mantenga el cable de alimentación lejos de las superficies calientes y de los objetos afilados. - Page 65 DESCRIPCIÓN DEL PRODUCTO El enfriador de aire reduce la temperatura ambiente a un nivel confortable mediante la refrigeración por ventilación. Para ello, el aparato se llena de agua fría u, opcionalmente, de cubitos de hielo o recipientes para hielo, que enfrían el aire caliente que entra a través del filtro y que luego es expulsado por el ventilador.
-
Page 66: Vista General Del Aparato
VISTA GENERAL DEL APARATO Panel de control Tapa posterior Pantalla Filtro de aire Lámina de ventilación vertical Filtro de panal Lámina de ventilación horizontal Recogedor de cable Carcasa del depósito de agua Ruedas Tapa extraíble frontal Mando a distancia Indicador del nivel de agua Recipiente para hielo Tapa superior ADVERTENCIA... -
Page 67: Panel De Control
PANEL DE CONTROL Núm. Botón Descripción de funciones Modo Encender o apagar el modo «Enfriamiento» «Enfriamiento» Modo Encender o apagar el modo «Oscilación» «Oscilación» Configurar el temporizador (de encendido y de Temporizador apagado) Elija el modo deseado: «Viento natural» o modo Modos «Nocturno»... -
Page 68: Indicaciones Luminosos De La Pantalla
INDICACIONES LUMINOSOS DE LA PANTALLA Núm Indicador led Descripción de funciones Se ilumina cuando el modo «Enfriamiento» está Modo activado. «Enfriamiento» Parpadea cuando el nivel del agua en el depósito está por debajo de 2 L. Se ilumina cuando el modo «Oscilación» está Modo «Oscilación»... -
Page 69: Mando A Distancia
MANDO A DISTANCIA Núm. Botón Descripción de funciones Encender/ Encender y apagar el aparato Apagar Temporizador Configurar el temporizador (encendido y apagado) Modo Encender o apagar el modo «Oscilación» «Oscilación» Velocidad Configurar la velocidad del ventilador Modos «Viento natural» o modo «Nocturno» Modo Encender o apagar el modo «Enfriamiento»... -
Page 70: Funcionamiento
Inserción de la pila en el mando a distancia Polaridad negativa (-) Polaridad positiva 1. La tapa del compartimento de pilas se puede extraer tirando suavemente hacia abajo. 2. Inserte la pila en el compartimento de pilas. Preste atención a la polaridad negativa y positiva de la pila. - Page 71 • Una vez utilizado el modo «Enfriamiento», puede desconectarlo. • Pulse el botón de encendido/apagado (21). Función de ahorro Al volver a encender el aparato tras la primera puesta en marcha, este recuerda los ajustes seleccionados para el modo de funcionamiento anterior. El aparato no guarda los ajustes de temporizador.
- Page 72 del modo «Viento natural» (29) parpadeará. • Pulse dos veces el botón de modo (19) para pasar al modo de reposo. La luz led del modo de reposo (28) parpadeará. El ciclo de ajuste para el modo de viento es el siguiente: Modo Viento Viento normal...
- Page 73 2. Cuando el ventilador está en modo de reposo y el nivel del ventilador está ajustado en «Medio», funcionará durante media hora con viento natural medio y luego cambiará a viento natural suave hasta que termine el tiempo preestablecido o hasta que se apague el aparato. 3.
- Page 74 Los indicadores led d horas del temporizador de inicio se iluminan en el siguiente orden: TIEMPO 1 h 2 h 3 h 4 h 5 h 6 h 7 h 8 h 9 h 10 h 11 h 12 h 13 h 14 h 15 h LED 1 h √ √ √ √ √ √ √...
-
Page 75: Llenar El Depósito De Agua
modo «Oscilación» (23) se ilumina. Función apagado automático Tras 24 horas de funcionamiento continuo, el aparato se apaga automáticamente. Apagar el aparato ADVERTENCIA ¡Riesgo de descarga eléctrica! No toque el enchufe con las manos mojadas o húmedas. • Apague el aparato. •... -
Page 76: Transporte Y Almacenamiento
ADVERTENCIA ¡Riesgo de lesiones! El líquido de los recipientes para hielo puede ser perjudicial para la salud. En caso de ingestión del líquido, consulte inmediatamente a un médico. Si el líquido ha entrado en contacto con los ojos, lávelos con agua y consulte inmediatamente a un oftalmólogo. TRANSPORTE Y ALMACENAMIENTO Nota: Puede dañar el aparato si lo almacena o transporta de forma inadecuada. -
Page 77: Limpieza Y Cuidado
LIMPIEZA Y CUIDADO Intervalos recomendados de limpieza y mantenimiento Limpieza y cuidado Antes de Según Mín. cada Mín. cada Mín. cada Mín. 1 vez cada uso necesidad 2 semanas 4 semanas 6 semanas al año Limpiar el depósito √ √ de agua Comprobar que las entradas y... - Page 78 Indicaciones sobre la limpieza y mantenimiento ADVERTENCIA Riesgo de descarga eléctrica. No toque el enchufe con las manos mojadas o húmedas. • Apague el aparato y desconecte el enchufe de la toma de corriente. • Para desconectar el aparato no tire del cable, sino del cuerpo del enchufe. Inspección visual del interior del aparato 1.
- Page 79 Limpieza del filtro de aire Nota: Si no limpia el filtro durante mucho tiempo, puede afectar negativamente al funcionamiento del aparato, como reducir el flujo de aire y aumentar el nivel de ruido. Limpie el filtro de aire una vez al mes. •...
-
Page 80: Detección Y Resolución De Anomalías
DETECCIÓN Y RESOLUCIÓN DE ANOMALÍAS ADVERTENCIA Riesgo de descarga eléctrica. ¡Solamente un técnico especializado autorizado debe llevar a cabo los trabajos de reparación y mantenimiento del aparato y de los componentes eléctricos! No intente reparar el aparato usted mismo. Durante la producción se comprobó varias veces el buen funcionamiento del aparato. Si, a pesar de todo, se producen fallos, compruebe los siguientes puntos: Anomalía Posible solución... - Page 81 El aparato está Compruebe si el modo «Enfriamiento de aire» está funcionando, pero el activo. El indicador led del modo «Enfriamiento de modo «Enfriamiento de aire» (22) debe estar encendido. aire» y la bomba no Compruebe el nivel de llenado del depósito de agua funcionan.
-
Page 82: Retirada Del Aparato
RETIRADA DEL APARATO Si el aparato lleva adherida la ilustración de la izquierda (el contenedor de basura tachado), entonces rige la directiva europea 2012/19/UE. Este producto no debe arrojarse a un contenedor de basura común. Infórmese sobre las leyes territoriales que regulan la recogida separada de aparatos eléctricos y electrónicos. - Page 83 Gentile cliente, La ringraziamo per aver acquistato il dispositivo. La preghiamo di leggere attentamente le seguenti istruzioni per l’uso e di seguirle per evitare possibili danni. Non ci assumiamo alcuna responsabilità per danni scaturiti da una mancata osservazione delle avvertenze di sicurezza e da un uso improprio del dispositivo.
-
Page 84: Avvertenze Di Sicurezza
AVVERTENZE DI SICUREZZA • Controllare la tensione sulla targhetta del dispositivo prima dell’utilizzo. Collegare il dispositivo solo a prese elettriche con tensione corrispondente. • Tenere il cavo lontano da superfici bollenti e oggetti taglienti. • Non far passare il cavo sotto a tappeti e non coprirlo con altri oggetti o tessuti. Posizionare il cavo in modo da non inciamparvi e da non restarvi impigliati. - Page 85 DESCRIZIONE DEL PRODOTTO Il raffrescatore evaporativo abbassa la temperatura ambiente attraverso una ventola di raffreddamento. Il dispositivo viene riempito con acqua o con cubetti di ghiaccio o piastre eutettiche, in modo da raffreddare l’aria che entra dal filtro ed emetterla poi tramite la ventola.
-
Page 86: Descrizione Del Dispositivo
DESCRIZIONE DEL DISPOSITIVO Pannello di controllo Copertura posteriore Display Filtro dell’aria Fessure di ventilazione verticali Filtro a nido d’ape Fessure di ventilazione orizzontali Avvolgicavo Copertura serbatoio Rotelle Copertura anteriore Telecomando Indicazione del livello dell’acqua Piastre eutettiche Copertura superiore AVVERTENZA Pericolo di lesione! Utilizzare solo accessori e pezzi di ricambio indicati nel manuale d’uso. -
Page 87: Pannello Di Controllo
PANNELLO DI CONTROLLO N° Tasto Descrizione della funzione Modalità di Accendere o spegnere la modalità di raffreddamento. raffreddamento Modalità di Accendere o spegnere la modalità di oscillazione. oscillazione Impostare il timer (di avvio e di spegnimento) tra 1 e 15 Timer ore. -
Page 88: Indicazioni Luminose Sul Display
INDICAZIONI LUMINOSE SUL DISPLAY N° Indicazione LED Descrizione della funzione Si illumina se è attiva la modalità di Modalità di raffreddamento. Lampeggia se l’acqua nel raffreddamento serbatoio scende sotto 2 litri. Modalità di Si illumina se è attiva la funzione di oscillazione. oscillazione Ore: 8h Indica le ore del timer attivo. -
Page 89: Telecomando
TELECOMANDO N° Tasto Descrizione della funzione On/off Accendere e spegnere il dispositivo. Timer Impostare il timer (di avvio e di spegnimento). Modalità di Accendere e spegnere la funzione oscillante. oscillazione Velocità Impostare la velocità della ventola. Selezionare la modalità di ventilazione: vento naturale Modalità... -
Page 90: Funzionamento
Inserire la batteria nel telecomando Polo negativo Polo positivo (+) 1. È possibile rimuovere il vano della batteria tirando leggermente verso il basso. 2. Mettere la batteria nel vano, prestando attenzione alla corretta polarità. 3. Riposizionare il vano della batteria e fissarlo correttamente. FUNZIONAMENTO Nota: non utilizzare il dispositivo senza filtro dell’aria! Senza il filtro, l’interno del dispositivo si sporca molto e ciò... - Page 91 Funzione di memorizzazione Quando l‘apparecchio viene riacceso dopo la prima accensione, ricorda le impostazioni selezionate per il modo di funzionamento precedente. L‘apparecchio non salva le impostazioni del timer. In caso di mancanza di corrente o di interruzione, le impostazioni salvate vengono cancellate. Impostare la modalità...
- Page 92 Modalità notturna (28) lampeggia. Il ciclo di impostazione per la modalità di ventilazione si presenta in questo modo: Modalità Vento normale Vento notturna (senza indicazione) naturale Ciclo Vento naturale Questa modalità imita l’effetto del vento naturale, impostabile premendo il tasto Velocità...
- Page 93 2. Se il dispositivo è impostato sulla modalità notturna e la velocità di ventilazione media, funziona per mezz’ora con il vento naturale di livello medio, passa poi al vento naturale di livello di ventilazione basso e resta in questa impostazione fino allo scadere del tempo impostato o fino allo spegnimento.
- Page 94 I LED delle ore per il timer di avvio si accendono in questo modo: TEMPO 1 h 2 h 3 h 4 h 5 h 6 h 7 h 8 h 9 h 10 h 11 h 12 h 13 h 14 h 15 h LED 1 h √ √ √ √ √ √ √ √...
-
Page 95: Riempire Il Serbatoio
Funzione di arresto automatico Dopo un funzionamento continuato di 24 ore, il dispositivo si spegne automaticamente. Spegnere il dispositivo AVVERTENZA Pericolo di scosse elettriche! Non toccare la spina con mani bagnate o umide. • Spegnere il dispositivo. • Staccare la spina impugnandola saldamente e non tirando dal cavo. •... -
Page 96: Trasporto E Conservazione
AVVERTENZA Pericolo di lesione! Il liquido contenuto nelle piastre eutettiche può essere dannoso per la salute! Se il liquido viene ingerito, consultare immediatamente un medico! Se il liquido entra in contatto con gli occhi, sciacquarli immediatamente con acqua e rivolgersi subito a un medico. TRASPORTO E CONSERVAZIONE Nota: se il dispositivo viene trasportato o stoccato in modo improprio, è... -
Page 97: Pulizia E Manutenzione
PULIZIA E MANUTENZIONE Intervalli consigliati per pulizia e manutenzione Cura e Prima di Secondo Almeno Almeno Almeno Almeno manutenzione ogni uso necessità ogni 2 ogni 4 ogni 6 una volta settimane settimane settimane all’anno Pulire il serbatoio √ √ Controllare ingressi e uscite dell’aria per la presenza √... - Page 98 Informazioni su pulizia e manutenzione AVVERTENZA Pericolo di scossa elettrica! Non toccare la spina con le mani umide o bagnate. • Spegnere il dispositivo e staccare la spina. • Quando si stacca la spina, non tirare dal cavo, ma impugnare la spina stessa. Controllo visivo dell’interno del dispositivo 1.
- Page 99 Pulire il filtro dell’aria Nota: se non si pulisce il filtro per lunghi periodi, possono peggiorare le prestazioni, ad es. può ridursi il flusso d’aria o aumentare la rumorosità. Pulire il filtro una volta al mese. • Togliere il filtro dell’aria sul retro dell’alloggiamento e immergere il filtro a nido d’ape e il telaio in acqua diverse volte.
-
Page 100: Correzione Degli Errori
CORREZIONE DEGLI ERRORI AVVERTENZA Pericolo di scosse elettriche! Eventuali riparazioni al dispositivo e opere sui componenti elettrici devono essere realizzate esclusivamente da tecnici qualificati! Non cercare di riparare autonomamente il dispositivo Il dispositivo è stato controllato diverse volte durante la produzione per assicurarne l’impeccabile funzionamento. - Page 101 Esce acqua dal Controllare se il dispositivo perde. dispositivo. Controllare se il serbatoio è fissato correttamente. Non è possibile inserire il Controllare se è stato attivato il meccanismo di serbatoio. abbassamento della pompa. Se la pompa è visibile nella zona in basso, il serbatoio viene bloccato. Spingere in alto la pompa, fino a quanto è...
-
Page 102: Smaltimento
SMALTIMENTO Se sul prodotto è presente la figura a sinistra (il cassonetto mobile sbarrato), si applica la direttiva europea 2012/19/UE. Questi prodotti non possono essere smaltiti con i rifiuti normali. Informarsi sulle disposizioni vigenti sulla raccolta separata di dispositivi elettrici ed elettronici. Non smaltire i vecchi dispositivi con i rifiuti domestici.
Need help?
Do you have a question about the Iceberg Breeze and is the answer not in the manual?
Questions and answers