Airxcel Aqua-Hot 200 Series Service Manual
Hide thumbs
Also See for Aqua-Hot 200 Series:
- Use and care manual (20 pages) ,
- Installation manual (45 pages) ,
- Service manual (105 pages)
Table of Contents
Advertisement
Quick Links
Advertisement
Table of Contents
Troubleshooting

Subscribe to Our Youtube Channel
Related Manuals for Airxcel Aqua-Hot 200 Series


Summary of Contents for Airxcel Aqua-Hot 200 Series
- Page 1 Service Manual Series AHE-250-D02...
-
Page 2: Table Of Contents
Introduction Contents Caution Notes As you read this information, take particular note of the NOTICE, Caution Notes ................2 CAUTION, WARNING, and DANGER symbols when they appear. Introduction ..................3 This information is important for safe and effi cient use of the Maintenance Schedule ..............5 Aqua-Hot system. -
Page 3: Introduction
Introduction System Overview Introduction to this Document The Aqua-Hot 250 Diesel Series is a Hydronic (water- Welcome to the Aqua-Hot 250-D02 Service Manual. This based) Heating Systems that can provide heat and tank-less, manual will serve as a guide for diagnosing and repairing the continuous hot water in one small, easy to install package. - Page 4 Introduction Read all instructions before servicing the Aqua-Hot unit. Aqua- Hot Heating Systems is not liable for damage resulting from failing to follow instructions contained in this, and any other Aqua-Hot documentation relevant to this unit. • Read this manual before installing or using the Aqua-Hot System to reduce the risk of injury to persons or damage to the equipment.
-
Page 5: Maintenance Schedule
Maintenance Schedule Introduction Maintenance Schedule Monthly Maintenance Check the Aqua-Hot’s antifreeze and distilled water heating solution to ensure that it is at the proper level. This can be DO NOT operate the diesel burner and/or electric heating accomplished by visually checking the coolant level in the Aqua- element without antifreeze and distilled water heating Hot’s expansion bottle;... -
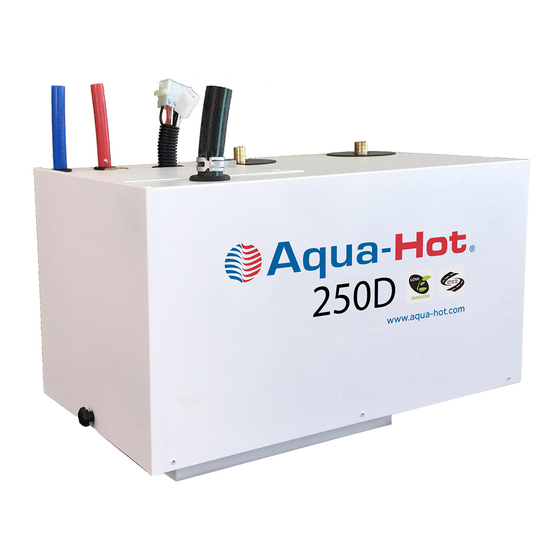
Page 6: System Features
System Features Figure 2 System Specifi cations Electric Element Power Consumption ........1000 W (maximum) Voltage ................120V AC DC Power Heat Input ..........66,000 BTU/hr ± 10% Fuel Consumption ..........0.40 gallon/hr Power Consumption ......... 108W (maximum) Zone Heat Circulation Pumps ...................1 Power Consumption (max) ............. 21W Voltage ................ -
Page 7: Component Cut-Aways
Component Cut-Away System Features 1. Access Cover Screw 2. Drain Valve 3. 3-Way Valve 4. Diesel Burner Controller 5. Tempering Valve 6. Diesel Burner Assembly Interlock Switch 8. Domestic Cold Water Inlet 9. Domestic Hot Water Outlet 10. 120V AC Connection 11. -
Page 8: Operational Flowchart
Operational Flow Chart Operating the LCD Operational Flow Chart A heat source is selected from Interior Switch Panel Diesel Burner Electric Element Electric Heating Element The burner will begin will activate, providing providing heat to the heat to the antifreeze and antifreeze and water heating water heating solution solution present within the... -
Page 9: Relay Control Board
Relay Control Board Controller Relay Control Board Fuse Functions, Locations, and Ratings: There are three fast-blow fuses included with this relay The relay control board at use in your Aqua-Hot 250 Diesel board and may need to be replaced if they cease to function. Series is designed to function in conjunction with the Diesel The cradles for these fuses are labeled FH1, FH2, and FH3 and Burner Controller to allow the heater to operate. - Page 10 Relay Control Board Controller Heating Status (D1): Burner Status (D5): This indicator light will illuminate orange when the burner This indicator light shows the status of the burner by and/or electric element switch on the interior switch panel is illuminating green when the burner switch is on. On the 250- ON and the control thermostat is calling for heat.
-
Page 11: Interior Switch Panel
Interior Switch Panel Controller Interior Switch Panel Electric Element Switch: When the coach is plugged into an AC power source (i.e. Introduction: shore power or a generator) and the electric element switch is ON, the electric heating element will be used to provide heat to The interior switch panel is used to control the two potential the boiler tank if the need arises. - Page 12 Interior Switch Panel Controller Switch Panel Rear View Electric Burner NOTE: The Burner and Electric Element switches must possess a jumper wire between Pin 4 and Pin 10 as depicted. Figure 6 Jumper Wire (see note) Switch Panel Wiring AC Electric Switch AC Control Switch Plug Pin 4 Pin 9...
-
Page 13: Exhaust System Requirements
Exhaust System Controller Exhaust System Requirements • The exhaust must be able to freely exit away from the Introduction: vehicle without any obstructions. The Aqua-Hot’s exhaust is hot and must be kept away from any • Use standard two-inch automotive-type exhaust piping heat-sensitive material. -
Page 14: Interlock Switch
Interlock Switch Controller Components Introduction: This section of the Service Manual details various Failure to disconnect all power supplies and/or allow the components of the Aqua-Hot that may require troubleshooting unit to cool before servicing could cause serious damage or and/or replacement in the event of malfunction. -
Page 15: Fluid Level Sensor
Fluid Level Sensor Fluid Level Sensor Troubleshooting Guidelines: Before troubleshooting the fl uid level sensor, ensure that the Introduction: following requirements have been met. The fl uid level sensor monitors the current fl uid level within • The fl uid expansion bottle is fi lled to at least the “COLD” the Aqua-Hot. - Page 16 Fluid Level Sensor Before continuing to the replacement procedure, ensure that the unit has cooled to ambient temperature, all power sources have been disconnected, and the unit is completely shut off. Fluid Return Port Replacement Procedure: In order to replace the fl uid level sensor, the overfl ow bottle must also be replaced.
-
Page 17: Control Thermostat
Control Thermostat Fluid Level Sensor Control Thermostat If the “Heating Status” (D1) indicator light is not illuminated, check the following: The control thermostat is installed into the Aqua-Hot’s • Verify that the temperature of the boiler tank has fallen boiler tank and monitors the temperature of the antifreeze below the 175°F minimum operating temperature and water heating solution to determine when it is at operating by checking with an infrared thermometer. - Page 18 Control Thermostat Fluid Level Sensor Control Thermostat Replacement Procedure Reconnect wire #14A and wire #23 to the new control thermostat. 1. Ensure that the Aqua-Hot has been completely shut 8. Refi ll the Aqua-Hot’s boiler tank with the previously down, all power sources disconnected, and the unit has drained antifreeze and water heating solution.
-
Page 19: Ac High-Limit Thermostat
High-Limit Thermostats AC High-Limit Thermostat • The fuses in the relay control board are functional. 2. Ensure that the unit has been shut down and completely Introduction: cooled before continuing. 3. Shut off the coach-side power breaker to the Aqua-Hot. The AC high-limit thermostat serves as a safety measure in the event that the electric heating element continues 4. - Page 20 High-Limit Thermostats Replacement Procedure: reinstall the mixing valve assembly. 11. Make sure the replacement AC high-limit thermostat is If it has been determined that the high-limit thermostat functioning properly by testing for continuity across this needs to be replaced, it can be easily replaced by following the thermostat.
-
Page 21: Burner High-Limit Thermostats
High-Limit Thermostats Burner High-Limit Thermostats Troubleshooting Procedure: 1. Locate the high-limit thermostats (see Figure 24). Introduction: 2. Disconnect the burner thermostats using the information below: The burner high-limit thermostats serve as a safety measure in the event that the burner continues to operate after the •... -
Page 22: Low-Temperature Cutoff Thermostat
Low-Temp Cutoff Thermostat Low-Temperature Cutoff Thermostat 3. If the ‘Low-Temperature Cutoff Status” light on the relay control board is illuminated after the unit has reached operating temperature, complete the following: Introduction: • Disconnect wire #14B and #25 from the low- The Low-Temperature Cutoff Thermostat (LTCO) operates temperature cutoff thermostat. - Page 23 Low-Temp Cutoff Thermostat Replacing the Low-Temperature Cutoff Thermostat: 1. Ensure that the Aqua-Hot has been completely shut down and that all the power sources have been disconnected. 2. Locate the Low-Temperature Cutoff Thermostat on the Failure to disconnect all power supplies and/or allow Aqua-Hot.
-
Page 24: Three-Way Valve
Three-Way Valve Three-Way Valve Introduction: The Aqua-Hot has a three-way directional valve to control coolant priority within the unit. This ensures that there will be a supply when heated water is being called for, but can provide interior heating when the need arises. Figure 28 5. - Page 25 Three-Way Valve Replacement Procedure: 1. Ensure that the Aqua-Hot has been completely shut down, all power sources have been disconnected, and the unit has completely cooled. Failure to disconnect all power supplies and/or allow 2. Use clamp hose pliers to pinch tubing surrounding the the unit to cool before servicing could cause serious three-way valve as indicated in Figure 30.
-
Page 26: Tempering Valve
Tempering Valve Tempering Valve Introduction: The tempering valve of the Aqua-Hot mixes the heated Failure to disconnect all power supplies and/or allow domestic water from the boiler tank with cold incoming the unit to cool before servicing could cause serious domestic water at a preset ratio to deliver steady hot water damage or personal injury. -
Page 27: Fluid Circulation And Stir Pump
Fluid Circulation Pump Circulation and Stir Pump Introduction: The fl uid circulation pump operates to provide fl uid circulation to either the interior heating zone or the antifreeze boiler tank depending on the heating and hot water needs at the time. - Page 28 Fluid Circulation Pump Replacement Procedure: 1. Ensure that the Aqua-Hot has been completely shut down, all power sources have been disconnected, and that the unit has been allowed to cool completely. Failure to disconnect all power supplies and/or allow 2. Clamp the zone outlet, and the zone return with hose pinch- the unit to cool before servicing could cause serious pliers as shown below.
-
Page 29: Ac Electric System
1. Switch both the electric and the burner switches to the OFF Introduction: position. The AC Electric system of the Aqua-Hot 200 Series unit 2. Allow the unit to cool completely. functions to provide supplementary heat to the Aqua-Hot boiler 3. - Page 30 Fluid Circulation Pump AC Electric System active, the relay control board will need to be replaced. • If 12V DC power is present at wire #28, disassemble the AC relay enclosure and check for power at Pin #1 of the AC relay. If power is not present at Pin #1, Failure to disconnect all power supplies and/or allow inspect the wiring harness for damage.
-
Page 31: Diesel Burner
Fluid Circulation Pump Diesel Burner Diesel Burner Overview Standard automotive diesel fuel is to be used as the fuel source. The diesel burner serves as the primary heating source for the Aqua-Hot 250-D02. The diesel burner is responsible for mixing Key components are called out below. - Page 32 Fluid Circulation Pump Diesel Burner p. 32 ©Aqua-Hot® 250-D02 Diesel Series Service Manual...
- Page 33 Fluid Circulation Pump Diesel Burner Torque Specs Part Number Description WPE-300-900 Controller, 12V DC Item Torque Value WPX-362-107 Controller Mounting Bracket 2 Nm WPX-470-562 Coil Mounting Screw 1.0 +0.5 Nm WPX-101-838 Ignition Coil, 12V DC 2 Nm (18 lb-in) WPX-404-918 Ignition Wire Boot 5 - 6 Nm(44 -53 lb-in) WPX-178-624...
- Page 34 Fluid Circulation Pump Diesel Burner Torque Specs Part Number Description WPX-434-795 C-Plug Harness Item Torque Value WPX-148-210 Blower Casing Screw 5.5 - 6.5 Nm (48.5-57.5 lb-in) WPX-152-552 Washer, Lock, Blower Casing 41 (Fan .457mm + .05mm ( STANDARD SHIM WPX-301-841 Blower Housing Gap) ) - 0.0mm...
- Page 35 Fluid Circulation Pump Diesel Burner Torque Specs Part Number Description WPX-322-083 Valve, Fuel Solenoid 12V DC Item Torque Value WPX-386-650 Valve, Fuel Solenoid Kit 50 (nut) 2 Nm WPX-267-279 Electrode Bolt 11.5 Nm (8.5 lb-ft) (fuel fi tting to fuel tower) WPX-152-560 Washer, Lock, Electrode WPX-278-971...
- Page 36 Fluid Circulation Pump Diesel Burner Torque Specs Part Number Description WPX-150-754 Banjo Bolt Item Torque Value WPX-151-157 Copper Gasket Ring 15 ± 1.5 Nm WPX-661-002 Banjo Fuel Pipe - Supply, DBW 2010 (with Straight Tube) 3 Nm WPX-661-001 Banjo Fuel Pipe - Return, DBW 2010 (with Straight Tube) 20 Nm WPX-277-282...
-
Page 37: Diesel Burner Operation
Diesel Burner Operation Fluid Circulation Pump Diesel Burner Operational Flow Chart The Motor will continue to run for approximately 3 Once the ignited air-fuel additional minutes. This mixture (FLAME) is process is referred to as observed by the Flame the Purge Cycle, which Sensor, the Ignition coil cools the heater’s internal will automatically switch... - Page 38 Diesel Burner Operation Fluid Circulation Pump NOTE: The Motor and Combustion Air Blower will begin to operate only if the Control thermostat is calling for heat. p. 38 ©Aqua-Hot® 250-D02 Diesel Series Service Manual...
- Page 39 Diesel Burner Operation Fluid Circulation Pump ©Aqua-Hot® 250-D02 Diesel Series Service Manual p. 39...
- Page 40 Diesel Burner Operation Fluid Circulation Pump NOTE: Whenever the Diesel Burner is switched OFF by the Control Thermostat, it will automatically be reactivated once the Aqua-Hot boiler tank’s coolant reaches the present temperature of approximately 160°F (±5°). p. 40 ©Aqua-Hot® 250-D02 Diesel Series Service Manual...
-
Page 41: Detaching The Diesel Burner
Fluid Circulation Pump Detaching the Burner Instructions for Detaching the Diesel Burner Be sure to move the diesel burner’s switch on the interior Be sure to clamp off the Fuel Supply and Return switch panel to the OFF position and disconnect the diesel lines at the ports on top of the Aqua-Hot prior to burner’s power supply before detaching the diesel burner beginning this replacement procedure. - Page 42 Fluid Circulation Pump Detaching the Burner Step 3: Disconnect the Diesel Burner’s Controller Locate the controller and disconnect both plugs. Diesel Burner Controller Figure 45 Diesel Burner Controller Figure 44 Step 4: Remove the fuel lines from the Aqua-Hot Using a ”...
- Page 43 Fluid Circulation Pump Detaching the Burner Step 5: Remove the Diesel Burner from the Aqua-Hot The diesel burner is secured to the Aqua-Hot with two nuts that can be loosened, and swung out of the way by using a 10mm socket wrench with a 10”...
-
Page 44: Reattaching The Diesel Burner
Reattaching the Burner Fluid Circulation Pump Reattaching the Diesel Burner to the Aqua-Hot When reattaching the diesel burner, be sure to properly align the diesel burner before tightening the eye-bolt nuts. Visually inspect all the rubber grommets on the top and bottom of the burner’s cast- aluminum blower casing to ensure they are in place. - Page 45 Reattaching the Burner Fluid Circulation Pump Step 2: Reattach the fuel lines to the Aqua-Hot Align the fuel lines on the diesel burner with the fi ttings on the Aqua-Hot, and using a ” wrench, tighten down both the supply and return fuel fi...
- Page 46 Reattaching the Burner Fluid Circulation Pump Step 4: Reinstall the Access Cover Reinstall the Aqua-Hot’s access cover and securely tighten the three bolts securing the access cover in place. Figure 58 NOTE: The access cover must be installed prior to operation as a safety switch (interlock) exists.
-
Page 47: Diesel Burner
In order to perform the following procedures, it may necessary to detach the diesel burner head. NOTE: The Aqua-Hot 200 Series is equipped with a 20A Fast Blow Fuse, located on the #3 wire, between the Aqua-Hot main plug and diesel burner controller’s B-plug, which is the... - Page 48 Fluid Circulation Pump Burner Components RPM Test: 1. Disconnect the ignition cables from the ignition electrodes. Diesel Burner Ignition Coil 2. Remove the four ignition coil screws that secure the ignition Ignition Coil Cables coil to the protection cap. 3. Lift the ignition coil and disconnect its wires from the C-plug harness prior to removing completely.
- Page 49 Fluid Circulation Pump Burner Components Motor Replacement Procedure: 1. Follow the directions on Page 41 for detaching the diesel burner. 2. Remove the four ignition coil screws that secure the ignition coil to the protection cap. Lift the ignition coil to disconnect Be sure to move the Diesel Burner switch on the interior its wires from the C-plug harness prior to removing.
- Page 50 Fluid Circulation Pump Burner Components Electrode Adjustment Gauge Protection Housing Blower Housing Blower Casing Motor Flange Figure 69 p. 50 ©Aqua-Hot® 250-D02 Diesel Series Service Manual...
-
Page 51: Flame Sensor
Fluid Circulation Pump Burner Components Flame Sensor 3. Connect the fl ame sensor’s green and blue wires to an ohmmeter. The fl ame sensor is a photo resistive device which supplies the 4. Check resistance by placing a shop rag over the fl ame diesel burner’s controller with a DC voltage signal when it sensor’s glass surface, to simulate a no-fl... - Page 52 Fluid Circulation Pump Burner Components Flame Sensor Replacement: Connect the fl ame sensor’s green wire to the green C-plug 1. In order to perform the following procedures, it is necessary harness wire (pin 6), and connect the blue wire to the to detach the diesel burner head.
-
Page 53: Ignition Electrodes
Fluid Circulation Pump Burner Components Ignition Electrodes Ignition Electrode Adjustment Procedure: 1. Follow the directions for detaching/reattaching the diesel The diesel burner’s ignition coil produces a high voltage ignition burner on Page 41. spark (approximately 8000 volts) across the ignition electrodes, 2. - Page 54 Fluid Circulation Pump Burner Components Replacement Procedure: Install retaining clamp and retaining clamp bolt and fi nger 1. Using a 10mm socket, loosen and remove the retaining tighten. clamp bolt and the retaining clamp. 8. Follow the ignition electrode adjustment procedure to 2.
-
Page 55: Ignition Coil
Fluid Circulation Pump Burner Components Ignition Coil The diesel burner’s ignition coil produces a high voltage ignition spark (approximately 8000 volts), which is released across the metal tips on the ignition electrodes during the initial diesel Before replacing the ignition coil, verify the electrodes are not burner start up. -
Page 56: Fuel Nozzle
Fluid Circulation Pump Burner Components Fuel Nozzle 3. Remove both the ignition cables from the ignition electrodes, or connect a jumper wire (with alligator clips) across the metal tips of the electrodes. The fuel nozzle is simply a fuel atomizer. It reduces the diesel fuel into a fi... - Page 57 Fluid Circulation Pump Burner Components NOTE: Be sure to use care when handling the new fuel nozzle. Oils and/or small dust or dirt particles from your hands may plug the nozzle’s small orifi ce. A partially plugged Be sure to reattach the diesel burner head prior to orifi...
-
Page 58: Fuel Solenoid
Fluid Circulation Pump Burner Components Fuel Solenoid Fuel Solenoid Replacement Procedure: 1. Disconnect the C-plug harness’ violet (+) and brown (-) The fuel solenoid allows the fl ow of diesel fuel to the diesel wires from the fuel solenoid. burner’s fuel nozzle. 2. -
Page 59: Fuel Pump
Fluid Circulation Pump Burner Components Fuel Pump 6. If fuel does not fl ow out of the return line into the empty container, the fuel pump must be replaced, The fuel pump draws diesel fuel from the vehicle’s fuel tank If fuel does fl... - Page 60 Fluid Circulation Pump Burner Components nozzle stand and the ignition electrodes. 3. Loosen the supply and return banjo bolts to remove the fuel supply and return pipes from the fuel pump. Disconnect the high pressure fuel pipe from both the fuel pump and the Inspect the nylon drive gear’s cavity inside the cast- nozzle stand.
- Page 61 Fluid Circulation Pump Burner Components Figure 86 Description Grommet, Blower Casing, Left Grommet, Blower Casing, Right Flame Sensor Retaining Clip, Photo Disc Photo Disc Fuel Pump High Pressure Fuel Tube Banjo Bolt Gasket Ring, Copper Banjo Fuel Tube, Supply Banjo Fuel Tube, Return Mounting Screw, Fuel Pump Washer, Lock, Fuel Pump Fuel Nozzle, 0.35 GPH...
-
Page 62: Bearings
Fluid Circulation Pump Burner Components Bearings Disconnect the motor’s black (+) and brown (-) wires from the C-plug harness’ wires. The bearings support the combustion air blower’s shaft and 6. Remove the four blower housing screws that secure the allows the blower to turn smoothly. blower housing to the blower casing. - Page 63 Fluid Circulation Pump Burner Components 4. Remove the four ignition coil screws that secure the NOTE: Be sure to inspect the blower casing’s bore/bearing ignition coil to the protection cap. Lift the ignition coil and cavity for signs of damage due to potentially seized bearings. disconnect its black (+) and brown (-) wires from the C-plug If damage is present, the blower casing must be replaced.
- Page 64 Fluid Circulation Pump 16. Reinstall the protection cap. Reconnect the black (+) and brown (-) wires of the ignition coil to the C-plug harness’ yellow (+) and brown (-) wires. Reinstall the ignition coil and secure to the protection cap with the four ignition coil screws.
-
Page 65: Diesel Burner Controller
Fluid Circulation Pump Burner Components Diesel Burner Controller A battery voltage level between 11.6-14 Volts DC must be present at the diesel burner controller during all testing. It may be necessary to perform a voltage check to ensure that this condition exists. To perform the voltage check, locate the controller’s B-plug and insert the probes of a DC voltmeter into the B-4 (+) and B-2 (-) pins. - Page 66 Fluid Circulation Pump Burner Components Ignition Coil Circuit Test: diesel-burner controller must be replaced. If voltage is present, proceed to the next circuit test. Turn the diesel switch OFF and locate the diesel-burner controller’s C-plug. Also, locate the VDC high-limit DC High-Limit Thermostat Circuit Test: thermostat and disconnect it’s 2-way male plug from the (white plastic) 6-way female connector.
-
Page 67: Checking Fuel Pressure
Fluid Circulation Pump Fuel Pressure Instructions for Checking Fuel Pressure: NOTE: A fuel pressure gauge is used to properly check the fuel pump’s pressure setting. The fuel pump is preset to 145 PSI. Perform the following procedure to check for a proper fuel pressure setting. Step 1: Remove the diesel burner Refer to the section on detaching the diesel burner on page 41. - Page 68 Fluid Circulation Pump Fuel Pressure Step 3: Install the fuel pressure gauge 1. Using a ⅝” and ¾” wrench, remove the fuel nozzle. Figure 98 2. Using a ⅝” and ¾” wrench, install the fuel pressure gauge. Figure 99 p. 68 ©Aqua-Hot®...
- Page 69 Fluid Circulation Pump Fuel Pressure Step 4: Running burner off an external fuel source 1. Using an external fuel source and rubber fuel lines, hook the burner supply and return fuel lines up to run off the external fuel source. Figure 100 A spark will appear across the ignition electrodes for a brief moment after the diesel burner has been activated.
-
Page 70: Adjusting Fuel Pressure
Fluid Circulation Pump Fuel Pressure Instructions for Adjusting Fuel Pressure: Step 1: Follow the directions for Adjusting the Fuel Pressure 1. Using an external fuel source and rubber fuel lines, hook the burner supply and return fuel lines up to run off the external fuel source. - Page 71 Fluid Circulation Pump Fuel Pressure Step 2: Adjust the Fuel Pressure to 145 PSI 1. Once the fuel solenoid has been activated, and the fuel pressure gauge is registering a pressure, the fuel pressure can be adjusted. To increase the fuel pressure turn the pressure adjustment screw clockwise, and to reduce the fuel pressure, turn the pressure adjustment screw counter clockwise.
-
Page 72: Annual Maintenance
Aqua-Hot Maintenance Fluid Circulation Pump Aqua-Hot Maintenance Monthly Maintenance: Failure to disconnect all power supplies and/or to Check the antifreeze and water heating solution to ensure that allow the heater to cool before servicing could cause it is at the proper level by visually checking the solution level in serious damage or personal injury. - Page 73 Fluid Circulation Pump Burner Maintenance Aqua-Hot Maintenance Procedure Step 2: Replace the Fuel Filter 1. Locate the fuel fi lter NOTE: Before performing an annual maintenance, it is 2. Using hose pinch off pliers, clamp off both fuel lines recommended to test run the diesel burner. While testing, going to the fuel fi...
- Page 74 Fluid Circulation Pump Burner Maintenance Step 2 Be sure to clamp off the fuel supply and return lines at the ports on top of the Aqua-Hot PRIOR to beginning this replacement procedure. Step 4: Remove the Diesel Burner 1. Locate the diesel burner’s controller and disconnect both plugs.
- Page 75 Fluid Circulation Pump Burner Maintenance Aqua-Hot Maintenance Procedure NOTE: To remove the diesel burner, it maybe necessary to disconnect the Control Thermostat and High-Limit Thermostats from the diesel burner’s thermostat plug. Step 4: Remove the Diesel Burner (continued) 1. Carefully pull the diesel burner away from the Aqua- Hot 4 - 5 inches before rotating the burner, then remove completely as shown in Figure 115.
- Page 76 Fluid Circulation Pump Burner Maintenance Step 5: Clean and Inspect the Combustion Chamber and Heat Transfer Tabs (continued) 3. Inspect the Combustion Chamber assembly and Air Swirler for damage or signs of warping. • Inspect the outer ring that the photo disc seats against for signs of warping. •...
- Page 77 Fluid Circulation Pump Burner Maintenance Step 7: Inspect the Diesel Burner 1. Reinstall the Combustion Chamber assembly and the Air Swirler into the Aqua-Hot. Electrodes Flame Sensor Fuel Nozzle Photo Disc Fuel Pump Grommets Figure 121 Inspect the following: 5. Flame Sensor 1.
- Page 78 Fluid Circulation Pump Burner Maintenance Step 8: Clean Ignition Electrodes and Flame Sensor 1. Ignition Electrodes • Polish away any carbon deposits that may have baked onto the metal tips of the ignition electrodes with a coarse sponger 2. Flame Sensor •...
- Page 79 Fluid Circulation Pump Burner Maintenance Step 9: Replace Fuel Nozzle 1. Use a ¾” wrench to hold the fuel nozzle manifold hex, while loosening the fuel nozzle with a ⅝” wrench and remove. 2. When replacing the fuel nozzle, be sure to tighten the nozzle, loosen it a ¼ turn, and then fi rmly re-tighten. This will establish a seated fi...
- Page 80 Fluid Circulation Pump Burner Maintenance Step 10: Adjust Ignition Electrodes 1. Using a 10mm socket, slightly loosen the retaining clamp bolt. 2. Place the electrode adjustment gauge on the nozzle manifold hex and insert the metal tips of the ignition electrodes into the appropriate notches of the electrode adjustment gauge.
- Page 81 Fluid Circulation Pump Burner Maintenance Step 11: Inspect the Photo Disc 1. If the photo disc is not free-fl oating, the electrode clamp bolt has been over-tightened, and has bent the electrode clamp. Using a 10mm socket, remove the electrode clamp and re-straighten. •...
- Page 82 Fluid Circulation Pump Burner Maintenance Step 13: Reconnect the Fuel Lines 1. Align the fuel lines on the diesel burner with the fi ttings on the Aqua-Hot. Using a ” wrench, tighten down both the supply and return fuel fi ttings. Diesel Fuel Return Diesel Fuel Supply NOTE: Be sure to re-install the fuel lines properly.
- Page 83 Fluid Circulation Pump Burner Maintenance Step 15: Reinstall the Aqua-Hot’s Access Cover 1. Reinstall the Aqua-Hot’s access cover. NOTE: The access cover must be installed prior to operation as a safety switch (interlock) exists. It will prevent the Aqua- Hot from operating whenever the access cover is not properly installed.
-
Page 84: Cold Weather Operation
Cold Weather Operation Fluid Circulation Pump Extreme Cold Weather Operation Diesel Burner If the Diesel Burner fails to operate: • Determine if the diesel fuel in the motor home is winter or summer fuel • Verify that the diesel fuel is liquid and not jelled •... -
Page 85: Fill And Purge Procedure
Fill and Purge Procedure Fluid Circulation Pump Filling the Aqua-Hot Purging the Interior Heating Loop Purpose: Purpose: This guide is intended to provide detailed instructions Outlined below is the procedure for fi lling the Aqua-Hot with for purging the interior heating loop. It is recommended that a 50/50 solution of propylene glycol and distilled water. -
Page 86: Winterization
Winterizing the Aqua-Hot Fluid Circulation Pump Winterizing the Aqua-Hot The Aqua-Hot’s domestic water heating system must be completely drained of domestic water at any time the heater is stored where freezing temperatures may be experienced. Not winterizing the Aqua-Hot when freezing temperatures are Please follow these instructions when winterizing the Aqua- present will result in serious damage to the Aqua-Hot domestic Hot domestic water heating system. -
Page 87: General Troubleshooting
General Troubleshooting General Troubleshooting • Test for unit operation: ○ If the burner fails to operate, proceed to Page 90 to Purpose: begin the diesel burner troubleshooting. ○ If the burner begins to operate at this stage, choose a This section serves to solve common operational problems, troubleshooting guide below based on the issue. -
Page 88: Lack Of Heat
General Troubleshooting Lack of Interior Heat Stage 3: 1. Begin troubleshooting the three-way valve. See Page 24. A lack of interior heat with a functioning burner can be attributed to many potential issues in the Aqua-Hot. Diagnosis 2. Reference Page 22 to diagnose the Low-Temperature will involve three stages. -
Page 89: Blue/White Smoke
General Troubleshooting 250-D02 Unit Smoke 5. Visually inspect this sub-assembly, looking for any damage or leak locations. Purpose: Smoke During the Burn Cycle: It is possible that the Aqua-Hot 250-D02 may smoke upon fi rst start-up. There are many possible causes for smoke as 1. -
Page 90: Aqua-Hot System
General Troubleshooting Diesel Burner Troubleshooting Diesel Burner Troubleshooting 8. Locate the left and right high-limit thermostats and press the red center button on both thermostats to reset. This section will assist in troubleshooting the Aqua-Hot • Test for continuity on both thermostats. Both should diesel burner. -
Page 91: System Schematic
General Troubleshooting System Schematic ©Aqua-Hot® 250-D02 Diesel Series Service Manual p. 91... -
Page 92: Antifreeze Information
General Troubleshooting Antifreeze Types Antifreeze Types concentrated propylene glycol for the Aqua-Hot’s antifreeze and water heating solution. The following information addresses the necessary usage Please note that this is only necessary when mixing of a propylene glycol based “boiler” type antifreeze in the concentrated propylene glycol antifreeze with water;... - Page 93 General Troubleshooting Antifreeze the brand of propylene glycol antifreeze employed. mixed with distilled water, at a ratio of 35% to 50% is recommended to provide the best performance combination of the aforementioned functions. If excess propylene glycol Rust and Anti-Corrosive Inhibitors exists within the heating solution, the water’s heat absorption properties are compromised.
-
Page 94: Measuring Antifreeze
Appendix Measuring Antifreeze Using a Refractometer Calibration Screw Prism Assembly Daylight Plate Assembly Eye Piece Properly Apply Antifreeze to the Prism Assembly Use the guide below to properly apply the propylene glycol mixture to the prism assembly of the refractometer. Once that is complete, peer through the eyeglass of the refractometer to continue to the next step. -
Page 95: Warranty
Warranty 2-YEAR LIMITED WARRANTY AQUA-HOT® HYDRONIC HEATING SYSTEM Aqua-Hot Heating Systems Inc. warrants the Aqua-Hot Heater to be free from defects in material and workmanship under normal use and service for a period of two years on both parts and labor commencing upon the original date of registration of the vehicle. Replacement parts are warranted for the remainder of the Heater’s standard warranty coverage or for six months, whichever is greater. - Page 96 Service Manual SERIES AHE-250-D02 Aqua-Hot Heating Systems, LLC 7501 Miller Drive, Frederick, CO 80504 Visit us online at www.aquahot.com Call us at 574-AIR-XCEL (574-247-9235). ©2021 Aqua-Hot Heating Systems, LLC. Printed in the USA...
Need help?
Do you have a question about the Aqua-Hot 200 Series and is the answer not in the manual?
Questions and answers