Table of Contents
Advertisement
Quick Links
Advertisement
Table of Contents

Related Manuals for IBM BladeCenter GPU Expansion Blade


Summary of Contents for IBM BladeCenter GPU Expansion Blade
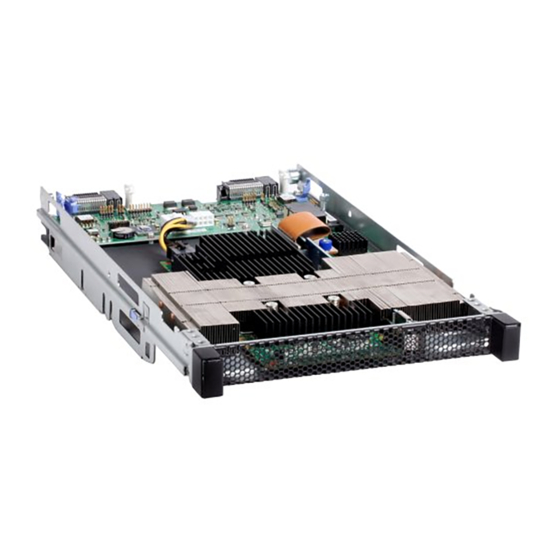
- Page 1 BladeCenter GPU Expansion Blade Installation Guide...
- Page 3 BladeCenter GPU Expansion Blade Installation Guide...
- Page 4 Before using this information and the product it supports, read the general information in “Notices” on page 31, the Warranty Information document, and the IBM Safety Information and the Environmental Notices and User Guide documents on the IBM Documentation CD.
-
Page 5: Table Of Contents
Guidelines for trained service technicians . vi Web . . 28 Inspecting for unsafe conditions . vi How to send DSA data to IBM . . 28 Guidelines for servicing electrical equipment . . vii Creating a personalized support web page . . 28 Safety statements . - Page 6 BladeCenter GPU Expansion Blade: Installation Guide...
-
Page 7: Safety
Ennen kuin asennat tämän tuotteen, lue turvaohjeet kohdasta Safety Information. Avant d'installer ce produit, lisez les consignes de sécurité. Vor der Installation dieses Produkts die Sicherheitshinweise lesen. Prima di installare questo prodotto, leggere le Informazioni sulla Sicurezza. © Copyright IBM Corp. 2012... -
Page 8: Guidelines For Trained Service Technicians
This section contains information for trained service technicians. Inspecting for unsafe conditions ® Use this information to help you identify potential unsafe conditions in an IBM product that you are working on. Each IBM product, as it was designed and manufactured, has required safety items to protect users and service technicians from injury. -
Page 9: Guidelines For Servicing Electrical Equipment
Make sure that the insulation is not frayed or worn. 4. Remove the cover. 5. Check for any obvious non-IBM alterations. Use good judgment as to the safety of any non-IBM alterations. 6. Check inside the system for any obvious unsafe conditions, such as metal filings, contamination, water or other liquid, or signs of fire or smoke damage. -
Page 10: Safety Statements
Be sure to read all caution and danger statements in this documentation before you perform the procedures. Read any additional safety information that comes with your system or optional device before you install the device. Statement 1 viii BladeCenter GPU Expansion Blade: Installation Guide... - Page 11 Statement 2 CAUTION: When replacing the lithium battery, use only IBM Part Number 33F8354 or an equivalent type battery recommended by the manufacturer. If your system has a module containing a lithium battery, replace it only with the same module type made by the same manufacturer.
- Page 12 Laser Klass 1 Luokan 1 Laserlaite Appareil A Laser de Classe 1 Statement 4 ≥ 18 kg (39.7 lb) ≥ 32 kg (70.5 lb) ≥ 55 kg (121.2 lb) CAUTION: Use safe practices when lifting. BladeCenter GPU Expansion Blade: Installation Guide...
- Page 13 Statement 8 CAUTION: Never remove the cover on a power supply or any part that has the following label attached. Hazardous voltage, current, and energy levels are present inside any component that has this label attached. There are no serviceable parts inside these components.
- Page 14 The device also might have more than one power cord. To remove all electrical current from the device, ensure that all power cords are disconnected from the power source. BladeCenter GPU Expansion Blade: Installation Guide...
- Page 15 Rack Safety Information, Statement 2 DANGER v Always lower the leveling pads on the rack cabinet. v Always install stabilizer brackets on the rack cabinet. v Always install servers and optional devices starting from the bottom of the rack cabinet. v Always install the heaviest devices in the bottom of the rack cabinet.
- Page 16 BladeCenter GPU Expansion Blade: Installation Guide...
-
Page 17: Chapter 1. Introduction
IBM. Configuring more than three expansion blade options to a blade server is not supported. 6. Unless otherwise stated, references to the BladeCenter unit apply to all IBM BladeCenter units. The expansion blade comes with a one-year limited warranty. For information about your warranty, see the Warranty Information document for your device on the IBM Documentation CD. -
Page 18: Related Documentation
BladeCenter unit. IBM Redbooks publications are developed and published by the IBM International Technical Support Organization (ITSO). The ITSO develops and delivers skills, technical know-how, and materials to IBM technical professionals, Business Partners, clients, and the marketplace in general. -
Page 19: Notices And Statements In This Document
Notices and statements in this document The caution and danger statements that appear in this document are also in the multilingual Safety Information document, which is on the IBM Documentation CD. Each statement is numbered for reference to the corresponding statement in the Safety Information document. - Page 20 BladeCenter GPU Expansion Blade: Installation Guide...
-
Page 21: Chapter 2. Expansion Blade Leds
Additional information about the error is provided by the light-path LEDs in the expansion blade (see “Light path diagnostics” on page 22 for additional information) © Copyright IBM Corp. 2012... - Page 22 BladeCenter GPU Expansion Blade: Installation Guide...
-
Page 23: Chapter 3. Installing Options
IBM. Configuring more than three expansion blade options to a blade server is not supported. For a list of CFFh expansion cards that your blade server and the IBM BladeCenter ® GPU Expansion Blade support, see the ServerProven list at http:// www.ibm.com/servers/eserver/serverproven/compat/us/. -
Page 24: Handling Static-Sensitive Devices
2. Up to three GPU Expansion Blades can be attached to a blade server. Support for four GPU Expansion Blades is available only when configured by IBM. Configuring more than three expansion blade options to a blade server is not supported. - Page 25 6. Download and apply the latest blade-server firmware and management-module firmware updates from http://www.ibm.com/systems/support/. 7. The expansion blade can be installed on various types of blade servers. The illustrations in this document might differ slightly from your hardware.
- Page 26 Note: Make sure that all devices are installed in the expansion blade before attaching it to the blade server (see “Installing a horizontal-compact-form- factor expansion card” on page 16 for instructions). 7. Install the expansion blade: BladeCenter GPU Expansion Blade: Installation Guide...
- Page 27 BladeCenter unit) or blade bay 5 through 8 (in a BladeCenter T unit), power modules must be installed in all four power bays. b. When a BladeCenter GPU Expansion Blade is installed on a blade device, it cannot be combined with other expansion unit types.
- Page 28 11. Turn on the blade server (see the documentation that comes with the blade server for more information). 12. If you installed the blade server in a BladeCenter unit that has a bezel, reinstall the bezel assembly (see the documentation for your BladeCenter unit for instructions). BladeCenter GPU Expansion Blade: Installation Guide...
-
Page 29: Removing A Gpu Expansion Blade
Removing a GPU Expansion Blade Use this information to remove a GPU Expansion Blade. The following illustration shows how to remove the expansion blade. Expansion unit Blade server cover release Blade server cover release Note: If more than one expansion blade is installed, remove each expansion blade, one at a time. -
Page 30: Removing The Expansion Blade Cover
4. Press the cover release on each side of the expansion blade and lift the cover open. 5. Lift the cover from the expansion blade and store it for future use. Statement 21: BladeCenter GPU Expansion Blade: Installation Guide... -
Page 31: Installing The Expansion Blade Cover
CAUTION: Hazardous energy is present when the blade server is connected to the power source. Always replace the blade cover before installing the blade server. Installing the expansion blade cover The following instructions and illustration show how to install the expansion blade cover. -
Page 32: Installing A Horizontal-Compact-Form-Factor Expansion Card
3. Carefully lay the combined unit down on a flat, static-protective surface, with the cover side up. 4. If a cover is installed on the expansion blade, remove it (see “Removing the expansion blade cover” on page 14). BladeCenter GPU Expansion Blade: Installation Guide... -
Page 33: Replacing A Gpu Adapter (Trained Service Technician Only)
5. Touch the static-protective package that contains the expansion card to any unpainted metal surface on the BladeCenter unit or any unpainted metal surface on any other grounded rack component; then, remove the expansion card from the package. 6. Locate the blade expansion connector and remove the cover, if one is installed; then, orient the expansion card above the connector. - Page 34 Locate the tray-release button on the bottom of the expansion unit. Tray release button d. Press in and hold the tray-release button; then, pull the expansion-unit riser assembly out of the expansion-unit system board. BladeCenter GPU Expansion Blade: Installation Guide...
-
Page 35: Installing A Gpu Adapter
5. Carefully turn over the expansion-unit riser assembly, and use a Phillips screwdriver to remove the four non-captive retaining screws, as shown in the following illustration. Store the screws in a safe location. 6. Carefully turn the expansion-unit riser assembly back over. Unplug the GPU adapter from the PCI connector in the riser assembly and lift it out of the riser assembly. - Page 36 8. Turn over the expansion-unit riser assembly and install the riser assembly into the expansion unit system board, as shown in the following illustration. BladeCenter GPU Expansion Blade: Installation Guide...
-
Page 37: Completing The Installation
9. Carefully reposition the expansion-unit riser assembly, aligning it with the expansion-unit system-board-assembly rails. 10. Firmly slide the assemblies together until the tray-release button securely locks the panels. 11. Connect the auxiliary power cable (A), as shown in the following illustration. 12. -
Page 38: Light Path Diagnostics
LEDs, and LEDs indicating additional failure information also will be lit. The following illustration shows the locations of the light path LEDs and the light path diagnostics switch on the expansion blade system board. BladeCenter GPU Expansion Blade: Installation Guide... - Page 39 BPE4 Ck Nxt CFFh GPU error LED The following table describes the LEDs on the expansion blade system board and suggested actions to correct the detected problems. Follow the suggested actions in the order in which they are listed in the Action column until the problem is solved. Lit light path diagnostics LED Description...
- Page 40 An error has occurred in an expansion blade Remove this expansion blade and check for installed below this expansion blade in the error LEDs that are lit in the expansion blade stack. beneath it. BladeCenter GPU Expansion Blade: Installation Guide...
-
Page 41: Chapter 4. Parts Listing - Bladecenter Gpu Expansion Unit
Replaceable components are of three types: v Tier 1 customer replaceable unit (CRU): Replacement of Tier 1 CRUs is your responsibility. If IBM installs a Tier 1 CRU at your request, you will be charged for the installation. v Tier 2 customer replaceable unit: You may install a Tier 2 CRU yourself or request IBM to install it, at no additional charge, under the type of warranty service that is designated for your server. - Page 42 BladeCenter GPU Expansion Blade: Installation Guide...
-
Page 43: Appendix. Getting Help And Technical Assistance
Appendix. Getting help and technical assistance If you need help, service, or technical assistance or just want more information about IBM products, you will find a wide variety of sources available from IBM to assist you. Use this information to obtain additional information about IBM and IBM products, determine what to do if you experience a problem with your IBM system or optional device, and determine whom to call for service, if it is necessary. -
Page 44: Using The Documentation
The troubleshooting information or the diagnostic programs might tell you that you need additional or updated device drivers or other software. IBM maintains pages on the World Wide Web where you can get the latest technical information and download device drivers and updates. -
Page 45: Software Service And Support
Software service and support Through IBM Support Line, you can get telephone assistance, for a fee, with usage, configuration, and software problems with your IBM products. For information about which products are supported by Support Line in your country or region, see http://www.ibm.com/services/supline/products/. - Page 46 BladeCenter GPU Expansion Blade: Installation Guide...
-
Page 47: Notices
Consult your local IBM representative for information on the products and services currently available in your area. Any reference to an IBM product, program, or service is not intended to state or imply that only that IBM product, program, or service may be used. Any functionally equivalent product, program, or service that does not infringe any IBM intellectual property right may be used instead. -
Page 48: Important Notes
IBM makes no representations or warranties with respect to non-IBM products. Support (if any) for the non-IBM products is provided by the third party, not IBM. Some software might differ from its retail version (if available) and might not include user manuals or all program functionality. -
Page 49: Particulate Contamination
If IBM determines that the levels of particulates or gases in your environment have caused damage to the device, IBM may condition provision of repair or replacement of devices or parts on implementation of appropriate remedial measures to mitigate such environmental contamination. -
Page 50: Telecommunication Regulatory Statement
In the request, be sure to include the publication part number and title. When you send information to IBM, you grant IBM a nonexclusive right to use or distribute the information in any way it believes appropriate without incurring any obligation to you. -
Page 51: Australia And New Zealand Class A Statement
Klasse A ein. Um dieses sicherzustellen, sind die Geräte wie in den Handbüchern beschrieben zu installieren und zu betreiben. Des Weiteren dürfen auch nur von der IBM empfohlene Kabel angeschlossen werden. IBM übernimmt keine Verantwortung für die Einhaltung der Schutzanforderungen, wenn das Produkt ohne Zustimmung der IBM verändert bzw. -
Page 52: Japan Vcci Class A Statement
Interference (VCCI). If this equipment is used in a domestic environment, radio interference may occur, in which case the user may be required to take corrective actions. Japan Electronics and Information Technology Industries Association (JEITA) statement BladeCenter GPU Expansion Blade: Installation Guide... -
Page 53: Korea Communications Commission (Kcc) Statement
Japan Electronics and Information Technology Industries Association (JEITA) Confirmed Harmonics Guidelines with Modifications (products greater than 20 A per phase) Korea Communications Commission (KCC) statement This is electromagnetic wave compatibility equipment for business (Type A). Sellers and users need to pay attention to it. This is for any areas other than home. Russia Electromagnetic Interference (EMI) Class A statement People's Republic of China Class A electronic emission statement... - Page 54 BladeCenter GPU Expansion Blade: Installation Guide...
-
Page 55: Index
People's Republic of China Class A getting 27 client reference program 1 electronic emission statement 37 help, sending diagnostic data to IBM 28 Completing the installation 21 product service, IBM Taiwan 29 help, World Wide Web 28 contamination, particulate and... - Page 56 United States electronic emission Class A notice 34 United States FCC Class A notice 34 unsafe conditions, inspecting for vi warranty 1 website compatible optional devices 7 BladeCenter GPU Expansion Blade: Installation Guide...
- Page 58 Part Number: 90Y5467 Printed in USA (1P) P/N: 90Y5467...
Need help?
Do you have a question about the BladeCenter GPU Expansion Blade and is the answer not in the manual?
Questions and answers