Table of Contents
Advertisement
Quick Links
Advertisement
Table of Contents

Subscribe to Our Youtube Channel
Related Manuals for Baroness TDA1200


Summary of Contents for Baroness TDA1200
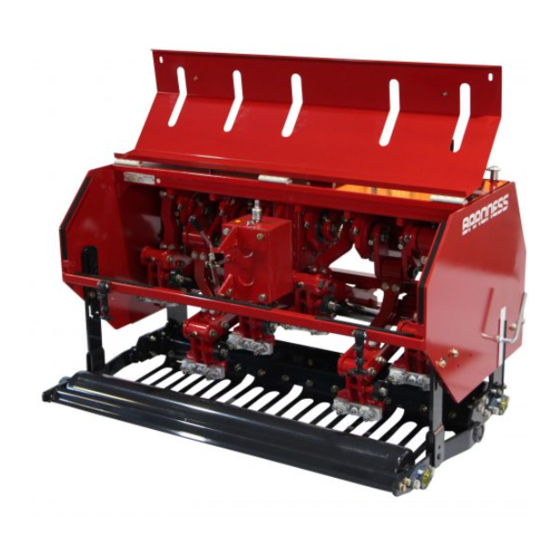
- Page 1 ・ Owner's Operating Manual Tractor Mounted Aerator Tractor Mounted Aerator Required reading Read this manual and the owner's manual for the engine before using the machine. Serial No. TDA1200 : 21038- ・ TDA1600 : 21026- Original lnstructions Ver. 2.1...
-
Page 2: Table Of Contents
1. Specifications ......................... 7 7-5. Inspection of Lawn Pressing Plate ............... 18 1-1. Specifications ......................7 7-6. Inspection of Gear Oil ..................19 TDA1200 ......................7 7-7. Supply of Gear Oil ....................19 TDA1600 ......................7 7-8. Inspection of Universal Joint ................19 1-2. - Page 3 18. Maintenance Work ..................... 30 18-1. Cleaning of Aeration Section ................30 18-2. Change of Tines ....................30 18-3. Change of Gear Oil .................... 31 18-4. Disassembly of Crank ..................31 Timing Chart ....................... 32 TDA1200 ......................32 TDA1600 ......................33 − 2 −...
-
Page 4: Greeting
Warning Symbols This manual uses the following warning symbols for handling precautions that are important for your safety. Thank you for purchasing the Baroness product. This manual describes the proper handling, adjustment, and inspection of your product. Warning symbol We hope you will use the product safely, and take advantage of its best performance. -
Page 5: Precautionary Statement
Kyoeisha. This product is designed to ensure safe operation and has been tested and inspected Note that the Baroness product warranty may not apply to defects caused by the use of thoroughly before shipment from the factory. parts from other companies. -
Page 6: Safe Operating Practices
− 5 − Safe Operating Practices Operation Training 1.Only operate in good light, keeping away from holes and hidden hazards. 2.Never operate the machine with damaged guards, shields, or without safety protective 1.Read this manual and other training material carefully.Be familiar with the controls, safety devices in place. -
Page 7: Maintenance And Storage
Disposal Maintenance and Storage 1.Disengage drives on level ground, stop drive to the tine section, set parking brake, stop engine. Wait for all movement to stop before adjusting, cleaning or repairing. Recycle and Waste Disposal 2.Never allow untrained personnel to service machine. About Recycle 3.Appropriately manage and correctly use the tools necessary for servicing or adjusting the machine. -
Page 8: Product Overview
− 7 − Product Overview 1. Specifications 1-1. Specifications TDA1200 TDA1600 Model TDA1200 Model TDA1600 Total length 38.19 in 97 cm Total length 38.19 in 97 cm Dimensions Total width 55.91 in 142 cm Dimensions Total width 70.47 in 179 cm Total height 33.46 in... -
Page 9: Types Of Tines
φ17V tine 265 (0.39 in) (0.47 in) (10.43 in) (Cores not discharged) * In the column “Quantity used”, the upper figure indicates the quantity for TDA1200 and the Mowing after aeration Better to mow Better to mow lower for TDA1600. -
Page 10: Relationship Between Operation Speed And Pitch
− 9 − 1-3. Relationship between Operation Speed and Pitch TDA1600 TDA1200 The engine rotation speed during tractor operation should be 1,800 -2,300 rpm. Max PTO rotation speed should be 1,000 rpm. The engine rotation speed during tractor operation should be 1,600 - 2,000 rpm. -
Page 11: 2. Names Of Each Section
2. Names of Each Section Tine mount holder Rear cover Up-down handle Change lever Front cover Gear box Protection pipe Frame Scraper Roller holding fixture Rear roller Front roller Tine mount Tine Roller hanger Lawn pressing plate − 10 −... -
Page 12: 3. Regulation Decals
− 11 − 3. Regulation Decals 3-2. Description of Regulation Decals 3-1. Positions of Regulation Decals Serial Number Plate The serial number plate indicates the model and serial number of the machine. Serial number plate Year of manufacture decal Specification Decal (For Europe) CE mark indicates that the machine sold in the EU nations complies with the EU requirements. -
Page 13: Ukca Mark
UKCA Mark Year of Manufacture Decal (For UK) (For Europe) UKCA mark indicates that the machine sold in the UK complies with the UK requirements. The year of manufacture decal indicates the year when this machine was manufactured. YEAR OF MANUFACTURE −... -
Page 14: Safety Signs And Instruction Signs
Safety decals and instruction decals are attached to this product. Make sure that they are preserved in their entirety. If they are damaged, become dirty, or peel off, replace them with new ones. Part numbers for decals that need to be replaced are listed in the parts catalog. Order them from a Baroness dealer or Kyoeisha. -
Page 15: Handling Instructions
Handling Instructions 6. Adjustment before Attachment 6-1. Precautions about Attachment 5. Tractor 5-1. Tractor Standards Make sure there is no one around the tractor and between this machine and the tractor. This machine employs “standard three-point link” mounting system. In the “standard three- point link”, attach the top and lower links of the tractor and the universal joint of this machine by hand. -
Page 16: Method Of Attaching Universal Joint
− 15 − 6-3. Method of Attaching Universal Joint 8.Attach the right lower link and lock the link pin. 9.Align the implement mounting hole in the top link (upper link) with the mounting holes of the machine. If the top link (upper link) is not aligned with the mounting pin hole, loosen the lock nuts Before attaching the universal joint, disengage the PTO clutch and stop the tractor’s on the top link and adjust its length. - Page 17 Be sure to attach the universal joint clutch part to the implement side. Do not forcibly insert the universal joint with a hammer etc. It may cause the joint breakage. 6.Pull the set cover and simultaneously push the universal joint onto PTO shaft until the 9.Shorten the joint to the highest possible locking device engages.
-
Page 18: Method Of Cutting Universal Joint
− 17 − 6-4. Method of Cutting Universal Joint 4.Cut the inner and outer shafts at the marked position. Work with great caution when using a high speed cutter. The universal joint length depends on the type of tractor to be linked. 1.Hold the half shafts of universal joint next to each other in the shortest working position Shaft... -
Page 19: 7. Inspections
7. Inspections 7-3. Inspection of Rollers 7-1. Precautions before Inspection Bearing wear due to frequent use or bearing damage caused by water infiltration may prevent the roller from rotating smoothly. Inspect the roller and, if necessary, replace parts such as oil seals and bearings. 1.Make sure that there is no abrasion nor adhesion of the roller. -
Page 20: Inspection Of Gear Oil
− 19 − 7-6. Inspection of Gear Oil 7-8. Inspection of Universal Joint The oil gauge is located on the side of the gear 1.Inspect the chain for damage, abnormal wear and so on. box. Oil filler cap 2.Inspect the cover for cracks, damage, abnormal wear and so on. 1.On a level surface, check that the oil level reaches the middle of the oil gauge. -
Page 21: Tightening Torques
Refer to the Tightening Torque table. Note that the Baroness product warranty may not apply to defects caused by incorrect or overtorque tightening, etc. A number of bolts are used in each part of this machine. Be sure to re-tighten the bolts and nuts, because they may be loosened at the earlier stage of the use. -
Page 22: Tightening Torque By Model
− 21 − 8-2. Tightening Torque by Model TDA1200 Tighten the following bolts and nuts at the torque specified in the table. For thread locking adhesive, apply a middle strength thread locker (ThreeBond 1322 or equivalent anaerobic sealant). Tightening torque... -
Page 23: Tda1600
TDA1600 Tighten the following bolts and nuts at the torque specified in the table. For thread locking adhesive, apply a middle strength thread locker (ThreeBond 1322 or equivalent anaerobic sealant). Tightening torque Thread locking Location Code Part name adhesive kgf-cm lb-in K0013161201 BOLT, HT M16-120... -
Page 24: Adjustment Before Operation
− 23 − 9. Adjustment before Operation ③ Tighten the right and left “roller holding fixtures.” 9-1. Precautions about Adjustment Up-down handle Shallow Deep Make sure there is no one around the tractor and between this machine and the tractor. Scale mark 150A Before adjusting the machine, apply the parking brake of the tractor, set the PTO speed change lever to the “Neutral”... -
Page 25: 10. Operation Method
10. Operation Method 10-1. Positions and Description of Operation Decals K4203001400 DECAL, DEPTH ADJUSTING HANDLE It indicates the tine depth. Shallow Deep K4203001390 DECAL, CRANK EFFECT SPEED It indicates the crank rotation speed. Crank effect speed High − 24 −... -
Page 26: Change Lever
− 25 − 10-2. Change Lever 10-3. Up-Down Handle Operate the up-down handle to adjust the tine depth. Rotate the handle to the appropriate direction. Stop the PTO rotation before shifting the change lever. Rotate the handle clockwise to increase the coring depth. Rotate the handle counterclockwise to decrease the coring depth. -
Page 27: Rear Roller
11. Traveling 10-4. Rear Roller 11-1. Precautions before Traveling ● If the rear roller is equipped, when using spike tines for coring, it functions to trample the lawn surface, so golfers will be possible to play immediately. ● When using side open tines for coring, keep the rear roller raised, to avoid to trample the grass and soil removed by the side open tines. -
Page 28: Operations
• Excessively high PTO rotation speed (more than 1,000 rpm) will apply excessive force to • Excessively high PTO rotation speed (TDA1200: more than 400 rpm/TDA1600: more other anomaly occurs in the machine during work, stop the engine immediately and the machine, causing breakage of the machine or spouting of oil from the gearbox. -
Page 29: Aeration Procedure
14. Long-Term Storage 12-2. Aeration Procedure ① Transfer the machine with raising position to the location in front of the working point. ● Remove dirt, grass clippings, debris, oil stains etc. completely. ② Select the crank rotation speed using the change lever. ●... -
Page 30: Maintenance
◆ For tractor maintenance schedule, refer to the Tractor's Owner's Manual. For the safe and best performance of your machine, use Baroness genuine parts for ◆ The values for consumables are not guaranteed. replacement and accessories. -
Page 31: Greasing
17. Greasing 18. Maintenance Work 17-1. About Greasing 18-1. Cleaning of Aeration Section Since there may be adhesion or damage due to lack of grease on moving parts, they must be Be sure to clean the aeration section after use. greased. -
Page 32: Change Of Gear Oil
− 31 − 18-3. Change of Gear Oil 18-4. Disassembly of Crank Be careful with hot oil, which could cause burns if it contacts your skin. When disassembling the crank section to replace bearings, exercise care so as not to have your fingers or hands caught in the crank metal fittings. -
Page 33: Timing Chart
Timing Chart TDA1200 View from the back Timing Left View from the left side − 32 −... -
Page 34: Tda1600
− 33 − TDA1600 View from the back Timing Left View from the left side... - Page 35 − 34 −...
- Page 36 − 35 −...
- Page 37 − 36 −...
- Page 38 − 37 −...
- Page 39 MEMO − 38 −...
- Page 40 1-26, Miyuki-cho, Toyokawa-city, Tel : +81-533-84-1390 Head Office Aichi-pref, 442-8530 JAPAN Fax : +81-533-84-1220 TDA1200-UM--GBZ/21D-00-S.K DoC00[EU00a/UK00]...
Need help?
Do you have a question about the TDA1200 and is the answer not in the manual?
Questions and answers