Table of Contents
Advertisement
Quick Links
Advertisement
Table of Contents

Related Manuals for BEYES GPRO F1


Summary of Contents for BEYES GPRO F1
- Page 1 Gutta Percha Obturation System Instruction for Use...
-
Page 2: Table Of Contents
11. Environment protection................14 12. Beyes Limited Warranty Statement ............14 Thank you for purchasing GPro F1 Gutta-percha Obturation System developed by Beyes Dental Canada Inc., Beyes has excellent Quality Control System. To guarantee correct and safe operation, please read this Instruction Manual carefully before use. Depending on the level... -
Page 3: Introduction
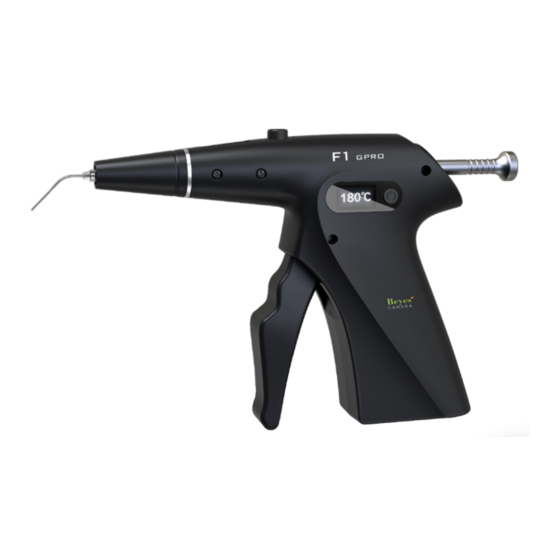
• Patient or dentist with pacemaker implanted • Patient with heart disease Note: Use of device on pregnant women or children should be cautious. 1.4 Package includes • GPro F1 gutta percha obturation gun • Charging base/stand • Power adapter • Gutta-percha injection needles... - Page 4 1.5 Diagram of Device The Gpro F1 is equipped with a display screen and a control button on both the left and right sides. The design of left and right sides are perfectly symmetrical, which enables either left- hand or right-hand operation;...
-
Page 5: Installation
2. Installation 2.1 Charge device Install the adapter plug for the power supply (Figure 2) Plug in the power supply and connect it to the charging base (Figure 3) Place the device on the base for charging. (Figure 4) Figure 2 Figure 3 Figure 4 Light on the base will be yellow while battery is charging and will turn green once fully charged. - Page 6 Warning: Make sure the device is off. Allow 5 minute for device to cool down Do not overtighten the screw. 2.3 Adjust needle Use wrench to bend needle to different angle for varies application. Note: Needles are made of silver which discolors after long-time exposed to air. It should be stored in sealed environment.
-
Page 7: Operation
3. Operation 3.1 Turn device on/off Press and hold button for 3 sec. Device turns on. Display shows setting and status. Press and hold button for 3 sec again. Device turns off. Display turns off. Note: device automatically shut down after 10 minutes idling 3.2 Select Temperature Press button to select the temperature setting. - Page 8 1. Turn on device and insert a gutta-percha pellet into GPro F1 and adjust to the desired preset temperature 2. Using GPro F1 activated tip, make contact with the upper part of filled master cone in the root canal 3. Pull the trigger to extrude the melted gutta-percha obturator into the canal 4.
-
Page 9: Technical Specification
5. Technical Specification 5.1 Product specifications Sizes GPro F1 Gutta Percha Obturation Gun 31.9mm×152.5mm×114.9mm Charging base 75.5mm×149.7mm×62.6mm Weight GPro F1 Gutta Percha Obturation Gun 170g Charging base 207g Power adapter 167g 5.2 Technical parameters Classification Class II(AC/DC power adapter) Optional preset temperatures 150°C-180°C-200°C-230°C... -
Page 10: Signs
6 Signs Product serial number Follow Instructions for Use Manufacturer Date of manufacture Type B applied part Class II equipment IPXO Power switch Ordinary equipment Device complies with WEEE Used indoor only directive Can be autoclaved Keep dry Handle with care Recovery Attention! Please refer to the accompanying documents. -
Page 11: Safety Precautions
After use, squeeze out all the residual materials inside heating chamber, power off the device, pull the pushing ram out of the GPro F1 gutta percha obturation gun from the back side, and remove the material on the top of pushing ram. -
Page 12: Troubleshooting
After pulling the pushing ram out from back part, insert the supplied cleaning brush from the back of the device and pull it out from the front part of the GPro F1 gutta percha obturation gun. Please take care not to add any cleaning agent or chemicals to the cleaning brush. -
Page 13: After-Sales Service
If the problem still cannot be solved, please contact your local dealer or Beyes Dental Canada Inc. 1. When the pushing ram is in the the GPro F1 gutta percha obturation gun, please do not push or pull the pushing ram vigorously. When the gutta-percha is heated up to the preset temperature, the pushing ram should be pushed by pulling the trigger for multiple times. -
Page 14: Environment Protection
11. Alterations or modifications to the product by any person or entity other than BEYES; 12. Products that would otherwise by covered under Sections 1 and 2 of this limited warranty, but are acquired: (i) from a person or entity that is not BEYES or one of its authorized dealers;... - Page 15 (ii) from a BEYES dealer that is not authorized to sell the product at issue in the geographic territory where the purchaser is located, or is not authorized to sell the product at issue within the medical, animal health or dental market, as the case may be, in which purchaser intends to use the product.
- Page 16 Federal law restricts this device to sale by or on the order of a dentist, physician, or any other practitioner licensed by the law of the states in which he or she practices to use or order the use of this device. Beyes Dental Canada Inc. Lotus NL B.V.
Need help?
Do you have a question about the GPRO F1 and is the answer not in the manual?
Questions and answers