Advertisement
Moku:Lab
Quick start guide
Moku:Lab layout
Power button / status LED
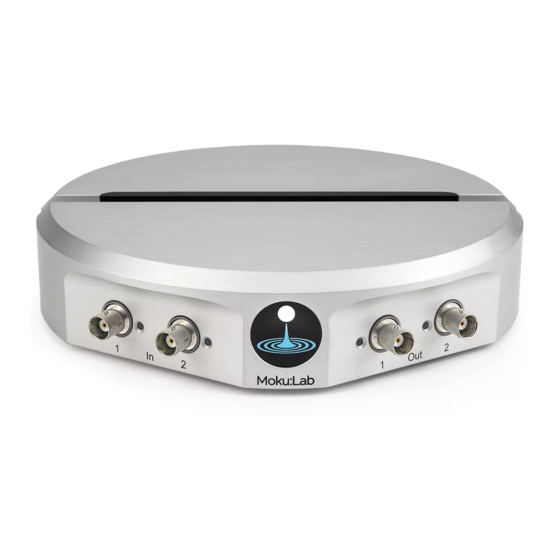
Analog inputs
Powering on & off
Connect the power supply to the DC power port on
1
the rear of the Moku:Lab.
Press and hold the power button for two seconds
2
until the status LED turns orange.
Wait for the status LED to turn blue / white.
3
To turn your Moku:Lab off, press and hold the power button for two seconds until the status LED turns
X
orange. Wait until the orange light turns off & the device has completely powered off before unplugging.
Installing on your iPad
Open the App Store on your iPad.
1
Search for the Moku:Lab application and verify
2
that the publisher is Liquid Instruments.
Download and Install Moku:Lab on your iPad.
3
©2019 Liquid Instruments
Analog outputs
Visit
liquidinstruments.com
DC power
10 MHz ref. output
SD card slot
Micro-USB data port
Ethernet port
Powered off
Initializing /
Powering down
or email
support@liquidinstruments.com
Kensington Lock slot
10 MHz ref. input
External trigger input
USB charge port
Powered on
for assistance.
Advertisement
Table of Contents

Related Manuals for Liquid Instruments Moku:Lab


Summary of Contents for Liquid Instruments Moku:Lab
- Page 1 Wait for the status LED to turn blue / white. To turn your Moku:Lab off, press and hold the power button for two seconds until the status LED turns orange. Wait until the orange light turns off & the device has completely powered off before unplugging.
- Page 2 Connecting to your Moku:Lab via iPad When your Moku:Lab powers on, it will be in its factory default state – it will broadcast a Wireless Access Point and Ethernet will be enabled. Wi-Fi To connect to your Moku:Lab wirelessly, configure your iPad to join Moku:Lab's Wireless Access Point network.
Need help?
Do you have a question about the Moku:Lab and is the answer not in the manual?
Questions and answers