
Subscribe to Our Youtube Channel
Related Manuals for Spartherm New Zealand Freestander


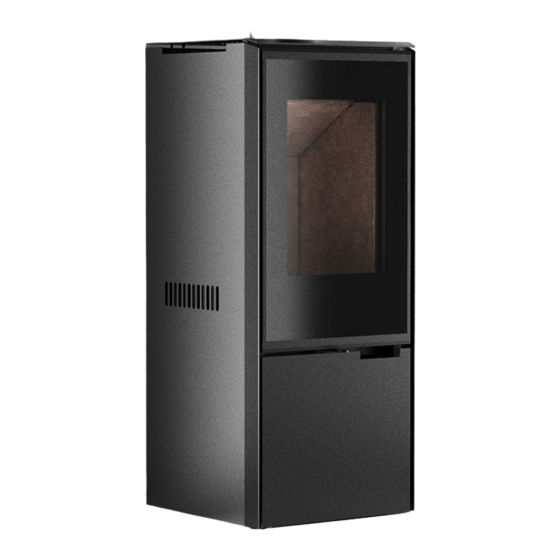
Summary of Contents for Spartherm New Zealand Freestander
- Page 1 Instruction Manual New Zealand - Freestander - ES1-P7S Australia - Freestander - ES1-P7H...
-
Page 2: Table Of Contents
TABLE OF CONTENTS Safety Information Product Dimensions New Zealand/Australia Freestander 2.2 Specifications Table Installation Installation - General 3.2 Safety Clearances 3.3 Installing the Flue 3.4 Australia Only - Modifying for Hardwood 4.5 Installing the Fan Assembly Bricks & Baffles Installation Operation Fuel 5.2 Smoking... -
Page 3: Safety Information
1.0 SAFETY INFORMATION ANY MODIFICATION OF THE APPLIANCE THAT HAS NOT BEEN APPROVED IN WRITING BY THE TESTING AUTHORITY IS CONSIDERED TO BE IN BREACH OF ANY APPROVAL NOTICE GRANTED FOR COMPLIANCE WITH AS/NZS 4012:2014 & AS/ NZS 4013:2014. DO NOT DISCARD THIS MANUAL •... - Page 4 • Children and pets must be prevented from touching the appliance when • Do not overload or over fire the appliance. it is hot. • Ashes must be disposed in a metal container with a tight lid and placed • Clothing or other flammable material should not be placed on or near on a non-combustible surface well away from the home or structure the appliance.
-
Page 5: Product Dimensions
2.0 PRODUCT DIMENSIONS NEW ZEALAND/AUSTRALIA FREESTANDER Top View Isometric 237.03 95.50 464.13 497.92 Front View Side View 630564_1... -
Page 6: Specifications Table
SPECIFICATIONS TABLE Product Type Fuel Type Average Peak Average Flue Average Unit Power* (kW) Power* Efficiency ** Diameter Emission Weight (kW) (mm) Factor (g/Kg) (Kg) New Zealand (ES1-P7S) Freestander Softwood 7.02 kW 8.23 kW 66.98 % 150mm 0.79 g/Kg 120Kg Australia (ES1-P7H) Freestander Hardwood... -
Page 7: Installation
3.0 INSTALLATION • To keep the door gasket from sticking to the appliance as the paint is curing; periodically open the fireplace’s door. • For the first two weeks use generous amounts of fuel and burn the appliance with the air control (if applicable) fully open for an hour as the appliance goes through a process of eliminating moisture in the steel and THE INSTALLATION OF THIS FIREPLACE, CONSTRUCTION firebricks. -
Page 8: Safety Clearances
NEGATIVE PRESSURE WITHIN YOUR HOME MAY Fire Parallel to Wall Installation INADVERTENTLY AFFECT YOUR APPLIANCE. ESCEA ACCEPTS NO LIABILITY FOR IMPROPER INSTALLATION OR CONSEQUENTIAL DAMAGES. SAFETY CLEARANCES All safety clearance dimensions stated are minimum requirements. An insulating hearth conforming to the size requirements in the following table must be installed unless the floor is made entirely from a non- combustible material. -
Page 9: Installing The Flue
INSTALLING THE FLUE AUSTRALIA ONLY - MODIFYING FOR Any flue system used on this fire must comply and be installed to fully HARDWOOD meet the requirements of AS/NZS 2918:2001 Domestic solid fuel burning To modify the appliance to burn hardwood (Australia only) remove the appliances –... -
Page 10: Installing The Fan Assembly
3. Remove the cutout tab shown below using a pair of snipe nose pliers. 2. Remove the back panel by loosening (not removing) the bolts. Lift it upwards to disengage it from the 8 pins (4 per side) that hold it securely onto the fire. -
Page 11: Bricks & Baffles Installation
4.0 BRICKS & BAFFLES INSTALLATION 4. Slide the front fan unit in (shown grey below) and attach using 2 self- tapping screws, circled below. OPERATION OF THE APPLIANCE WITHOUT THE FIREBRICKS (CHAMOTTE) OR BAFFLES IN PLACE CAN RESULT IN EXCESSIVE TEMPERATURES THAT COULD DAMAGE THE APPLIANCE, CHIMNEY AND THE SURROUNDING ENCLOSURE. -
Page 12: Operation
DO NOT LEAVE THE FIRE UNATTENDED WHEN THE DOOR IS UNLATCHED OR WHEN USING A SPARK SCREEN AS Your Spartherm product is designed with the most advanced technology. The UNSTABLE WOOD COULD FALL OUT OF THE FIRE CHAMBER appliance is extremely airtight. - Page 13 Slowly add slightly larger wood pieces. Lay the pieces lengthwise from front Once the medium sized firewood is burning briskly and an ember bed has to back in the hot ember bed with a small gap between each piece so that started to establish you can control the fire using the air adjustment control the air can flow directly into this gap and ignite the fuel above.
- Page 14 Step 1: Expansion / contraction noises during heating up and cooling down cycles • Ensure that all air controls in the fireplace are open (if available). Put the are normal and to be expected. logs on the bottom of the fireplace. It is important that the wood is cleft and dry.
-
Page 15: Fuel
FUEL moisture while after proper seasoning only about 20% of the water remains. As wood is burned, this water boils off, consuming energy that should be used in heating. The wetter the wood, the less heat is given off and the more creosote is produced. -
Page 16: Ash Removal Procedures
ASH REMOVAL PROCEDURES and chimney should be inspected regularly during the heating season to determine if a creosote build-up has occurred. If creosote has accumulated it should be removed to reduce the risk of a chimney fire. RUNAWAY OR CHIMNEY FIRE IMPROPER DISPOSAL OF ASHES MAY RESULT IN FIRES. -
Page 17: Chimney Cleaning
DO’S AND DON’TS • After the chimney fire is out, clean and inspect the chimney for stress and cracks prior to lighting another fire. Also check combustibles around the chimney and the roof. • Build a hot fire. CHIMNEY CLEANING •... -
Page 18: Servicing/Maintenance
6.0 SERVICING/MAINTENANCE Clean the glass after the first 10 hours of operation with the recommended appliance glass cleaner (supplied). Thereafter clean as required. The glass is very strong but do not let burning fuel rest or fall against it and always close the door gently. -
Page 19: Troubleshooting
7.0 TROUBLESHOOTING Contact your dealer for questions concerning prices and policies on replacement parts. Normally all parts can be ordered through your authorised dealer / distributor. An up to date list of authorised dealers can be found at sparthermfires.co.nz APPLIANCE MAY BE HOT, DO NOT SERVICE UNTIL APPLIANCE HAS COOLED. -
Page 20: General Warranty Terms And Conditions
Spartherm fire dealer. 1. Nature of Warranty 1.1 Subject to the exclusions in section 2 & 3, Escea undertake to put right any defects in the Spartherm products supplied by Escea for the periods specified below: Parts Parts and Labour Warranty... - Page 21 A 2.1.3 The use of products, including flue systems that are not spray can of touch up Spartherm paint is available and can be specified in accordance with installation manual. purchased from your Spartherm dealer.
- Page 22 30 km from the nearest service centre to your location. You can obtain details on the location of service centres and service call fees by visiting the Spartherm website or calling the customer care line below. THIS DOCUMENT CONTAINS TECHNICAL DATA SUBJECT TO 4.0 Warranty Claims...
-
Page 23: Service History & Data Plate
9.0 SERVICE HISTORY & DATA PLATE SERVICE HISTORY The appliance must be serviced at least annually and possibly more frequently – dependant on usage. Date Dealer Name Service Technician Service Performed Notes 630564_1... - Page 24 630564_1...
Need help?
Do you have a question about the New Zealand Freestander and is the answer not in the manual?
Questions and answers