Advertisement
Quick Links
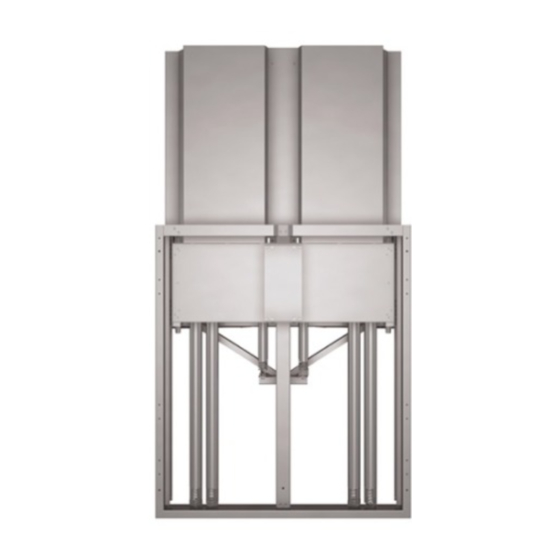
EZ1/ML360 user manuAl
ez-lift SERIES
Consists of:
EZ1/MB26/396
EZ1/MA3
CAPACITY
Supports most displays up to
VESA Mounting
Horizontal - 400-600mm
Vertical - 400-1200mm
Salamander Interactive Wall Mounts
Mount Body
VESA Interface
361.7 lbs (164.4 kg)
interactive
wall mounts
501-517 [02.21]
page 1 of 12
Advertisement

Subscribe to Our Youtube Channel
Related Manuals for Salamander EZ-LIFT Series

Summary of Contents for Salamander EZ-LIFT Series
- Page 1 SERIES interactive wall mounts Consists of: Mount Body EZ1/MB26/396 VESA Interface EZ1/MA3 CAPACITY Supports most displays up to 361.7 lbs (164.4 kg) VESA Mounting Horizontal - 400-600mm Vertical - 400-1200mm Salamander Interactive Wall Mounts 501-517 [02.21] page 1 of 12...
- Page 2 M 6 x 1 2 m m (1 0 x ) o r M 8 x 1 2 m m (1 0 x ) o r M 1 0 x 1 2 m m (1 0 x ) Salamander Interactive Wall Mounts 501-517 [02.21] page 2 of 12...
-
Page 3: General Warning
Never adjust the inner springs Disposal of the EZ-Lift Springs should be unattached before disposal of the EZ-Lift. Sort the EZ-Lift, the accessories and the packaging for the environmentally friendly recycling. Salamander Interactive Wall Mounts 501-517 [02.21] page 3 of 12... - Page 4 SERIOUS PERSONAL INJURY OR DAMAGE TO EQUIPMENT! It is the installers responsibility to make sure the structure to which the EZ-Lift is being installed is capable of supporting three times the combined weight of the EZ-Lift and all attached equipment is not to exceed: 497lbs / 225kg Mounting EZ-LIFT to Wall EZ1/MB26/396 Unpack the EZ-Lift. Remove the application frame cover. Remove the wall frame covers: Undo the screws front (1) and side (2) and slide out to the top (3). Locating your mount WOOD CONSTRUCTION: locate two framing studs (minimum of 16” (405 mm) apart) at the desired location using a stud finder device. MASONRY: a minimum width of 16” (405 mm) is required between fasteners. Salamander Interactive Wall Mounts 501-517 [02.21] page 4 of 12...
- Page 5 = 700 = Mounting Bracket Hole Position 84” [2134] = 700 = = 600 = 26” Adjustable Range [660] 45.75” [1162] 17” Approx. Lowest Screen Position [432] Mount wall brackets Remove the wall bracket (4): Undo the screws left and right and remove the bracket. Salamander Interactive Wall Mounts 501-517 [02.21] page 5 of 12...
- Page 6 Mount Wall Bracket Mount the wall bracket to the wall. Fasteners not included, select based on type of wall. Be sure wall structure is sufficient to handle load. Accommodates 3/8 inch (10 mm) fasteners. Lift the EZ-Lift in place. Hold it there. WARNING - VERY HEAVY Salamander Interactive Wall Mounts 501-517 [02.21] page 6 of 12...
- Page 7 Mark the mounting holes at the top of the EZ-Lift Take the EZ-Lift down and put it aside, drill the holes Lift the EZ-Lift in place .Tighten screws at the top. Salamander Interactive Wall Mounts 501-517 [02.21] page 7 of 12...
- Page 8 Put the security screws back securing the wall bracket to the EZ-Lift. Do not tighten the screws yet Always level the EZ-Lift vertically! Avoid it crashing into the wall during use and noise from misalignment. Level the EZ-Lift at the bottom. Tighten the security screws (1) on both sides. Salamander Interactive Wall Mounts 501-517 [02.21] page 8 of 12...
- Page 9 Mount the wall frame covers (3): Slide them in from the top, make sure the tabs at the bottom (5) slide in to the slots. Tighten the screws front (1) and side (2) Mount the application frame cover (optional), tighten the 2 screws on either side at the indicated positions. Salamander Interactive Wall Mounts 501-517 [02.21] page 9 of 12...
- Page 10 Mounting VESA Bracket to EZ-Lift # EZ1/MA3 400 - 600 15.75"- 23.6" 1321 1.22" 52" Mount the horizontal profiles to the EZ-Lift. NOTE: top and bottom profiles are different Top: Short tab Bottom: longer tab M6 x 12mm (8x) Salamander Interactive Wall Mounts 501-517 [02.21] page 10 of 12...
- Page 11 Mount the vertical profiles to the touch panel. Metric hardware 6, 8 and 10 mm included NOTE: holes at the top Lift the panel on to the EZ- Lift. NOTE: Flat against the brackets, then lower it HEAVY: TWO PERSON JOB Salamander Interactive Wall Mounts 501-517 [02.21] page 11 of 12...
- Page 12 5 seconds in turn until the panel is balancing. Fine-tune the balance. 1/2” [13mm] Never adjust inner springs! LIMITED WARRANTY FOR COMMERCIAL VIDEO DISPLAY STANDS AND MOUNTS Salamander warrants against manufacturing defects for two (2) years from the date of purchase. Salamander will repair or replace, at our option, any product defective in materials or craftsmanship. Batteries are not covered by the warranty. Full warranty including limitations and warranty claim information may be found at www.salamandercommercial.com Subject to printing errors and technical amendments. Salamander Interactive Wall Mounts 501-517 [02.21] page 12 of 12...
Need help?
Do you have a question about the EZ-LIFT Series and is the answer not in the manual?
Questions and answers