Table of Contents
Advertisement
Quick Links
Advertisement
Table of Contents

Related Manuals for Woody Valley Xpression


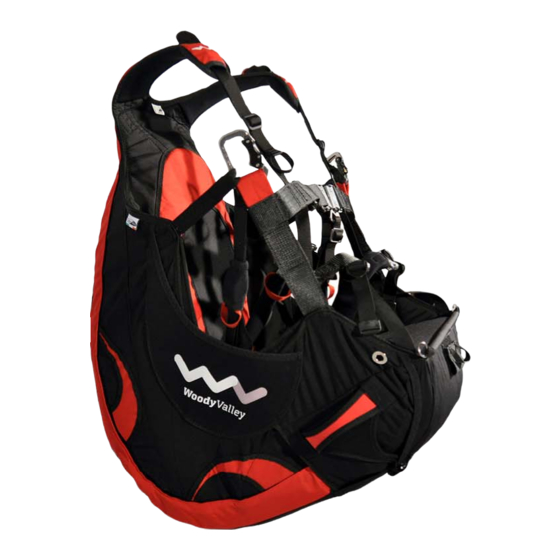
Summary of Contents for Woody Valley Xpression
- Page 1 Please read this manual before flying with the X-PRESSION for the first time.
- Page 2 The incorrect or inappropriate use of Woody Valley equipment greatly increases this risk. In no case can Woody Valley and the Woody Valley retailer be held responsible for personal injury caused to yourself or to third parties, or for whatever type of damage.
-
Page 3: Table Of Contents
INDEX 1- GENERAL INFORMATION ..........................................1 1.1- C ........................................................2 ONCEPT 1.2- X-PRESSION ..................................................2 PROTECTION 1.3- S.O.S.......................................................2 LABEL 2- BEFORE USING THE HARNESS ......................................... 3 2.1- A X-PRESSION ........................................3 SSEMBLING THE DORSAL PROTECTION FOR 2.2- R ....................................................3 ESERVE PARACHUTES 2.2.1- Connecting the deployment handle to the deployment bag .....................................4 2.2.2- Connecting the reserve parachute to the harness ......................................4 2.2.3- Inserting the reserve parachute into the X-PRESSION harness ..................................7 2.2.4- Reserve parachute deployment..............................................9... -
Page 4: 1- General Information
1- GENERAL INFORMATION The equipment supplied should comprise: - Harness - Wooden seat plate - Hook-in karabiners - 2 floating reserve parachute deployment handles - 3 elastic loops for fastening the reserve parachute The optional extras comprise: - Speed-bar - Relax-bar - Front ballast pocket - Leg Cover (wind-proof protection) -
Page 5: Concept
1.1- Concept X-PRESSION is a product that was developed entirely by Woody Valley to meet the demands specifically expressed by our pilots. This paragliding harness was designed principally for pilots who fly aerobatics and freestyle, but also for pilots who like to fly in a seated position. In building this harness, we have dedicated meticulous attention to even the smallest details regarding comfort and safety. -
Page 6: 2- Before Using The Harness
2.1- Assembling the dorsal protection for X-PRESSION Woody Valley recommends that assembly should be performed in the sequence detailed below. In case of doubts or any other problems regarding this procedure, please consult your instructor, your Woody Valley retailer, or the importer. -
Page 7: 1- Connecting The Deployment Handle To The Deployment Bag
2.2.1- Connecting the deployment handle to the deployment bag X-PRESSION is supplied with a handle for reserve parachute extraction. It is identified with the number 9; this handle alone should be used for this purpose. The black loop attached to the handle itself should be passed into the loop on the deployment bag, and then the entire handle should be passed through its own loop and pulled tight. - Page 8 Second system: The reserve parachute bridle is passed through the loop at the end of the harness reserve parachute bridle. The reserve parachute itself is then passed through the large loop in the reserve parachute bridle. This connects the two bridles. The loops should be pulled as tight as possible to avoid any chance of dangerous friction developing between the two bridles during the shock caused when the reserve parachute opens.
- Page 9 The two connections should be made using screw-lock karabiners with a breaking strength of at least 1,400 kg. In any case, it is important to verify that the length of the bridle is sufficient to position the reserve parachute inside the harness pocket, and that there is sufficient play to enable the parachute to be taken out of the pocket without causing the reserve parachute deployment bag itself to open during extraction.
-
Page 10: 3- Inserting The Reserve Parachute Into The X-Pression Harness
2.2.3- Inserting the reserve parachute into the X-PRESSION harness Insert the reserve parachute into the pocket of the harness, so that the handle is visible and facing outwards, and the loop connecting the handle to the deployment bag is facing upwards. Thread a thin cord (such as paraglider riser cords) through each elastic loop. - Page 11 Push the metal pins on the handle into the elastic loops and under the transparent cover. It is essential to remove the cords after this operation. The cords should be pulled out slowly in order not to damage the elastic loops by excessive friction. Lastly, the handle should be positioned under the elastic cover. Repeat all the operations described above to insert the second reserve parachute.
-
Page 12: 4- Reserve Parachute Deployment
2.2.4- Reserve parachute deployment It is vital to feel periodically for the position of the reserve parachute deployment handle during normal flight, so that the action of reaching for the reserve parachute handle becomes instinctive in an emergency. In emergency situations, the deployment procedure is as follows: Look for the reserve parachute handle and grasp it firmly with one hand. -
Page 13: 2- Adjusting The Back
2.3.2- Adjusting the back Adjusting the back is achieved by means of just 2 settings. This system was designed specially for this type of harness which, even when subjected to high centrifugal forces, retains the configuration to which it was adjusted. 2.3.3- Shoulder-strap adjustment Shoulder-strap adjustment enables the harness to be adjusted to the pilot’s height. -
Page 14: 4- Chest Strap Adjustment
2.3.4- Chest strap adjustment The chest strap adjusts the distance between the two karabiners, and it can be set between 37 and 48 centimetres. When the chest strap is tighter, stability is greater. We recommend a length of about 40-42 cm. A wider distance does not improve glider performance, and a smaller distance can accentuate the effects of a “twist”... -
Page 15: 5- Leg Strap Adjustment
2.3.5- Leg strap adjustment Because the leg straps are attached relatively high up, the pilot has considerable freedom in thigh movement. Normally, the manufacturer’s original setting should be satisfactory. However it is important to try reaching the correct seated position in the launch phase without using your hands, by testing the movements in a flight simulator. - Page 16 Fix the smoke canister to the cord using adhesive tape. When in the air, release the canister by pulling the red sphere on the left shoulder strap with a vigorous movement.
-
Page 17: 3- Flying With The X-Pression Harness
3- FLYING WITH THE X-PRESSION HARNESS 3.1- Pre-flight checks For maximum safety, use a complete and consistent system of pre-flight checks and repeat the same mental sequence every flight. Check that: all buckles are fastened. Take particular care in the case of ice or snow. Always clean off snow or ice before fastening buckles; ... -
Page 18: Dual Flight
Woody Valley recommends using a suitable lifejacket when flying above water. If the reserve parachute is deployed over water, we would like to point out that both deployment handles were designed so that they float together with the... -
Page 19: Tow Bridle Connection
3.5- Tow bridle connection The X-PRESSION harness can be used for towed launches. The tow bridle release should be hooked directly to the main karabiners, ensuring that the karabiners are positioned with the opening bar facing the rear. For further details, refer to the documentation provided with your tow release, or ask a qualified towing instructor at your flying site. -
Page 20: Cockpit And Front Ballast Assembly
4.3- Leg Cover Leg Cover is a product that has been developed uniquely by Woody Valley in order to ensure unequalled comfort. The special cover in waterproof, vapour- permeable fabric ensures protection from the cold and provides an improved aerodynamic profile. To fit the leg cover to the harness, follow the instructions provided in the Leg Cover instruction manual. -
Page 21: 5- Maintenance And Repair
Zip fasteners should be kept clean and lubricated with silicone spray. In the case of making any request to an official retailer or Woody Valley for maintenance operations, please quote the complete identification number shown on the silver label in the rear pocket. -
Page 22: 6- Technical Data
6- TECHNICAL DATA Distance between karabiner and seat Size M cm 35; L cm 37; XL cm 39 Distance between karabiners (min. max.) Size M cm 41/60; L cm 41/60; XL cm 41/60 Size of wooden seat, size M Width 30 cm; depth 36 cm Size of wooden seat, size L Width 32 cm;...
Need help?
Do you have a question about the Xpression and is the answer not in the manual?
Questions and answers