Advertisement
Q: How to pair new cameras to the NVR?
A: First at all, delete the channel 1.
In the Video Manage interface, you can add new cameras to the NVR
(When there is unoccupied channel in the bottom table), re-pair
cameras to the NVR again (when any cameras lose connection), or
delete cameras from their current channels.
Note:
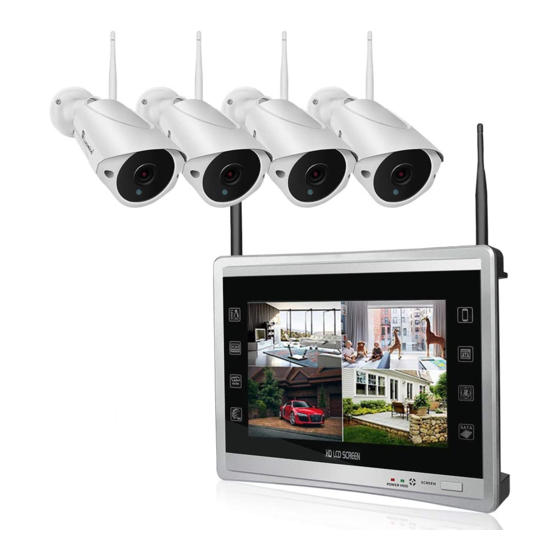
All the 4/8 cameras of Luowice Wireless Security Camera System
have already been paired to the NVR. The cameras will automatically
connect to the NVR once they are plugged in power.
No action required if all the cameras' live videos show on the screen
within minutes. If any camera does not show properly, please kindly
follow the below instruction to pair the camera to the NVR.
Advertisement
Table of Contents

Subscribe to Our Youtube Channel
Related Manuals for Luowice WS9004CH-4C


Summary of Contents for Luowice WS9004CH-4C
- Page 1 NVR again (when any cameras lose connection), or delete cameras from their current channels. Note: All the 4/8 cameras of Luowice Wireless Security Camera System have already been paired to the NVR. The cameras will automatically connect to the NVR once they are plugged in power.
- Page 2 Note: Protocol: Support two protocols: N1 and ONVIF. And default is “N1”. 1.1 Refresh Function: Search wireless IP cameras in LAN. Operation: Step 1. Connect the cameras to the NVR via network cable. Step 2. Wait for about 20 seconds, and then click “Refresh” at the top right side.
- Page 3 Function: Pair cameras to the NVR channels. Then the system can transmit the NVR’s WIFI hotpot and password to the cameras and the cameras can transmit the video signals back to the NVR wirelessly. When to Use Match Code: a) Add new add-on cameras to the NVR. b) Re-pair cameras to the NVR when they lose connection.
- Page 4 Step 3. Select the camera from the upper table, and then select an unoccupied channel from the bottom table, and click “Match Code”. Wait for seconds and then you shall see the camera display live video on the screen if nothing goes wrong. Step 4.
- Page 5 within the WIFI range. Once you plug the camera in power from where you installed it, it will connect to the NVR automatically and display live video on the screen. Note: If you can not find the new camera’s information, please click ‘Refresh’...
- Page 6 IPC Disconnect: Camera has been paired to the NVR, but not connected successfully.
Need help?
Do you have a question about the WS9004CH-4C and is the answer not in the manual?
Questions and answers