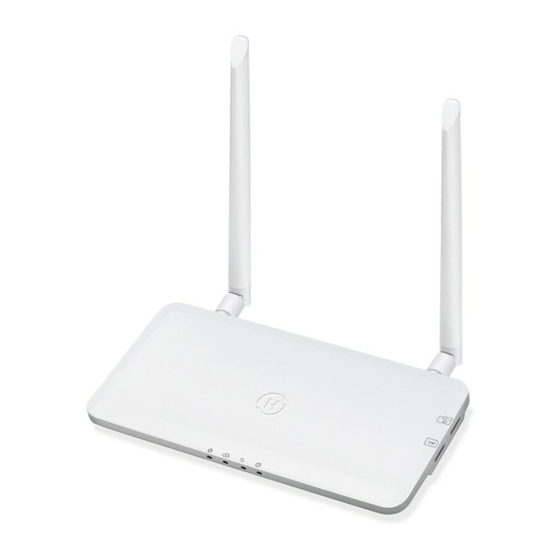
Hoymiles DTU-Pro User Manual
Data transfer unit
Hide thumbs
Also See for DTU-Pro:
- User manual (17 pages) ,
- Quick installation manual (2 pages) ,
- User manual (14 pages)
Table of Contents
Advertisement
Quick Links
Advertisement
Table of Contents

Subscribe to Our Youtube Channel
Summary of Contents for Hoymiles DTU-Pro
- Page 1 DTU-Pro Version 1.4 (March 2021)
-
Page 2: Table Of Contents
6. Site Creation on HMP ............................. 14 7. End-user Login ............................... 14 8. View the Website platform ............................15 9. View the mobile Application ........................... 15 10. LED Indicators ................................ 15 11. Technical Data ............................... 16 © 2021 Hoymiles Power Electronics Inc. All rights reserved. -
Page 3: Important Safety Information
Note that only professionals can install or replace DTU. Do not try to repair DTU without Hoymiles’ approval. If DTU is damaged, please send the DTU back to your installer for repairing/replacing. Disassembling DTU without Hoymiles’ approval will invalidate remaining of the warranty period. -
Page 4: Other Information
PV modules and the operation data of the microinverters to the DTU, which is the hardware basis of the module-level monitoring. With conversion efficiency up to 96.7% and MPPT efficiency up to 99.9%, Hoymiles microinverters rank into the first class of the world’s microinverter industry. -
Page 5: Interface Layout
DTU Communication Indicator (With Server) DTU Communication Indicator (With MI) DTU Alarm Indicator GPRS Antenna (GSM) RS485 DRM Port (For Australia only) Ethernet Port USB Port Reset Bottom Power Port 2.4G Antenna © 2021 Hoymiles Power Electronics Inc. All rights reserved. -
Page 6: Export Management Function (Rs485 Port)
(input port) in order to cease output active power or limit active power to a regulating level. This logic input can be RS485 port, Ethernet port, etc. DTU-Pro provide RTU Modbus protocol over RS485 port for this remote active power control. For more information, please refer to “Modbus implementation Technical Note”. -
Page 7: Drm Port
DTU-PRO 3.5 DRM Port DRM port is provided to support several demand response modes as below by connecting external control device with a standard RJ-45 connector. For DTU-Pro, it can support DRM0/5/6/7/8 if used with Hoymiles microinverters. Mode Requirement DRM0... -
Page 8: Dtu Installation
4. DTU Installation 4.1 System Capacity The DTU-Pro is capable of monitoring up to 99 panels. If the communication between the DTU and microinverter caused by the installation conditions, the number of PV modules that the DTU can monitor may be reduced. -
Page 9: System Installation Sequence
3. Connect to the Internet between Microinverters and DTU 4. Start procedure Wall-mount the DTU (optional) 5. Normal operation 4.5 Preparation A. Download the Hoymiles S-miles installer App B. Check the box for following items: © 2021 Hoymiles Power Electronics Inc. All rights reserved. -
Page 10: Install The Dtu
Two Antennas Adapter Bracket 5 Pin Plug C. Choose the way DTU-Pro connect to the Internet: For DTU-Pro (WiFi Version): Use WiFi or Ethernet. Please prepare for the following items, if needed: - Ethernet Cable (if choose Ethernet option). - Page 11 (the M4 screws need to prepare by installer); - Match the bracket’s upper buckle with DTU-Pro; - Match the bracket’s lower buckle by gently press the lower side of the DTU-Pro until hear the Click. Please make sure the antennas are vertical to the wall.
- Page 12 Use the Lan Cable, one side connect to house router, another side connect to DTU Ethernet port. Use the smart mobile/tablet open the Installer App and login. Click “O&M” on the bottom of the page and then click “Network Configuration”, select “Ethernet” (If choose Ethernet). © 2021 Hoymiles Power Electronics Inc. All rights reserved.
-
Page 13: Complete Installation Map
Please complete the installation map. Peel the serial number label (as circled below) from the DTU and place it on the installation map. Complete system information of the installation map shown as follows. © 2021 Hoymiles Power Electronics Inc. All rights reserved. -
Page 14: Site Creation On Hmp
DTU-PRO 6. Site Creation on HMP A. Install S-Miles Installer APP by searching “Hoymiles” at the App Store (IOS) or Play Store (Android). B. Open the APP and login in with your installer account name and password. If you are a new... -
Page 15: View The Website Platform
9. View the mobile Application Download mobile APP by searching “Hoymiles” at App Store (IOS) or Play Store (Android), log in with customer/installer login account and password, all installed Microinverters operating details will be able to view from there.. -
Page 16: Technical Data
Communication to Cloud GSM(850/900/1800/1900MHz) Type WIFI(802.11b/g/n) /Ethernet Ethernet Sample rate Per 15 minutes Communication to Meter Signal RS485 Maximum distance (RS485 cable) 500m Display LED Indicator * 4 – RUN, Cloud, MI, ALM © 2021 Hoymiles Power Electronics Inc. All rights reserved. - Page 17 *1 If the DTU installation location is inside the metal box or under the metal/concrete roof, extended antenna will be suggested. *2 Depending on the installation environment, please refer to user manual for more details. © 2021 Hoymiles Power Electronics Inc. All rights reserved.


Need help?
Do you have a question about the DTU-Pro and is the answer not in the manual?
Questions and answers