Table of Contents
Advertisement
Advertisement
Table of Contents

Related Manuals for Gutermann AQUASCAN 610


Summary of Contents for Gutermann AQUASCAN 610
- Page 1 AQUASCAN 610 Operating Manual JW V 1.1...
-
Page 2: Table Of Contents
Settings ..................24 4.5.9. Communication ................30 4.5.10. Status ..................31 Sensors ....................32 Positioning of Accelerometers ............33 Extension Antenna ................36 Installation of Hydrophones .............. 37 Example Results .................. 40 Trouble Shooting .................. 42 AQUASCAN 610 1/41 Version 1.1... -
Page 3: Introduction
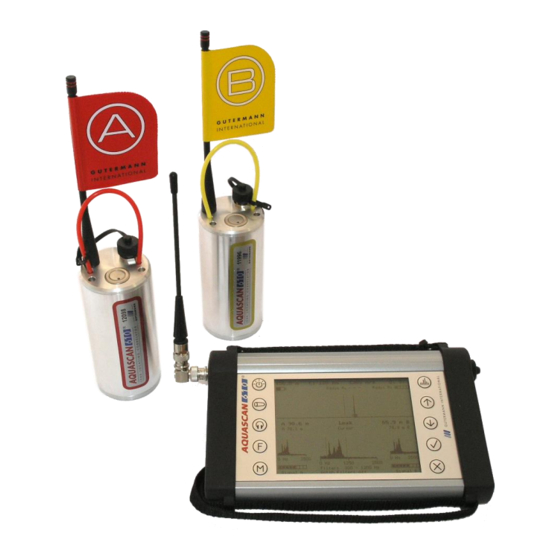
The ‘Streetworks Act’ friendly sensors with built in radio has led the way in next generation correlators almost eliminating the need for cables. The AquaScan 610 has the highest precision on all pipe materials including uPVC, MDPE and other plastics. The Wizard assist feature makes the operation user friendly. -
Page 4: Charging All Equipment
5 minutes by pressing e. Adjust the filter (see chapter 4.4) setting if necessary to enhance the measurement quality and cleanness (reduced minor peaks and spicks). AQUASCAN 610 3/41 Version 1.1... -
Page 5: Main Screen
Save the Correlation via manage measurement (chapter 4.5.6). 3. Main Screen Fig. 1 AquaScan 610 Main Screen Pipe Length is the distance between sensors A & B following the path of the pipe which is not always a straight line. - Page 6 These filters are determined by the pipe material selected, using manual filtering the lower and upper filter maybe adjusted- see filtering chapter 4.4 Signal level A is the sound signal strength indicated by blocks; the AQUASCAN 610 5/41 Version 1.1...
- Page 7 Battery level indicator fills in depending on the state of charge; the example currently shows 70% charge. When the battery is full the indicator is filled in completely. A lightening symbol next to battery indicator appears when the charger is plugged in. AQUASCAN 610 6/41 Version 1.1...
-
Page 8: Correlator Keyboard
4. Correlator Keyboard Fig. 2 AquaScan 610 Correlator keyboard 4.1 On/Off: Press at least 1 sec to turn the Correlator on or off. If the device is on, pressing the key less than 1 sec will switch the backlight on or off. -
Page 9: Pipe Details
Correlate. Select manual to enter sound velocity instead of material and diameter however the sound velocity must be known by the operator or measured using the velocity check (see chapter 4.5.3.) AQUASCAN 610 8/41 Version 1.1... -
Page 10: Listen Function
Clear all deletes the list of sections. Single Material reverts back to the material menu and allows the entry of 1 section between sensor A & B. 4.3 Listen Function Press to enter the Headset/listen menu. Fig. 5 Headset listen Menu AQUASCAN 610 9/41 Version 1.1... -
Page 11: Filters
(mute function) 4.4 Filters The objective for filtering is to clean up the correlation and unmask any hidden leak. Press the filter menu will appear: Fig. 6 Filter Menu Fig. 7 Optional Multiple Filter Menu AQUASCAN 610 10/41 Version 1.1... -
Page 12: Advanced Spectrum Analysis
(they will not be the large peaks). 4. Start by making an informed estimate at the required filter setting. If you are not successful retry using a series of different settings until you have exhausted every option. AQUASCAN 610 11/41 Version 1.1... - Page 13 Set filter manually with the cursor in the coherence spectrum graphics. Select lower filter limit and press Fig. 10 Select upper filter Select upper filter limit and press or press to return to lower filter limit AQUASCAN 610 12/41 Version 1.1...
-
Page 14: Notch Filter
A/C currents at 50/60 Hz. As a rule 110/120V AC creates a 50Hz disturbance and 230/240V AC create a 60Hz disturbance. Multiple filters: 4.4.4. Fig. 12 Multiple filter AQUASCAN 610 13/41 Version 1.1... -
Page 15: Main Menu
13 and press Fig. 13 Multiple filter on/off Main Menu Press for Main Menu. Select item by using keys and confirm with Fig. 14 Main Menu AQUASCAN 610 14/41 Version 1.1... -
Page 16: Contrast
First move the cursor to position 1 with . Confirm with Fig. 15 Peak Suppression part 1 Secondary move the cursor to position 1 with .Confirm with Fig. 16 Peak Suppression part 2 AQUASCAN 610 15/41 Version 1.1... -
Page 17: Velocity Check
In this case we simulate the leak outside of the pipe section we are measuring (that means that both sensors are on one side of the leak). First, enter the distance between sensor A & B with . Confirm with AQUASCAN 610 16/41 Version 1.1... - Page 18 Fig. 19 Velocity Check part 2 Then, Select metallic or non-metallic / unknown pipe material. Note: If pipe material is metallic the measurement will be more precise if you select metallic instead of unknown. Fig. 20 outside Leak AQUASCAN 610 17/41 Version 1.1...
- Page 19 The difference when entering the information is the distance between sensor A and the known leak has to be entered as shown below; Fig. 22 Velocity Check inside leak AQUASCAN 610 18/41 Version 1.1...
-
Page 20: Ground Microphone
4.5.4. Ground Microphone Fig. 23 AquaScan 610 with Geophone attached To assemble the Geophone, take the T-bar handle and screw into the stainless steel plate of the Geophone base in a clockwise direction. There should be no thread visible once complete. When attaching the cable ensure the notch lines up between the 4 way plug on the cable and the socket of the T-Bar. - Page 21 Geophone taking readings at regular intervals. Use the memory facility to analyze the results and return to the loudest point to confirm the leak. Fig. 26 Method of Pin Pointing with a Geophone AQUASCAN 610 20/41 Version 1.1...
-
Page 22: Live Signals
Load, save and delete measurements. Depending on the size of the measurements you can store up to 64 measurements in the internal memory. Fig. 28 Manage measurement 4.5.6.1 Load Measurement A list with stored measurements will appear AQUASCAN 610 21/41 Version 1.1... - Page 23 Select the character by moving the cursor and press confirm, repeat this until the name is complete. To delete a character press To save move the cursor to OK then Time and date of the AQUASCAN 610 22/41 Version 1.1...
-
Page 24: Corr Settings
After selecting a measurement you will be asked if you want to delete the measurement. After confirming with the measurement will be deleted. 4.5.7. Corr Settings Fig. 32 Corr Duration Press to open the next window which is shown in fig 28. AQUASCAN 610 23/41 Version 1.1... -
Page 25: Settings
Highlight the required duration by moving the cursor and press to confirm. 4.5.8. Settings The Settings Menu is shown in fig 34 and each option will be covered in this section. Fig. 34 Settings window AQUASCAN 610 24/41 Version 1.1... - Page 26 AQUASCAN 610 25/41 Version 1.1...
- Page 27 Change language by choosing from the list shown in fig 35 and press to confirm. 4.5.1.2. Units Select metric or imperial unit system. Input Select method for entering numbers: Number: changes whole number. Digit: changes single digit of number, switches to next digit, switches to previous digit. AQUASCAN 610 26/41 Version 1.1...
- Page 28 Switch wizard assisted mode on or off by pressing . Follow the wizard steps to perform a correlation, and example of this is shown below. Fig. 36 Wizard Assist Mode Fig. 37 Wizard Assist Step 1 Fig. 38 Wizard Assist Step 2 AQUASCAN 610 27/41 Version 1.1...
- Page 29 Fig. 39 Wizard Assist Step 3 Fig. 40 Wizard Assist Step 4 Fig. 41 Wizard Assist result! AQUASCAN 610 28/41 Version 1.1...
- Page 30 (if switched on) or a white static noise can be heard. 4.5.1.5. Connect to Headset Connects AquaScan 610 to the BT headset which was selected by Find Headset (cover previously). Alternatively connect from the headset button. AQUASCAN 610 29/41 Version 1.1...
-
Page 31: Communication
Set date format to dd.mm.yyyy (17.01.2006) or mm/dd/yyy (01/17/2006). 4.5.9. Communication Select this option to allow a PC to connect to the AquaScan 610. This feature is used to download saved measurements into the viewing software or update firmware. A Bluetooth pairing must be established between the PC and AquaScan 610 by searching for Bluetooth devices in the PC BT manager. -
Page 32: Status
Information from top to bottom: • Serial number • Firmware version of the main processor • Firmware version of the core processor • Memory state • Size of MMC (Multi Media Card) • Date and time AQUASCAN 610 31/41 Version 1.1... -
Page 33: Sensors
Charge warning: When battery is almost discharged during operation mode, the LED will start flashing about twice per second. Further operation will be possible for approx. 30 minutes. When battery is discharged, the sensor will shut off automatically. AQUASCAN 610 32/41 Version 1.1... -
Page 34: Positioning Of Accelerometers
If the chambers are deep enough to take the sensor with antenna then the lid maybe shut (see fig 49) however metallic lids will attenuate the signal reducing the distance of the radio range. Fig. 49 the AquaScan Sensor deployment AQUASCAN 610 33/41 Version 1.1... - Page 35 (e.g. B sensor in fig 52) to bring the leak in bracket i.e. between the sensors. Fig. 52 Out of Bracket so move the sensor AQUASCAN 610 34/41 Version 1.1...
- Page 36 See example correlation in chapter 6, fig 67. To rectify the fault move one of sensors so both are on the same water main. Fig. 54 Parallel Water Mains - “Central Correlation” AQUASCAN 610 35/41 Version 1.1...
-
Page 37: Extension Antenna
• Position Sensor antenna to reduce interference from parked vehicles and improve line of sight. • Position yourself with Aquascan 610 Correlator centrally between the two sensors with best line of sight. If you are correlating around a corner stand on the corner. -
Page 38: Installation Of Hydrophones
• Connect Pressure gauge to check the pressure • Connect the hydrophone with the tapping valve shut, and then fully open the valve ensuring the tapping is completely open. Fig. 58 Sensor connected to Hydrophone AQUASCAN 610 37/41 Version 1.1... - Page 39 Unscrew the bleed valve using a flat blade screwdriver and inspect the mechanism for grit, clean and remove any particles. Note: Do not clean bleed valve when the Hydrophone is under water pressure. AQUASCAN 610 38/41 Version 1.1...
- Page 40 Fig. 61 removed Hydrophone Bleed Valve AQUASCAN 610 39/41 Version 1.1...
-
Page 41: Example Results
5. Example Results Fig. 62 Excellent Correlation on AC pipe Fig. 63 Good Correlation on PVC pipe Fig. 64 Poor Correlation on PVC pipe AQUASCAN 610 40/41 Version 1.1... - Page 42 Fig. 65 No Correlation Fig. 66 Out of Bracket Correlation Fig. 67 Centre Correlation AQUASCAN 610 41/41 Version 1.1...
-
Page 43: Trouble Shooting
Perform a velocity check out by several pipe material or age of meters pipe Leak result on Leak could be up the Move sensor to next a Tee section branch of the Tee section section of the Tee AQUASCAN 610 42/41 Version 1.1...
Need help?
Do you have a question about the AQUASCAN 610 and is the answer not in the manual?
Questions and answers