Table of Contents
Advertisement
Advertisement
Table of Contents

Related Manuals for Gutermann ZONESCAN


Summary of Contents for Gutermann ZONESCAN
- Page 1 U s e r M a n u a l Version: 1.1.0 Language: English...
- Page 2 For any questions relating to this product, please write to: support@gutermann-water.com...
-
Page 3: Table Of Contents
Connection Test ....................23 5.1.8 Finalize the changes ..................... 24 6 Device Maintenance ......................... 25 Alpha Maintenance ........................25 Repeater Maintenance ........................30 Logger Maintenance ........................31 Project Maintenance ........................32 7 Firmware Update ........................32 ZONESCAN INSTALL User Manual page – i... - Page 4 How do I change from always to just once on Android? ..........37 10.2 How do I clear app cache on Android? .................. 37 11 Support ............................ 38 12 Disposal ........................... 39 13 Imprint ............................. 39 ZONESCAN INSTALL User Manual page – ii...
-
Page 5: Safety Instructions
In particular, these products are not intended to be used on wastewater and gas pipes. Gutermann is not liable for any damage caused by misuse, improper operation, and as a result of non-compliance with safety instructions and warnings. -
Page 6: Overview
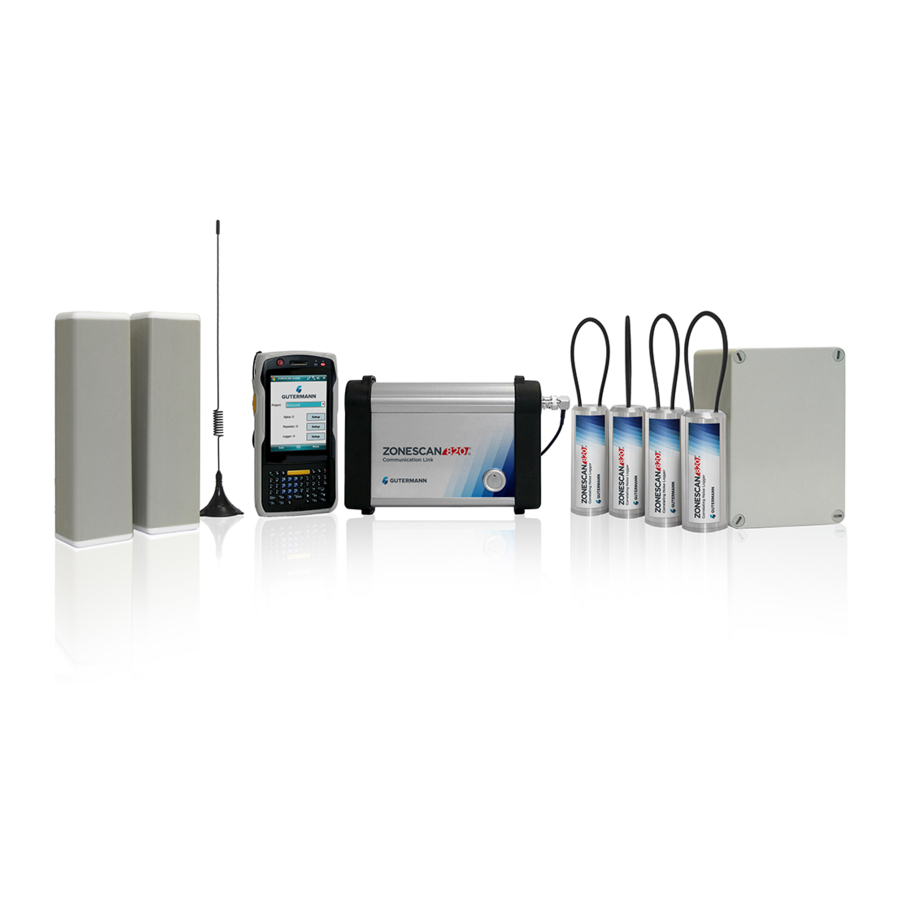
ZONESCAN INSTALL is Gutermann’s latest installation app for professional water leak detection systems. In the past, ZONESCAN ALPHA systems were set up using ZONESCAN mobile on a Windows Mobile PDA. This will be replaced by ZONESCAN INSTALL, running on Android phones or tablets. This Android mobile app handles device setup, maintenance, and firmware updates. -
Page 7: Android Device Requirements
• https://play.google.com/store/apps/details?id=eu.gutermann.zonescan.install • After the installation, you can start ZONESCAN INSTALL with the icon on the home screen: 3.4 Action Bar The Action Bar, located at the top of each screen, controls app navigation and basic functions. How it looks depends on the screen you are on. On the main screen, the Action Bar contains the following... -
Page 8: App Setup Wizard
Install the app from the play-store, launch the app, and grant the necessary permissions required for the app. Accept the license conditions to continue with the setup process. When ZONESCAN INSTALL is launched guided tutorials are provided all through the app to help you with the working of the app. - Page 9 Once the account details are correctly entered, press the back button in the ‘Account Settings’ screen as shown in the figure below. Then select the ‘Reload’ option to download the associated projects from the ZSNet. ZONESCAN INSTALL User Manual page – 5...
-
Page 10: Nb-Iot Wizard
Then select the downloaded project to configure the gateway settings. 4.1.1 Configuring Gateway Settings Configure the gateway settings to establish contact with the Gutermann gateway. You need to fill in the following details on the Gateway Settings screen: Gateway Address: Default address is set to ‘95.217.68.86’. -
Page 11: Configure Nb-Iot Logger
For successful registration, the NB-IoT Logger will have to be known to ZONESCAN NET. So, you have to upload the project from ZONESCAN INSTALL to ZONESCAN NET before Network contact time is up. 4.1.2 Configure NB-IoT Logger You need to configure the NB-IoT Logger before you deploy it. Refer to the photo below for correct cable connections and follow these steps: Remove the external antenna from the NB-IoT Logger. -
Page 12: Nbiot Navigation Drawer Options
Confirm the Android dialog asking you to allow ZONESCAN INSTALL to access the USB device • to proceed. Confirm the dialog asking if you want to synchronize the network settings. • 4.1.3 NBIoT Navigation Drawer options Once the project is downloaded you will land on the main map screen of the NB-IoT project. Once the Navigation Drawer is selected you will find the below-mentioned options. - Page 13 Display Settings: Display settings can be set based on Reachability or RSSI value. Based on these values the color of the logger is set to green, yellow, or red. c) Account Settings: Update the server username and password. ZONESCAN INSTALL User Manual page – 9...
-
Page 14: Import Nbiot Project
4.1.4 Import NBIoT project In ZONESCAN INSTALL go to ‘Project Management’, search for your project, and download it. This step is most important because it makes sure that you work with the most recent configuration. If there were any changes (e.g., exchanged loggers) this step would update your local copy of the project so there are no more data inconsistencies. -
Page 15: Adding Nbiot Logger
Make sure that the Logger serial number is in the range of ‘500 000 000’ to ‘516 777 215’. If the logger serial number is not within this range, the logger firmware needs to be updated to v1105 or above. If not updated, you will not be able to deploy the logger. ZONESCAN INSTALL User Manual page – 11... - Page 16 Once the data is read, you will see a dialog ‘Would you like to synchronize the network settings’ here. Select ‘OK’ Once the network settings are read, the basic NB-IoT device setup is finished. Then you’ll be directed to the deploy screen. ZONESCAN INSTALL User Manual page – 12...
-
Page 17: Finalize The Changes
This section is divided into three sub-sections: Read Device Config, State, and Log To read each of the parameters select NBIoT maintenance in the navigation drawer item. Then, connect the OTG cable to the mobile device. ZONESCAN INSTALL User Manual page – 13... - Page 18 Select ‘Device Log’ in the bottom navigation item. Once selected communication with the logger is made and in case of any trouble with the NB-IoT device communication, you can send the NB-IoT log file to the support team by selecting the ‘share’ option. ZONESCAN INSTALL User Manual page – 14...
- Page 19 On the map, long click on the deployed logger to go to the maintenance screen. Alternatively, select ‘List’ in the navigation drawer and click on the logger you want to upload the device image. ZONESCAN INSTALL User Manual page – 15...
-
Page 20: Nbiot Sleep Mode
‘Logger’ in the maintenance view to edit or delete the logger. Note: After editing the logger the changes need to be uploaded to ZSNet. On the deletion of the logger, all the associated deployments and measurements of the device will be deleted in ZONESCAN INSTALL only but not on ZSNet. -
Page 21: Nbiot Firmware Update
• If it is already downloaded to your device, you will be asked to confirm the selection. • If not, a download is offered. • Choose the required version and select ‘Continue’. • ZONESCAN INSTALL User Manual page – 17... -
Page 22: Alpha Wizard
This procedure will cover each step necessary to set up a new ALPHA project from scratch. For each device, there is a guided workflow implemented in the ZONESCAN install. You can switch off the tutorial notes in the ‘General’ section of the settings found in the left-hand menu bar when you no longer need them. - Page 23 Display Settings: Display settings can be set based on Reachability or RSSI value. Based on these values the color of the logger is set to green, yellow, or red. f) Account Settings: Update the server username and password. ZONESCAN INSTALL User Manual page – 19...
-
Page 24: Import Alpha Project
5.1.3 Import Alpha project In ZONESCAN INSTALL, go to Project Management, search for your project, and download it. It is vital to eliminate data inconsistencies, and make sure the most recent version of the project is downloaded into the app, before starting work each day. Any changes made on ZS.Net, or by another INSTALL user (i.e., exchanged loggers) will not be visible on your local... -
Page 25: Wake Up Devices
ALPHA type (this influences some options later). The next step is to deploy the ALPHA on the map. This can be done via GPS position or manually moving the position on the map. ZONESCAN INSTALL User Manual page – 21... - Page 26 It is recommended to insert the SIM card and to set up and test the internet connection while in the office or hotel before your actual appointed day of installation. This will save valuable time on the installation day. ZONESCAN INSTALL User Manual page – 22...
-
Page 27: Adding Measurement Point
The most important part of the adding measurement point workflow is the connection test – make sure you get the best possible radio connection for your devices. This will influence reliability as well as battery life. ZONESCAN INSTALL User Manual page – 23... -
Page 28: Finalize The Changes
- such as fog – occur. 5.1.8 Finalize the changes When you are done, you need to upload the changes you made to the ZONESCAN net for them to become effective. Go to ‘Project Management’ and tap ‘upload’ on your project. -
Page 29: Device Maintenance
When you log in to ZONESCAN net, you will see all the installed devices. You can calculate the radio window settings and then transfer the settings to the ALPHAs – only then will they start working. 6 Device Maintenance This section is further divided into three sub-sections. - Page 30 1) Alpha State: To test communication with an alpha, choose “Alpha State”. Make sure the commlink is switched on and paired with the Android device. Then, enter the alpha number and select the ‘Connect’ button to initiate the communication. ZONESCAN INSTALL User Manual page – 26...
- Page 31 5) Read Alpha Log: This option is available only for V2 alpha. In case of any trouble with Alpha communication, you can send the Alpha log file to support team by selecting ‘Read Alpha Logfile’. ZONESCAN INSTALL User Manual page – 27...
- Page 32 6) Alpha GPS: This option is available only for V2 alpha. This feature is needed to find a good placement for the Alpha, so it has good GPS connection. From the GPS the Alpha gets the precise time which is needed for precise leak detection (do pinpoint measurements). ZONESCAN INSTALL User Manual page – 28...
- Page 33 On selection of the ‘Merge’ button, all the devices connected to the previous alpha are transferred to the new V2 alpha. ZONESCAN INSTALL User Manual page – 29...
-
Page 34: Repeater Maintenance
Since the repeater cannot send the antenna change to the Alpha directly, upload the project to the Gutermann Cloud afterwards. Then in ZONESCAN NET, go to Administration > Radio Windows and send the current configuration again, so that the Alpha can pick up the change. -
Page 35: Logger Maintenance
Contacting the logger may take a long time. To avoid the delay, wake up the logger once before contacting. Edit /Replace/Delete Logger Similar to edit, replace, and delete function of the alpha. When any changes are made, the new information must be uploaded to ZSNet ZONESCAN INSTALL User Manual page – 31... -
Page 36: Project Maintenance
Project Maintenance When something is not working right, some loggers are not giving data or worse. ZONESCAN INSTALL helps you in the field to identify and repair the problem. Go to ‘Project Management’ and re-import the project. Only then you do have the latest •... - Page 37 Multiple selections is possible (for example to update a ZONESCAN smart set) • ZONESCAN INSTALL User Manual page – 33...
-
Page 38: Offline Maps
8 Offline Maps By default, ZONESCAN INSTALL uses online Open Street Maps. However, this requires internet access. Also, the map server can be slow which causes grey tiles on the map. Therefore, it is better to use offline maps. To download an offline map, you need a fast internet connection. -
Page 39: Overview Of Connected Devices
Toggle between the overlay items to view only the selected devices on the screen. 9.3 Navigation, Moving and Redeploying devices, and Maintenance These functions are available in the context menu on long touch on a device. ZONESCAN INSTALL User Manual page – 35... - Page 40 If “Move Within Area” is selected, device is to be moved within an area in 10sec. If “Redeploy In New Area” is selected, you’ll be directed to the deploy screen. Here you can choose a new area, deploy the device, and then press next to go to the main screen. ZONESCAN INSTALL User Manual page – 36...
-
Page 41: Check Commlink Battery
Tap the ‘Other Apps’ heading to see a list of your installed apps. • Find the application for which you want to clear the cache and tap its listing. • Tap the ‘Clear cache’ button. • ZONESCAN INSTALL User Manual page – 37... -
Page 42: Support
In case of any problems with the app, a problem report and database can be sent to the support team to resolve the issue. To send a problem report, click on ‘Navigation item Help’. Here you will find options to send the problem report and database. ZONESCAN INSTALL User Manual page – 38... -
Page 43: Disposal
If the orderly disposal of our products is not possible, send the unit to Gutermann at the address below in the Imprint. Gutermann ensures its products are disposed of in an environmentally friendly way.
Need help?
Do you have a question about the ZONESCAN and is the answer not in the manual?
Questions and answers