Table of Contents

Subscribe to Our Youtube Channel
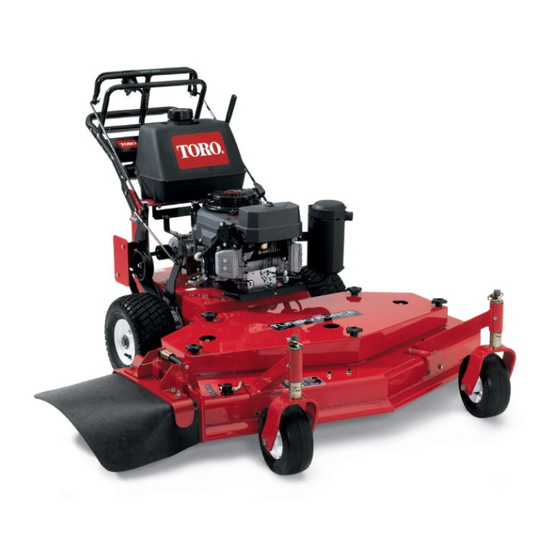
Related Manuals for Toro TURBO FORCE 39678


Summary of Contents for Toro TURBO FORCE 39678
- Page 1 Form No. 3428-319 Rev A Commercial Walk-Behind Mower Fixed Deck, T-Bar, Gear Drive with 48in TURBO FORCE ® Cutting Unit Model No. 39678—Serial No. 404324200 and Up *3428-319* A Register at www.Toro.com. Original Instructions (EN)
- Page 2 Section 4442 or 4443 to use or operate the engine on additional information, contact an Authorized Service any forest-covered, brush-covered, or grass-covered Dealer or Toro Customer Service and have the model land unless the engine is equipped with a spark and serial numbers of your product ready.
-
Page 3: Table Of Contents
Contents Belt Maintenance ..........37 Inspecting the Belts .......... 37 Replacing the Traction-Drive Belt...... 37 Safety ............... 4 Replacing the Drive Belt ........38 General Safety........... 4 Replacing the Mower Belt ......... 38 Safety and Instructional Decals ......5 Adjusting the Mower Belt Tension ..... 39 Product Overview ............. -
Page 4: Safety
Safety This machine has been designed in accordance with ANSI B71.4-2017. General Safety This product is capable of amputating hands and feet and of throwing objects. Always follow all safety instructions to avoid serious personal injury. • Read, understand, and follow the instructions and warnings in this Operator’s Manual and on the machine and attachments before starting the engine. -
Page 5: Safety And Instructional Decals
Safety and Instructional Decals Safety decals and instructions are easily visible to the operator and are located near any area of potential danger. Replace any decal that is damaged or missing. decal93-7298 93-7298 decaloemmarkt Manufacturer's Mark 1. Traction drive—Forward 2. Pull to brake. 1. - Page 6 decal98-5130 98-5130 1. Warning—read the Operator's Manual for instructions on torquing the blade bolt/nut to 102 to 106 N∙m (75 to 80 ft-lb). decal95-5537(gear) 95-5537 1. Read the Operator's 3. Pull back to disengage. decal106-5517 106-5517 Manual for instructions on operating the cutting 1.
- Page 7 decal106-5519 106-5519 1. Cutting/dismemberment hazard of 3. Warning—read the Operator's Manual. 5. Thrown object hazard, mower—lower hand or foot, mower blade—stay away the deflector before using the machine. from moving parts. 2. Warning—shut off the engine before 4. Thrown object hazard—keep leaving the machine.
- Page 8 decal130-8374 130-8374 1. Fast 2. Slow 3. Engine—stop 4. Engine—slow decal131-1180 131-1180 1. Read the Operator's 3. Bagging setting Manual. 2. Short, light grass; dry 4. Tall, dense grass; wet conditions conditions decal133-8062 133-8062...
-
Page 9: Product Overview
Controls Product Overview Become familiar with all the controls before you start the engine and operate the machine. Control Panel g213356 Figure 3 1. Side discharge 5. Fuel tank 2. Mower deck 6. T-bar control 3. Spark plug 7. Handle 4. -
Page 10: Specifications
Blade-Control Lever (Power Specifications Takeoff) Note: Specifications and design are subject to change without notice. Use the blade-control lever in conjunction with the blade-control bail to engage and disengage power to Width with deflector down 161 cm (63-1/2 inches) the mower blades (Figure Length 184 cm (72 inches) -
Page 11: Before Operation
Operation • If you spill fuel, do not attempt to start the engine; avoid creating a source of ignition until the fuel vapors have dissipated. Note: Determine the left and right sides of the • Do not fill containers inside a vehicle or on a truck machine from the normal operating position. -
Page 12: Performing Daily Maintenance
◊ Before leaving the operating position machine. Do not engage in any activity that – Use only accessories and attachments causes distractions; otherwise, injury or property approved by The Toro® Company. damage may occur. – Be sure of your footing while using this •... -
Page 13: Operating The Parking Brake
• toward you. Stop the blade(s) when crossing If you lose control of the machine, step away from gravel surfaces. the direction of travel of the machine. • – Start the engine carefully according to Always keep the machine in gear when going instructions and with your feet well away from down slopes. -
Page 14: Starting The Engine
Starting the Engine Shutting Off the Engine Connect the spark-plug wires. Important: In an emergency, you can stop the engine immediately by turning the ignition key to Open the fuel valve. the Off position. Disengage the PTO and shift to the N EUTRAL Move the throttle lever to the S position... -
Page 15: Operating The Blade-Control Lever (Pto)
Operating the Using the Safety-Interlock Blade-Control Lever (PTO) System The blade-control lever (PTO) engages and WARNING disengages power to the mower blades. If the safety-interlock switches are Engaging the Mower Blades disconnected or damaged, the machine could operate unexpectedly, causing personal Squeeze the blade-control bail against the upper injury. -
Page 16: Driving The Machine
Driving the Machine Using the Lower Control The throttle control regulates the engine speed (rpm). Move the throttle control to the F position for the This procedure is for driving up a curb. You can do best mowing performance. this while driving forward or backward. WARNING Note: Some curbs do not allow the rear drive tires to... -
Page 17: Stopping The Machine
g001452 Figure 10 1. Lower control 2. Handle bar—engaged g000211 Figure 9 1. Lower control 3. Lower control bar—engaged and the bar—engaged and the Stopping the Machine machine going reverse machine going forward 2. Pull up to assist the machine. CAUTION You or bystanders may be injured if you move Driving Backward up a Curb... -
Page 18: Positioning The Flow Baffle
Position B Use this position when bagging. g012676 Figure 11 1. Slot 2. Nut g012678 Figure 13 Positioning the Flow Baffle The following figures are only recommendations for use. Adjustments vary by grass type, moisture Position C content, and the height of the grass. This is the full open position. -
Page 19: Side Discharging Or Mulching Grass
Side Discharging or Mulching Grass This mower has a hinged grass deflector that disperses clippings to the side and down toward the turf. DANGER Without the grass deflector, discharge cover, or complete grass catcher assembly mounted in place, you and bystanders are exposed to blade contact and thrown debris. - Page 20 g001455 Figure 16 1. Axle-pivot bolt 2. Axle-adjustment bolt g001456 Figure 17 Place a jack under the rear center of the engine 1. Latch pin 3. Spacer (13 mm or 1/2 inch) frame. Raise the rear end of the engine frame 2.
-
Page 21: Adjusting The Control Rods
Adjusting the Control Rods With the wheel drive fully engaged, check the gap between the upper control bar and the fixed bar. The gap needs to be approximately 25 to 32 mm (1 to 1-1/4 inches) as shown in Figure Note: The upper control bar and the fixed bar must be parallel in the engaged, relaxed, and... -
Page 22: Height-Of-Cut Chart
Height-of-Cut Chart Number of spacers Number of 1/4-inch blade spacers below the spindle below the caster 13 mm 5 mm Axle (1/2 (3/16 position inch) inch) 32 mm (1-1/4 38 mm (1-1/2 45 mm (1-3/4 26 mm (1 inch) 51 mm (2 inches) inches) inches) inches) -
Page 23: After Operation
After Operation After Operation Safety General Safety • Always shut off the machine, remove the ignition key (if equipped), wait for all moving parts to stop, and allow the machine to cool before adjusting, servicing, cleaning, or storing it. • Clean grass and debris from the machine to help prevent fires. -
Page 24: Maintenance
Carefully release pressure from components with stored energy. • To ensure safe, optimal performance of the machine, use only genuine Toro replacement parts. Replacement parts made by other manufacturers could be dangerous, and such use could void the product warranty. -
Page 25: Recommended Maintenance Schedule(S)
Recommended Maintenance Schedule(s) Maintenance Service Maintenance Procedure Interval • Change the engine oil. After the first 8 hours • Check the mower belt tension. • Check the mower belt tension. After the first 25 hours • Check the safety-interlock system. •... -
Page 26: Lubrication
Lubrication Greasing the Transmission Couplers Greasing the Machine Lubricate the transmission couplers and idler-arm pivots located at the rear of the machine (Figure 21). Grease the machine more often in dirty or dusty conditions. Grease Type: No. 2 lithium or molybdenum grease Park the machine on a level surface, disengage the blade-control switch (PTO), and engage the parking brake. -
Page 27: Engine Maintenance
Engine Maintenance Engine Safety • Do not change the governor speed or overspeed the engine. • Run the engine dry or remove the fuel with a hand pump; never siphon the fuel. If you must drain the fuel tank, do it outdoors. Servicing the Air Cleaner Service Interval: Every 25 hours—Clean the foam air-cleaner element. -
Page 28: Servicing The Engine Oil
Servicing the Engine Oil Note: Change the oil more frequently when the operating conditions are extremely dusty or sandy. Engine-Oil Specifications Engine-Oil Type: Detergent oil (API service SF, SG, SH, SJ, or SL) Crankcase Capacity: 1.7 L (58 oz) with the filter g001464 removed;... - Page 29 Install the replacement oil filter to the filter adapter, turn the oil filter clockwise until the rubber gasket contacts the filter adapter, and tighten the filter an additional 3/4 turn (Figure 27). Fill the crankcase with the proper type of new oil. Run the engine for approximately 3 minutes, shut off the engine, and check for oil leaks around the oil filter and drain valve.
-
Page 30: Servicing The Spark Plugs
Servicing the Spark Plugs Checking the Spark Plugs Look at the center of the spark plugs (Figure 29). Service Interval: Every 100 hours/Yearly (whichever comes first) Replace the spark plugs Note: If you see light brown or gray on the if necessary. -
Page 31: Fuel System Maintenance
Fuel System Maintenance DANGER In certain conditions, fuel is extremely flammable and highly explosive. A fire or explosion from fuel can burn you and others and can damage property. Refer to Adding Fuel (page 11) for a complete list of fuel related precautions. g005243 Figure 30 Servicing the Fuel System... -
Page 32: Electrical System Maintenance
Electrical System Install a new filter and move the hose clamps close to the filter. Maintenance Open the fuel-shutoff valve at the fuel tank (Figure 30). Check for fuel leaks and repair, if needed. Electrical System Safety Wipe up any spilled fuel. •... - Page 33 WARNING Battery terminals or metal tools could short against metal machine components, causing sparks. Sparks can cause the battery gasses to explode, resulting in personal injury. • When removing or installing the battery, do not allow the battery terminals to touch any metal parts of the machine.
- Page 34 Charging the Battery WARNING Charging the battery produces gasses that can explode. Never smoke near the battery and keep sparks and flames away from battery. g000537 Figure 34 Important: Always keep the battery fully charged 1. Vent caps 3. Lower line (1.260 specific gravity).
-
Page 35: Drive System Maintenance
Drive System Cooling System Maintenance Maintenance Checking the Tire Pressure Cleaning the Air-Intake Screen Service Interval: Every 50 hours/Monthly (whichever comes first) Remove any buildup of grass, dirt, or other debris Maintain the air pressure in the rear tires at 83 to 97 from the cylinder and cylinder head cooling fins, kPa (12 to 14 psi). -
Page 36: Brake Maintenance
Brake Maintenance Servicing the Parking Brake Check the brakes on both a level surface and a slope. Always engage the parking brake when you stop the machine or leave it unattended. If the parking brake does not hold securely, adjust it. Checking the Parking Brake Service Interval: Before each use or daily Park the machine on a level surface and... -
Page 37: Belt Maintenance
Belt Maintenance Check the brake before you adjust it; refer to Checking the Parking Brake (page 36). Disengage the parking brake. Inspecting the Belts To adjust the brake, rotate the wing nuts on the brake rods (Figure 38). Service Interval: Every 25 hours—Check the belts for wear or cracks. -
Page 38: Replacing The Drive Belt
Install the mower belt (Figure 40). Check the belt guide under the engine frame for the proper adjustment (Figure 40). Note: The distance between the belt guide and mower belt should be 19 mm (3/4 inch) when you engage the mower belt. Adjust the belt, if necessary. -
Page 39: Adjusting The Mower Belt Tension
Note: The distance between the belt guide and mower belt should be 32 mm (1-1/4 inches) when you engage the mower belt. Adjust the mower belt as necessary. The disengaged belt should not drag or fall off the pulley when the guides are properly adjusted. - Page 40 13 mm (1/2 inch) halfway between the pulleys (Figure 44). If there is no adjustment remaining in the turnbuckle and the belt is still loose, the rear idler pulley needs to be positioned to the middle or front hole (Figure 45).
-
Page 41: Adjusting The Pto-Engagement Linkage
g001475 Figure 46 g017648 1. Idler pulley in the slot 4. Belt guide Figure 47 2. Traction belt 5. 19 mm (3/4 inch) 1. Bellcrank 4. Yoke 3. Mower belt 6. Mower belt 2. Safety switch located 5. Nut under the engine deck 3. -
Page 42: Adjusting The Pto-Safety Switch
Mower Deck Loosen the nut against the yoke (Figure 47). Remove the assist-arm link from the assist arm Maintenance and rotate the link to adjust the length. Install the assist-arm link into the assist arm and secure it with the hairpin cotter (Figure 48). - Page 43 Replace the blades if you hit a solid object or if the blades are out of balance or bent. To ensure optimum performance and continued safety conformance of the machine, use genuine Toro replacement blades. Replacement blades made by other manufacturers may result in non-conformance with safety standards.
- Page 44 Note: If the blade is not balanced, file some metal off the end of the sail area only (Figure 55). g000553 Figure 56 1. Blade 2. Balancer Repeat this procedure until the blade is balanced. Installing the Blades Install the curved washer and then the blade onto the bolt.
-
Page 45: Adjusting The Blade Brake
Adjusting the Blade Brake Replacing the Grass Deflector Park the machine on a level surface, disengage the PTO, and engage the parking brake. Shut off the engine, remove the key, and WARNING disconnect the spark-plug wires from the spark An uncovered discharge opening could allow plugs. -
Page 46: Cleaning
Cleaning Place one J-hook end of the spring around the grass deflector (Figure 58). Important: The grass deflector must be Cleaning under the Mower able to rotate. Lift the deflector up to the fully-open position and ensure that it rotates Service Interval: Before each use or daily into the fully-down position. -
Page 47: Storage
Storage Start the engine and run it until it shuts off. Dispose of fuel properly. Recycle the fuel according to local codes. Cleaning and Storing the Important: Do not store fuel containing Machine stabilizer/conditioner longer than the duration recommended by the Park the machine on a level surface, disengage fuel-stabilizer manufacturer. -
Page 48: Troubleshooting
Troubleshooting Problem Possible Cause Corrective Action The fuel tank is showing signs of collapsing 1. The air-cleaner paper element clogged. 1. Clean the paper element. or the machine is frequently showing signs of running out of fuel. The engine overheats. 1. - Page 49 Problem Possible Cause Corrective Action The machine does not drive. 1. The shift lever is in the N 1. Move the shift lever to a drive gear EUTRAL position. position. 2. The traction belts are worn, loose, or 2. Contact an Authorized Service Dealer. broken.
-
Page 50: Schematics
Schematics g001471 Electrical Schematic (Rev. -A) - Page 51 While the exposure from Toro products may be negligible or well within the “no significant risk” range, out of an abundance of caution, Toro has elected to provide the Prop 65 warnings. Moreover, if Toro does not provide these warnings, it could be sued by the State of California or by private parties seeking to enforce Prop 65 and subject to substantial penalties.
Need help?
Do you have a question about the TURBO FORCE 39678 and is the answer not in the manual?
Questions and answers