Table of Contents
Advertisement
Advertisement
Table of Contents

Related Manuals for Bernard Controls AQ Switch Series


Summary of Contents for Bernard Controls AQ Switch Series
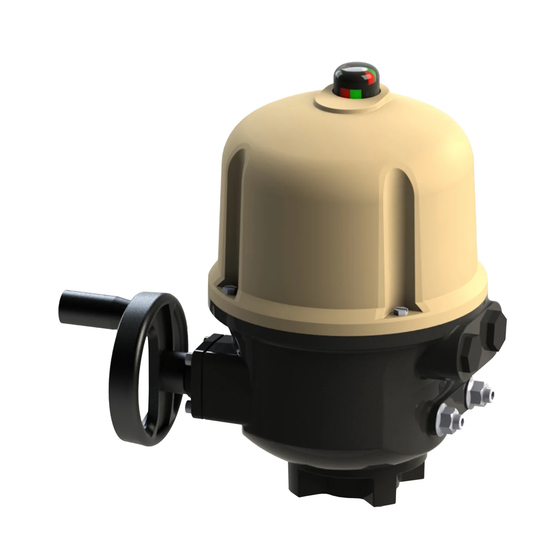
- Page 1 AQ Switch RANGE Start Up Guide SUG_17003 EN - Ind. C Art: 5100466...
- Page 2 English...
-
Page 3: Table Of Contents
English TABLE OF CONTENTS DOCUMENTS ------------------------------------------------------------- 5 INTENDED USE OF THE ACTUATOR ----------------------------------- 6 SAFETY-------------------------------------------------------------------- 6 PACKAGING, STORAGE AND MAINTENANCE ------------------------- 7 Packaging Storage Maintenance HANDWHEEL OPERATION ---------------------------------------------- 8 ASSEMBLY ON THE VALVE OR DAMPER ------------------------------ 8 Changing closing direction visual indication ELECTRICAL COMMISSIONING --------------------------------------- 10 Electrical configurations Before wiring... - Page 4 English Position feedback potentiometer (OPTION) TAM position transmitter (OPTION) Positioner board setting (OPTION) TORQUE LIMITING DEVICE (EXCEPT ON AQ5/10/15) ------------ 27 10.1 Torque limiter operation 10.2 Torque limiter adjustment APPENDIX --------------------------------------------------------------- 29 11.1 Wiring diagram without positioner option 11.2 Wiring diagrams with positioner option...
-
Page 5: Documents
Thank you for choosing a Bernard Controls electric actuator. Our actuator has been designed, manufactured and tested rigorously to give you maximum satisfaction. Bernard Controls develops a range of products and accessories to meet your needs for various applications. Visit our website to discover these innovative products: www.bernardcontrols.com... -
Page 6: Intended Use Of The Actuator
English 2 INTENDED USE OF THE ACTUATOR Bernard Controls actuators are manufactured in accordance with the latest technical evolutions and safety regulations. The AQ SWITCH and AQ SWITCH POSITIONER are intended to operate a valve or a damper in moderate environmental and operational constraints. -
Page 7: Packaging, Storage And Maintenance
English 4 PACKAGING, STORAGE AND MAINTENANCE 4.1 Packaging AQ actuators are delivered in a cardboard box of a size equivalent to the actuator and sit in a cardboard wedge. 4.2 Storage Actuators should be stored under a shelter, in a clean and dry place, and protected from wide temperature variations. -
Page 8: Handwheel Operation
English 5 HANDWHEEL OPERATION AQ actuators feature a handwheel for safety operation. To avoid potentially harmful rotating protruding parts during electrical operation, AQ handwheels feature a foldable handle: you can fold it during electrical operation and unfold it if you need to operate the actuator manually. - Page 9 English Standard indicator orientation Reverse indicator orientation for clockwise closing for counterclockwise closing How to change cap orientation 1. Disassemble the cover then the cap. 2. Turn the cap 90°. 3. Reassemble the cap then the cover.
-
Page 10: Electrical Commissioning
English 7 ELECTRICAL COMMISSIONING 7.1 Electrical configurations During the commissioning, the actuator will correspond to one of the two following configurations: 8 - Capacitor 7 - Switches board 6 - Torque limiter (except on AQ5/10/15) 5 - Motor 4 – Heating resistance 3 - Cams 2 - Terminal block 1 - Position indicator... -
Page 11: Before Wiring
English 7.2 Before wiring • The electrical connection of the actuator must be carried out by a qualified professional. All interventions inside the actuator must be carried out by a qualified professional. • In case of incorrect installation, there is a risk of electric shock and damage to the device. -
Page 12: Wiring Without Positioner Option
English 7.3 Wiring without positioner option How to wire actuator The wiring must be done according to the wiring diagram that matches the characteristics of your actuator (see Chapter 11). Both thermal protector and torque limit switches must be integrated into your control system to prevent potential damage to the actuator or valve. -
Page 13: Wiring With Positioner Option
English 7.4 Wiring with positioner option 7.4.1 Power terminal block See Chapter 11 for more information on the wiring. The power terminal block is located on a side of the electronic assembly and consists of a screw-type terminal. For three-phase supply, the positioner provides automatic phase correction, thus phase sequency is not important. - Page 14 English 7.4.2 Control and signaling terminal block control signaling terminal block (1) is located on electronic assembly. 1. Connect the control and signaling wires (marked 1 upper terminals. 2. Tighten the sealing nut on the cable gland when you have completed wiring. ...
- Page 15 English How to wire actuator with Positioner The wiring must be done according to the wiring diagram of your actuator. See Chapter 11 for more information on the wiring. 1. Using a 3×0.5 mm flat blade screwdriver, connect the power supply on terminals marked L1, L2 &...
-
Page 16: After Wiring
English 7.5 After wiring What to check after wiring Once the wiring of the actuator is completed, please check the following: 1. Make sure that the power supply voltage matches the information on the sticker located on the side of the actuator. 2. -
Page 17: Calibration Of Travel Limits
English 8 CALIBRATION OF TRAVEL LIMITS The actuator is factory-set for a 90° travel. It features 2 devices to limit the travel: • Cams trigger switches to switch off power at an end position or to signal a position. They are factory pre-set, but you can re-adjust them during commissioning if necessary. -
Page 18: Calibration Of Mechanical Stops
English 4. Check that the valve position is correct. If it is not, return to step 1. If you cannot reach the correct closed position because you are blocked by the mechanical stop, loosen the mechanical stop so that you have enough space to go to the correct closed position, then return to step 1. -
Page 19: Calibration Of Cams Corresponding To Signaling Switches (If Wired)
English 7. Perform steps 2 to 5 for the counterclockwise direction. 8.3 Calibration of cams corresponding to signaling switches (if wired) 1. Slightly drive the output in the clockwise direction using the manual override. 2. Set the blue cam corresponding to the clockwise signaling switch (3 in Figure 1). - Page 20 English 6. Once the closing switch is tripped, press the S local setup command to validate the position. The device performs an AUTOSET to self-calibrate the deadband. The device is now set. The LED stops blinking and stays ON. If the LED continues to blink after the AUTOSET process, it is indicating one or several of the following errors: •...
-
Page 21: Calibration Of Position Options
English 9 CALIBRATION OF POSITION OPTIONS 9.1 Position feedback potentiometer (OPTION) The potentiometer used for the actuator position feedback is driven by the travel cam block system. For clockwise closing: • 0% position indicates a closed valve. • 100% position indicates an open valve. The resistance value is measured between terminals 16 and 17. - Page 22 English Position feedback potentiometer (Left) & TAM position transmitter (Right) Signal inversion To change the signal variation direction, invert the potentiometer wires on the terminal block (e.g. for a connection on 16/17/18, invert 16 and 18).
-
Page 23: Tam Position Transmitter (Option)
English 9.2 TAM position transmitter (OPTION) The TAM transmitter delivers a 4 to 20 mA signal that is linearly proportional to the angular position of the valve. Electrical connections See Chapter 11 for more information on the wiring. A filtered or stabilized power supply should be provided within the 12 to 32 VDC range. - Page 24 English 5. Adjust the potentiometer by turning its shaft with a flat blade screwdriver so that the output current reaches a minimum value. 6. Turn backwards until the current value regularly increases, then turn backwards again and stop as soon as the minimum value determined above is reached.
-
Page 25: Positioner Board Setting (Option)
English 9.3 Positioner board setting (OPTION) 9.3.1 Input signal The valve can be controlled in 2 different ways: • 0-10V/0-20mA signal • 4-20 mA signal Depending on the type of signal chosen, set the inverter (1) to the Volt (0-10V signal) or mA (4- 20mA signal) position. - Page 26 English Fail position and input signal Switch B Switch C Signal type Fail position 0-20 mA / 0-10 V Fail last 4-20 mA Fail open 4-20 mA Fail closed 4- 20 mA Fail last Direction of rotation Switch D Actions Closing counterclockwise (CCW) Closing clockwise (CW) You must power off and power on the actuator for the changes to...
-
Page 27: Torque Limiting Device (Except On Aq5/10/15)
English 10 TORQUE LIMITING DEVICE (EXCEPT AQ5/10/15) If the actuator stops on a position which is not the one required, please check that the actuator did not reach a mechanical stop or that the valve has no stiff point. Actuators are set and tested in our factory according to the torque stated on the order. -
Page 28: Torque Limiter Adjustment
English 10.2 Torque limiter adjustment The torque scale disk is factory-set and is a reference for cams setting. Do not modify its position or you will not be able to set the torque limiter accurately. To adjust torque limits, set the tips of the cams to match the required percentage of maximum torque. -
Page 29: Appendix
English 11 APPENDIX 11.1 Wiring diagram without positioner option... - Page 30 English A – Torque limit switch (except on E – Three-phase motor AQ5/10/15) F – Single phase motor B – Travel limit switch S1 – Counterclockwise direction C – Extra travel limit switch (normally for opening) D – Heater resistance S2 –...
-
Page 31: Wiring Diagrams With Positioner Option
English 11.2 Wiring diagrams with positioner option 11.2.1 Three phases supply diagram... - Page 32 English A – Power board S1 – Counterclockwise direction B – Positioner board (normally for opening) – For C – Switch board signalization D – Torque board (except on S2 – Clockwise direction (normally AQ5/10/15) for closing) – For signalization H –...
- Page 33 English 11.2.2 Single phase supply diagram...
- Page 34 English A – Power board S1 – Counterclockwise direction B – Positioner board (normally for opening) – For C – Switch board signalization D – Torque board (except on S2 – Clockwise direction (normally AQ5/10/15) for closing) – For signalization H –...
- Page 36 Tel.: +33 (0)1 34 7 71 00 / Fax: +33 (0)1 34 07 71 01 / mail@bernardcontrols.com CONTACT BY OPERATING AREAS > AMERICA > EUROPE > INDIA, MIDDLE EAST & AFRICA NORTH AMERICA BELGIUM AFRICA BERNARD CONTROLS UNITED STATES BERNARD CONTROLS BENELUX BERNARD CONTROLS AFRICA HOUSTON NIVELLES (BRUSSELS) ABIDJAN - IVORY COAST inquiry.usa@bernardcontrols.com inquiry.belgium@bernardcontrols.com inquiry.africa@bernardcontrols.com...
Need help?
Do you have a question about the AQ Switch Series and is the answer not in the manual?
Questions and answers
AQ 430 actuator not working manually , how to assembly on Valve , send one video
To assemble a Bernard Controls AQ 430 actuator on a valve:
1. Attach the actuator directly to the valve using proper bolts or a suitable interface.
2. Ensure the actuator and valve are in the same position (both open or both closed) before assembly.
3. If a mechanical stop blocks the correct position, loosen it to align the actuator and valve.
4. After assembly, the actuator can operate in any position.
5. Do not lift the actuator by the handwheel to avoid damaging internal gearing.
6. Ensure cable glands are not oriented upwards to prevent moisture ingress.
This answer is automatically generated