Table of Contents

Related Manuals for Sanden Vendo SVE 100


Summary of Contents for Sanden Vendo SVE 100
- Page 1 User and maintenance manual Superstack SVE 100 - SVE 189 - SVE 217 - SVE 254 SandenVendo Europe S.p.A. Regione Cavallino,2 15030 Coniolo (AL) - Italy Tel. +39 0142.335111 Fax +39 0142.562348 E-mail: marketing@sandenvendo.it website: www.sandenvendo.com...
- Page 2 Sanden International (Europe) Limited SandenVendo Italian Branch (SVI) Regione Cavallino, 2 15030 Coniolo (AL) Italy Tel.:+ 39 0142 335111 Fax.:+ 39 0142 562348 e-mail: marketing@sandenvendo.it www.sandenvendo.com SandenVendo German Branch (SVG) Spangerstrasse 22 40599 Dusseldorf Germany Tel.: + 49 211 740390...
- Page 3 Instructions for the installer, maintenance technician and final user INDEX 1 GENERAL INFORMATION ....................2 1.1 Purpose of Manual ......................2 1.2 Interested people ......................2 1.3 Responsibility ........................ 4 1.4 Manufacturer ......................... 5 1.5 Service Centres ......................5 1.6 Warranty ........................5 1.7 General safety warnings ....................
- Page 4 Instructions for the installer, maintenance technician and final user 1 GENERAL INFORMATION 1.1 Purpose of Manual The manual contains the correct procedures for loading, usage, regular extra-ordinary maintenance installation vending machines. This manual is a very important part of the vendor and therefore must be kept intact and available for the whole productive life of the vendor.
- Page 5 Instructions for the installer, maintenance technician and final user Technicians allowed to operate one this vending machines Operator (person who only loads the machine with products to be sold) o The operator can only load products to be sold in the vending machine. o Doing this operation the operator should never move the protective lower carter as indicated on the related safety icon-label on...
- Page 6 Instructions for the installer, maintenance technician and final user been given supervision or instruction concerning use of the appliance in a safe way and understand the hazards involved. Children shall not play with the appliance. Cleaning and user maintenance shall not be made by children without supervision.
- Page 7 Instructions for the installer, maintenance technician and final user 1.4 Manufacturer “SandenVendo Europe S.p.A.” claims more than 50 years of experience in the manufacturing of Vending machines, and it is the technical know-how acquired, after years of researches and close contact with the production and commercialisation at global level that represents the best warranty SandenVendo Europe S.p.A.
- Page 8 Instructions for the installer, maintenance technician and final user The warranty does not include, damages to the vendor caused by: Transport and/or handling Operator errors Lack of maintenance contemplated for in this Manual Failures and/or breakages not caused by the malfunction of the vending machine 1.7 General safety warnings ...
- Page 9 Instructions for the installer, maintenance technician and final user The vendor must be installed in a way that the electric plug is accessible after installation If the power cable is damaged, it should be substituted by the manufacturer or by his after- sales technicians or however by an equally qualified person, in order to avoid any risks ...
- Page 10 Instructions for the installer, maintenance technician and final user CAUTION: FAILURE TO ABIDE BY THE INSTRUCTIONS CONTAINED IN THIS MANUAL MAY INVOLVE DAMAGES TO THE VENDOR AND/OR PERSONNEL The pictures and illustrations in this document are only indicative. SandenVendo Europe S.p.A. recalls that the technical and performance of products can change without notice.
- Page 11 Instructions for the installer, maintenance technician and final user 1.8 Symbols In the manual and/or on the machine, hazardous areas are shown with signs, plates, symbols and icons that indicate danger or an obligation in each case. Here are the symbols used in the manual and on the vending machine: SYMBOL MEANING COMMENT...
- Page 12 Instructions for the installer, maintenance technician and final user 2 MACHINE PARTICULARS 2.1 Technical particulars FIG. 2.1 - DIMENSIONS Dimensions Height (A) 1425 mm 1830mm 1830 mm 1830 mm Width (C) 705 mm 705 mm 853 mm 1010 mm Depth (B) 745 mm 745 mm 745 mm...
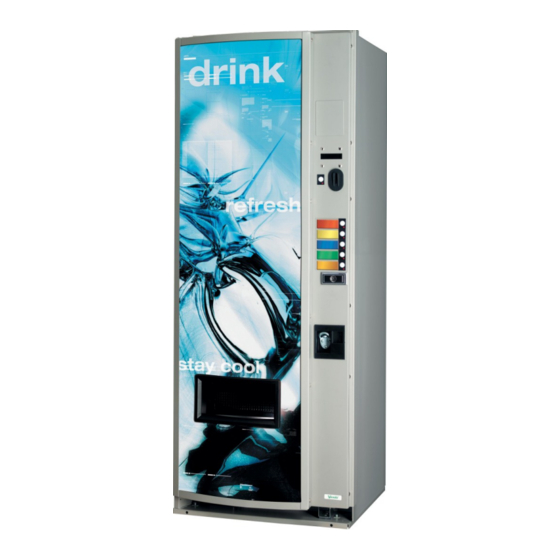
- Page 13 Instructions for the installer, maintenance technician and final user 2.2 Description of components 1 Cabinet 2 Door 3 Luminous Advertising Panel 4 Coins Insert 5 Selections Push Buttons 6 Door Lock 7 Coin Return Cup 8 Delivery Eyelet Fig. 2.2 1 Control Box 2 Coin Chute 3 Coin Mechanism Support...
- Page 14 Instructions for the installer, maintenance technician and final user 2.3 Coin introduction – selection panel 1 Display For User Messages 2 Price And Message Display 3 Coin Return Button 4 Red Led Lamp 5 Products Label 6selection Button 7 Sold Out Red Lamp Fig.
- Page 15 Instructions for the installer, maintenance technician and final user 2.5 Cooling system 1 Condenser 2 Condenser Fan Motor 3 Fans 4 Evaporator 5 Evaporator Fan Motor 6 Thermostat 7 Compressor 8 Condenser Pan Fig. 2.6 The cooling system stats working when the machine is connected to the electrical supply. The compressor stops when it reaches the temperature set on the thermostat.
- Page 16 Instructions for the installer, maintenance technician and final user 3 INSTALLATION 3.1 Transport and positioning Fig. 3.1 GROSS WEIGHT NET WEIGHT MODEL A (mm) B (mm) C (mm) (Kg) (Kg) 1425 1830 1830 1830 1010 To transport and handle the vending machine carefully follow the instructions below.
- Page 17 Instructions for the installer, maintenance technician and final user 3.2 Installation environment characteristics CAUTION: THE APPLIANCE IN UNSUITABLE FOR INSTALLATION OUTSIDE CAUTION: DO NOT USE WATER JETS TO CLEAN THE VENDING MACHINE, IT IS UNSUITABLE TO INSTALL IT IN ENVIRONMENTS WHERE WATER JETS ARE USED Environments conditions for installing the vending machine ...
- Page 18 Instructions for the installer, maintenance technician and final user 3.5 Stability The stability of SandenVendo vending machines against overturning is guaranteed whether the vending machine is empty or full and / or with the door open. The overturning of the vending machine without external influence is impossible. However, to protect the machine against vandalism, such as attempts to tilt the vending machine, we recommend to attach one of the following optional kits: 1) Wall fixing kit part number 135078/2...
- Page 19 Instructions for the installer, maintenance technician and final user 3.6Connection to the power mains SERVICE CORD INSTALLATION CASE “A” CASE “B” (WITH METAL GRILLE) (WITH PLASTIC GRILLE) FIG. 3.3 CAUTION: BEFORE DOING THE ELECTRICAL CONNECTION MAKE THE FOLLOWING CHECKS Make sure that the particulars of the power mains (tension and frequency) are the same as those indicated on the machine’s rating plate: this vending machine must be connected to a 230 V , 50 Hz power mains, each voltage below 207 V or over 253 V can causes failure.
- Page 20 Instructions for the installer, maintenance technician and final user 3.7 Installing the coin mechanism Hook the coin mechanism on 3 screws suitably placed (E) on the door (F) (fig. 3.4). Check that the coin mechanism has the coin entrance in line with the exit of the curved channel (G) and that the distance between the two parts is around 10 mm maximum.
- Page 21 Instructions for the installer, maintenance technician and final user 3.8 Control settings All the machine’s control and operation settings can be set through the programming routine of the electronic board. The programming routine of the electronic board is described in the PROGRAMMING MANUAL supplied with the vending machine.
- Page 22 Instructions for the installer, maintenance technician and final user 4 ACCESS TO THE INTERNAL PART You can only access to the internal part of the machine (maintenance area) using the special key provided with the vending machine (rif. Fig. 4.1). Access to the service area is only possible using the specially provided tool.
- Page 23 Instructions for the installer, maintenance technician and final user 5 USING THE VENDING MACHINE 5.1 Warnings CAUTION: NEVER LOAD THE VENDING MACHINE WITH PRODUCTS DIFFERENT FROM THOSE RECOMMENDED BY THE MANUFACTURER (REFER TO CHAPTER: PROPER USE). CAUTION: NEVER LOAD THE VENDING MACHINE WITH PRODUCT FORMATS DIFFERENT FROM THOSE RECOMMENDED BY THE MANUFACTURER.
- Page 24 Instructions for the installer, maintenance technician and final user 5.1.2 Charging This mechanism can vend some packages stacked in double depth (2D column) (ref. Fig 5.7) and other in single depth (1D column) (ref. Fig 5.2) FIG.5.2 – EXAMPLE OF CHARGING 5.1.3 Conversion from 1D to 2D and from 2D to 1D If conversions are necessary, refer to the instructions below: 1) Remove the mechanism cover...
- Page 25 Instructions for the installer, maintenance technician and final user FIG.5.4 – CAM 6) Remove the delivery chute to get better access to the lower area of vend mechanism 7) Remove the plastic wedge (G) that is installed on the lower bail rod (I) if you have to convert from 2D to 1D.
- Page 26 Instructions for the installer, maintenance technician and final user 5.1.4 Loading The machine is equipped with a number of both metal (1 mm) and plastic (4 mm – 2 mm) shims (S), which will allow you to set the stack for the most common packages. Installation of them is based on average diameter of products.
- Page 27 Instructions for the installer, maintenance technician and final user FIG.5.7 Check again, and adjust if necessary the back spacer (P), so that between it and the row of products just loaded there is a space of about 10 mm (rif. Fig. 5.7). Load the second row of products on opposite side of column and third row above the first in the same manner described above.
- Page 28 Instructions for the installer, maintenance technician and final user 5.2 Final check 1- Completely load the column 2- Make several selection, check the reloading and the delivery of the product For some product format the column needs spacers or other special kits: in this case contact SandenVendo or the authorized service centres for the correct set up.
- Page 29 Instructions for the installer, maintenance technician and final user 6 MAINTENANCE The following section is a basic guide for the general maintenance and cleaning of the vending machine. Maintenance on the cooling unit may only be performed by trained specialist staff. While working, always wear protective goggles and gloves. Maintenance personnel must be made aware of the potential danger in touching hot metal parts.
- Page 30 Instructions for the installer, maintenance technician and final user 6.3 Replacing neon lamps To replace a neon lamp, work as follows: Open the door of the vending machine using the special key supplied (ref. Fig. 6.1). Press the luminous green LIGHT SWITCH pushbutton to disconnect power to the neon lamps: switch from position “1”...
- Page 31 Instructions for the installer, maintenance technician and final user 6.4 Cleaning the vending machine The vending machine should be generally cleaned in order to keep the machine in perfect working order. In general we advise that you: Check the vending machine and the surrounding area; check for sign of rust on the outer cabinet and obstructions in the air vents ...
- Page 32 Instructions for the installer, maintenance technician and final user 6.6 General cleaning operation In order that the machine is in perfect working condition, it is important that it is clean and well kept. Please follow the instructions below: Clean the Vendor with water and soap. The exterior may be waxed with any good automobile wax Small internal signs of corrosion can be removed using sand paper and covering the surface with nitrocellulose lacquer...
- Page 33 Instructions for the installer, maintenance technician and final user Only technicians from SandenVendo or authorised personnel may carry out the operations that require the machine’s lower protection to be opened, because of possible risks due to electric shock and moving mechanical parts. 6.7 Recommended cleaning products We recommend cleaning the machine using only the following types of products and materials:...
- Page 34 Instructions for the installer, maintenance technician and final user 7 INFORMATION – DANGER SIGNS A series of warning messages are written inside all the SandenVendo vending machines; this is to make the user is aware of the dangers that exist while he is working on the machine.
- Page 35 Instructions for the installer, maintenance technician and final user 13) Vending machine identification and main technical data Manufacture date: Month / Year 14) CAUTION: Hazardous Area pay extreme care whilst operating the vend mechanisms 15) CAUTION DANGER AND PROHIBITION: danger of electric shocks and mechanical risks 16) Final inspection certificate.
- Page 36 Instructions for the installer, maintenance technician and final user 8 TROUBLESHOOTING The following table lists the problems that may occur on our vending machines. We have listed the possible causes together with the recommended solutions to eliminate the problems. CAUTION: IN CASE OF FAILURE AND/OR POOR OPERATION ONLY CONTACT THE SKILLED PERSONNEL AT OUR SERVICE CENTRES MAY WE REMIND YOU THAT OUR AFTER SALES SERVICE CENTRE IS AVAILABLE FOR ANY TECHNICAL INFORMATION YOU MAY NEED...
- Page 37 Instructions for the installer, maintenance technician and final user PROBLEM POSSIBLE CAUSES RECOMMENDED SOLUTIONS The vending machine is not Check the power source. powered. Check the power cable connections and the fuses. The cooling system does not work. Communication failure between the power board and the vending Check the communication cable is intact.
- Page 38 Instructions for the installer, maintenance technician and final user 9 STORAGE AND DISPOSAL 9.1 Storage Should the vending machine not be used immediately or is stowed for long periods, check that it is correctly packed and positioned vertically. Meaning it should be stored in a closed, but well ventilated room and which does not have particular characteristics hazardous to the machine’s components, in particular the electronic ones.
- Page 39 Instructions for the installer, maintenance technician and final user 9.3 Person in charge of disposal Directive WEEE 2002/96/CE enforces the obligation NOT to dispose WEEE (Waste Electrical and Electronic Equipment) as household waste and to select this waste for separate collection. By law, the person in charge of disposal must, upon receiving an appliance showing this symbol , before disposing of it select the WEEE waste and make it available for...
- Page 40 D i c hi a r a z i o ne d i C o nf or m i t à D e c l a r a t i o n of C o n f or m i t y SandenVendo Europe S.p.A.
- Page 41 Revision Data Change Page 15/10/2013 Update point 1 GENERAL WARNINGS 3 ~ 9 Added point 3.5 Stability Update table of point 7.6 General cleaning operation Update page of Declaration of Conformity 07/03/2014 Update layout...
Need help?
Do you have a question about the Vendo SVE 100 and is the answer not in the manual?
Questions and answers