Table of Contents
Advertisement
Available languages
Available languages
Quick Links
INSTRUCTION MANUAL
Item # 1003928491
Model # 6381602331
LUTEC USA CUSTOMER SERVICE
Thank you for purchasing this Lutec Coastal fixture.
This product has been manufactured with the highest standards of safety and quality.
Questions, problems, missing parts?
Before returning please call or email our customer service hotline Monday-Friday
9am-5pm EST (Eastern Standard Time) Toll Free 1-(877) 714-8669
E-mail: service@lutec.net Website: www.lutec.com
Please reference your Model # 6381602331
Advertisement
Table of Contents

Related Manuals for LUTEC 6381602331


Summary of Contents for LUTEC 6381602331
- Page 1 Item # 1003928491 Model # 6381602331 LUTEC USA CUSTOMER SERVICE Thank you for purchasing this Lutec Coastal fixture. This product has been manufactured with the highest standards of safety and quality. Questions, problems, missing parts? Before returning please call or email our customer service hotline Monday-Friday 9am-5pm EST (Eastern Standard Time) Toll Free 1-(877) 714-8669 E-mail: service@lutec.net Website: www.lutec.com...
-
Page 2: Table Of Contents
/ expense costs involved in the replacement or repair of said product. Contact the Customer Service Team at 1-877-714-8669 or visit www.lutec.com... -
Page 3: Package Contents
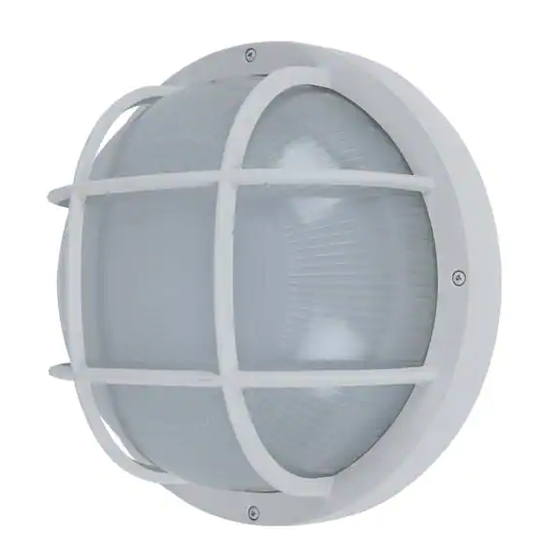
PACKAGE CONTENTS Part Description Quantity Diffuser Cage Diffuser Fixture Pan HARDWARE CONTENTS NOTE: Parts are not to scale. Hex Nut Screw Wire Nut Mounting Secondary Qty : 2 Qty : 2 Plate Diffuser Ring Qty : 1 Qty : 1... -
Page 4: Installation
INSTALLATION INSTALLATION Before you begin to install this lighting fixture, ensure all parts are present. Compare parts with the Hardware Included and Package Contents lists. If any part is missing or damaged, do not attempt to assemble the product. TOOLS REQUIRED TOOLS REQUIRED (NOT INCLUDED) Wire Phillips... -
Page 5: Assembly Instruction
ASSEMBLY INSTRUCTIONS WARNING: Consult a qualified electrician if you are not WARNING: Changes or modifications to this unit not certain about the installation process. Always install wiring expressly approved by the party responsible for compliance connections in accordance with local code, ordinances and could void the user’s authority to operate the equipment. - Page 6 ASSEMBLY INSTRUCTIONS Wire connection guide: Ground wire: Wrap ground wire from outlet box around ground screw preassembled on mounting plate (CC) no less than 2 in. from wire end. Tighten ground screw. If fixture is supplied with a ground wire, connect to outlet ground wire with a wire nut.
- Page 7 ASSEMBLY INSTRUCTIONS Carefully place the wires into the junction box. Then secure the fixture pan (C) to the threaded nipple with the hex nut (CC1) detached from the mounting plate (CC). Attach the diffuser (B) the diffuser cage (A) to the fixture pan (C), OR diffuser cage (A) can be substituted by Secondary Diffuser Ring (DD) if desired.
-
Page 8: Care And Maintenance
ASSEMBLY INSTRUCTIONS Color temperature adjustment: The initial time the light is energized, the color temperature is 3000K, turn off the switch and on again within 3 seconds, the color temperature changes to 5000K. Repeat this process for desired color temperature. 3000K 5000K CARE AND MAINTENANCE... - Page 9 Antes de regresar, llame o envíe un correo electrónico a nuestra línea de atención al cliente de lunes a viernes 9 am-5pm EST (hora estándar del este) Llamada gratuita 1- (877) 714-8669 Correo electrónico: service@lutec.net Sitio web: www.lutec.com Por favor, haga referencia a su modelo # 6381602331...
- Page 10 El fabricante renuncia específicamente a cualquier responsabilidad, y no será responsable de ningún daño o pérdida resultante o incidental, incluido pero sin limitarse a cualquier costo por mano de obra o gastos incurridos en el reemplazo o reparación de dicho producto. Comuníquese con el Equipo de Servicio al Cliente al 1-877-714-8669 o visite www.lutec.com.
- Page 11 CONTENIDO DEL PAQUETE Pieza Descripción Cantidad Caja difusora Difusor Aro de fijación CONTENIDO DEL HARDWARE NOTA: Las partes no están a escala. Tuerca Hexagonal Tornillo Tuerca Blanca Placa Anillo difusor Cantidad : 2 Cantidad : 2 de montaje secundario Cantidad : 1 Cantidad : 1...
- Page 12 INSTALACIÓN INSTALACIÓN Antes de empezar a instalar esta lámpara, asegúrese de que estén todas las piezas. Compare las piezas con el Herraje Incluido y con las listas de Contenido de los Paquetes. Si falta alguna pieza o está dañada, no intente armar el producto. HERRAMIENTAS REQUERIDAS HERRAMIENTAS REQUERIDAS(NO INCLUIDO) Alicates...
- Page 13 INSTRUCCIONES DE ENSAMBLAJE ADVERTENCIA: Consulte a un electricista ADVERTENCIA: Los cambios o las modificaciones calificado si no está seguro sobre el proceso de a esta unidad que no sean aprobados en forma instalación. Siempre instale las conexiones expresa por la parte responsable del cumplimiento eléctricas en conformidad con los códigos y pueden invalidar el permiso del usuario para usar el ordenanzas locales y el Código Eléctrico Nacional.
- Page 14 INSTRUCCIONES DE ENSAMBLAJE Guía de conexión de cables Cable de tierra: Envuelva el cable de tierra de la caja de salida alrededor del tornillo del suelo premontado en la barra transversal (CC) no menos de 2 pulg. desde el extremo del cable. Apriete el tornillo de tierra. Si el accesorio se suministra con un cable a tierra, conecte al cable de toma de tierra con una tuerca de cable.
- Page 15 INSTRUCCIONES DE ENSAMBLAJE Coloque cuidadosamente los cables en la caja de conexiones. Luego asegure la bandeja del accesorio (C) al mango de unión con la tuerca hexagonal (CC1) separada de la placa de montaje (CC). Coloque el difusor (B) la caja del difusor (A) en la bandeja del accesorio (C), O la caja difusora (A) puede ser sustituida.
- Page 16 INSTRUCCIONES DE ENSAMBLAJE Ajuste de la temperatura de color: La hora inicial en que la luz se energiza, a temperatura del color, es 3000K, apague el interruptor y enciéndalo de nuevo en 3 segundos, la temperatura de color cambiará a 5000K. Repita este proceso para obtener la temperatura de color deseada.
Need help?
Do you have a question about the 6381602331 and is the answer not in the manual?
Questions and answers