Advertisement
Advertisement

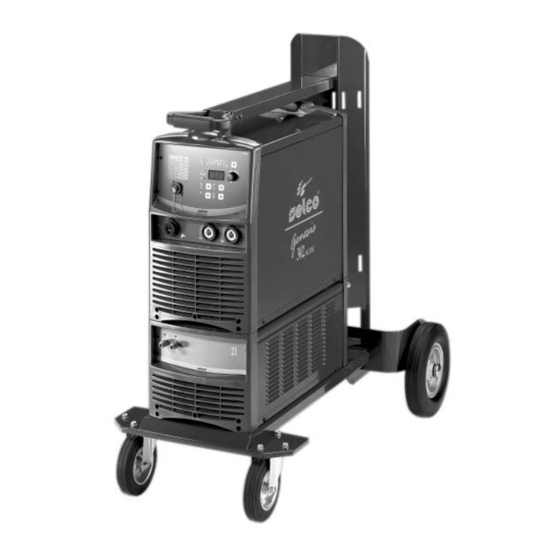
Related Manuals for Selco Genesis 302 AC/DC


Summary of Contents for Selco Genesis 302 AC/DC
- Page 1 REPAIRS MANUAL Ge ne sis 302-382 AC/DC WU21...
-
Page 2: Table Of Contents
Via Palladio, 19 I - 35010 ONARA DI TOMBOLO (Padova) Italy Tel. + 39 049 9413111 Fax + 39 049 9413311 e-mail: info@selco.it How to contact Selco Service Department: SELCO s.r.l. Service Department c/o SELCO 2 Via Macello, 61 I - 35010 CITTADELLA (Padova) Italy Tel. -
Page 3: Purpose Of The Manual
In order to avoid serious injury to persons or damage to things, this manual must be used only by qualified technicians. Selco S.r.l. accepts no liability for any injury to persons or dama- ge to things that may occur during performance of repairs, even after reading or practical application of this manual. -
Page 4: Warnings, Precautions And General Notices For Performing Repairs
2) WARNINGS, PRECAUTIONS AND GENERAL Moving parts: CAUTION ! Keep your hands well away from the NOTICES FOR PERFORMING REPAIRS fan when the machine is connected to the power supply. Ensure that the machine is unplugged and Repairs must be performed by qualified personnel only. that the fan is at a standstill before replacing it. -
Page 5: Instruments And Conventions For Performing Diagnosis And Repair
3) INSTRUMENTS AND CONVENTIONS FOR PERFOR- 3.3) Grid load MING DIAGNOSIS AND REPAIR Use of grid load can speed up fault tracing and machine testing. J ust remember that a fixed power resistor applied to machine's 3.1) Instruments for basic diagnosis output is somewhat equivalent to a welding arc, but only inside of a narrow output voltage range, whose center value can be The following are required:... - Page 6 3.4) Conventions By convention, when a measurement has to be taken between two points, for example a b , the arrow point indicates where to apply the red tip of the multimeter (a),while the black tip is applied at the other end (b). When a double arrow appears between two measuring points (e.g.: c d ), the voltage to be measured is alternating...
-
Page 7: Description Of Operation Of The Power Sources And Technical Dates
4) DESCRIPTION OF OPERATION OF THE POWER SOURCES AND TECHNICAL DATES 4.1) Use and routine maintenance (excerpt from the "Instructions for use" manual provided with each power source). 1.0 SAFETY WARNING Prior to performing any operation on the machine, make sure - lf said containers or pipes have been opened, emptied and that you have thoroughly read and understood the contents of carefully cleaned, the welding operation must in any case be... - Page 8 2.0 ELECTROMAGNETIC COMPATIBILITY (EMC) WARNING WELDING AND CUTTING CABLES This device is built in compliance with the indications contained The welding cables must be kept as short as possible, positioned in the harmonized standard EN50199, to which the operator near one another and laid at or approximately at ground level. must refer for the use of this apparatus.
- Page 9 - a rear control panel with gas socket value. The Genesis 302 AC/DC and Genesis 382 AC/DC can be sup- Allows you to continuously adjust the welding current both in plied with WU21 cooling unit for liquid cooling of the TIG TIG and MMA.
- Page 10 The first time the torch button is pressed, the pre-gas time is * Set-up parameters. run, the arc is struck and welding is performed with the initial When “ S5” is pressed after switch-on, the set-up menu is current. accessed (confirmed by a central "0" on the display “ D1” ) The first time it is released, slope-up to current "I1"...
- Page 11 (9) all the modifications performed in the SET- UP are cancelled and you return to the standard values set by SELCO. - The number on the display “D1” is replaced by the value of the parameter which is modified via the potentiometer “E1”.
- Page 12 Maximum current absorbed * Filling or topping up of the tank must be performed in MMA 17 A (x= 40%) 22.8 A (x= 35%) with Selco cooling liquid, code 18.91.001. Current absorbed in MMA (x= 100%) 11 A 16 A...
- Page 13 Dimensions and mass 6.1 Electrical connection to mains The system is provided with one single electrical connection Trolley Dimensions in mm Mass with 5 m cable at the rear of the power source. type Power source input cable and fuse sizing table: GT23 1000 Power source...
- Page 14 * Keep the sealed plug for future transport of the unit. * Filling or topping up of the tank must be performed with Selco cooling liquid, code 18.91.001. * Tighten the plug completely.
- Page 15 For TIG welding in the 8.0 PROBLEMS - CAUSES torch is NOT liquid- 8.1 Possible faults in the MMA welding cooled, it is advisable to close the cooling circuit Fault Cause and make the connec- tions illustrated in Fig.8: Excessive spatter 1) Long arc.
- Page 16 8.3 Possible electrical failures Fault Cause Machine does not come on 1) No voltage at power supply (Green led off) socket. 2) Faulty power supply plug or cable. 3) Internal fuse blown. Power delivery not correct 1) Incorrect setting of welding (Green LED on) parameters.
- Page 17 4.2) Operating principle - Block diagram General overview EMI input filter Three phases input rectifier Smoothing capacitor Quasi-resonant full bridge inverter Snubbing inductor Primary current transformer Resonant inductor Power transformer Secondary power rectifier Secondary inverter Hall-effect secondary current sensor Output filter HF transformer HF generator Auxiliary multi-output switching power supply...
- Page 18 Quasi-resonant full bridge power inverter * Note: due to resonant topology of primary power inverter, - 30kHz switching frequency* switching frequency is not constant: it varies in [27 ... 33]kHz = Fast response welding current loop range, depending on actual output power; due to full bridge = High stability welding arc topology, secondary rectifier works at double inverter frquency, that is 55...65kHz, thus allowing a very precise arc...
- Page 19 Output Rectifier & AC Inverter - Full bridge FRED rectifier - Microprocessor AC current shaping - Microprocessor controlled inversion = Minimized voltage clamp - Superimposition pulse generator = Easy arc inversion and stable arc in AC welding - Microprocessor triggered arc striking circuit - Superimposition pulse + arc striking pulse = Very easy arc striking even in worst operational contidions (hard oxide on workpiece)
- Page 20 Auxiliary Switching Mode Power Supply (SMPS) * Note: due to resonant topology of primary power inverter, - Flyback topology running @ 30kHz switching frequency* switching frequency is not constant: it varies in [27 ... 33]kHz range, depending on actual output power. - Buck topology running @ 30kHz switching frequency* - Directly derived from 560V DC link - Post-regulated primary side auxiliary supplies...
- Page 21 Microprocessor supervision - Overvoltage, undervoltage, phase lack alarms for safety ope- rational mode - Thermal protections management for power stages: inverter, output rectifier & AC inverter - Microprocessor programming of temperature level that acti- vates fan cooling = less noise, less dust incoming, power saving - Microprocessor recognized alarm events = Alarm code displayed on front panel - Wide range of parameters settable via software (setup)
-
Page 22: Wiring And Connection Diagrams
5) WIRING AND CONNECTION DIAGRAMS The power sources in the Genesis 302-382 AC/DC series consist basically of the same electronic boards, possibly with some confi- guration and/or calibration differences (cf. in the following chapter 9 the sections dedicated to the individual boards). The basic differences between the two models are (cf. - Page 25 5.3) Cooling unit wiring diagram Wiring and connection diagrams...
- Page 26 Connections for central adapter and remote control connector 5.4) FRONT VIEWS CENTRAL TORCH ADAPTER REMOTE CONTROL 3 - 5 = Torch trigger A = EXT 5V (max power) B = EXT GND (min power + torch trigger) C = EXT POT (to central ref.) D = - (not connected)
- Page 27 Remote control wiring diagrams 5.5) RC12 Wiring diagram RC16 Wiring diagram Wiring and connection diagrams...
-
Page 28: Pc Boards' Location
6) PC BOARDS’ LOCATION PC boards’ location... - Page 29 PC boards’ location...
-
Page 30: Description Of Diagnostic Indications
7) DESCRIPTION OF DIAGNOSTIC INDICATIONS For the meaning and use of the various controls, please refer to the respective user manuals; only the diagnostic indications are described in this section. The Genesis 302-382 AC/DC series automatically compensates for the variations in power supply voltage, i.e. variations of ± 15% with respect to the rated power supply voltage do not produce significant variations in the welding current. - Page 31 Simultaneously with switch-on of the yellow led, it indicates an alarm status via blinking codes (in this status only the two power supply and alarm leds are on): Indicat. Type of error Action General error due to a temporary See errors E10 & E19. fault in the power supply or in the output current Mains alarm (overvoltage, under-...
- Page 32 7.2) Internal diagnostic indications Status under normal conditions Meaning + 30Vdc Torch Trigger power supply + 24Vdc Remote Control power supply -24Vdc Remote Control power supply + 26Vdc Main Internal power supply + 10Vdc µP logic power supply -20Vdc Main Internal power supply + 12VAUX + 12Vdc Primary Logic power supply Alarm: phase lack!
- Page 33 Meaning Status under normal conditions -20Vdc Secondary Inverter Driver power supply + 20Vdc Secondary Inverter Driver power supply -20Vdc Secondary Inverter Driver power supply + 20Vdc Secondary Inverter Driver power supply + 15Vdc Aux. power supply (+ 400Vdc to HF and Superimposition PCBs) + 15Vdc Aux.
Need help?
Do you have a question about the Genesis 302 AC/DC and is the answer not in the manual?
Questions and answers
As dori va rog schema electrica pentru SELCO FP204 Neomig XP