Table of Contents
Advertisement
Quick Links
Advertisement
Table of Contents

Subscribe to Our Youtube Channel
Related Manuals for Electrolux EW6F6268N3


Summary of Contents for Electrolux EW6F6268N3
- Page 1 EW6F6268N3 Washing Machine User Manual...
-
Page 2: Table Of Contents
17. QUICK GUIDE....................39 WE’RE THINKING OF YOU Thank you for purchasing an Electrolux appliance. You’ve chosen a product that brings with it decades of professional experience and innovation. Ingenious and stylish, it has been designed with you in mind. So whenever you use it, you can be safe in the knowledge that you’ll get great results every time. -
Page 3: Safety Information
ENGLISH SAFETY INFORMATION Before the installation and use of the appliance, carefully read the supplied instructions. The manufacturer is not responsible for any injuries or damage that are the result of incorrect installation or usage. Always keep the instructions in a safe and accessible location for future reference. - Page 4 If a tumble dryer is stacked on the top of the washing • machine, make sure to use the correct stacking kit approved by ELECTROLUX (see more details in chapter "Accessories - Stacking kit").
-
Page 5: Safety Instructions
ENGLISH 2. SAFETY INSTRUCTIONS 2.1 Installation 2.2 Electrical connection The installation must comply WARNING! with relevant national Risk of fire and electric regulations. shock. • Remove all the packaging and the • The appliance must be earthed. transit bolts including rubber bush •... - Page 6 2.6 Service • You can extend the drain hose to maximum 400 cm. Contact the • To repair the appliance contact the Authorised Service Centre for the Authorised Service Centre. Use other drain hose and the extension. original spare parts only.
-
Page 7: Product Description
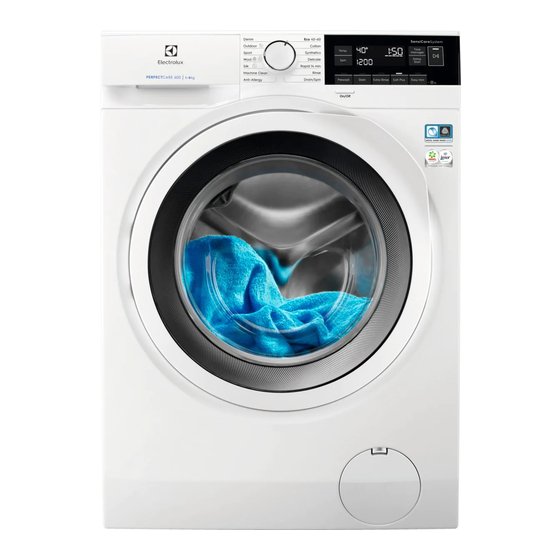
ENGLISH 3. PRODUCT DESCRIPTION 3.1 Appliance overview 11 12 Worktop Drain hose Detergent dispenser Inlet hose connection Control panel Mains cable Door handle Transit bolts Rating plate Hose support Drain pump filter Feet for levelling the appliance The rating plate reports the model name (A) , product number (B), electrical ratings (C) and serial number (D). -
Page 8: Installation
Level of protection against ingress of solid particles IPX4 and moisture ensured by the protective cover, except where the low voltage equipment has no protection against moisture Water supply pressure Minimum 0.5 bar (0.05 MPa) Maximum 8 bar (0.8 MPa) - Page 9 ENGLISH 4. Remove the three transit bolts and 2. Loosen or tighten the feet to adjust the pull out the plastic spacers. level. All feet must rest firmly on the floor. We recommend that you keep the packaging and the transit bolts for any transport of the appliance.
- Page 10 2. Position it toward left or right Make sure that the plastic depending on the positon of the water guide cannot move when the tap. Make sure that the inlet hose is not appliance drains and the in vertical position.
-
Page 11: Accessories
6. ACCESSORIES 6.1 Fixing plate kit If you install the appliance on a plinth that is not an accessory supplied by ELECTROLUX, secure the appliance in the fixing plates. Read carefully the instructions supplied with the accessory. 6.2 Stacking kit... -
Page 12: Control Panel
6.3 Pedestal with the drawer 6.4 Available in www.electrolux.com/shop or from authorised dealer Only appropriate accessories approved by ELECTROLUX ensure the safety standards of the appliance. If unapproved parts are used, any claims will be invalidated. 7. CONTROL PANEL 7.1 Special features... - Page 13 ENGLISH 7.2 Control panel description Programme dial Easy Iron touch button Spin reduction options touch button Soft Plus touch button Temp. touch button Extra Rinse touch button Display Stain touch button Delay Start touch button Prewash touch button Time Manager touch button On/Off push button Start/Pause touch button...
- Page 14 Delay start indicator. Door locked indicator. The digital indicator can show: • Programme duration (e. g. • Delay time (e. g. • Cycle end ( • Warning code (e.g. Time Manager bars level indicator. Maximum laundry weight indicator. Add garments indicator. Lights on during the beginning of the Wash phase, while the user can still pause the appliance and add more laundry.
-
Page 15: Dial And Buttons
ENGLISH 8. DIAL AND BUTTONS 8.1 Introduction • Activate the No Spin option. Set this option to deactivate all spin The options/functions are phases. The appliance performs the not available with all only draining phase of the selected washing programmes. washing programme. - Page 16 8.5 Prewash 8.8 Permanent Soft Plus With this option you can add a prewash Set this option to optimise the fabric phase to a washing programme. softener distribution and improve fabric softness. The corresponding indicator above the touch button illuminates.
-
Page 17: Programmes
ENGLISH suitable for a full load of normally indicator soiled garments. a quick cycle for a full load of lightly soiled garments. very quick cycle for a smaller lightly soiled load (max. half load recommended). the shortest cycle to freshen up a ■... - Page 18 Programme Reference Maxi‐ Programme description Default tem‐ spin (Type of load and level of soiling) perature speed load Temperature Spin range speed range [rpm ] Delicate 1200 rpm 3 kg Delicate fabrics such as acrylics, viscose 30 °C (1200- and mixed fabrics requiring gentler wash‐...
- Page 19 ENGLISH Programme Reference Maxi‐ Programme description Default tem‐ spin (Type of load and level of soiling) perature speed load Temperature Spin range speed range [rpm ] 800 rpm 0,5 kg Special programme for silk and mixed syn‐ Silk (800 - 400) thetic items.
- Page 20 Programme Reference Maxi‐ Programme description Default tem‐ spin (Type of load and level of soiling) perature speed load Temperature Spin range speed range [rpm ] 800 rpm 3 kg Special programme for Denim clothing Denim (1200 - with delicate washing phase to minimize 30 °C...
- Page 21 ENGLISH Programme Drain/Spin ■ ■ ■ ■ ■ ■ ■ ■ ■ ■ ■ Anti-Allergy Machine Clean ■ ■ ■ ■ ■ ■ Silk ■ ■ ■ ■ Wool Sport ■ ■ ■ ■ ■ ■ ■ ■ ■ ■ ■...
-
Page 22: Settings
9.2 Woolmark Apparel Care - Blue The wool wash cycle of this machine has been approved by The Woolmark Compa‐ ny for the washing of wool garments label‐ led as «hand wash» provided that the gar‐ ments are washed according to the instruc‐... - Page 23 ENGLISH 12.1 Activating the appliance CAUTION! Make sure that no laundry 1. Connect the mains plug to the mains gets caught between the socket. seal and the door to avoid 2. Open the water tap. risk of water leakage and 3.
- Page 24 After a washing cycle, if necessary, remove any detergent residue from the detergent dispenser. 12.4 Check the position of the detergent flap 1. Pull out the detergent dispenser until it stops. Make sure that the flap does not cause a blockage when you close the drawer.
- Page 25 ENGLISH 12.8 The SensiCare System The drain pump can operate load detection shortly before the appliance fills water. After touching the Start/Pause button: 12.7 Starting a programme with the delay start 1. The SensiCare System starts estimating the weight of the load to calculate the real programme 1.
- Page 26 1. Rotate the selector knob to the "Reset" 1. Press button On/Off to deactivate the appliance. position After five minutes from the end of the 2. Wait for 1 second. The display shows programme, the energy saving function automatically deactivates the appliance.
-
Page 27: Hints And Tips
ENGLISH 12.14 Stand-by option Turn the programme dial to set a new cycle. The Stand-by function automatically If the dial is rotated to the "Reset" deactivates the appliance to reduce the position , the appliance automatically energy consumption when: turns off in 30 seconds. •... -
Page 28: Care And Cleaning
Special stain removers are available. • mould in the appliance. Use the special stain remover that is Excessive detergent may cause: applicable to the type of stain and fabric. • sudsing, • reduced washing effect, 13.3 Detergent type and •... - Page 29 ENGLISH 14.1 Periodic cleaning schedule 14.3 External cleaning Periodic cleaning helps to extend the Clean the appliance with mild soap and life of your appliance. warm water only. Fully dry all the surfaces. Do not use a scouring pads or After each cycle, keep the door and the any scratching material.
- Page 30 Occasionally, at the end of a drained out with the water. Regularly cycle the display may show examine the seal. Coins, buttons, other the icon : this is a small items can be recovered at the end recommendation to perform of the cycle.
- Page 31 ENGLISH 3. Make sure that all detergent residue rinsing programme without any is removed from the upper and lower clothes in the drum. part of the recess. Use a small brush to clean the recess. 4. Insert the detergent drawer into the guide rails and close it.
- Page 32 180˚ WARNING! Make sure that the impeller of the pump can rotate. If it does not rotate, contact the Authorised Service Centre. Make sure also that you tighten the filter correctly to prevent leakages.
-
Page 33: Troubleshooting
ENGLISH 14.10 Cleaning the inlet hose and the valve filter 45° 20° 14.11 Emergency drain 3. Put the two ends of the inlet hose in a container and let the water flow out If the appliance cannot drain the water, of the hose. - Page 34 15.1 Alarm Codes and Possible failures The appliance does not start or it stops during operation. First try to find a solution to the problem (refer to the tables). WARNING! Deactivate the appliance before carrying out any check. With some problems, the display shows an alarm code and the Start/Pause...
- Page 35 ENGLISH Problem Possible solution • Make sure that the mains plug is connected to the mains socket. • Make sure that the appliance door is closed. • Make sure that there is no damaged fuse in the fuse box. The programme does •...
-
Page 36: Consumption Values
Problem Possible solution • Increase the detergent quantity or use a different deter‐ gent. The washing results • Use special products to remove the stubborn stains before are not satisfactory. you wash the laundry. • Make sure that you set the correct temperature. - Page 37 ENGLISH 16.2 Legend Laundry load. h:mm Programme duration. Energy consumption. °C Temperature in the laundry. Litres Water consumption. Spin speed. Remaining moisture at the end of spinning phase. The higher is the spin speed, the higher is the noise and the lower is the remaining moisture. Values and programme duration may differ depending on different conditions (e.g.
- Page 38 Standard cotton pro‐ Load Energy Water Approxi‐ Remain‐ grammes. (kg) con‐ con‐ mate pro‐ ing mois‐ sumption sumption gramme ture (%) (kWh) (litres) duration (minutes) For Standard 40°C cotton: 0,51 Set Eco 40-60 at 30°C 1) At the end of spin phase.
-
Page 39: Quick Guide
ENGLISH 17. QUICK GUIDE 17.1 Daily use Connect the mains plug to the mains 3. Set the desired options by means of socket. the corresponding touch buttons. 4. To start the programme, touch the Open the water tap. Start/Pause button. Load the laundry. - Page 40 17.3 Programmes Programmes Load Product description White and coloured cottons. Normally Eco 40-60 8 kg soiled garments. Cotton 8 kg White cotton and coloured cotton. Synthetics 3 kg Synthetic items or mixed fabric items. Delicate fabrics such as acrylics, viscose,...
- Page 44 www.electrolux.com/shop...
Need help?
Do you have a question about the EW6F6268N3 and is the answer not in the manual?
Questions and answers