Table of Contents
Advertisement
Available languages
Available languages
Quick Links
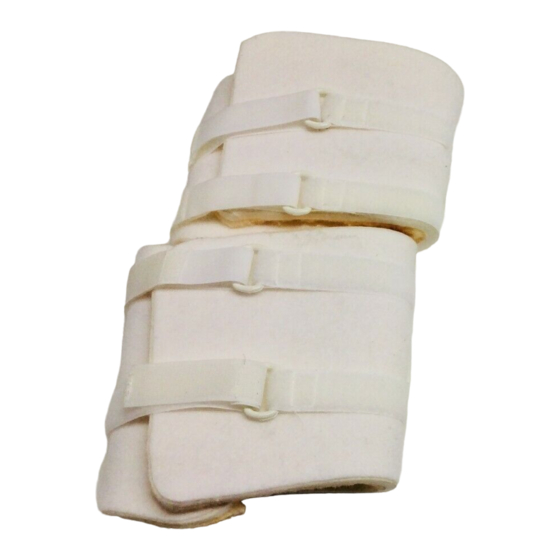
Rolyan
Progressive
Elbow/Knee Splint:
®
®
A812-410 through A812-414
Figures referred to in the instructions are on
page 6.
INDICATIONS
• For mild to moderate spasticity or
contractures
• Can be used in the presence of arthritis,
dementia, Parkinson's disease, and
osteoporosis
CONTRAINDICATIONS
• Not for use with severe fixed deformities
• Not for use with severe edema
PRECAUTIONS
• This splint is to be fitted initially by a
healthcare professional who is familiar with
the purpose for which it is prescribed. The
healthcare professional is responsible for
providing wearing instructions and
precautions to other healthcare
practitioners, care providers involved in the
patient's care, and the patient.
• If unusual swelling, skin discoloration or
discomfort occurs, use should be
discontinued and a healthcare professional
consulted.
• Be careful that the splint is not so tight that
circulation is impaired.
• After heating splinting material, always
check its temperature before applying it to
the patient.
NEDERLANDS
Rolyan
Progressive
elleboog-/kniespalk
®
®
De bij de gebruiksaanwijzing horende
afbeeldingen bevinden zich op pagina 6.
INDICATIES
• Voor zwakke tot middelmatige spasticiteit of
contracturen
• Kan worden gebruikt bij artritis, dementia,
ziekte van Parkinson en osteoporose
CONTRA-INDICATIES
• Niet gebruiken bij ernstige gefixeerde
vervorming van de enkel
• Niet gebruiken bij ernstig oedeem
VOORZORGSMAATREGELEN
• Deze spalk moet aanvankelijk worden
gepast door een medische deskundige, die
weet waarvoor deze spalken worden
voorgeschreven. De medische deskundige
moet de instructies voor het dragen van
deze spalk en de voorzorgsmaatregelen
bespreken met de andere medische
deskundigen, degenen die betrokken zijn
bij de verzorging van de patiënt en met de
patiënt zelf.
• Indien ongewone zwelling, huidverkleuring
of ongemak optreedt, dient het gebruik te
worden gestaakt en moet contact worden
opgenomen met een medische
deskundige.
• Zorg ervoor dat de spalk niet zodanig strak
wordt aangebracht dat de bloedsomloop
wordt belemmerd.
• Wanneer de spalk wordt opgewarmd, dient
u altijd de temperatuur te controleren
CARE AND CLEANING
• Splint should be kept away from open flames.
• Stay should be removed and all hook-and-
loop closures fastened before hand washing
and air drying the soft splint.
• Be sure the splint pieces are completely dry
before reapplying them.
• The stay will lose its shape in temperatures
over 135°F (57°C).
INSTRUCTIONS FOR USE
1. Place splint onto extremity to check for fit.
Splint should allow unobstructed motion of
shoulder or hip and clear bony protrusions.
When wrapped around extremity, edges of
sections should overlap approximately 2"
(5 cm). Excess can be trimmed to reduce
bulk.
2. Without allowing them to touch each other,
heat the three parts of the stay in water
heated to 160° to 170°F (70–75°C) until soft
enough to mold. Remove from heat pan and
place on a towel on a flat surface.
Forming the stay
Note that the Ezeform
stay pieces will bond
®
quickly, so place them carefully.
3. Place largest piece on flat surface.
4. Line up top edge of cross bar of T-shaped
piece with top edge of cross bar of largest
piece (A). Cutout area of T-shaped piece
should line up with extended top of largest
piece. Press pieces together gently.
alvorens de spalk bij de patiënt aan te
brengen.
ONDERHOUD EN SCHOONMAKEN
• De spalk moet uit de buurt van open vuur
worden gehouden.
• Men dient de balein te verwijderen en alle
haak- en lussluitingen vast te maken voordat
de zachte spalk in de wasmachine wordt
gewassen en aan de lucht wordt gedroogd.
• Zorgen dat alle spalkdelen volledig droog zijn
voordat men ze opnieuw aanbrengt.
• De enkelbalein verliest zijn vorm bij
temperaturen boven 57 ºC.
GEBRUIKSAANWIJZINGEN
1. Plaats de spalk op het lidmaat om de maat te
controleren. De spalk moet ongehinderde
beweging van de schouder of heup toestaan
en botuitsteeksels vrijlaten. Wanneer de spalk
om het lidmaat gewikkeld is, moeten de
randen van de delen elkaar ongeveer 5 cm
overlappen. Overtollig materiaal kan worden
bijgeknipt om de dikte te verminderen.
2. Verwarm de drie delen van de steun zonder
dat deze met elkaar in aanraking komen in tot
70-75 °C verwarmd water totdat ze zacht
genoeg zijn om te vormen. Verwijder de delen
uit de verwarmkom en plaats ze op een
handdoek op een platte ondergrond.
Het vormen van de steun
Denk eraan dat de Ezeform
steunstukken snel
®
aan elkaar vast blijven zitten; u moet ze derhalve
voorzichtig neerleggen.
5. Place straight piece so top is even with
cutout edge of T-shaped piece and centers
line up (B).
6. Bend extended top of largest piece over other
two pieces (C) to fit into cutout area of T-
shaped piece.
7. Fold two slit sides of largest piece onto
middle of stay, forming a "T" (D).
8. If necessary, trim edges of stay so they line up
evenly.
9. If necessary, reheat stay. Place stay on
extremity with center seam away from skin
and cross bar on upper arm or thigh. Mold to
appropriate degree of elbow or knee
extension (E).
10. For greater comfort, flare ends of stay slightly.
Applying the splint
11. Open fastener on stay pocket and put stay
into pocket (F). Close flap over cross bar of
stay. Top D-ring strap also has hook-and-loop
closure to keep it in place on pocket flap.
12. Place splint on extremity and secure D-ring
straps. A properly applied splint for the upper
extremity is shown in G and H.
13. As condition changes, splint may be
progressed by heating stay and remolding it.
3. Plaats het grootste stuk op een platte
ondergrond.
4. Breng de bovenste rand van de kruisbalk van
het T-vormige stuk op één lijn met de
bovenste rand van de kruisblak van het
grootste stuk (A). Het uitgesneden deel van
het T-vormige stuk moet op één lijn zijn met
de verlengde bovenkant van het grootste
stuk. Druk de stukken voorzichtig tegen
elkaar.
5. Plaats het rechte stuk zodat de bovenkant
gelijk is met de rand van de uitsnijding van het
T-vormige stuk en de middellijnen met elkaar
op één lijn zijn (B).
6. Buig de verlengde bovenkant van het grootste
stuk over de andere twee stukken (C) zodat
deze in het uitgesneden deel van het T-
vormige stuk past.
7. Vouw de twee ingesneden zijkanten van het
grootste stuk op de middelste steun,
waardoor een "T" gevormd wordt (D).
8. Knip de randen van de steun zo nodig bij
zodat ze gelijk uitlijnen.
9. Verwarm de steun zo nodig opnieuw. Plaats
de steun op het lidmaat met de middennaad
van de huid vandaan en de kruisbalk op de
bovenarm of het dijbeen. Vorm tot de van
toepassing zijnde mate van elleboog- of
kniestrekking (E).
10. Laat voor groter comfort de uiteinden van de
steun iets wijd uitlopen.
Het aanbrengen van de spalk
11. Maak de bevestiging op de steunhoes open
en plaats de steun in de hoes (F). Sluit de flap
1
Advertisement
Table of Contents

Subscribe to Our Youtube Channel
Related Manuals for Rolyan Progressive A812410


Summary of Contents for Rolyan Progressive A812410
- Page 1 Rolyan Progressive Elbow/Knee Splint: ® ® A812-410 through A812-414 CARE AND CLEANING Figures referred to in the instructions are on 5. Place straight piece so top is even with page 6. cutout edge of T-shaped piece and centers • Splint should be kept away from open flames.
- Page 2 12. Plaats de steun op het lidmaat en maak de D- verwarmen en opnieuw te vormen. ringbanden vast. Een op de juiste manier FRANÇAIS Attelle de coude ou de genou Rolyan Progressive ® ® Les illustrations citées dans les instructions •...
- Page 3 DEUTSCH Rolyan Progressive Ellbogen-/Knieschiene ® ® Die Abbildungen, auf die in den Anleitungen • Vor erneutem Anlegen sicherstellen, daß die 6. Die verlängerte Oberseite des größten Teils so Bezug genommen wird, befinden sich auf Schienenteile vollkommen trocken sind. über die beiden Teile biegen (C), daß sie in Seite 6.
- Page 4 ITALIANO Splint per gomito/ginocchio Progressive Rolyan ® ® Le figure di cui si fa menzione nelle istruzioni • Il supporto rigido per la caviglia perde la sua 7. Piegare i due lati fessurati della porzione più si trovano a pagina 6.
- Page 5 ESPAÑOL Férula para codo/rodilla Rolyan Progressive ® ® Las figuras a las que se hace referencia en las • Asegúrese de que las piezas de la férula 6. Doble la parte superior extendida de la pieza instrucciones se encuentran en la página 6.
- Page 6 Authorized European Representative 1000 Remington Blvd., Suite 210 W68 N158 Evergreen Blvd. Patterson Medical Canada Bolingbrook, IL 60440 Cedarburg, WI 53012 6675 Millcreek Drive, Unit 3 Patterson Medical Ltd. Phone: 800-323-5547 Phone: 800-323-5547 Mississauga, ON L5N 5M4 Nunn Brook Road, Huthwaite Sutton-In-Ashfield, Nottinghamshire NG17 2HU Direct Phone: 630-378-6000 Direct Phone: 630-378-6000...
Need help?
Do you have a question about the Progressive A812410 and is the answer not in the manual?
Questions and answers