
Related Manuals for MHS Boilers DECORAL ELECTRIC WIFI


Summary of Contents for MHS Boilers DECORAL ELECTRIC WIFI
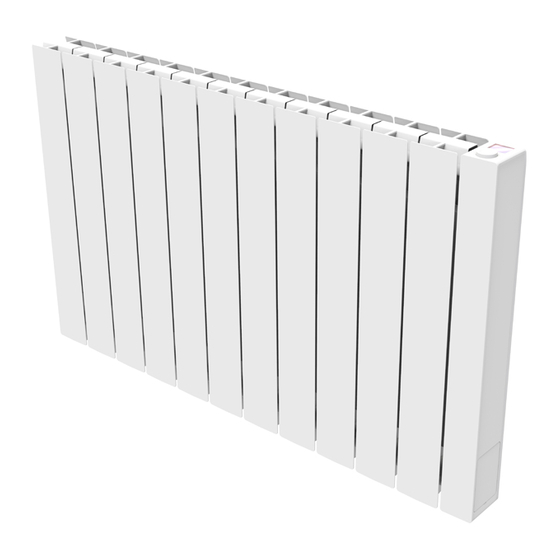
- Page 1 INSTALLATION, USE AND MAINTENANCE MANUAL DECORAL ELECTRIC WIFI ALUMINIUM FLUID FILLED ELECTRIC RADIATOR...
-
Page 2: Table Of Contents
DEAR CUSTOMER, WE THANK YOU FOR YOUR CONFIDENCE. BEFORE INSTALLING AND/OR USING THE PRODUCT, PLEASE READ CAREFULLY THIS MANUAL CONCERNING THE CORRECT INSTALLATION, USE AND MAINTENANCE OF THE APPLIANCE. WE REMIND YOU AS WELL THAT THIS MANUAL MUST ACCOMPANY THE RADIATOR IN CASE OF TRANSFER TO ANOTHER PLACE OF INSTALLATION. -
Page 3: Warnings
WARNINGS The symbol shown here appears on a label on the radiator, whose meaning is: to avoid the overheating of the appliance, DO NOT COVER THE RADIATOR with clothes or other objects. The radiator shall in no case: - be covered in part or in full - be in direct contact or too close to curtains, furniture, etc. -
Page 4: Electrical Connections
ELECTRICAL CONNECTIONS IMPORTANT During installation, maintenance and cleaning, the appliance must not be powered. The appliance must be powered only with 230 Vac voltage. The radiator is supplied with a power cable with 3 wires as per table below: Brown Phase Blue or Grey Neutral... -
Page 5: Installation Of The Appliance
INSTALLATION OF THE APPLIANCE To achieve the best results in terms of heat output and comfort of your appliance, we recommend to 30 cm install the radiator, if possible, under a window or near areas with high heat loss of the room to heat. The radiator must not be installed in a niche or under a power outlet. - Page 6 Using a pencil, mark the position of holes T1 and T2: Marked points T1 and T2 correspond to the position of the holes for the lower screws. Place the bracket so that the lower slots of the bracket match the marks T1 and T2 : Using a spirit level, check that the bracket is straight and mark the position of the two upper holes U1 and U2 .
- Page 7 Position the bracket and insert the screws with washers. Then tighten the screws:: Position upper plastic parts of the bracket: Fit the two lower clamps and rotate them until you hear a first click. Position the radiator by leaning it on the upper part of the brackets and then rotating it. Push the radiator until it is automatically locked by lower plastic clamps The operation is over only when locking hooks are blocked and the radiator is fixed on the wall, without any possibility of movement.
-
Page 8: Adjustment And Programming
If necessary, remove the radiator and operate on the lower plastic clamps by moving them horizontally and then rotating them: ADJUSTMENT AND PROGRAMMING CONTROL PANEL The appliance has an ON/OFF switch on the rear of the right plastic side (1). To power the radiator, position the switch to I. -
Page 9: Description Of Operating Modes
DESCRIPTION OF OPERATING MODES Press the knob to access the MENU, press again to select MODE item and select one of the operating modes: • SIMPLE (manual) • PROGRAMMING • TEMPORARY MODE A box on the display indicates the mode you are selecting, press the knob to confirm the selection. Select to return to the previous menu. -
Page 10: Temporary Mode
4.3.3 TEMPORARY MODE The selection of this mode allows setting a temperature different from the programmed/set temperature for a limited period of time, ranging from 30 minutes to 24 hours, after which the appliance returns to operate at the previous temperature selected in SIMPLE or PROGRAM mode. -
Page 11: Programming
The maximum default temperature is 30 °C, but it can be changed using “MAX TEMP. ” parameter of PROG SA 10:30 PARAMETERS/RESTRICTIONS menu. 20.0°C In PROGRAM mode, it is possible to change COMFORT and/or ECO temperatures by simply turning the EXEMPTION knob: the new setting will be maintained until the new automatic temperature change set in the program UNTIL 17:00... -
Page 12: Returning To Factory Programming
4.5.2 RETURNING TO FACTORY PROGRAMMING In PROGRAMMING select DEF. PROG. and press the knob. Select to cancel the operation. Press RESET to confirm the return to the factory programming. PROGRAMMING DEF. PROG. DEF. PROG. DEF. PROG. RESET RESET PARAMETERS From SIMPLE / PROGRAM / TEMPORARY menus, press the knob to access the MENU and then select PARAMETERS to adjust/set the following parameters: WINDOW OPENING DETECTION (WINDOW): enabled/disabled type function. -
Page 13: Details Of Some Functions
6. FACTORY SETTINGS: allows returning to the factory parameter setting. Select VALIDATE and press and hold the knob for approx. 5 seconds to reconfigure the factory settings. 7. RESTRICTIONS: Select this option in the PARAMETERS menu to: Set the maximum permitted temperature: the maximum temperature can be adjusted from 22 to 30 °C, 30 °C is the factory setting Lock the use of PARAMETERS or the use of both PARAMETERS and PROGRAMMING (PAR &... -
Page 14: Key Lock
KEY LOCK It is possible to lock the device to avoid an improper or unintentional use, for instance for children protection or in a public space To lock the keys (knob) from one of SIMPLE/PROGRAM/TEMPORARY modes, press and hold the knob for a few seconds and then select LOCK. -
Page 15: Radiator Registration And Pairing
In the same menu it is also possible to: Select STATUS to check the radiator connection status: connected / not connected. On the display, the icon is steady ON if the radiator is connected and flashes if the radiator is not yet connected. Follow the procedure described below to connect it. - Page 16 be displayed (figure 04): Enter the network password if required. Press, “CONFIGURE”, the Switch Wi-Fi network Configure Wi-Fi screen shown in figure 05 will be displayed. Press “GO TO WI-FI SETTINGS”, the Wi-Fi setting page of the operating system will be displayed (figure 06). Select the Wi-Fi network you want this thermostat to connect to Go to settings and select the Wi-Fi network of the...
- Page 17 4.11.2 APP operation From the APP, you can manage every single radiator, groups of radiators or even radiators in different buildings, you can set many of the functions of the radiator and its programming, as well as monitor the daily temperature to make sure that it meets your needs. You can add new radiators to your personal list at any time and give them a name to easily recognise them.
-
Page 18: Radiator Cleaning
RADIATOR CLEANING For your safety, before any cleaning operation, disconnect power supply. Cleaning operations must be carried out with radiator off and cold. Do not use abrasive or corrosive products to clean the heating body. Use, for instance, soapy water and then dry the body using a soft cloth. - Page 19 PROBLEM STATE OF THE RADIATOR PROBABLE CAUSE SOLUTION Window opening detection Function enabled Lowering of temperature in ---- does not work properly the rooms has not exceeded 5°C in the time provided or The position of the radiator Relocate the radiator. does not allow the probe to detect the temperature correctly.
-
Page 20: Warranty
WARRANTY The body in aluminum alloy is warranted against manufacturing defects for 10 years from date of purchase. Electric and electronic components are warranted for 2 years from the date of purchase of the radiator. To validate your warranty, it is necessary to produce a document attesting the date of purchase (tax receipt, invoice, sales receipt). -
Page 21: Characteristics Of The Appliance
CHARACTERISTICS OF THE APPLIANCE IP24: appliance protected against water jets Class II insulation class, double insulation The radiator is composed of a body in die-cast aluminum and contains a fluid for internal heat transmission composed of highly refined mineral oil with high coefficient of heat transmission, featuring high resistance to oxygenation to aid a long duration and low viscosity. -
Page 22: Information Requirements For The Regulation Eu 2015/1188 Of 28 April 2015
INFORMATION REQUIREMENTS FOR ELECTRIC LOCAL SPACE HEATERS IN ACCORDANCE WITH ANNEX II, POINT 3.A.I.2, OF THE REGULATION EU 2015/1188 OF 28 APRIL 2015 IMPLEMENTING DIRECTIVE 2009/125/EC. Model identifiers: eBlitz Wi-Fi 750 W / 1000 W / 1250 W / 1500 W / 1800 W Item Symbol Value Unit... -
Page 23: Declaration Of Conformity
DECLARATION OF CONFORMITY DECLARATION OF CONFORMITY We hereby declare for FONDITAL S.p.A. via cerreto 40, 25079 Vobarno (BS) Italia that ELECTRICAL RADIATORS FOR HEATING Model eBlitz Wi-Fi produced by FONDITAL S.p.A. are manufactured according to Regulations: The Radio Equipment Regulations 2017 and amendments. Electrical Equipment (Safety) Regulations 2016 and amendments. - Page 24 MHS Radiators Limited, Unit 4 Genesis, Endeavour Drive, Basildon, SS14 3WF Tel: 0345 521 5666 Fax: 01268 888260 orders@mhsradiators.co.uk enquiries@mhsradiators.co.uk mhsradiators.co.uk SALES OFFICE - 0345 521 5666 AFTERSALES - 01268 546775...
Need help?
Do you have a question about the DECORAL ELECTRIC WIFI and is the answer not in the manual?
Questions and answers