Table of Contents
Advertisement
Quick Links
Advertisement
Table of Contents

Subscribe to Our Youtube Channel
Related Manuals for Bernina Studio Frame


Summary of Contents for Bernina Studio Frame
- Page 1 BERNINA Studio Frame Assembly Instructions...
-
Page 3: Table Of Contents
2.12 Attaching the leaders ..........32 2.13 Setting up the quilting area ........34 2.14 Attaching the bungee cords ........38 2.15 Leveling the Studio Frame ........38 2.16 Attaching the front handles ........40 Technical specifications ........42 Dimensions ............42... -
Page 4: Important Safety Instructions
Important safety instructions IMPORTANT SAFETY INSTRUCTIONS Please observe the following general safety instructions when assembling the quilting frame. Before using the quilting frame, also read the operating instructions for the machine carefully. WARNING To protect persons from injuries: • The packaging of the quilting frame and the machine is large and heavy. The packaging should therefore always be carried by at least two adults together. -
Page 5: Important Information
Environmental Protection BERNINA International AG is committed to environmental protection. We make every effort to increase the environmental friendliness of our products by continually improving their design and production technology. If the product is no longer required, disassemble all components and dispose of them in an environmentally friendly way in accordance with the national guidelines. -
Page 6: My Bernina
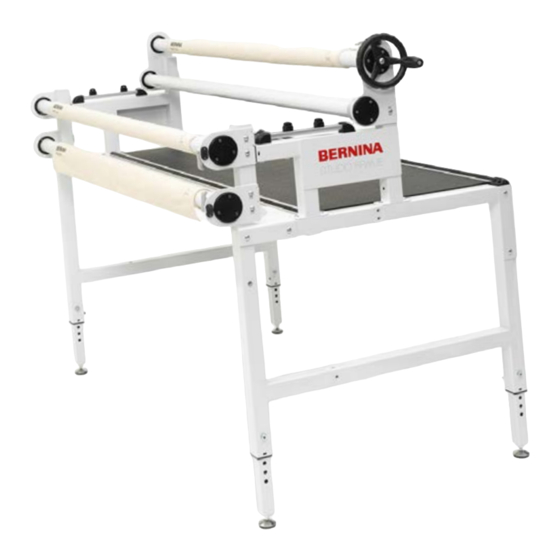
My BERNINA 1.1 Overview of the Studio Frame The BERNINA Studio Frame is available in two versions: 5-foot frame and 10-foot frame. These assembly instructions describe the assembly of both versions. The pictures in these assembly instructions show the assembly of the 10-foot frame. Unless otherwise stated, these pictures apply equally to the 5-foot frame. -
Page 7: Overview Of Delivery
1.2 Overview of delivery The BERNINA Studio Frame is delivered in 4 boxes. Boxes 1 – 3 contain all the parts needed to build up a 5- foot frame. Box 4 contains additional parts for expanding to a 10-foot frame. The machine is delivered in a separate box. - Page 8 My BERNINA Illustration Number Designation Rail support, right Brace, front left Brace, front right Brace, back left Brace, back right Cover cap for rail end, right Cover cap for take-up rail Handwheel for take-up rail...
- Page 9 My BERNINA Illustration Number Designation Cover cap for rail end, left Bungee cord Cord clamp Screws, M8 × 16 16 mm (16 pre-assembled) Screws M4 × 20 mm Washers, M8 (12 pre-assembled) Allen keys Allen key with handle, 4 mm Open-end wrench 10–13 / 14–17 Box 2 – Parts for 5-foot frame...
- Page 10 My BERNINA Illustration Number Designation Backing-rail, top rail, take-up rail for 5-foot frame Box 3 – Accessories Illustration Number Designation Carriage Stand profile, front, for machine Stand profile, rear, for machine Vibration kit Handles Leaders Adhesive tape, for attaching the leaders...
- Page 11 My BERNINA Box 4 – Parts for 10-foot frame Abbildung Number Bezeichnung Leg, center Tabletop, pre-assembled Brace, front, center Brace, rear center Rail extension for 10-foot frame Rail coupler Track coupler, incl. 8 grup screws Plastic insert for 10-foot frame...
-
Page 12: Quilting Frame Assembly
> Check the individual parts for damage. > Check that the delivery is complete. > If parts are missing or if you have any questions about the assembly, contact your specialist BERNINA dealer immediately. 2.2 Adjusting the height The correct working height corresponds with the distance between the elbow and the floor. - Page 13 > Fix nut with open-end wrench and tighten screw with Allen > Tighten the locking screw with an Allen key (4 mm). key (5 mm). Preparing allignment of the Studio Frame All legs are equipped with height-adjustable feet. These are designed only for horizontal alignment of the quilting frame. Required tools: •...
-
Page 14: Assembling The Base Frame (10-Foot Frame)
Quilting frame assembly 2.3 Assembling the base frame (10-foot frame) Removing tracks Required parts: Required tools: • Allen key with handle, 4 mm > Remove 8 screws (M6 × 6 mm) from both table tops and > Remove the 2 tracks. set aside. -
Page 15: Installing Braces
Quilting frame assembly > Place second tabletop on the support of the center leg. > Place the tabletop on the 2 supports of the left leg. Make sure that there is no space between the tabletops. > Insert 2 screws from below but leave them loose. >... - Page 16 Quilting frame assembly > Position the rear center brace (C). > Position the rear right brace (D). > Insert all 6 screws. > Insert all 5 screws. > Position the front right brace (E). > Position the front center brace (F). >...
-
Page 17: Fitting The Tracks
Quilting frame assembly Fitting the tracks Required parts: Required tools: • Allen key with handle, 4 mm • Allen key, 3 mm • 8 grub screws, M6 × 6 mm • 16 screws, M6 × 6 mm (see page 14) > Insert the coupling piece halfway into the track. >... -
Page 18: Assembling The Base Frame (5-Foot Frame)
Quilting frame assembly > Place the carriage and move it back and forth a few times > Slide the carriage from the left edge to the right edge of from the far left to the far right. the frame, pressing the carriage onto the tracks at the –... -
Page 19: Installing Braces
Quilting frame assembly > Place the tabletop on the 2 supports of the right leg. > Place the tabletop on the 2 supports of the left leg. > Insert 2 screws from below but leave them loose. > Insert 2 screws from below but leave them loose. Installing braces Required parts: Required tools:... -
Page 20: Fitting The Tracks
Quilting frame assembly > Position the rear right brace (C). > Position the front right brace (D). > Insert all 5 screws. > Insert all 4 screws. > Check that all legs are at a 90° angle to the tabletop. If the angles are not correct, align the legs. -
Page 21: Assembling The Rail Support Unit
Quilting frame assembly > Place both tracks onto the table top with the wide edge > Insert 4 screws (M6 × 6 mm) at the front and rear. facing inward and push them outward until they are flush > Check that the rear track is flush with the rear edge of the with the edge of the table. -
Page 22: Connecting Rails (10-Foot Frame Only)
Quilting frame assembly > Position the right rail support. > Move the rail holder so that the screws are centered in the > Tighten all screws. slots. > Tighten the screws. > Fit the rear rail support on the right. >... -
Page 23: Fitting The Top Rail
Quilting frame assembly > Insert the rail coupler (A) into the rail without rachet wheel > Unscrew 2 screws as far as they will go. (B) as far as it will go. > Repeat steps 1 – 4 with all rails. – The 2 left-hand screws are visible through the holes in the rail. -
Page 24: Fitting The Backing Rail
Quilting frame assembly > Tighten the cover with 3 screws. > Insert the cover cap into the end of the rail. 2.8 Fitting the backing rail Required parts: Required tools: • Allen key, 2.5 mm 5-foot frame: • 3 screws, M4 × 20 mm 10-foot frame: >... -
Page 25: Assembling The Machine
Quilting frame assembly > Tighten the cover with 3 screws. > Insert the cover cap into the end of the rail. 2.9 Assembling the machine Attaching stand profiles The machine can easily tip over without stand profiles CAUTION Risk of injury and damage to the machine. >... - Page 26 Quilting frame assembly Fitting the front stand profile Required parts: Required tools: • Slotted screwdriver • Allen key, 5 mm • Screwdriver, Torx 20 > Attach the parts of the damping carrier (G) to the bottom > Screw the threaded bolt (J) with spring washer (D) into of the front stand profile [1].
- Page 27 Quilting frame assembly > Place the blue damping mat (C) on the screw from above > Screw the screw (F) into the thread of the front slot nut so that the recess on the side encloses the threaded bolt only tight enough so that the profile can still moved. (J).
- Page 28 2 screws (C). through the center hole. For BERNINA Q 16 only, for BERNINA Q 20 please see step > Align the stand profile so that the rail unit which is fitted in the slotted hole is on the same side as with the front stand profile (top or bottom).
-
Page 29: Placing The Machine
Quilting frame assembly For BERNINA Q 20 only > Measure and mark 6.5 in (166 mm) from the rear edge of the machine. Move the stand profile so that the edge of the aluminium plate (D) touches the marking > If an arrow is printed on the machine at the marking, move the stand profile so that the edge of the aluminium plate (D) touches the tip of the printed arrow. -
Page 30: Fitting The Idler Rail
Quilting frame assembly > Place the carriage. CAUTION! Risk of injury. The machine is heavy. > Place the machine on the carriage with the help of another person. CAUTION! Risk of injury. The machine can fall down as long as the idler rail is not assembled. >... -
Page 31: Fitting The Take-Up Rail
Quilting frame assembly > Tighten the cover with 3 screws. > Insert the cover cap into the end of the rail. 2.11 Fitting the Take-up rail Required parts: Required tools: • Allen key, 2.5 mm • Allen key, 6 mm • 3 screws, M4 × 20 mm 5-foot frame: 10-foot frame: >... -
Page 32: Attaching The Leaders
Quilting frame assembly > Tighten the cover with 3 screws. > Fasten the handle to the handwheel using the Allen key, 6 mm. > Fasten the handwheel to the take-up rail using the Allen key, 6 mm. > Insert the cover cap into the end of the rail. 2.12 Attaching the leaders The included leaders fit the 10-foot frame. - Page 33 Quilting frame assembly > Measure the length of the backing rail (A). > Measure and mark half the leader length (B)* from the > To mark the rail center, measure half the rail length from center of the backing rail, top rail and take-up rail to the the ratchet wheel and mark.
-
Page 34: Setting Up The Quilting Area
Quilting frame assembly > Attach the backing leader with the printed side inwards > Attach the Top leader with the printed side outwards. (towards the frame). > Remove the protective film from the adhesive tape. > Remove the protective film from the adhesive tape. >... - Page 35 Quilting frame assembly > Loosen 4 screws. > Push the machine forward until it touches the take-up – Rail holder can be moved. rail. > Pull the top rail and the backing rail forward. > Move the machine to the right rail support. >...
- Page 36 Quilting frame assembly Setting up the backing rail height Parts involved: Required tools: • Front roll holders, left and right. • Allen key, 5 mm • Backing rail • Allen key, 6 mm • Open-end wrench, > Loosen 3 screws each on the right and left side. >...
- Page 37 Quilting frame assembly Setting up the height of the idler rail Parts involved: Required tools: • Rear roll holders, left and right. • Allen key, 5 mm • Idler rail • Allen key, 6 mm > Loosen 3 screws each on the right and left side. >...
-
Page 38: Attaching The Bungee Cords
> Guide the 2 bungee cords from the inside to the outside through the cord holder on both sides. > Attach a cord clamp each to the ends of the bungee cords. 2.15 Leveling the Studio Frame Required parts: Required tools: •... - Page 39 Quilting frame assembly > Use the spirit level to check the horizontal alignment of the Prerequisite: quilting frame. • The quilting frame is in the final position for quilting. > If necessary, shorten the lateral leg lengths by screwing in >...
-
Page 40: Attaching The Front Handles
Quilting frame assembly 2.16 Attaching the front handles Attaching the front handle unit Required parts: Required tools: • Screwdriver, Torx 25 > Loosen the locking levers and pull the handles apart. > Plug in the cable at the back of the sewing head. >... - Page 41 Quilting frame assembly > Only tighten the locking ring to a point where the locking > Loosen the locking levers on both handles. lever can still be swung down with force. > Swing the locking lever down vertically. > Adjust both handles to the appropriate angles. >...
-
Page 42: Technical Specifications
Technical specifications Technical specifications 3.1 Dimensions Studio Frame 10-foot frame 5-foot frame Length × Witdth 10.9 × 3.3 ft (3.3 × 1 m) 5.8 × 3.3 ft (1.8 × 1 m) Height 36 – 44 in (0.92 – 1.12 m) 36 – 44 in (0.92 – 1.12 m) Leader width 114 in (2.89 m) 52 in (1.32 m) - Page 44 BERNINA recommends threads from BERNINA International AG | CH-8266 Steckborn Switzerland | www.bernina.com | © Copyright by BERNINA International AG 1058135.10A.04 2021-07 EN...
Need help?
Do you have a question about the Studio Frame and is the answer not in the manual?
Questions and answers