Table of Contents
Advertisement
Available languages
Available languages
Quick Links
Advertisement
Chapters
Table of Contents

Subscribe to Our Youtube Channel
Related Manuals for CLEOPATRA 90133701


Summary of Contents for CLEOPATRA 90133701
- Page 1 Installatie- en gebruikershandleiding Installation and user manual Montage und Bedienungsanleitung Maatwerk dak voor bouwkundige stoomdouches Roof for constructual steamshower cabins (P.41) Dach für Dampf-Einbaukabine (P. 81) artikelnr. 90133701 2012/04 R05...
- Page 2 Cleopatra B.V. Oostzijde 295 1508 EN Zaandam Nederland www.cleopatra.nl Copyright Alle informatie in dit technische document, evenals de tekeningen en technische beschrijvingen beschikbaar gesteld door ons, blijven ons eigendom en mogen niet worden gekopieerd zonder onze toestemming. Wij behouden ons het recht voor om wijzigingen aan te brengen in het belang van verdere ontwikkeling.
-
Page 3: Table Of Contents
Inhoudsopgave Installatiehandleiding Voorwoord ....................5 1 Inleiding ...................... 5 2 Symbolen in de handleiding ..............6 3 Veiligheidsvoorschriften ................7 4 Tips voor het plannen en gebruik van een stoom- / douchecabine..9 5 Technische gegevens ................10 6 Product identificatie ................. 11 7 Leveringsomvang .................. -
Page 4: Installatiehandleiding
Dak voor bouwkundige stoom- / douchecabines Installatiehandleiding... -
Page 5: Voorwoord
Voorwoord In deze handleiding staan de belangrijkste aanwijzingen en stappen voor het installeren van een Cleopatra maatwerkdak voor bouwkundige stoom- / douchecabines. Lees de handleiding aandachtig door om fouten tijdens de montage te voorkomen. Onjuiste installatie kan leiden tot het niet correct functioneren van het product, schade en / of persoonlijke verwondingen. -
Page 6: Symbolen In De Handleiding
2 Symbolen in de handleiding De hieronder beschreven symbolen komen voor in de handleiding en op sommige plaatsen op het product zelf. Het is van groot belang om veiligheidsinstructies op te volgen en voorzichtig te werken, om ongelukken, verwondingen en materiële schade te voorkomen. Let op! Gevaar Informeert het betrokken personeel dat het niet naleven van de veiligheidsvoorschriften, risico geeft op letsel. -
Page 7: Veiligheidsvoorschriften
Kitten Voor de flexibele afdichtingen tussen onderdelen van het maatwerkdak adviseert Cleopatra gebruik te maken van schimmelwerende zuurvrije siliconenkit. Afhankelijk van de omstandigheden kunnen desondanks kleurveranderingen in de kit voorkomen. Indien schoonmaken niet het gewenste resultaat levert, zal de kit vervangen moeten worden. Het vervangen van kit valt niet binnen de garantie. - Page 8 De stoom- / douchecabine mag niet worden gebruikt in openbare ruimtes. • Kinderen mogen niet zonder toezicht worden achtergelaten in de stoom- / douchecabine. Cleopatra kan niet aansprakelijk gesteld worden voor schade ontstaan door: Het niet volgens de handleiding installeren of gebruiken van het product ...
-
Page 9: Tips Voor Het Plannen En Gebruik Van Een Stoom- / Douchecabine
Sommige materialen voelen koud aan en moeten worden verwarmt om comfortabel aan te voelen. Cleopatra adviseert om een serviceluik te maken, zodat de ruimte boven het dak toegankelijk is. Het luik maakt, installatie, onderhoud en reparatie van optionele onderdelen eenvoudiger (zie hoofdstuk... -
Page 10: Technische Gegevens
5 Technische gegevens Materiaal: GRP met gelcoat en XPS materiaal. Afmetingen: gespecificeerd door de klant; max. 1850 x 2550 mm Dikte: 40 mm Ventilatie (optioneel) Diameter: Ø 125 mm Verlichting (optioneel) : Kleurlicht DeLuxe Voltage: 12V AC 50 Hz Vermogen: 40 W Kleurlicht Basic Voltage:... -
Page 11: Product Identificatie
6 Product identificatie De productidentificatiesticker bevind zich boven op het dak. Op de productidentificatiesticker is de volgende informatie te vinden: Naam en adres van de fabrikant Product naam Productiedatum Productieordernummer Aansluitspanning / frequentie Max. totaal opgenomen vermogen ... -
Page 12: Leveringsomvang
90002880 Plug 6x30 90014500 Carrosseriering 5,3x20x1,5 A2 90072480 Zelfborende schroef 4,8x38 A2 90087480 Handleiding 90133701 Afstandhouder 10mm 19205310 Masterbit 1/4" AW groen 52860242 * Het aantal van deze onderdelen in de leveringsomvang is afhankelijk van de afmetingen van het dak. -
Page 13: Productoverzicht En Beschikbare Opties
8 Productoverzicht en beschikbare opties 1 Afdichting 2 Ventilatiaansluiting Ø125 mm (optioneel) 3 Ventilativentiel (optioneel) 4 Voorgeboord verzonken gat 5 Kleurlicht DeLuxe (optioneel) 6 Hoofddouche (optioneel) 7 Luidspeker (optioneel) 8 Witlicht (optioneel) 9 Kleurlicht Basis (optioneel) -
Page 14: Benodigd Gereedschap
9 Benodigd gereedschap 1 Siliconenkit 2 Waterpas 3 Boor 6mm 4 Potlood 5 Rolmaat 6 Schroevendraaier PH2 7 Scherp mes Opmerking Gebruik uitsluitend zuurvrije siliconenkit. -
Page 15: Installatie
10 Installatie Opmerking: voor illustratiedoeleinden zijn sommige delen van de ruimte of het dak niet afgebeeld. 10.1 Montage van de wandprofielen Let op! De 4 wandprofielen zijn gemarkeerd in overeenstemming met de maten A1, A6, B1 en B6 op het bestelformulier. - Page 16 Gebruik de meegeleverde pluggen en schroeven om de profielen te monteren. Let op: De meegeleverde pluggen zijn geschikt voor wanden van beton of volle steen. Gebruik pluggen die geschikt zijn voor het materiaal waarvan de wanden gemaakt zijn, indien de wanden van een ander materiaal gemaakt zijn.
-
Page 17: Installatie Van Het Dak
10.2 Installatie van het dak Als de ruimte boven het dak na installatie bereikbaar is, kunnen elektrische componenten, water en ventilatie na installatie van het dak aangesloten worden. Wanneer de ruimte boven het dak niet toegankelijk is, moeten de aansluitingen gemaakt worden voordat het dak wordt vastgeschroefd. -
Page 18: Ventilatie
wandprofiel zelfborende schroef carrosserie Ø20 Detail van het bevestgingssysteem van het dak. 10.3 Ventilatie Het optionele ventilatieventiel moet worden aangesloten op een ventilatiekanaal met een diameter van Ø125 mm, dat verbonden is met de buitenlucht. Zorg dat gecondenseerd water altijd terugstroomt naar de cabine. -
Page 19: Kleurlicht Basis
10.4 Kleurlicht Basis Het Kleurlicht Basis is verbonden met het lichtnet, zoals te zien in de tekening hieronder. Het aansluitschema voor het Kleurlicht Basis bevindt zich in de deksel van de elektronica box. Let op: De elektronicabox moet toegankelijk zijn voor reparatie en vervanging. - Page 20 1 Elektrabuis, externe diameter 16mm (niet in de leveromvang) 2 Buisconnector 16mm (open zijde boven) 3 Inbouwdeel voor de bediening, geïnstalleerd achter de tegels 4 Bediening voor het Kleurlicht Basis Kort het inbouwdeel af, zodat de voorkant van de Juiste positie tegels gelijk ligt aan de voor de voorkant van het...
-
Page 21: Kleurlicht Deluxe
10.5 Kleurlicht DeLuxe Het Kleurlicht DeLuxe is aangesloten op de K4 bediening van de ProSteam stoomgenerator of op de DL40 stoomgenerator, zoals aangegeven in het onderstaande schema. -
Page 22: Witlicht
10.6 Witlicht Het Witlicht is aangesloten op de K4 bediening van de ProSteam stoomgenerator of op de DL40 stoomgenerator, zoals aangegeven in het onderstaande schema. Optioneel kan het Witlicht worden aangesloten op een 12 V AC 50 Hz voeding met een schakelaar om het licht te bedienen. De hiervoor benodigde onderdelen zitten niet in de leveringsomvang. -
Page 23: Schoonmaak Instructies
11 Schoonmaak instructies Maak het dak regelmatig schoon. De schoonmaakfrequentie is afhankelijk van het gebruik van de stoom- / douchecabine. Gebruik uitsluitend zachte niet-schuurende zeep zonder alcohol. Gebruik nooit een schoonmaakmiddel met chloor. Chloor kan aluminium en chromen onderdelen in het dak en de cabine beschadigen. Oppervlakte onderhoudsinstructies Het maatwerkdak is eenvoudig schoon te maken en te onderhouden. -
Page 24: Reserveonderdelen
12 Reserveonderdelen Pos. Art. nr. Omschrijving Aantal 19547107 Ventilatie ventiel Ø125 mm 97102460 Luidspreker 97652000 Kleurlicht DeLuxe 25946000 Halogeen lamp 97632000 Hoofddouche Ø180 mm 97618000 Hoofddouche Ø240 mm 97617320 Halogeen armatuur 25946000 Halogeen lamp 95469000 Kleurlicht Basis rozet 95472000 Led lamp... -
Page 25: Gebruikershandleiding
Dak voor bouwkundige stoom- / douchecabines Gebruikershandleiding... -
Page 26: Veiligheidsvoorschriften
13 Veiligheidsvoorschriften Zonder toezicht en zonder instructies is het gebruik van de cabine voor de volgende personen verboden: - kinderen - volwassenen met mentale en/of fysieke beperkingen - personen die niet zijn geïnstrueerd omtrent het juiste gebruik van de cabine - personen onder invloed van alcohol of drugs Gebruik de cabine uitsluitend vrij van make-up . -
Page 27: Algemeen Gebruik
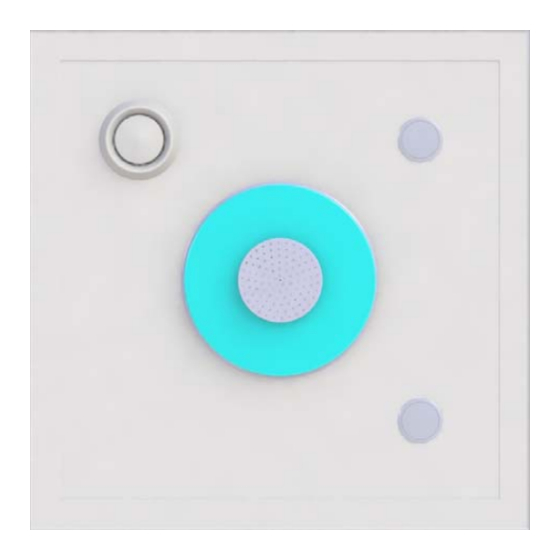
14 Algemeen gebruik Tips voor gebruik Personen met een mentale en/of fysieke beperking mogen de cabine uitsluitend onder toezicht te gebruiken. Neem contact op met uw arts, indien u gezondheidsklachten heeft. Voorbeelden van onjuist gebruik: • De stoom/douche cabine mag niet worden gebruikt in openbare ruimtes. - Page 28 U kunt een kleur vastzetten door te wachten op de gewenste kleur en vervolgens op de toets te drukken. De fixatie wordt aangegeven door het rode én groene indicatielampje in de toets. Door nogmaals op de toets te drukken begint de kleur weer te veranderen.
-
Page 29: Kleurlicht Deluxe
15.2 Kleurlicht DeLuxe Het kleurlicht DeLuxe kan uitsluitend worden gebruikt in combinatie met de K4-Bediening. De K4-bediening is onderdeel van de Pro Steam en de DL40 stoomgeneratoren. Het kleurlicht DeLuxe kan uitsluitend worden geïnstalleerd in combinatie met een 180 mm of 240 mm hoofddouche. Het kleurlicht Deluxe ondersteunt zeven verschillende kleuren en 5 verschillende kleur veranderende programma's. - Page 30 Kleurkeuze kleurlicht Er staan 13 kleuren/kleurcombinaties tot uw beschikking: C00 = kleurinstelling door de gebruiker gedefinieerd C01 = rood C02 = oranje C03 = geel C04 = groen C05 = blauw C06 = lila C07 = paars C08 = warme kleurtonen C09 = koude kleurtonen C10 = groene kleurtonen C11 = complete kleurspectrum, langzame...
-
Page 31: Witlicht
De wit lichtoptie bestaat uit 2 stuks 10W halogeen lampen. Ze kunnen worden bediend met de K4-bediening, of met een externe schakelaar (niet geleverd door Cleopatra). De K4-bediening is onderdeel van de Pro Steam en de DL40 stoomgeneratoren. A = licht toets (licht aan / uit) Wit licht aan / uit. -
Page 32: Schoonmaak Instructies
16 Schoonmaak instructies Maak het dak regelmatig schoon. De schoonmaakfrequentie is afhankelijk van het gebruik van de stoom- / douchecabine. Gebruik uitsluitend zachte niet-schuurende zeep zonder alcohol. Gebruik nooit een schoonmaakmiddel met chloor. Chloor kan aluminium en chromen onderdelen in het dak en de cabine beschadigen. Oppervlakte onderhoudsinstructies Glas en aluminium producten zijn eenvoudig schoon te maken en te onderhouden. -
Page 33: Lampen Verwisselen
17. Lampen verwisselen 17.1 Kleurlicht Basis; het vervangen van de LED lamp Artikelnr.: 95472000 Serviceset lamp Bad verlichtingsset Benodigd gereedschap: 1. Lamp uitwisselsgereedschap (in de leveringsomvang) Voor aansluiting in de elektronicabox, zie het schema in de deksel. Montage in omgekeerde volgorde. -
Page 34: Kleurlicht Deluxe; Het Vervangen Van De Halogeen Lamp
17.2. Kleurlicht Deluxe; het vervangen van de halogeen lamp Artikelnr. 25946000: Lamp 10W / 12V Benodigd gereedschap: 1. schroevendraaier PH2 2. Inbussleutel SW3 Verwijder de hoofddouche. Verwijder de schroeven PH2 (3 st). Verwijder de inbusschroeven SW3 (3 st). Let op: het verwijderen van de inbusschroeven zorgt dat de verlichtingsunit los komt van het dak. - Page 35 Verwijder de verlichtingsunit uit het dak. Let op: De verlichtingsunit weegt ca. 9kg. Maak alle connectoren (3x) op de verlichtingsunit los. Ontkoppel alle bedrading. Laat de lamp niet aan de bedrading hangen, hierdoor kan schade aan de bedrading ontstaan. Trek de druksluitingen aan de bovenzijde van de verlichtingsunit omhoog om toegang te krijgen tot de lampen.
- Page 36 Verwijder de defecte halogeenlamp uit de fitting. Druk de nieuwe halogeenlamp in de fitting. Let op: raak het glas van de halogeen- lamp niet met de blote handen aan. Het aanraken van de halogeenlamp met de blote handen, verkort de levensduur.
-
Page 37: Witlicht; Het Vervangen Van De Halogeenlamp
17.3. Witlicht; het vervangen van de halogeenlamp Artikelnr. 25946000: Lamp 10W / 12V Benodigd gereedschap: 1. schroevendraaier PH1 Trek de verlichtingsunit uit het dak. Maak de connector aan de verlichtingsunit los. Schroef de afdekkap aan de achterzijde van de verlichtingsunit los. Verwijder de afdekkap. - Page 38 Trek de fitting met de halogeenlamp uit de verlichtingsunit. Verwissel de halogeenlamp. Let op: raak het glas van de halogeen- lamp niet met de blote handen aan. Het aanraken van de halogeenlamp met de blote handen, verkort de levensduur. Montage in omgekeerde volgorde. defect - nieuw...
-
Page 39: Verwijdering Van Oude Elektrische En Elektronische Apparaten
18 Verwijdering van oude elektrische en elektronische apparaten (Van toepassing binnen de Europese Unie en andere Europese landen met een gescheiden inzamel systeem.) Dit symbool op het product of de verpakking geeft aan dat dit product niet mag worden behandeld als huishoudelijk afval. - Page 40 I t e m n o . 9 0 1 3 3 7 0 1 . P r i n t e d i n T h e N e t h e r l a n d s . 0 4 - 2 0 1 2 Oostzijde 295 Cleopatra B.V. 1508 EN Zaandam Nederland Tel: +31 75-647 82 00 info@cleopatra.nl...
- Page 41 Roof for constructual steam / shower cabins Installation and user manual item no. 90133701 2012/04 R05...
- Page 42 Cleopatra B.V. Oostzijde 295 1508 EN Zaandam The Netherlands www.cleopatra.nl Copyright All information contained in this technical document, as well as the drawings and technical descriptions made available by us, remain our property and may not be copied without our permission.
- Page 43 Table of content Installation manual Forword ......................5 1 Introduction ....................5 2 Symbols used in the instructions ..............6 3 Safety precautions ..................7 4 Tips for planning a steam cabin..............9 5 Technical data ..................10 6 Product identification ................11 7 Scope of delivery ..................
-
Page 44: Installation Manual
Roof for constructual steam / shower cabins Installation manual... -
Page 45: Forword
Forword This installation manual contains the most important steps and directions for mounting a Cleopatra made to measure roof for constructual steam / shower cabins. Read this manual attentively to prevent mistakes while mounting the roof. Incorrect installation may lead to faults in the functioning of the product, damage and / or personal injuries. -
Page 46: Symbols Used In The Instructions
2 Symbols used in the instructions The symbols described below appear in the installation instructions and in some locations on the product itself. It is absolutely essential to follow safety instructions and to work with care in order to prevent accidents, injury and material damage. -
Page 47: Safety Precautions
3 Safety precautions Before installing the product check whether the walls of the room can support the weight of the roof and whether all technological equipment is available. Set the product to the zero energy state prior to any cleaning and repair work, i.e. - Page 48 The steam / shower cabin may not be used in public areas. Children must not be left unattended in the steam / shower cabin. Cleopatra accepts no liability for damage caused by: Non-observance of the manual ...
-
Page 49: Tips For Planning A Steam Cabin
Cleopatra advises to install a service hatch to access the space above the roof. The hatch makes the installation, maintenance and service of the optional components in the roof easier (see chapters... -
Page 50: Technical Data
5 Technical data Roof Material: GRP with gelcoat and XPS materials. Measurements: specified by the costumer; max. 1850 x 2550 mm Thickness: 40 mm Ventilation (optional) Diameter: Ø 125 mm Light (optional) : Colour Light DeLuxe Voltage: 12V AC 50 Hz Power: 40 W Colour Light Basic... -
Page 51: Product Identification
6 Product identification The product identification label can be found on top of the roof. The following information is shown on the identification label. Manufacturer’s name and address Product name Production date Production order no. Connected voltage / frequency ... -
Page 52: Scope Of Delivery
90014500 Large plain washer 5,3x20x1,5 A2 90072480 Selfdrilling screw 4,8x38 A2 90087480 Manual 90133701 Spacer 10mm 19205310 Masterbit 1/4" AW groen 52860242 * The number of these items in the scope of delivery depend on the size of the roof. -
Page 53: Product Overview And Available Options
8 Product overview and available options 1 Seal 2 Ventilation connection Ø125 mm (Optional) 3 Ventilation valve (optional) 4 Predrilled countersunk hole 5 Colour Light DeLuxe (optional) 6 Overhead shower (optional) 7 Loudspeaker (optional) 8 White light (optional) 9 Colour Light Basic (optional) -
Page 54: Required Tools
9 Required tools 1 Silicon 2 Spirit level 3 Drill 6mm 4 Pencil 5 Tape measure 6 Screwdriver PH2 7 Sharp knife COMMENT Use acid free silicone only... -
Page 55: Installation
10 Installation Note: for illustrative purposes, some parts of the room or roof are not shown in the illustrations. 10.1 Mounting the support brackets Attention: the 4 support brackets are labelled in correspondence with the dimensions A1, A6, B1 and B6 on the order form. - Page 56 Use the screws and plugs supplied to mount the support brackets to the wall. Attention: The supplied plugs are suitable for walls made of concrete or solid stone. If the walls are made of a different material, use appropriate plugs. These plugs are not in the scope of delivery.
-
Page 57: Installing The Roof
10.2 Installing the roof If the space above the roof can be reached after installing the roof, electrical, water and ventilation connections can be made after the roof has been installed. If the space above the roof can’t be reached, the connections will have to be made before installing the roof. -
Page 58: Ventilation
support bracket selfdrilling screw roof washer Ø20 mm Detail of the mounting system of the roof 10.3 Ventilation The optional ventilation valve needs to be attached to a ø125 mm ventilation duct, leading to the open air. Make sure that condensed water flows back towards the cabin. -
Page 59: Colour Light Basic
10.4 Colour Light Basic The Colour Light Basic is connected to the mains power supply as shown in the drawing below. The wiring diagram for the Colour Light Basic is located in the cover of the control box. Attention: The control box of the Colour Light Basic needs to be accessible for repairs and replacement. - Page 60 1 Wiring conduit, external diameter 16mm (not in scope of delivery) 2 Pipe connector 16mm (open side up) 3 Wall insert for the control unit, installed behind the tiles 4 Control unit for Color Light Basic Shorten the front of the wall insert, so it is in one plain Right position for with the tiles.
-
Page 61: Colour Light Deluxe
10.5 Colour Light DeLuxe The Colour Light DeLuxe is connected to the K4 control unit and the transformer of the ProSteam steam generator or the DL40 steam generator as shown in the diagram below. -
Page 62: White Light
10.6 White light The white light is connected to the K4 control unit of the ProSteam steam generator or the DL40 steam generator as shown in the drawing below. Optionally the White Light can be connected to a 12V AC 50Hz power supply with a switch to operate the White Light. -
Page 63: Cleaning Instructions
11 Cleaning instructions Clean the roof on a regular basis. The frequency of cleaning depends on how often the steam / shower cabin is used. Only use soft, non-abrasive soap or a liquid cleaner without alcohol. Never use cleaner containing chlorine. Chlorine can damage the aluminium and chrome parts in the roof and cabin. -
Page 64: Spare Parts
12 Spare parts Pos. Part no. Description Scope 19547107 Ventilation valve Ø125 mm 97102460 Loudspeaker 97652000 Colour Light DeLuxe 25946000 Halogen lamp 97632000 Overhead shower Ø180 mm 97618000 Overhead shower Ø240 mm 97617320 Halogen light 25946000 Halogen lamp 95469000 Colour Light Basic rosace 95472000 Led lamp... -
Page 65: User Manual
Roof for constructual steam / shower cabins User manual... -
Page 66: Safety Precautions
13 Safety precautions Without supervision and without instructions, the use of the steam / shower cabin is prohibited for the following persons: - Children - Adults with physical, mental and/or sensory restrictions. - Persons that not have been instructed, for which purposes the steam cabin should not be used. -
Page 67: General Use
14 General use Tip for using People who are restricted in their action should only use the steam / shower cabin with special diligence Please contact your doctor if you have health concerns. Only use fragrances registered with the Food Standards Agency. Examples for non-using ... - Page 68 pressing the button to fix this color. The fixation is indicated by the red and green indication lights inside the button. Pressing the button again once more starts the color change. The color change is indicated by the red indication light inside the button. Switching off the light.
-
Page 69: Color Light Deluxe
15.2 Color Light DeLuxe The Color Light DeLuxe can only be used in combination with the K4 control unit. The K4 control unit is part of the Pro Steam and DL40 steam generators. The Color Light DeLuxe can only be installed in combination with a 180 mm or 240 mm overhead shower. - Page 70 Colored light color selection Eight colors as well as five color programs are available: C00 = user-defined setting C01 = red C02 = orange C03 = yellow C04 = green C05 = blue C06 = lilac C07 = violet C08 = warm color shades C09 = cold color shades C10 = green color shades C11 = complete color spectrum, slow color changes...
-
Page 71: White Light
The white light option consists of 2 x 10W halogen lights. They can be controlled with the K4 control unit, or with an external switch (not supplied by Cleopatra) The K4 control unit is part of the Pro Steam and DL40 steam generators. -
Page 72: Cleaning Instructions
16 Cleaning instructions Clean the cabin on a regular basis. The frequency of cleaning depends on how often the steam / shower cabin is used. Only use soft, non-abrasive soap or a liquid cleaner without alcohol. Never use cleaner containing chlorine. Chlorine can damage the aluminium and chrome parts in the steam / shower cabin. -
Page 73: Exchanging The Lamps
17. Exchanging the lamps 17.1 Colour Light Basic; exchanging the LED lamp part no.: 95472000 Service set lamp for the light set required tool 1. lamp exchanging tool (in scope of delivery) For connection to the electronics box, see the diagram in the cover. Assembly in reverse order. -
Page 74: Colour Light Deluxe; Exchanging The Halogen Lamp
17.2. Colour Light Deluxe; exchanging the halogen lamp Part no. 25946000: Lamp 10W / 12V Required tools: 1. screw driver PH2 2. Allen key SW3 Remove the overhead shower. Remove the screws PH2 (3 pcs). Remove the hex socket screws SW3 (3 pcs). - Page 75 Carefully remove the Color Light DeLuxe unit from the roof. Attention: The unit weights approx. 9kg. Disconnect all the connectors (3x) from the light unit. Disconnect all the connected wires. Do not let the light unit hang on the electrical wires. Doing so may damage the wiring.
- Page 76 Remove the defective halogen lamp from the socket. Push the new halogen lamp into the socket. Attention: don’t touch the glass of the halogen lamp with your hands. Touching the glass of the halogen lamp reduces it’s life. Assembly in reverse order.
-
Page 77: White Light; Exchanging The Halogen Lamp
17.3. White Light; exchanging the halogen lamp Part no. 25946000: Lamp 10W / 12V Required tools: 1. screw driver PH1 Pull the light unit out of the roof. Remove the connector from the light unit. Unscrew the cap on top of the light unit. - Page 78 Remove the fitting and halogen lamp from the housing. Exchange the halogen lamp. Attention: don’t touch the glass of the halogen lamp with your hands. Touching the glass of the halogen lamp reduces it’s life. Assembly in reverse order. defective - new...
-
Page 79: Disposal Of Old Electrical And Electronic Equipment
18 Disposal of old electrical and electronic equipment (Applicable in the European Union and other European countries with separate collection systems.) This symbol on the product or on its packaging indicates that this product shall not be treated as household waste. Instead it shall be handed over to the applicable collection point for the recycling of electrical and electronic equipment. - Page 80 I t e m n o . 9 0 1 3 3 7 0 1 . P r i n t e d i n T h e N e t h e r l a n d s . 0 4 - 2 0 1 2 Oostzijde 295 Cleopatra B.V. 1508 EN Zaandam Nederland Tel: +31 75-647 82 00 info@cleopatra.nl...
- Page 81 Dach für Dampf-Einbaukabine Montage- und Bedienungsanleitung Art. 90133701 R04 EN 2010/09...
- Page 97 Cleopatra - Oostzijde 295 - NL - 1508 EN ZAANDAM T el.: +31 / (0) / 756478200 E-mail: info@cleopatra.nl - Internet: www.cleopatra.nl Art. 90133701 R04 NL 2010/09...
Need help?
Do you have a question about the 90133701 and is the answer not in the manual?
Questions and answers