
Related Manuals for GYS PROGYS CEL 250 TRI


Summary of Contents for GYS PROGYS CEL 250 TRI
- Page 1 CEL 250 TRI FR - 2 / 3-8 / 39-44 EN - 2 / 9-14 / 39-44 DE - 2 / 15-20 / 39-44 ES - 2 / 21-26 / 39-44 NL - 2 / 27- 32 / 39-44 IT - 2 / 33-38 / 39-44 73502-V5-23/06/2016...
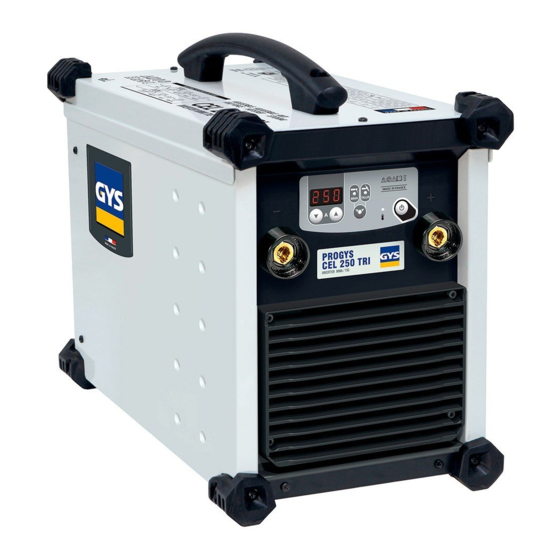
- Page 2 FACE AVANT / FRONTAL SIDE/ FRONTSEITE/ PARTE DELANTERA / VOORZIJDE / PARTE FRONTALE CEL 250 A TRI Afficheur Voyant mode Voyant mode Sélecteur Bouton sélection/ Voyant de protection Bouton de mise en « soudage à « soudage à valeur + validation thermique marche / veille...
-
Page 3: Alimentation-Mise En Marche
DESCRIPTION Merci de votre choix ! Afin de tirer le maximum de satisfaction de votre poste, veuillez lire avec attention ce qui suit : Ces postes de soudure Inverter, portables, ventilés, sont conçus pour le soudage à l’électrode enrobée (MMA) et à électrode réfractaire (TIG Lift) en courant continu (DC). - Page 4 Pour régler le Hot Start et Arc Force, suivre les étapes suivantes : Presser le sélecteur Régler le pourcentage souhaité (afficheur ) grâce aux touches Valider la valeur souhaitée en pressant sur le sélecteur ...
-
Page 5: Commande A Distance
Combinaisons conseillées / affutage électrode Courant (A) ∅ Electrode (mm) ∅ Buse Débit = ∅ fil (métal d’apport) (mm) (Argon l/mn) 0,5-5 10-130 130-190 Pour un fonctionnement optimal vous devez utiliser une électrode affûtée de la manière suivante : L = 2,5 x d. COMMANDE A DISTANCE La commande à... -
Page 6: Entretien
Note : les essais d’échauffement ont été effectués à température ambiante et le facteur de marche à 40 °C a été déterminé par simulation. ENTRETIEN • L'entretien ne doit être effectué que par une personne qualifiée. • Couper l'alimentation en débranchant la prise, et attendre l’arrêt du ventilateur avant de travailler sur l'appareil. - Page 7 RECOMMANDATION POUR RÉDUIRE LES ÉMISSIONS ÉLECTRO-MAGNÉTIQUES Généralité L’utilisateur est responsable de l’installation et de l’utilisation de l’appareil suivant les instructions du fabricant. Si des perturbations électromagnétiques sont détectées, il est de la responsabilité de l’utilisateur de résoudre la situation suivant les recommandations données dans la notice ou avec l’assistance technique du fabricant. Evaluation de la zone de soudage Avant d’installer l’appareil, l’utilisateur devra évaluer les problèmes électro-magnétiques potentiels qui pourraient se présenter dans la zone où...
- Page 8 ANOMALIES, CAUSES, REMÈDES Anomalies Causes Remèdes L’appareil ne délivre pas de courant et Attendre la fin de la période de La protection thermique du poste s’est le voyant jaune de défaut thermique refroidissement, environ 2 min. Le voyant enclenchée. est allumé . ...
- Page 9 Thank you for choosing our product! In order to take the most of your welder, please read the following instructions carefully: These Inverter’s machines are portable, air cooled and made to weld electrode and TIG Lift in direct current (DC). It allows welding with rutiles, basic, stainless steel, cast iron electrodes and Cellulosic.
- Page 10 To adjust the Hot Start and Arc Force, go through the following steps: Press the selector . Set the required percentage ( display ) using keys Valid the required figure by pressing the selector button ...
-
Page 11: Remote Control
Recommended combinations / Electrode grinding Current (A) Ø Electrode (mm) Ø Nozzle (mm) Flow rate (Argon L/mn) = Ø wire (filler metal) 0,5-5 10-130 130-190 To optimize the working, you have to use an electrode grinded as below : L = 3 x d for a low current L = d for a strong current REMOTE CONTROL The remote control operates in TIG and MMA mode. -
Page 12: Maintenance
Nota: the overheating tests have been made at room temperature and the duty cycles at 40°C have been determined by simulation. MAINTENANCE • Refer all servicing to qualified personnel. • Disconnect the generator and wait until the ventilator stopped before working on the unit. Inside the device, voltages and current are dangerous. -
Page 13: Troubleshooting
RECOMMENDATION TO REDUCE ELECTRO-MAGNETIC EMISSIONS General The user is responsible for installing and using the arc welding equipment according to the manufacturer’s instructions. If electromagnetic disturbances are detected, then it shall be the responsibility of the user of the arc welding equipment to resolve the situation with the technical assistance of the manufacturer. - Page 14 Default coming from the Use a tungsten electrode with the Instable arc tungsten electrode adequate size Use a well prepared tungsten electrode Too important gas flow Reduce gas flow rate rate The tungsten electrode gets oxidised and Welding zone Protect welding zone against air tern at the end of welding.
- Page 15 Wir freuen uns, dass Sie sich für ein Markengerät der Firma JBDC entschieden haben und danken Ihnen für das entgegengebrachte Vertrauen. Bitte lesen Sie sorgfältig vor dem Erstgebrauch diese Betriebsanleitung. Diese tragbaren Inverter Schweissgeräte sind für Schweißen mit umhüllten Stabelektroden und WIG Lift mit Gleichstrom konzipiert.
- Page 16 Um den Hot Start und den Arc Force zu justieren befolgen Sie die Schrittfolge : Drücken Sie die Taste Stellen Sie den gewünschten Prozentsatz ( Anzeige ) mit Taste Bestätigen Sie den gewünschten Wert mit derTaste ...
- Page 17 Empfohlene Schweißeinstellungen/ Electrode schleifen Strom (A) Ø Electrode (mm) Ø Düse (mm) Gasströmung = Ø Zusatzdraht (Argon L/mn) 0,5-5 10-130 130-190 Um einen optimalen Schweißverlauf zu gewährleisten, nutzen Sie nur Elektroden, welche nach folgendem Vorbild geschliffen wurden: L = 3 x d für niedrigen Schweißstrom L = d für hohen Schweißstrom ANSCHLUSS FÜR FERNSTEUERUNG Die Fernregelung funktioniert im WIG- und im E-Hand-Modus.
-
Page 18: Wartung
WARTUNG • Wartungsarbeiten dürfen nur von qualifizierten Personen durchgeführt werden. • Achten Sie bei allen Wartungsarbeiten darauf, daß das Gerät spannungslos ist. Ziehen Sie den Netzstecker und warten Sie das Auslaufen des Lüfters ab. • Achtung: die Spannungen im Geräteinneren sind sehr hoch und können lebensgefährlich sein. •... -
Page 19: Hinweise Zur Reduzierung Von Elektromagnetischen Störungen
HINWEISE ZUR REDUZIERUNG VON ELEKTROMAGNETISCHEN STÖRUNGEN Allgemein Es liegt in der Verantwortung des Anwenders dafür Sorge zu tragen, dass die Schweißausrüstung nach den Vorgaben des Herstellers angeschlossen und verwendet wird. Liegen elektromagnetische Störungen vor, ist der Anwender dafür verantwortlich dieses Problem mithilfe des technischen Supports des Herstellers zu beheben. Prüfung des Schweißbereiches Prüfen Sie vor Anschluss der Schweißausrüstung die Arbeitsumgebung auf potentielle elektromagnetische Probleme. -
Page 20: Fehlersuche
FEHLERSUCHE Fehler Ursache Lösungen Das Gerät liefert keinen Der Übertemperaturschutz wurde Warten Sie ca. 2min bis der Kühlvorgang Strom und die gelbe ausgelöst. abgeschlossen ist. Die Anzeige Übertemperaturanzeige erlischt. leuchtet. Die Anzeige ist an, das Masseklemme oder Elektrodenhalter- Überprüfen Sie die Anschlüsse. - Page 21 DESCRIPCION ¡Gracias por su elección! Para sacar el mayor provecho de su equipo, lea atentamente lo siguiente: Estos equipos de soldadura Inverter, portátiles y ventilados están diseñados para la soldadura con electrodos revestidos (MMA) y con electrodos refractarios (TIG Lift) en corriente continua (DC). En MMA, pueden soldar todo tipo de electrodos: rutilo, acero inoxidable, hierro fundido y básicos.
- Page 22 Para ajustar el Hot Start y el Arc Force, siga las etapas siguientes: Presione la tecla de selección Ajuste el porcentaje deseado (indicador) mediante los botones. Confirme el valor deseado presionando la tecla de selección ...
-
Page 23: Control A Distancia
Combinaciones aconsejadas / afilado del electrodo Corriente (A) ∅ Electrodo (mm) Caudal ∅ Boquilla = ∅ hilo (metal de (Argón l/mn) aporte) (mm) 0,5-5 10-130 130-190 Para un funcionamiento óptimo, debe utilizar un electrodo afilado de la siguiente manera: L = 2,5 x d. CONTROL A DISTANCIA El control a distancia funciona en modo TIG y MMA. -
Page 24: Mantenimiento
100% 160A 100% 180A Nota: los ensayos de calentamiento se han efectuado a temperatura ambiente y los del ciclo de trabajo a 40º mediante simulación. MANTENIMIENTO • El mantenimiento sólo debe realizarlo un personal cualificado. • Corte el suministro eléctrico, luego desconecte el enchufe y espere que se pare el ventilador antes de trabajar sobre el aparato. - Page 25 RECOMENDACIONES PARA REDUCIR LAS EMISIONES ELECTROMAGNÉTICAS. Indicaciones generales El usuario se responsabiliza de instalar y usar el aparato siguiendo las instrucciones del fabricante. Si se detectan alteraciones electromagnéticas, el usuario debe resolver la situación siguiendo las recomendaciones del manual de usuario o consultando el servicio técnico del fabricante.
- Page 26 ANOMALIAS, CAUSAS Y SOLUCIONES Anomalías Causas Soluciones El aparato no libera corriente y el Espere a que acabe el tiempo de La protección térmica del equipo se ha indicador amarillo de fallo térmico se enfriamiento, alrededor de 2 minutos. El activado.
- Page 27 BESCHRIJVING Hartelijk dank u voor uw keuze! Leest u, voor een optimaal gebruik van het apparaat, aandachtig het hier opvolgende door : Dit lasapparaat is een draagbare, geventileerde Inverter voor het lassen met beklede elektrode (MMA) en met niet afsmeltende elektrode (TIG Lift) in gelijkstroom (DC). In MMA kan met het apparaat ieder type elektrode gelast worden : rutiel, rvs, gietijzer, basische en cellulose.
- Page 28 Om Hot Start en Arc Force in te stellen, ga als volgt te werk : Druk op de selectieknop Stel het gewenste percentage in (display ) met behulp van de knoppen Druk op de selectie knop om de gewenste waarde in te stellen ...
- Page 29 Geadviseerde combinaties / elektrode slijpen Lasstroom ∅ Elektrode (mm) ∅ Buis Gasstroom = ∅draad (mm) (Argon l/mn) (lastoevoegmateriaal) 0,5-5 10-130 130-190 Voor optimaal gebruik slijp de elektroden als volgt: L = 2,5 x d. AFSTANDSBEDIENING De afstandsbediening werkt in TIG en MMA modus. Connectiviteit De CEL 250A TRI is uitgerust met een stopcontact voor de afstandsbediening.
- Page 30 100% 160A 100% 180A NB: de thermische tests zijn uitgevoerd bij normale temperatuur en de vermogensfactor bij 40°C is door simulatie bepaald. ONDERHOUD • Het onderhoud kan alleen door gekwalificeerd personeel gedaan worden. • Haal de stekker eruit om de elektriciteitsvoorziening te onderbreken en wacht tot de ventilator stilstaat. De spanning en de stroomsterkte binnen het toestel zijn hoog en gevaarlijk.
- Page 31 AANBEVELINGEN VOOR REDUCEREN VAN DE ELEKTROMAGNETISCHE EMISSIES Algemeen De gebruiker is verantwoordelijk voor het installeren en gebruiken van het toestel volgens de instructies van de fabrikant. Als elektromagnetische storingen worden geconstateerd, is het de verantwoordelijkheid van de gebruiker van het om het probleem op te lossen, volgens de aanwijzingen in de handleiding, of met hulp van de technische dienst van de fabrikant.
- Page 32 AFWIJKINGEN, OORZAKEN, OPLOSSINGEN Afwijkingen Oorzaken Oplossingen Lasapparaat levert geen stroom en Wacht ongeveer 2 min tot het lasapparaat geel lampje van de thermische defect De thermische beveiliging slaat aan. afgekoeld is. Lampje gaat uit. brandt. De kabel van de aardingsklem of Display staat aan maar het elektrodehouder is niet goed Controleer de aansluitingen.
- Page 33 DESCRIZIONE Grazie per averci scelto! Per trarre la massima soddisfazione da questo dispositivo, si consiglia di leggere attentamente quanto segue: Questi dispositivi di saldatura inverter, portatili, ventilati, sono concepiti per la saldatura ad elettrodo rivestito (MMA) e ad elettrodo refrattario (TIG Lift) in corrente continua (DC). In MMA, saldano tutti i tipi di elettrodo: rutile, inox, ghisa, basico e cellulosico.
- Page 34 Per regolare l'Hot Start e l'Arc Force, seguire la procedura sottostante: Premere il tasto di scelta Regolare la percentuale desiderata (schermo ) usando i tasti Confermare il valore desiderato premendo sul tasto selettore Regolare la percentuale desiderata (schermo ) usando i tasti . ...
-
Page 35: Comando A Distanza
Combinazioni consigliate / affilatura elettrodo Corrente (A) ∅ Elettrodo (mm) Flusso ∅ Condotto = ∅ filo (metallo di (Argon l/mn) (mm) apporto) 0,5-5 10-130 130-190 Per un funzionamento ottimale dovete utilizzare un elettrodo affilato come segue: L = 2,5 x d. COMANDO A DISTANZA Il comando a distanza funziona in modalità... -
Page 36: Manutenzione
100% 160A 100% 180A Nota: le prove di riscaldamento sono state effettuate a temperatura ambiente e il ciclo di lavoro di 40° è stato determinato per simulazione. MANUTENZIONE • La manutenzione deve essere effettuata da una persona qualificata. • Interrompere l'alimentazione scollegando la presa, e aspettare l'arresto del ventilatore prima di lavorare sul dispositivo. - Page 37 CONSIGLI PER RIDURRE LE EMISSIONI ELETTROMAGNETICHE Generalità L'utente è responsabile dell'installazione e dell'uso del dispositivo seguendo le istruzioni del fabbricante. Se sono riscontrate perturbazioni elettromagnetiche, è responsabilità dell'utente risolvere la situazione seguendo i consigli descritti sul manuale d'istruzione comprese nel manuale o con l'assistenza tecnica del fabbricante. Valutazione della zona di saldatura Prima di usare il dispositivo, l'utente dovrà...
-
Page 38: Anomalie, Cause, Rimedi
ANOMALIE, CAUSE, RIMEDI Anomalie Cause Rimedi Il dispositivo non eroga corrente e la Aspettare la fine del periodo di La protezione termica del dispositivo si spia gialla di guasto termico è accesa raffreddamento, circa 2 minuti. La spia è attivata. si spegne. - Page 39 DECLARATION DE CONFORMITE : JBDC atteste que les postes de soudure sont fabriqués conformément aux exigences des directives Basse tension 2006/95/CE du 12/12/2006, et aux directives CEM 2004/108/CE du 15/12/2004. Cette conformité est établie par le respect des normes harmonisées EN 60974-1 de 2005, EN 60974-10 de 2007 et EN 50445 de 2008.
- Page 40 SCHÉMA ÉLECTRIQUE / CIRCUIT DIAGRAM / SCHALTPLAN/ ESQUEMA ELÉCTRICO / ELEKTRISCHE SCHEMA / SCHEMA ELETTRICO PIÈCES DE RECHANGE/ SPARE PARTS / ERSATZTEILE/ PIEZAS DE RECAMBIO / RESERVE ONDERDELEN / PEZZI DI RICAMBIO N° CEL 250A TRI Douilles / Connectors / 51468 Schweißbuchsen / Conectores / Fitting / Boccole...
- Page 41 ICÔNES/ SYMBOLS/ ZEICHENERKLÄRUNG / ICONOS / PICTOGRAMMEN / ICONE Ampères Amps Ampere / Amperios 60Hz Einphasiege / Netzspannungsversorgung 50 oder 60 Hz / Volt Volt Volt / Voltio Alimentación eléctrica monofásica 50 o 60Hz / Enkel fase elektrische voeding 50Hz of 60Hz. Hertz Hertz Hertz / Hercio...
- Page 42 between each electrode. Anzahl der Anschluss an ein privates Niederspannungs- Standard-Elektroden, die in 1 Stunde bei 20°C Versorgungssystem. Einschränkungen beim geschweißt werden können mit einer Pause Anschluss an ein öffentliches von 20 s zwischen jeder Elektrode / Número Niederspannungs- Versorgungssystem: Für de electrodos que se pueden soldar en una weitere Informationen s.
- Page 43 est constitué par la prise secteur en Mise en veille/mise en marche coordination avec l'installation électrique standby/On Schalter Bereit/ Ein / standby/ domestique. L'utilisateur doit s'assurer de puesta en marcha / Aan/uit knop l'accessibilité de la prise. . The mains Attention ! Lire le manuel d’instruction disconnection mean is the mains plug in avant utilisation...
Need help?
Do you have a question about the PROGYS CEL 250 TRI and is the answer not in the manual?
Questions and answers