
Related Manuals for Wallenstein MX Series


Summary of Contents for Wallenstein MX Series
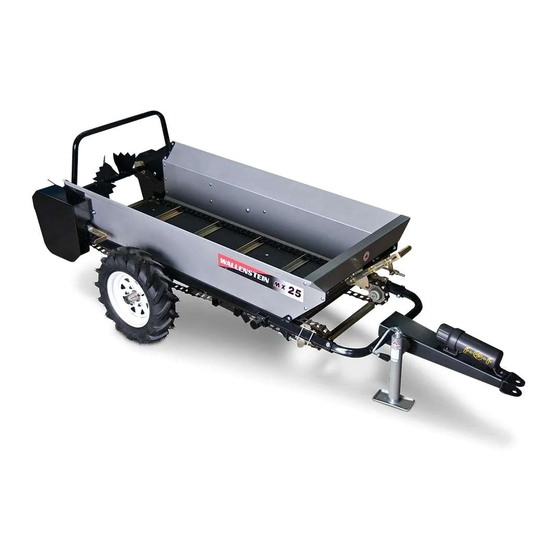
- Page 1 OPERATOR'S MANUAL MX Series Compact Manure Spreader MX25G, MX50G, MX80G MX50P , MX80P Rev Dec-2020 Document Number: Z97045_En...
-
Page 2: Foreword
Operator's Manual. Keep this manual handy for frequent reference and to pass on to new operators or owners. Call your Wallenstein dealer or the Distributor if you need assistance, information, or additional copies of the manuals. -
Page 3: Table Of Contents
MX Series Foreword Manure Spreaders Table of Contents 1. Foreword ..............2 10. Specifications ............38 1.1 Introduction ............2 10.1 Machine Specifications ........38 1.2 Delivery Inspection Report ........4 10.2 Common Bolt Torque Values ......39 1.3 Serial Number Location ........5 10.3 Wheel Lug Nut Torque ........40 1.4 Types of Decals on the Machine ......6... -
Page 4: Delivery Inspection Report
Foreword Manure Spreaders 1.2 Delivery Inspection Report Wallenstein MX Series Manure Spreader www.wallensteinequipment.com To activate the warranty, register your product at: This form must be filled out by the dealer at the time of delivery, then signed by the dealer and customer. -
Page 5: Serial Number Location
MX Series Foreword Manure Spreaders 1.3 Serial Number Location Always provide the model and serial number of your Wallenstein product when ordering parts, or requesting service or other information. The product information plate location is shown in the following illustration. -
Page 6: Types Of Decals On The Machine
Product Decals provide the machine model and serial number, generally two panels. They can be either vertical or horizontal. and other important information. Manufactured by: Wallenstein Equipment Inc., 7201 Line 86, Wallenstein ON N0B2S0, Canada MODEL: ########## TYPE OF VEHICLE/TYPE DE VEHICLE: TRA / REM... -
Page 7: Safety
YOU are responsible for the SAFE operation and maintenance DANGER – of your Wallenstein product. YOU must make sure that anyone who is going to use, maintain, or work around the machine is Indicates an imminently hazardous situation that, if not avoided, familiar with the operating and maintenance procedures and will result in death or serious injury. -
Page 8: Safety Rules
MX Series Safety Manure Spreaders 2.4 Safety Rules • Keep a first-aid kit available for use, should the need arise, and know how to use it. CAUTION! • Keep a fire extinguisher available for use, should Hearing loss hazard. Prolonged the need arise, and know how to use it. -
Page 9: Safe Condition
6. Chock the wheels to prevent movement. 2.7 Safety Training Safety is a primary concern in the design and manufacture of Wallenstein products. Unfortunately, efforts to provide safe equipment can be wiped out by a single careless act. • It is the operator's responsibility to read, understand, and follow ALL safety and operating instructions in this manual. -
Page 10: Sign-Off Form
MX Series Safety Manure Spreaders 2.8 Sign-Off Form The design and manufacture of this product conforms to the Everyone who uses the machine must read and thoroughly applicable provisions in the following standards: understand all safety, operation, and maintenance information in this manual. -
Page 11: Safety Sign Explanations
MX Series Safety Manure Spreaders 2.9 Safety Sign Explanations Practicing good safety means becoming familiar with safety The top panel (or left-hand panel for horizontal signs) shows the signs (decals) and warnings, and being aware of situations that safety alert (the potential hazard), and the bottom (or right-hand) require alertness. - Page 12 MX Series Safety Manure Spreaders PTO-drive Models 01374 Fig. 4 – PTO-driven Manure Spreaders...
- Page 13 MX Series Safety Manure Spreaders Ground-drive Models 01386 Fig. 5 – Ground-driven Manure Spreaders...
- Page 14 MX Series Safety Manure Spreaders 1. WARNING! 4. WARNING! Risk of entanglement in beater-bar Risk of serious injury or death if the paddles. power take-off (PTO) is not stopped and disengaged. Keep hands, loose clothing, and long hair away from the beater-bar paddles while Before performing any maintenance, stop they are operating.
-
Page 15: Replacing Damaged Safety Signs
MX Series Safety Manure Spreaders 7. WARNING! IMPORTANT! If parts are replaced that have safety signs on them, new signs must be applied. Safety signs must always Risk of being caught in rotating parts be replaced if they become damaged, are removed, or resulting in serious injury. -
Page 16: Familiarization
Familiarization Manure Spreaders 3. Familiarization A Wallenstein Compact Manure Spreader is a light-duty trailer 3.2 Operator Orientation designed to hold, transport, and spread manure or other similar material. A set of beater-bar paddles at the back of the main box IMPORTANT! The directions for left-hand side, right-hand spread the manure. -
Page 17: Machine Components
MX Series Familiarization Manure Spreaders 3.3 Machine Components PTO-drive Models Ground-drive Models 01387 Fig. 6 – Machine Components 1. Operator's manual container 6. Beater bar and paddles 11. Tongue-and-groove poly floorboards 2. Trailer jack 7. Beater-bar drive cover 12. Ground-drive control 3. -
Page 18: Attaching To A Tow Vehicle
MX Series Attaching to a Tow Vehicle Manure Spreaders 4. Attaching to a Tow Vehicle 1. Keep bystanders clear of the area. WARNING! 2. Make sure that there is enough space and clearance to Never let anyone stand between the tractor and safely back up to the tow vehicle. -
Page 19: Pto Shaft
MX Series PTO Shaft Manure Spreaders 5. PTO Shaft Before installing the PTO shaft, make sure that it is the correct 5. Subtract B from the uncut PTO shaft measurement A. size. (A – B). The result is the length that BOTH halves of the PTO shaft should be shortened. -
Page 20: Installing A Pto Shaft
MX Series PTO Shaft Manure Spreaders 5.2 Installing a PTO Shaft Make sure that the equipment is in the following state: • The tractor is turned off and the parking brake is applied. • The PTO shaft shielding is in good condition and able to turn freely, independent of the PTO shaft. -
Page 21: Controls
MX Series Controls Manure Spreaders 6. Controls 6.2 PTO-drive Models WARNING! For information about operation of the PTO control, see the Do not operate the machine until you are tractor operator's manual. thoroughly familiar with the position and function of the various controls. Read the operator’s 1. -
Page 22: Operating Instructions
MX Series Operating Instructions Manure Spreaders 7. Operating Instructions The operator is responsible for being familiar with and • Do not allow anyone within 20 ft (6 m) of the manure following all operating and safety procedures. spreader during operation. Objects thrown from the rear of the manure spreader could cause injury. -
Page 23: Stopping In An Emergency
MX Series Operating Instructions Manure Spreaders 7.3 Stopping in an Emergency 7.5 Machine Break-In If an emergency occurs: Although there are no operational restrictions on the manure spreader when it is used for the first time, it is recommended 1. Stop forward movement. -
Page 24: Loading
MX Series Operating Instructions Manure Spreaders 7.6 Loading • Be cautious of foreign objects in the manure that could jam the beaters and potentially damage the machine. Smaller objects could be thrown toward the driver. • Make sure that the manure spreader is securely attached to the tow vehicle. -
Page 25: Spreading
Some manure is finer or more fluid. In this case, an optional end gate can be installed to prevent the manure from draining out during loading. For more information about accessories for your manure spreader, contact your Wallenstein dealer or go to www.wallensteinequipment.com. 01389 Fig. - Page 26 Some manure is finer or more fluid. In this case, an optional end gate can be installed to prevent the manure from draining out during loading. For more information about accessories for your manure spreader, contact your Wallenstein dealer or go to www.wallensteinequipment.com. 01389...
-
Page 27: Removing A Jam
MX Series Operating Instructions Manure Spreaders 7.8 Removing a Jam Ground-drive Models 1. Stop the tow vehicle, apply the parking brake, and then turn Use the following procedure if manure or other material in the off the engine. manure spreader bridges or jams up. Be aware that if you are 2. -
Page 28: Transporting
MX Series Operating Instructions Manure Spreaders 7.9 Transporting 7.10 Storage • Never allow riders on the manure spreader. IMPORTANT! During cold weather months, never store • Always disengage the beater and apron drives before manure in the manure spreader between unloading times. A transporting the manure spreader on a roadway. -
Page 29: Service And Maintenance
• When replacement parts are required, only use genuine Complete the pre-operation checks. See page 23 original equipment manufacturer (OEM) parts. Wallenstein Equipment cannot be held responsible for damage or injuries that are caused by use of unapproved parts or Every 50 hours or Annually accessories. - Page 30 MX Series Service and Maintenance Manure Spreaders 8.3.1 Grease Points Number Every 50 hours of Location of Grease IMPORTANT! Use a hand-held grease gun for all greasing. Operation or Annually Points Pump one shot of grease per fitting. PTO-shaft shield (PTO-drive •...
- Page 31 MX Series Service and Maintenance Manure Spreaders PTO-drive Models 01395 Fig. 22 – PTO-drive 50-hour Grease Points...
- Page 32 MX Series Service and Maintenance Manure Spreaders Ground-drive Models 01396 Fig. 23 – Ground-drive 50-hour Grease Points...
-
Page 33: Roller Chain
MX Series Service and Maintenance Manure Spreaders 8.4 Roller Chain 8.5 Apron Chain Lubricate the roller chains every 50 hours or monthly. Use a Lubricate the apron chain every 50 hours or monthly. Use a good quality chain lubricant for the best performance. - Page 34 MX Series Service and Maintenance Manure Spreaders 8.5.2 Tensioning the Apron Chain 8.5.3 Shortening the Apron Chain Over time the apron chain can stretch. If it stretches to a point IMPORTANT! Adjust both sides the same amount to keep where no further adjustment is possible, links must be removed the loading even.
-
Page 35: Main Box Sealing Flap
MX Series Service and Maintenance Manure Spreaders 8.6 Main Box Sealing Flap Drive Belt Periodically check the condition of the front main box sealing WARNING! flap. Replace the sealing flap if the sides or bottom of the main box are not adequately sealed. -
Page 36: Beater-Bar Paddles
For optimal performance, inspect the beater-bar paddles on a regular basis and replace paddles that are worn or damaged. Recheck the drive-belt tension after 10 hours of use. Contact your Wallenstein dealer to purchase replacement paddles. 01398 Fig. 31 – Tensioning a Drive Belt 1. -
Page 37: Troubleshooting
Wallenstein. Before you call, have The following table provides possible causes and solutions for the serial number for your manure spreader handy. For more some of the common problems you may encounter. -
Page 38: Specifications
MX Series Specifications Manure Spreaders 10. Specifications 10.1 Machine Specifications Model MX25G MX50G MX50P MX80G MX80P Recommended Tractor 12–25 hp 15–30 hp 15–30 hp 20–45 hp 20–45 hp Size 11–19 kW 11–22.4 kW 11–22.4 kW 15–33.5 kW 15–33.5 kW Drive Type... -
Page 39: Common Bolt Torque Values
MX Series Specifications Manure Spreaders 10.2 Common Bolt Torque Values Imperial Bolt Torque Specifi cations Checking Bolt Torque Torque Value Bolt SAE Gr. 2 SAE Gr. 5 SAE Gr. 8 The tables shown give correct torque values for various Diameter bolts and capscrews. Tighten all bolts to the torque lbf•ft... -
Page 40: Wheel Lug Nut Torque
MX Series Specifications Manure Spreaders 10.3 Wheel Lug Nut Torque Wheel Lug Nut Torque It is extremely important safety procedure to apply Wheel Units 1st Stage 2nd Stage 3rd Stage and maintain proper wheel mounting torque on your Size trailer axle. Torque wrenches are the best method to lbf•ft... -
Page 41: Product Warranty
Product Warranty Manure Spreaders 11. Product Warranty LIMITED WARRANTY Wallenstein products are warranted to be free of defects in materials and workmanship under normal use and service, for a period of Five Years for Consumer Use Two Years for Commercial/Rental Use from the date of purchase, when operated and maintained in accordance with the opera�ng... -
Page 42: Alphabetical Index
12. Alphabetical Index Apron chain Jam, remove ............... 27 Lubricate ................ 33 Maintenance ............29, 33 Shorten ................34 Load Tension ................34 Height ................38 Troubleshooting ............. 37 Instructions ..............24 Attaching to a Tow Vehicle ..........18 Lubricant ................29 Lug nut Maintenance .............. - Page 43 Caution, definition ............. 7 Danger, definition ............7 Delivery checks............4 Equipment guidelines ..........8 Hearing protection ............ 8 Important, definition ..........7 Notice, definition ............6 PPE................8 Rules, general............8 Rules, maintenance ..........29 Rules, operating............22 Signal Words ............7 Sign, definition ............6 Sign, explanations ...........11 Sign-Off Form ............
- Page 44 www.wallensteinequipment.com...
Need help?
Do you have a question about the MX Series and is the answer not in the manual?
Questions and answers