
Related Manuals for Wallenstein MX Series


Summary of Contents for Wallenstein MX Series
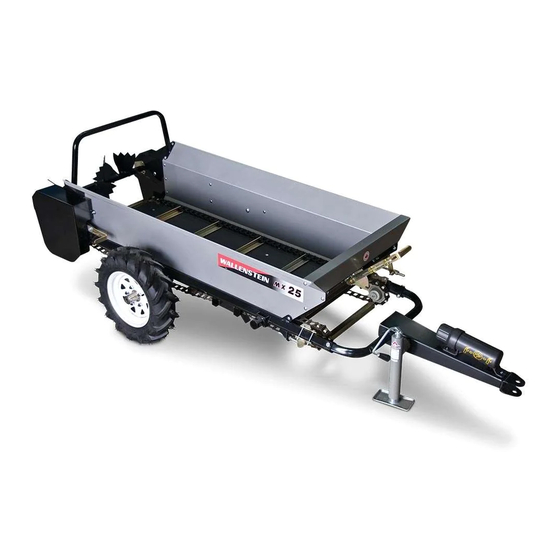
- Page 1 OPERATOR'S MANUAL MX Series Compact Manure Spreader MX25G MX50G, MX50P MX80G, MX80P Rev Feb-2020 Document P/N: Z97045_En...
-
Page 2: Introduction
INTRODUCTION Congratulations on your choice of the Wallenstein MX series Manure Spreader to compliment your opera- tion. This equipment has been designed and manufactured to meet the needs of a discerning land owner, timber or landscaping industry. This manual covers models: •... -
Page 3: Table Of Contents
CONTENTS REMOVING FROM STORAGE ....33 PLACING IN STORAGE ....... 33 SERVICE AND MAINTENANCE ����������������34 INTRODUCTION �������������������������������������������2 SERVICE ............34 DELIVERY INSPECTION REPORT ��������������������������5 7.1.1 FLUIDS AND LUBRICANTS ......34 7.1.2 GREASING ............ 34 DECAL INFORMATION ��������������������������������������������6 7.1.3 SERVICING INTERVALS ......34 SERIAL NUMBER LOCATION ����������������������������������6 SERVICE ILLUSTRATIONS ...... - Page 4 LIMITED WARRANTY Wallenstein products are warranted to be free of defects in materials and workmanship under normal use and service, for a period of Five Years for Consumer Use Two Years for Commercial/Rental Use from the date of purchase, when operated and maintained in accordance with the operating and maintenance instructions supplied with the unit.
-
Page 5: Delivery Inspection Report
WALLENSTEIN MX Series Manure Spreader DELIVERY INSPECTION REPORT To activate warranty, register your product online at www�wallensteinequipment�com Pre-Delivery Inspection _________________________________________ Customer’s Name Inspect for damage from shipping, immediately contact the shipping company if damage is found� MX SERIES MANURE SPREADERS... -
Page 6: Decal Information
Serial Number ________________________________________ DECAL INFORMATION As you begin to get familiar with your Wallenstein product, you will notice that there are numerous Decals located on the machine. Here is a brief explanation of what they are for and how to read them. -
Page 7: 2� Safety
ATTENTION! BE ALERT ! YOUR SAFETY IS INVOLVED ! The Safety Alert Symbol identifies important safety messages on the Wallenstein product and in the manual. When you see this symbol, be alert to the possibility of personal injury or death! Follow the instructions in the safety message. -
Page 8: Safety Do's & Don'ts
SAFETY YOU are responsible for the SAFE operation and maintenance of your Wallenstein Compact Manure Spreader. YOU must ensure that you and anyone else who is going to use, maintain or work around the Manure Spreader be familiar with the using and maintenance procedures and related SAFETY information contained in this manual. -
Page 9: Equipment Safety Guidelines
6. Operate the machine only with a tractor equipped with an Equipment Damage approved Roll-Over-Protective- MX series PTO spreaders are designed to Structure (ROPS). Always wear work at PTO speed of 540 RPM. Operating your seat belt when operating the the spreader above 540 RPM will cause tractor. -
Page 10: Safety Training
2�4 PREPARATION 2�3 SAFETY TRAINING 1. Never use the machine until you have read and 1. Safety is a primary concern in the design and completely understand this manual, the Tractor manufacture of our products. Unfortunately, our Operator's Manual and each of the Safety Messages efforts to provide safe equipment can be wiped out found on the safety signs on the tractor and machine. -
Page 11: Maintenance Safety
2�5 MAINTENANCE SAFETY 2�6 HYDRAULIC SAFETY 1. Make sure that all the components 1. Good maintenance is your responsibility. Poor in the hydraulic system are kept maintenance is an invitation to trouble. in good condition and are clean. 2. Follow good shop practices. 2. -
Page 12: Operating Safety
• fences Wallenstein has designed this machine to be used with all its safety equipment properly attached, 14. Never use alcoholic beverages or drugs which can hinder alertness or coordination while operating this to minimize the chance of accidents. -
Page 13: Transport Safety
2�10 TRANSPORT SAFETY 4. Do not load the spreader unless it is hitched to the tractor and do not unhitch a loaded spreader from 1. Comply with state and local laws governing safety the tractor leaving it supported by only the jack. and transporting of machinery on public roads. -
Page 14: Sign-Off Form
2�12 SIGN-OFF FORM The design and manufacture of this product conforms to relative provisions in the following standards: Anyone using this machine must read and thoroughly ISO 4254-1 Agricultural machinery – Safety understand all Safety, Operation and Maintenance information ASABE S318 Safety for Agricultural Field Equipment in this manual. -
Page 15: Safety Signs
SAFETY SIGNS 1. Keep safety signs clean and legible at all times. 2. Replace safety signs that are missing or have become illegible. 3. Replaced parts that displayed a safety sign should also display the current sign. 4. Safety signs in Section 3 each have a part number displayed with it. Use this part number when ordering replacement parts. -
Page 16: Safety Sign Locations
3�3 SAFETY SIGN LOCATIONS The types of safety signs and locations on the equipment are shown in the illustrations that follow. Good safety requires that you familiarize yourself with the various safety signs, the type of warning and the area, or particular function related to that area, that requires your SAFETY AWARENESS. - Page 17 GROUND DRIVE MODELS Z94168 Z94117 Z94168 Z94117 Z94239 Z94127 Z94117 Z94127 IMPORTANT! - If safety signs have been damaged, removed, become illegible or parts replaced without safety signs, new signs must be applied. New safety signs are available from your authorized dealer.
-
Page 18: Operation
OPERATION OPERATING SAFETY • When operating the spreader, be aware of • Close and secure all guards, deflectors and surroundings or obstructions such as: shields before starting and operating. • Bystanders • Read and understand operator's manual before • Trenches starting. -
Page 19: Machine Components
4�2 MACHINE COMPONENTS The Wallenstein Compact Manure Spreader is a light-duty trailer designed to hold, transport and spread manure or any other material. A set of beaters in the rear frame spreads the material over the field. PTO or ground drive models are available. PTO power is transmitted along the left side of the frame to drive the beaters and unloading chain systems. -
Page 20: Machine Break-In
4�3 MACHINE BREAK-IN 4�4 PRE-OPERATION CHECKLIST Although there are no operational restrictions on the Efficient and safe operation of the Compact Manure Compact Manure Spreader when used for the first time, Spreader requires that each operator reads and it is recommended that the following mechanical items understands the using procedures and all related safety be checked: precautions outlined in this section. -
Page 21: Attach To Tractor
4�5 ATTACH TO TRACTOR Review the transport safety section 2.10 before proceeding. When coupling or uncoupling the spreader to a tow vehicle, the spreader should always be located on a level, dry area that is free of debris and other foreign objects. 1. -
Page 22: Controls
4�6 CONTROLS Before starting to work, all operators should familiarize themselves with the location and function of controls. PTO Control Refer to the tractor operator's manual for information on the operation of the PTO control. Apron Drive The spreader is designed with an 4-position lever on the right side of the box to set apron drive speed to Off, Fast, Medium or Slow. - Page 23 Ground Drive The Ground Drive models are designed with a 2-position lever on the front that engages or disengages the drive system. Move the lever down to engage ground drive. Move the lever up to move the idler guide between the chain and sprocket, disengaging the ground drive.
-
Page 24: Pto Driveline (If Equipped)
4�7 PTO DRIVELINE (IF EQUIPPED) A PTO drive line is supplied with the machine. To accompany the variety of 3 point hitch geometry available today, the drive line can be too long for some machines or too short for others. It is very important that the drive line be free to telescope but not to bottom out when going through its working range. -
Page 25: Assembly
4�8 ASSEMBLY Yoke Lock The Spreader is shipped from the factory in a partially dis-assembled configuration to allow for easy shipping. Refer to this section before assembling if your model/ machine requires assembly. 4�8�1 PTO DRIVELINE (IF EQUIPPED) 1. Clear the area of bystanders, especially small children. -
Page 26: Field Operation
The operator has the responsibility of being familiar with all operating and safety procedures and following them� Although the Wallenstein Spreader is easy to use, each operator should review this section to familiarize themself with the detailed safety and operating procedures. These procedures can be applied to all versions of the Spreader. -
Page 27: Before Loading
4�9�3 TRACTOR 4�9�2 BEFORE LOADING • Verify all the access covers are secured. • In freezing weather, make certain the apron chain is not frozen to the spreader floor or slides, make sure • Start tractor. there are no lumps of manure frozen to the floor. •... -
Page 28: Spreading Operation
4�10 SPREADING OPERATION 4�10�1 LOADING • Load the spreader from front to back. Loading this way permits the material to be spread uniformly. Always wear personal protective equipment (PPE) • Do not over load, maximum load height should be whenever operating the machine. This includes but is no higher than 42 in. -
Page 29: Spreading - Pto Models
Lever area and repeat loading procedure. Notice: Equipment Damage MX series PTO spreaders are designed to work at PTO speed of 540 RPM. Operating the spreader above 540 RPM will cause damage to the spreader and will void 540 RPM the warranty�... -
Page 30: Spreading - Ground Drive Models
4�10�3 SPREADING - GROUND DRIVE MODELS Follow this procedure when the spreader is loaded and ready to go. 1. With ground drive disengaged, move from the loading area to the field to be spread. 2. Stop tractor and engage parking brake. 3. -
Page 31: Unplugging
4�10�4 UNPLUGGING Follow this procedure when a jam or plug has occurred. Be aware that if spreading in freezing weather frozen chunks could cause a jam. Stop the tractor, shut off the tractor and put the spreader into safe condition� 5. -
Page 32: Transporting
TRANSPORTING TRANSPORT SAFETY • Comply with state and local laws governing safety • Be sure the spreader is hitched positively to the and transporting of machinery on public roads. tractor and a retainer is used through the drawbar. Always attach a safety chain between the hitch •... -
Page 33: Storage
STORAGE STORAGE SAFETY • Store the unit in an area away from human • Store the unit in a dry, level area. Support the activity. frame with planks if required. • Do not permit children to play on or around the stored machine. -
Page 34: Service And Maintenance
SERVICE AND MAINTENANCE MAINTENANCE SAFETY • Good maintenance is your responsibility. Poor • Always use personal protection devices such as maintenance is an invitation to trouble. eye, hand and hearing protectors, when performing any service or maintenance work. Use heavy gloves •... -
Page 35: Service Illustrations
7�2 SERVICE ILLUSTRATIONS Look for this Decal on your After each use, wash machine. It indicates a and clean, remove This illustration shows the general location of lubrication grease point and the number entangled material points for PTO Drive models. of hours between greasing. - Page 36 This illustration shows the general location of lubrication Look for this Decal on your After each use, wash points for Ground Drive models. machine. It indicates a and clean, remove grease point and the number entangled material of hours between greasing. and small debris.
- Page 37 Apply grease or heavy oil to apron chain and roller chains daily. Roller Chains Apron Chain Apron Chain...
-
Page 38: General Maintenance
7�3 GENERAL MAINTENANCE By following a careful service and maintenance program for your machine, you will enjoy many years of trouble free operation. • Check tightness of all nuts and bolts on a regular basis and retighten if required. • Grease the machine including the PTO at the interval stated in the lubrication chart. -
Page 39: Drive Belt Tension / Replacement (If Equipped)
7�4�2 DRIVE BELT TENSION / REPLACEMENT (IF EQUIPPED) The machine is designed with a sheave on the PTO shaft, which is used to drive the line shaft sheave through a pair of drive belts. When the belt is in disrepair or loose, the ability to efficiently drive the line shaft may be affected. It is important to periodically check the condition as well as the tension of the belt. -
Page 40: Apron Chain Tension
7�5 APRON CHAIN TENSION 6. Check the chain tension. The chain should sag 6 - 8 in. (150 - 200 mm) below the frame for proper An apron chain is used to convey manure into the beaters setting. for spreading. It must be oiled frequently and kept properly 7. -
Page 41: Apron Chain Links
7�7 APRON CHAIN LINKS 7�8 SEALING FLAP Over a period of time the chain will become stretched Check the condition of the front frame sealing flap. to a point where no further adjustment is available, at Replace sealing flap if not sealing the sides or bottom. this point links should be removed from the chain to allow for further tensioning. -
Page 42: Lubrication Chart
7�9 LUBRICATION CHART See Lubrication and Maintenance sections for details of service. Copy this page to continue record. 50 Hours 8 Hours or Daily or Annually Check Check Clean Check Check Check Check Check Check Check Check Check... -
Page 43: Troubleshooting
TROUBLESHOOTING In the following charts, we have listed many of the problems, causes and solutions to the problems that you may encounter. If you encounter a problem that is difficult to solve, even after having read through this troubleshooting section, please call your local distributor or dealer. -
Page 44: Ground Drive Models
8�1 GROUND DRIVE MODELS PROBLEM CAUSE SOLUTION CAUTION Obstructed Clear debris from paddle area Ensure machine is off Ground drive Beater does not turn Engage ground drive not engaged. Drive belt loose. Adkjust or replace drive belt Ensure machine is off Turn apron chain on. -
Page 45: Specifications
9 SPECIFICATIONS MX25 MX50G MX50P MX80G MX80P MX130 MX130T Recommended HorsePower 15-25 15-30 18-30 20-45 25-45 45-75 45-75 Drive Type Ground Ground PTO @ 540 Ground PTO @ 540 PTO @ 540 PTO @ 540 Chain & Chain & Belt / Worm Chain &... -
Page 46: Bolt Torque
9�1 BOLT TORQUE CHECKING BOLT TORQUE The tables shown below give correct torque values for various bolts and capscrews. Tighten all bolts to the torques specified in chart unless otherwise noted. Check tightness of bolts periodically, using bolt torque chart as a guide. Replace hardware with the same strength bolt. Torque figures indicated are valid for non-greased or non-oiled threads and heads unless otherwise specified. -
Page 47: 10 Accessories
10 ACCESSORIES Call your dealer for pricing and availability. For replacement parts, go to www.wallensteinequipment.com and click on "Parts and Manuals" to download the latest parts manual, then call your dealer to order. End Gate M7570 - MX50G & MX50P M7550 - MX80G &... -
Page 48: Index
INDEX chain lubrication ............ 40 Emergency ............... 27 freezing ..............28 HEARING LOSS............10 Informative Labels ........... 6 Maintenance Labels ..........6 MX130 ................. 2 ORIENTATION ............2 PPE 8, 10, 15 Product Labels ............6 PTO speed ............ 9, 12, 29 Safe Condition 8, 9, 11, 12, 13, 18, 26, 27, 34, 38 Safety .................
Need help?
Do you have a question about the MX Series and is the answer not in the manual?
Questions and answers
What size drive belts for the mx80p. I need to order them