IRiver H10 Instruction Manual
Hide thumbs
Also See for H10:
- Instruction manual (40 pages) ,
- Manual (15 pages) ,
- Specifications (2 pages)

Subscribe to Our Youtube Channel
Related Manuals for IRiver H10


Summary of Contents for IRiver H10
- Page 1 Instruction Manual H10 [20GB;color] www.iriveramerica.com Thank you for your purchase. Please read this manual carefully before using your new player.
-
Page 2: Table Of Contents
Viewing text …………………………………………………………………………………… 51 Browser function ……………………………………………………………………………… 54 Chapter 1 I Getting started Chapter 4 I Useful features Features of the H10 [20GB;color]……………………………………………………………… 8 Settings Menu ………………………………………………………………………………… 56 Components …………………………………………………………………………………… 10 Settings menu navigation …………………………………………………………………… 57 Locating the controls ………………………………………………………………………… 11 Menu settings …………………………………………………………………………………... -
Page 3: Before Using The Product
It is important that you read the manual to ensure that you get the most out of your new player. related to this manual. You may not copy or reproduce any part of this manual unless authorized by iriver Limited. You can be punished by using any part of this manual illegally. Thank you. -
Page 4: Precautions And Safety
Before using the product Before using the product Precautions and Safety Precautions and Safety Please read the notices before using for your safety. Please read the notices before using for your safety. Electricity Product Do not overload a single Do not kink or crease the Do not handle power plug Do not place heavy objects Keep away from harsh... - Page 5 Users are responsible for creating Hearing experts advise against extended play. Always keep a proper backup of data backup data and iriver Limited is not listening to continuous, loud and Data in HDD can be damaged. stored on portable devices.
-
Page 6: Chapter 1 I Getting Started
Chapter 1 I Getting started Features of the H10 [20GB;color] ……………………… 8 Components …………………………………………… 10 Locating the controls ……………………………………11 H10 [20GB;color] Player………………………………………11 Remote control ………………………………………………12 Cradle …………………………………………………………13 LCD screen display………………………………………14 LCD screen display ……………………………………………14 MUSIC screen ………………………………………………15 FM RADIO screen ……………………………………………16 RECORDING screen …………………………………………16... -
Page 7: Features Of The H10 [20Gb;Color]
Small Device – Large Capacity Enhanced 3D sound The H10 [20GB;color] features a 20GB hard drive that can hold more than 4,800 music files. SRS WOW sound effect technology provides rich bass sound and dynamic 3D sound effect. (1GB = 1,000,000,000 Bytes - Not all memory available for storage.) -
Page 8: Components
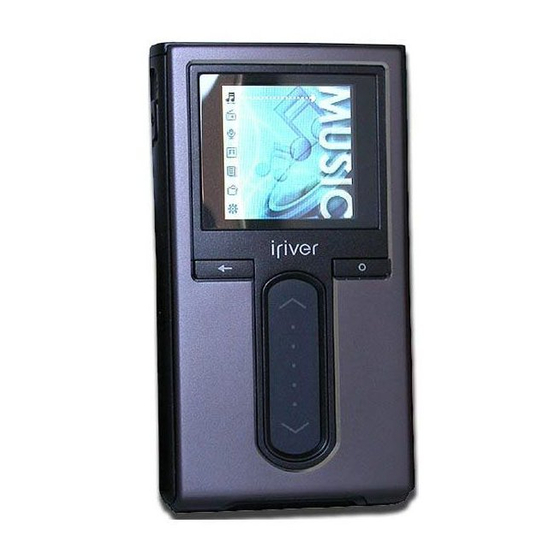
Getting started Components Locating the controls Accessories subject to change without notice and may vary from image shown. Actual player may vary slightly from images shown. H10 [20GB;color] Player H10 [20GB;color] Player Instruction Manual / Earphones Warranty Card / Quick Start Guide... -
Page 9: Remote Control
Getting started Getting started Locating the controls Locating the controls Actual player may vary slightly from images shown. Actual player may vary slightly from images shown. Remote control Cradle (Remote control is an optional accessory.) (Cradle is an optional accessory.) Top view Front view Back view... -
Page 10: Lcd Screen Display
Getting started Getting started LCD screen display LCD screen display LCD screen display I MUSIC screen Menu Time Note Hold indicator : MUSIC Battery indicator : FM RADIO Artist : RECORDING File name : PHOTO File number / Total file number : TEXT File type / Play mode : BROWSER... -
Page 11: Connecting The Product
LCD screen display Connecting the product I FM RADIO screen Connecting PC – Connecting cable Connect the included USB cable to the port on the H10 [20GB;color] then to an open USB port on your computer. Stereo Preset Channel number... -
Page 12: Connecting The Power - Connecting The Adapter(Player)
Getting started Getting started Connecting the product Connecting the product Be sure to use the supplied AC adapter to connect the cable to the player. Connecting the power – connecting the adapter (cradle) Connecting the power – connecting the adapter (player) (Cradle is an optional accessory.) 1. -
Page 13: Connecting Earphone/Remote Control
Getting started Getting started Connecting the product Connecting the product Connecting earphone/remote control Connecting the cradle (Remote control is an optional accessory.) (Cradle is an optional accessory.) 1. Put the player into the connection terminal of the cradle. 1. Connect the remote control to the jack on the top of the player. 2. -
Page 14: Installing The Software
Getting started Getting started Connecting the product Installing the software Connecting the cradle – Line-In connection Installing the WMP 10 (Cradle is an optional accessory.) 1. Put the player into the connection terminal of the cradle. 1. The program installation process will start automatically after inserting the Installation CD to the 2. -
Page 15: Chapter 2 I Quick Start
Chapter 2 I Quick start Turning on/off the player and Playing music …………26 Controlling volume and changing modes …………… 27... -
Page 16: Turning On/Off The Player And Playing Music
Quick start Quick start Turning on/off the player and playing music Controlling volume and changing modes Note Controlling volume Button image with white background = Press the button quickly. Button image with black background = Press and hold the button. Use the [ ] scroll to control volume during playback. -
Page 17: Chapter 3 I Basic Operation
Chapter 3 I Basic operation Playing music ………………………………………………… 30 Playing music …………………………………………………………30 Setting up the Play mode ……………………………………………34 Playlist function…………………………………………………36 Download Music & Playlists …………………………………37 Listening to FM radio …………………………………………39 Listening to FM radio …………………………………………………39 Scanning FM radio frequency - Manual search ……………………40 Scanning FM radio frequency - Auto Scan …………………………40 Storing FM radio station - Manually …………………………………41 Storing FM radio stations - Automatically …………………………41... -
Page 18: Playing Music
Basic operation Basic operation Playing music Playing music Playing music Press the [ ] button after releasing the Use the [ ] scroll the select the item. HOLD switch to display the initial screen. Example: In case of selecting <Titles> : Press it to move to the desired item. - Page 19 Basic operation Basic operation Playing music Playing music Playing previous/next title Press the [ ] button during playback to display the EQ selection screen. Press the [ ] button during playback to play previous / next title. Select the EQ using the [ ] scroll and press : Plays previous file the [...
-
Page 20: Setting Up The Play Mode
Basic operation Basic operation Playing music Playing music Setting up the Play mode Various Play modes can be used during playback. Select the desired Play mode using the [ scroll and press the [ ] button to setup the Play mode. Select the <SETTINGS>... -
Page 21: Playlist Function
Basic operation Basic operation Playlist function Download Music & Playlists What is Playlist Get the last Windows Media Player "Playlist" is a list of the titles that enables you to manage the titles or other audio files. In order to copy music & playlists to your player, you must use Windows Media Player 10. Now you can play the music at any time and any place. -
Page 22: Listening To Fm Radio
Press the [ ] button to switch to the FM Radio. Click the “Sync” menu button. On the right side the Sync screen choose the H10 [20GB;color] from the download list. Setup the Preset by pressing the [ ] button and press [ ] button to select an FM station. -
Page 23: Scanning Fm Radio Frequency - Manual Search
Basic operation Basic operation Listening to FM radio Listening to FM radio Scanning FM radio frequency – Manual search Storing FM radio station - Manually If <PRESET> is displayed, press the [ ] button to If <PRESET> is displayed, press the [ ] button to disable "Preset"... -
Page 24: Scanning Fm Radio Frequency - Preset Feature
Basic operation Basic operation Listening to FM radio Listening to FM radio Scanning FM radio frequency – PRESET feature Erasing FM radio station If <PRESET> is not displayed, press the [ If <PRESET> is not displayed, press the [ button to enable "Preset" mode. button to enable "Preset"... -
Page 25: Recording
Basic operation Basic operation Recording Recording Line-in recording is only available using the optional cradle. Recording Voice Line–In recording Select the <RECORDING> mode using the After connecting the player and cradle, connect the cradle's Line-In jack to ] scroll from the main menu. the Line-Out (or earphone) jack of an external device using the Line-In/Out connection cable. -
Page 26: Recording Fm Radio Station
Basic operation Basic operation Recording Recording Recording FM radio station Begin playback on the source. Select the <FM RADIO> mode using the Then press the [ ] button to start recording. ] scroll from the main menu. Press the [ ] button to stop recording. -
Page 27: Viewing Images
] button to display the Image screen. Note Note The recorded file is saved in following locations depending on the SOURCE. Loading time for large images may take longer. Voice iriver H10 20GC/My Recordings/VoiceYYMMDDXXX.MP3 Line In iriver H10 20GC/My Recordings/AudioYYMMDDXXX.MP3 Tuner iriver H10 20GC/My Recordings/TunerYYMMDDXXX.MP3... -
Page 28: Viewing Text
Repeat for all the images you would like to add to your player. Click the “Sync” menu button. On the right side the Sync screen choose the H10 [20GB;color] from the download list. Use the [ ] scroll to move to the previous/next Click Start Sync to transfer the items on your Sync list to the player. -
Page 29: Getting Text Files On The Player
: Selects the number : Moves to the desired page Double click on the H10 [20GB;color] device then double click on the <Data> folder. To get text on the player, click and drag the text files from your PC to the "Text"... -
Page 30: Browser Function
Basic operation Browser function Browser function The Browser allows you to navigate all the files on the player. You can play titles, view images, or display text files with out switching modes. Several advanced features of each mode will not be available, such as the image slide show, Artist and Genre searching, etc. -
Page 31: Settings Menu
Useful features Useful features Function control is subject to change with different firmware versions. Settings Menu Settings menu navigation User can configure their own settings. Changing menu Select the <SETTINGS> mode using the Custom EQ ] scroll when the main screen appears. SRS Settings Beep On/Off Play Mode... -
Page 32: Menu Settings
Useful features Useful features Settings menu navigation Menu settings Customizing the function settings Sound Use the [ ] scroll on the main menu. 1. Custom EQ Various frequency bands can be selected and customized. : Changes frequency band ] : Selects frequency level Press the [ ] button to display the contents of that sub menu. -
Page 33: Menu Settings
Useful features Useful features Menu settings Menu settings 3. Beep On/Off 5. Fade In Sets the beep volume for moving cursor. When activated, volume increases gradually at playback mode. You can prevent sudden loudness when you play music file at the Select <On>... -
Page 34: Record
Useful features Useful features Menu settings Menu settings Record 1. Voice Setting 3. Line–In Setting Sets the quality of voice recording. Sets the quality for recording from external device. Select <Low>, <Medium>, <High> using the [ ] scroll and press the Select <Low>, <Medium>, <High>... -
Page 35: Timer
Useful features Useful features Menu settings Menu settings Timer 5. Track Seperation 1. Power-Off Timer While recording from external device, if no sound occurs for Automatically turns the power off at stop mode after fixed time. around 1.5 minutes, a new file will be created. The available time settings are <Off>, <10 Sec.>, <30 Sec.>, <1 Min.>, <5 Min.>, <10 Min.>. - Page 36 Useful features Useful features Menu settings Menu settings 3. Backlight Timer 5. Alarm/Rec. Select Sets the time that the backlight stays on. Sets the time to activate the alarm function or the FM Rec Timer. The available time settings are <Always On>, <5 Sec.>, <30 Sec.>, Select <Off>, <Alarm>, <FM Rec.>...
-
Page 37: Extra
Useful features Useful features Menu settings Menu settings Extra 7. FM Rec. Timer 1. Reset All Settings Sets the time to activate FM radio recording. Initializes all settings to original factory setting (if Yes is selected). : Selects item Select <Yes> or <No> using the [ ] scroll and press the [ ] button ] : Sets the time for recording... - Page 38 Useful features Useful features Menu settings Menu settings 3. Scan Speed 5. Auto Preset Sets the speed of fast scan. You can tune and store FM radio stations automatically. The available speed range are <1X>, <2X>, <4X>, <6X>. Select <Yes> or <No> using the [ ] scroll and press the [ ] button to confirm it.
-
Page 39: Chapter 5 I Additional Information
Useful features Menu settings 7. Copyright Press the [ ] button to see copyright information. Chapter 5 I Additional information Troubleshooting ………………………………………… 74... -
Page 40: Troubleshooting
Switch it to OFF position and try it again. Audio titles listed under <MUSIC> will only play if they were loaded using iriver plus or Windows Media Player. The titles saved in Check whether the plug or connection jack of earphone is dirty. -
Page 41: Chapter 6 I Appendix
Chapter 6 I Appendix Specifications …………………………………………… 78 FCC ……………………………………………………… 79... -
Page 42: Specifications
Appendix Appendix Specifications Federal Communications Commission (FCC) Category Item Specifications Capacity 20GB* The device manufactured and found to comply with limits for a Class B computing File system FAT 32 device according to the specifications in FCC rules Part 15. Operation is subject to the following two conditions;...
Need help?
Do you have a question about the H10 and is the answer not in the manual?
Questions and answers