
Related Manuals for SECO-LARM ENFORCER EV-N1506-2W4Q


Summary of Contents for SECO-LARM ENFORCER EV-N1506-2W4Q
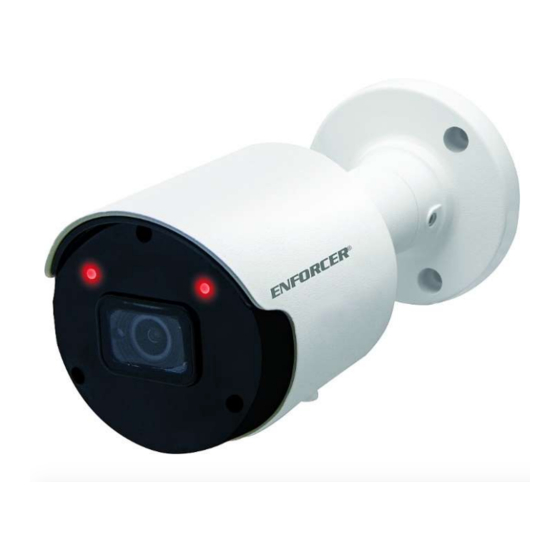
- Page 1 IP Fixed Cameras Web Manual Model# Lens Resolution Voltage Style Color EV-N1506-2W4Q 2.8mm 5MP, 1440p 12VDC Bullet White EV-N2506-2W4Q 2.8mm 5MP, 1440p 12VDC Turret White ®...
-
Page 2: Table Of Contents
For PC Installation: CDROM\software for PC (except MAC) 1. Click next 2. Choose install location, click next 3. Review your settings and click Install 4. Click Finish (Click the checkbox to the Launch Device Config Tool.) SECO-LARM U.S.A., Inc. -
Page 3: Device Search
Filtration – Filter search results by IP, Media Port, or Channel Open – Browse for firmware file Username – Enter username Password – Enter password Device Search – Upgrade: Upgrade the camera using firmware file. Click the camera listed Click upgrade SECO-LARM U.S.A., Inc. -
Page 4: Connect To Camera
Login – Login Connect to Camera: Enter the camera’s IP address into the web address of your internet Browser: 192.168.1.168 (Default) using Internet Explorer NOTE: Web Interface designed for Internet Explorer. May not work correctly on other browsers. SECO-LARM U.S.A., Inc. -
Page 5: Login Screen
If this is the first-time accessing camera, you will need to install the following plugin. Login Screen: Username: admin Password: Set password at initial login (to reset password, press and hold reset button) NOTE: Reset button available on select cameras SECO-LARM U.S.A., Inc. -
Page 6: Live
Screen Icons: Stop displaying Displays screen using Stretches display to cover Fullscreen Record (local) original proportions more of the open window Snapshot (local) Digital Zoom Configure color settings Displays information of Log out plugin and web version SECO-LARM U.S.A., Inc. -
Page 7: Color Adjustments
Search – Click to search Screen Icons: Play Stop Forward by one frame Record Snapshot Download Viewing speed Audio Digital Zoom Displays screen using Stretches display to Fullscreen original proportions cover more of the open window SECO-LARM U.S.A., Inc. -
Page 8: Remote Setting - Channel
Flicker Control – Select between 60Hz and 50Hz (United States uses 60Hz, Europe uses 50Hz by default) Show Name – Select to display camera name Show Time – Select to display camera time Refresh – Reloads initial values Save – Click to save changes SECO-LARM U.S.A., Inc. - Page 9 Time Exposure (max) – Select shutter speed (1/5~1/20000, flickerless) Defog Mode – Select to control defog mode (Disable, Auto, Manual) Refresh – Reloads initial values Save – Click to save changes Default – Restore factory default SECO-LARM U.S.A., Inc.
- Page 10 Save – Click to save changes Data Bit – Set Data Bit (5.6,7,8) Stop Bit – Set Stop Bit (1, 2) Copy – Copies configuration to another channel Parity – Set parity (None, Odd, Even, Mark, Space) SECO-LARM U.S.A., Inc.
- Page 11 Privacy Zone – Select to enable/disable privacy zone (zone selected will be blacked out of video) Delete – Remove selected privacy zone Refresh – Reloads initial values Save – Click to save changes SECO-LARM U.S.A., Inc.
-
Page 12: Remote Setting - Record
Stream Mode – Select between Mainstream and Sub stream to record Record – Enable/Disable recording PreRecord – Enable/Disable PreRecord (This always caches a few seconds of video) Netbreak – Enable/Disable Netbreak Refresh – Reloads initial values Save – Click to save changes SECO-LARM U.S.A., Inc. -
Page 13: Remote Setting - Alarm
FTP Upload – Enable file transfer alert to an PTP site Send to Cloud – Select to enable cloud alert Enable Record – Select to start recording when alarm is activated Refresh – Reloads initial values Save – Click to save changes SECO-LARM U.S.A., Inc. -
Page 14: Remote Setting - Network
DNS2 – Specify secondary DNS Password – Enter password Refresh – Reloads initial values IP Address – Uses current IP Address Save – Click to save changes Subnet Mask – Uses current subnet mask SECO-LARM U.S.A., Inc. - Page 15 HTTPS – Number of the https port Refresh – Reloads initial value Multicast Port – Number of the Multicast port Save – Click to save changes UPNP – Enable / Disable UPNP SECO-LARM U.S.A., Inc.
- Page 16 Hostname – Enter the URL for site Username – Enter username Password – Enter password Refresh – Reloads initial values Save – Click to save changes Test DDNS – Select to test settings SECO-LARM U.S.A., Inc.
- Page 17 Interval – Enter interval to send email in minutes (1, 3, 5, 10) Refresh – Reloads initial values Save – Click to save changes Test Email – Click to test sending an email Cancel – Exits with no changes saved SECO-LARM U.S.A., Inc.
- Page 18 HTTPS – Select to enable HTTPS (HTTPS is a secured version of HTTP) Certificate Type – Select type of certificate for HTTPS (Default, Custom) Refresh – Reloads initial values Save – Click to save changes SECO-LARM U.S.A., Inc.
- Page 19 RTSPEnable – Select to enable real time streaming protocol (RTSP is a protocol used to stream media across ethernet networks) Anonymous Login – Select to allow users with no credentials Refresh – Reloads initial values Save – Click to save changes SECO-LARM U.S.A., Inc.
-
Page 20: Remote Setting - Device
Client Type – Camera will only support Dropbox for cloud storage Driver Name – Enter driver name Refresh – Reloads initial values Save – Click to save changes Activate Cloud – Click to test cloud settings SECO-LARM U.S.A., Inc. -
Page 21: Remote Setting - System
Daylight Time Mode – Select daylight time mode (week, date) o Time Offset – Select daylight savings time offset (1hr, 2hr) o NTP – Enable network time protocol Refresh – Reloads initial values Save – Click to save changes SECO-LARM U.S.A., Inc. - Page 22 Username – Account username Password – Account password (able to change password) Active – Displays if account is active or disabled Refresh – Reloads initial values Save – Click to save changes SECO-LARM U.S.A., Inc.
- Page 23 Export – Export log file (saves to directory specified in Path) Name – Enter a filename for log file Start Time – Set start time of search Search – Performs the Search and displays log End Time – Set end time of search SECO-LARM U.S.A., Inc.
- Page 24 Remote Setting – System – Maintenance – Load Default: Select the categories to restore back to factory default: All – Will automatically select all categories Save – Restores the selected categories back to factory default SECO-LARM U.S.A., Inc.
- Page 25 Scan – Click to browse for file Start – Start Upgrade IMPORTANT NOTE: Do not close the browser or turn off the power when camera update is in progress, as this may cause damage to camera. SECO-LARM U.S.A., Inc.
- Page 26 Import File – Enter file location to import a configuration file Export File – Enter file path to export a configuration file Scan – Browse Import – Import file Export – Export file SECO-LARM U.S.A., Inc.
- Page 27 Auto Reboot – Select to enable auto reboot of camera Reboot – Select to reboot daily, weekly, or monthly. Specify Day and time. Refresh – Reload initial values Save – Click to save changes Reboot – Reboots camera SECO-LARM U.S.A., Inc.
-
Page 28: Local Setting
Download Path – Set the directory for downloaded video Capture Type – Select snapshot format (BMP, PNG, JPG) Snapshot Path – Set the directory for snapshots Save – Click to save changes File Type – Select video format (RF, AVI, MP4) SECO-LARM U.S.A., Inc. -
Page 29: Troubleshooting/Warranty
RF exposure requirements and void user’s authority to operate the device. WARRANTY: This SECO-LARM product is warranted against defects in material and workmanship while used in normal service for three (3) years from the date of sale to the original customer.
Need help?
Do you have a question about the ENFORCER EV-N1506-2W4Q and is the answer not in the manual?
Questions and answers