Advertisement
OPERATING INSTRUCTIONS
Mode d'emploi
Surface mount kit with side mirrors
Kit de montage en surface avec miroirs
latéraux
for SideLight cabinets
pour armoires de toilette SideLight
Please read instructions before proceeding
Lire attentivement les instructions avant d'installer l'armoire de toilette
Save these instructions
Conservez ces instructions
V 1.0
1/8
Advertisement
Table of Contents

Subscribe to Our Youtube Channel
Related Manuals for SIDLER SideLight


Summary of Contents for SIDLER SideLight
- Page 1 Surface mount kit with side mirrors Kit de montage en surface avec miroirs latéraux for SideLight cabinets pour armoires de toilette SideLight Please read instructions before proceeding Lire attentivement les instructions avant d’installer l’armoire de toilette Save these instructions Conservez ces instructions...
- Page 2 OPERATING INSTRUCTIONS Mode d’emploi IMPORTANT SAFETY INSTRUCTIONS – to reduce the risk of burns, fire, electric shock, or injury: This product is for household use only WARNING – do not use outdoors WARNING – use this furnishing only for its intended use as described in these instructions ...
- Page 3 OPERATING INSTRUCTIONS Mode d’emploi List of all components to be installed Liste des pièces à installer the components Pos.2 / Pos.3 / Pos. 4 are included in the delivered mirror cabinet. Les pièces (Pos. 2/3/4) sont inclus dans l’armoire de toilette livrée. Pos.
- Page 4 OPERATING INSTRUCTIONS Mode d’emploi Installation Guide – Instructions d’installation Step 1 – Mounting bracket 1ère étape – Support de montage 1) Mount the mounting bracket (Pos. 2) according to the schematic drawings below. Recommended height: center of mounting holes at 74’’. Monter le support (Pos.
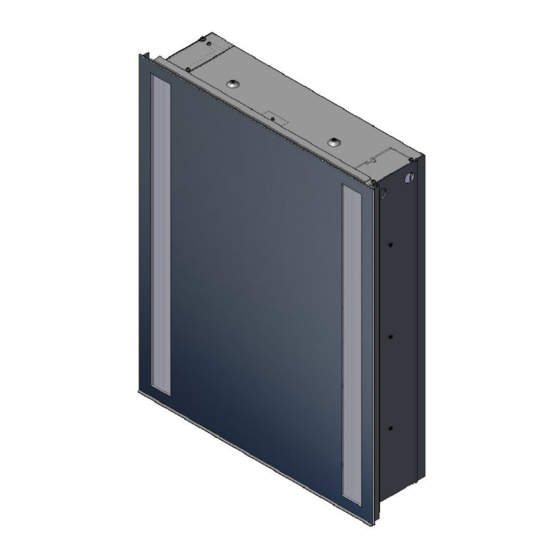
- Page 5 OPERATING INSTRUCTIONS Mode d’emploi Pos.2 Pos.2 Pos.4 Pos.3 Pos.5 Step 2 – Preparing wiring / assembling side mirrors 2ème étape - Préparation du câblage / assemblage des miroirs latéraux Bend the two flaps open at the back of the mirrored cabinet Plier les deux volets ouverts vers l’àrrière de l’armoire de toilette V 1.0...
- Page 6 OPERATING INSTRUCTIONS Mode d’emploi 1) Attach the side mirror and fasten it at the top and bottom with screws as show in the picture below. Accrocher le miroir latérale et fixer-le en haut et en bas, selon l’image ci- dessous Fastening positions Points de fixation V 1.0...
- Page 7 OPERATING INSTRUCTIONS Mode d’emploi Step 3 – Mount the Cabinet 3ème étape – Monter l’armoire de toilette 1) Thread the wires through the back opening, to connect them to the terminal block Enfiler les fils à travers l’ouverture arrière, pour les relier au bornier 2) Hang the cabinet on the mounting bracket (Pos.
- Page 8 Step 2.3 (Connect the Electric Cables) Étape 2.3 (Connecter les cables électriques) LIMITED WARRANTY SIDLER will provide a two-year warranty in respect of defects associated with the Product, commencing from the date of delivery, subject to the following conditions: ( I )
Need help?
Do you have a question about the SideLight and is the answer not in the manual?
Questions and answers